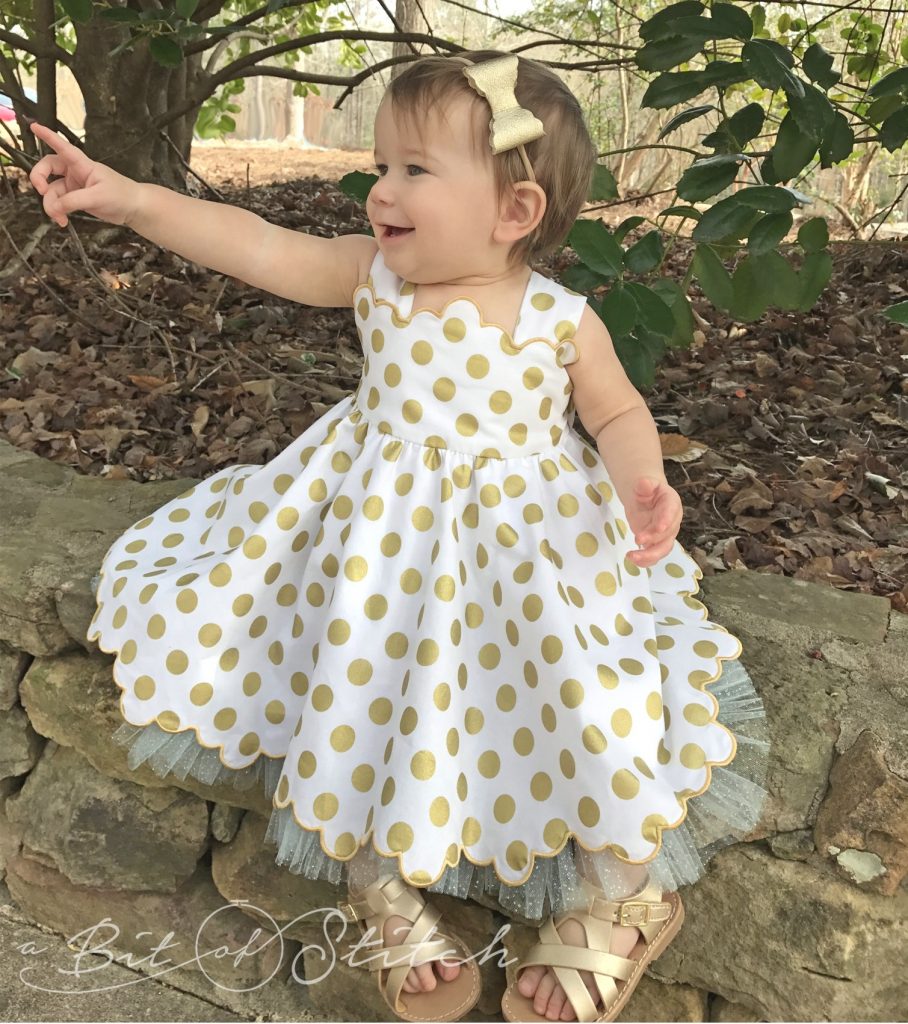
Are you ready to finish your project? Yes, of course you are. Let’s do it! 🙂
The first step to finishing up a cutwork border design is trimming the tails and removing the stabilizer. So, first things first, let’s get that done.

Use your little snips with curved blades or the snips with a crook on the end (you’ll see those in my video) to trim away any long thread tails on the wrong side. Don’t cut off the knots, but do clip off the tails. If you accidentally clip off a knot, go ahead and apply a drop of seam sealant before you proceed.
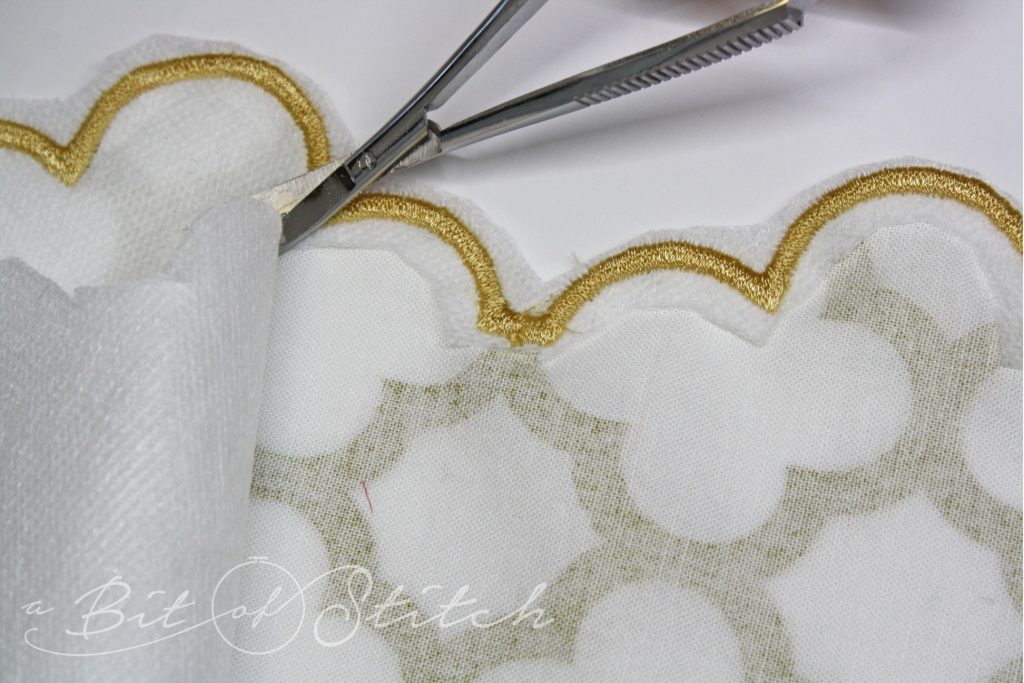
I like to cut away as much of my wash-away stabilizer as I can. I use my big scissors to rough cut off the large parts around the border, and then I use my little trimming snips to trim away most of the remaining stabilizer closer to the border’s edge. THAT is optional. You can always just dump the whole lot in a tub of water and soak the entire stabilizer away. So why do I bother to cut it away? Ha! I’m always in a hurry to get something finished, don’t you know! Removing as much stabilizer as possible greatly reduces the soak time, and the stuff floating around in my rinse water (which tends to make the fabric a bit stiff) is greatly reduced as well.
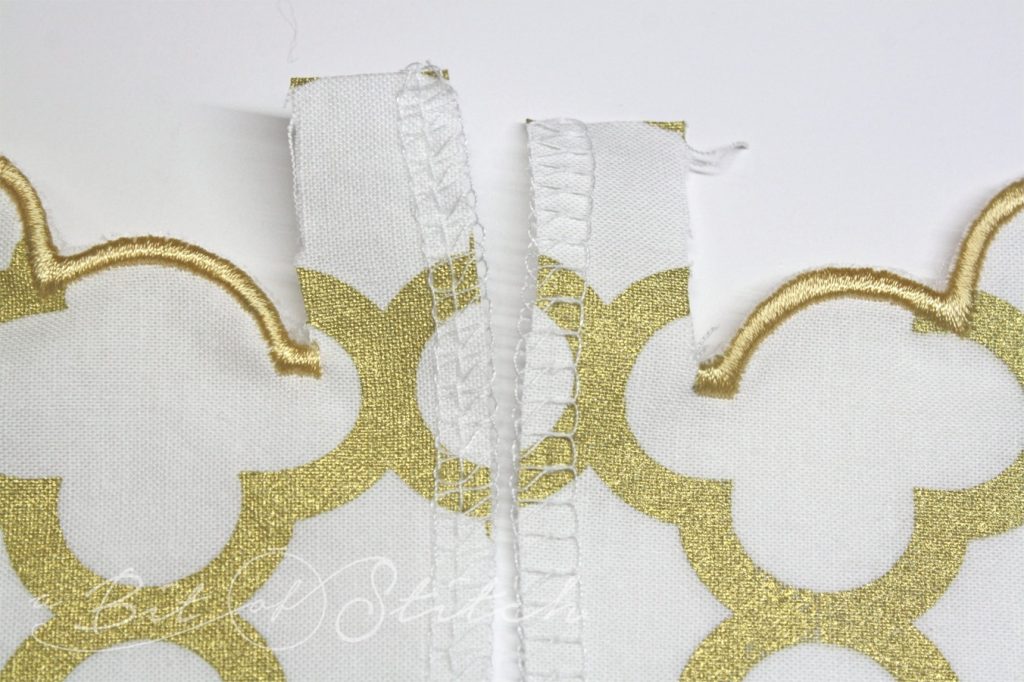
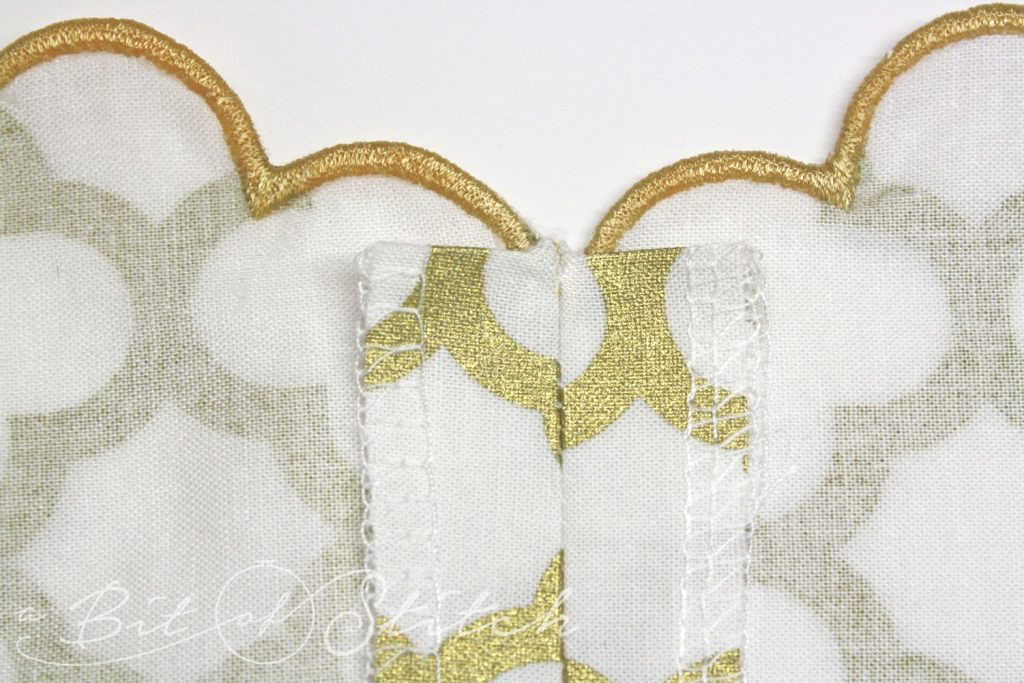
Before soaking, I like to go ahead and serge (or zigzag) any remaining raw edges. It isn’t necessary to serge tiny bits of exposed raw edge – just the big strips. Do not cut off any extra bits of fabric extending past the ends of your border; you’ll need those later. Be sure to leave a good seam allowance where the fabric pieces need to be joined.
Once the stabilizer has been cut away, the rest must be soaked away with water. (Check the stabilizer package to see what water temperature is recommended.) I find that the following does the trick for most of my cutwork projects: two fast cold soaks, followed by a longer cool soak with a drop or two of laundry detergent, and then a final cold rinse. Then I roll up the fabric in a bath towel, squeeze out the excess water, and hang it up to dry. After that, a good press from the wrong side with a steam iron (using a press cloth to protect the embroidery) finishes it up perfectly!
Line up your border ends – right sides together – and take a quick whip stitch by hand at the very edge to secure the two layers together. This will keep the bump of that thick embroidery from shifting when you sew the seam. Try not to sew too far into the embroidery.
Make use of Miss Destiny’s brain and extra eyeballs! Here are some tips:
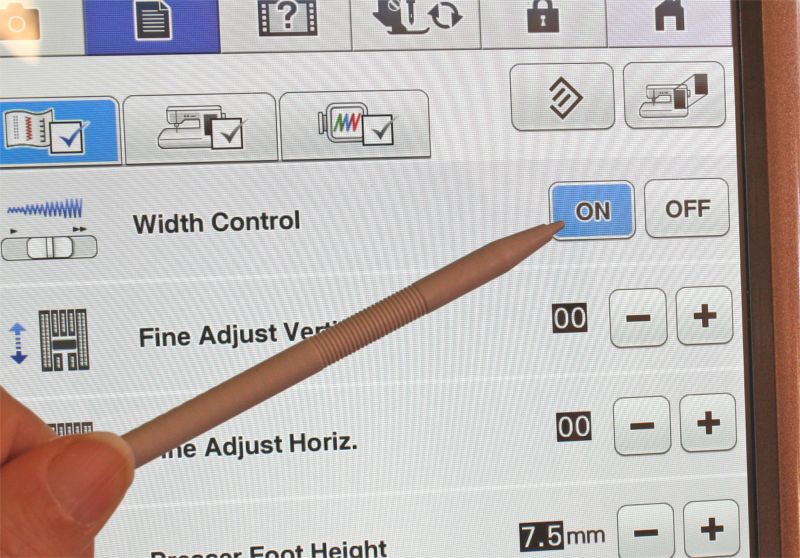
Turn on the Width Control in the machine menu.
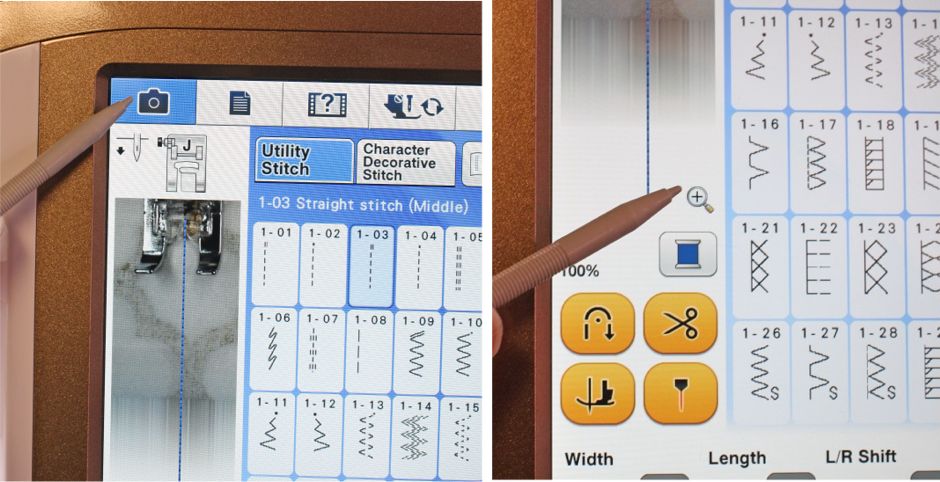
Put your fabric under the needle, lower the presser foot, and choose your stitch. I’m using the straight middle stitch with my “N” foot because I can see what I’m doing with that foot. Now press the Camera icon. You’ll see the fabric under the foot with your proposed stitching line on top. See that little magnifying glass icon with the + inside? It’s at the bottom of that camera view window. Press that icon.
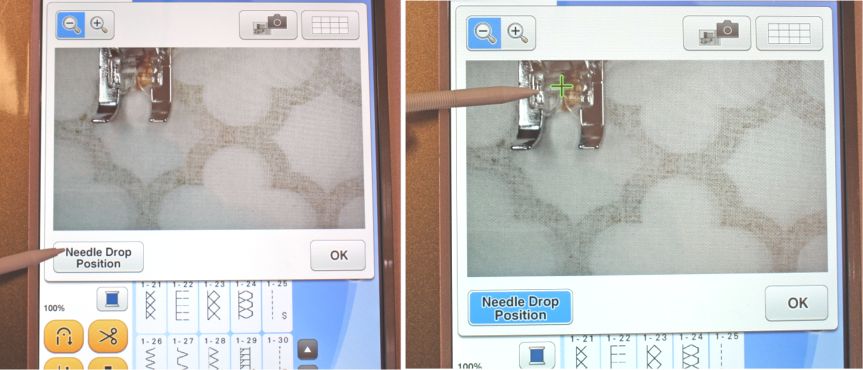
Now you’ll get a close-up view where you can see exactly where the foot is placed. Press the “Needle Drop Position” button. Woo-hoo! Now you’ll see PRECISELY where the needle will drop and where the machine will begin to stitch.
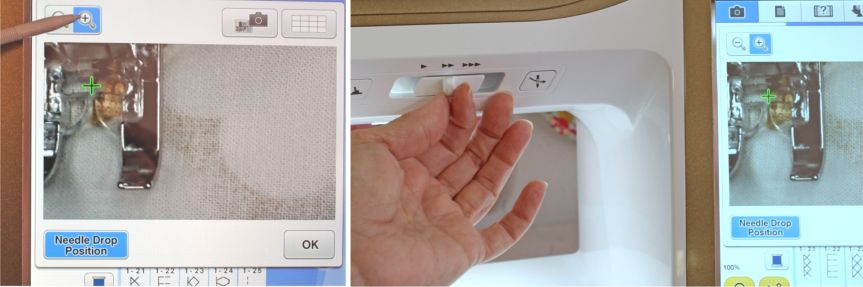
Not lined up where you need it to be? No problem! Click the magnifying glass at the top of the camera window (photo below on the left) to enlarge the view so you can see even better what Destiny is seeing. Now just move the Speed Control lever back and forth to move the needle. HOW COOL IS THAT? Oh my goodness. I love this feature! Talk about a bird’s eye view – this is awesome!
Now you can sew that seam together precisely.
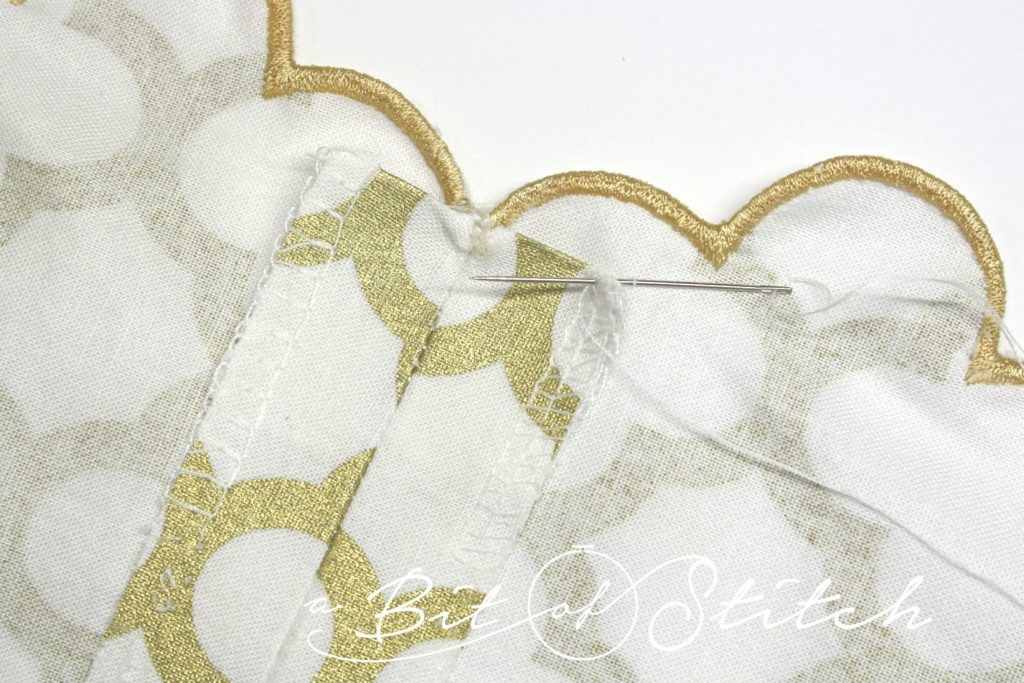
Press open the seam allowance selvages and tuck up the extra ends.
Whip stitch those ends under nice and neat by hand. I like to whip stitch a small distance up both sides of the seam allowance selvage edges too, just to keep everything under there in place. Grab only tiny bits of the fabric with the needle so that your stitches won’t show from the right side.
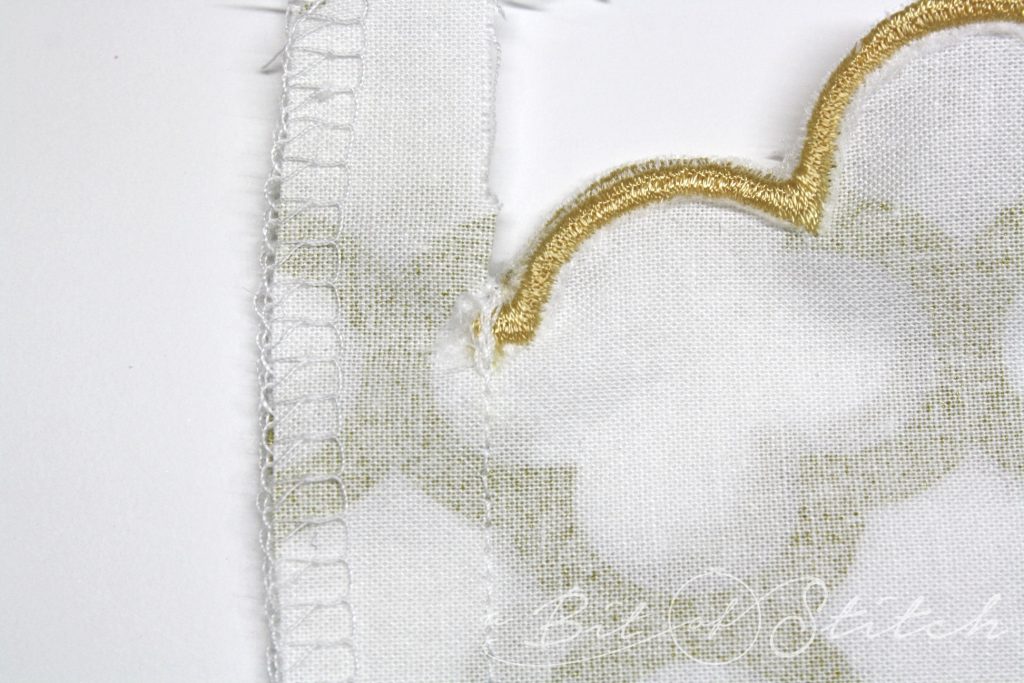
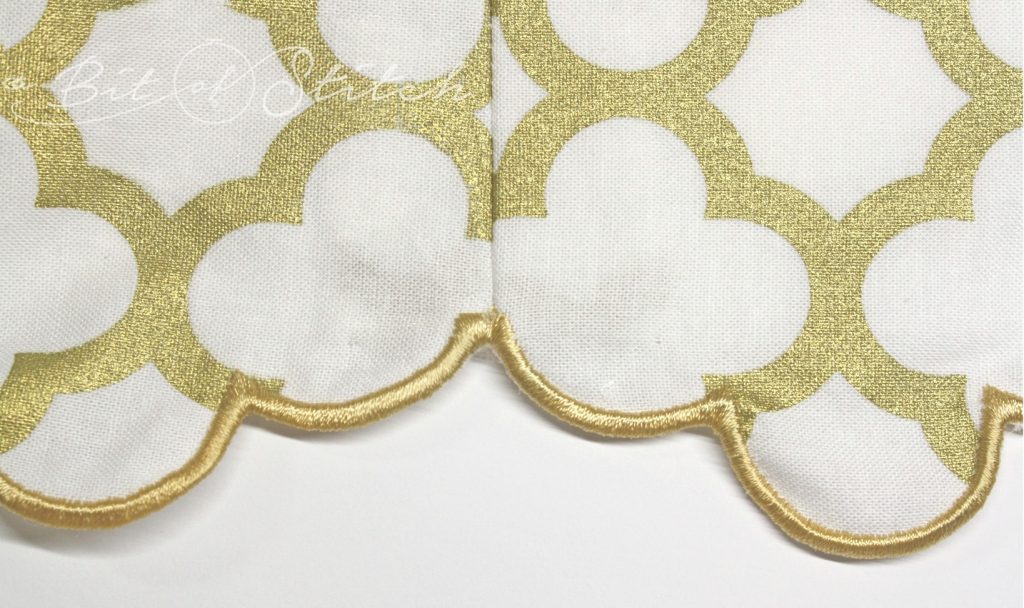
There, a prettily finished seam in your border!
Thanks for reading this final project post for my week with Baby Lock’s Love of Sewing Challenge on the Destiny II. I hope you were inspired!
Click HERE to check out my post-post, a short collection of photos and a few more garment details just for the fun of it!
Evy