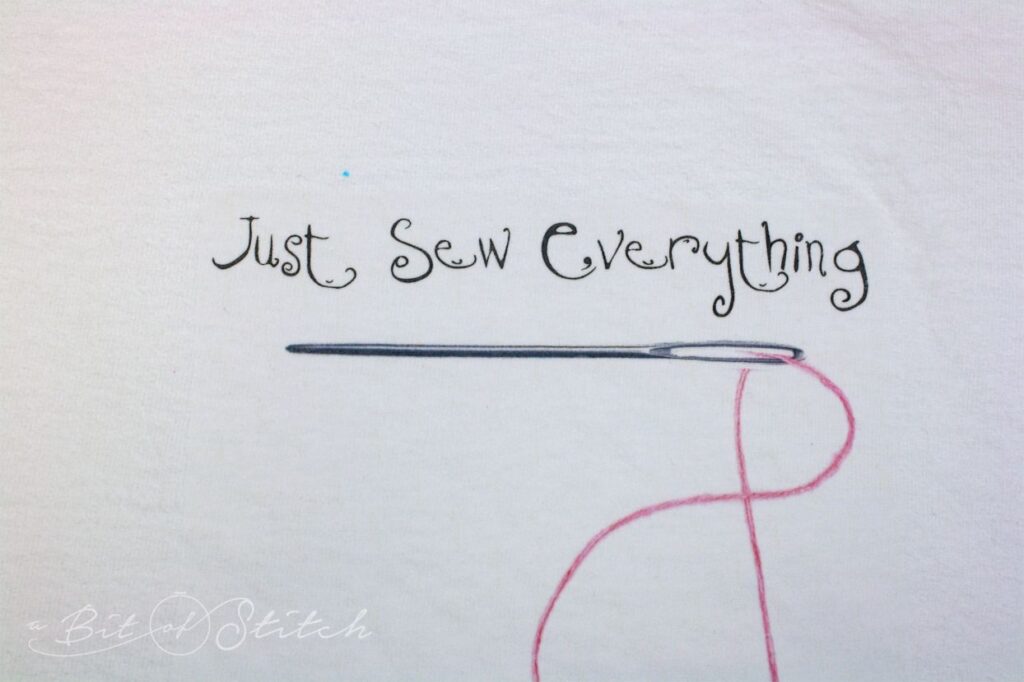
I fell totally in love with this super sweet T-shirt. It says “just sew everything” on the front and since I totally believe in THAT, you know I needed this shirt! Classic Sewing magazine has them in their online boutique, so go get yours! There are other sewing motifs too, all cute as buttons. I might be starting a collection, ha!

See the little pink heart? Well, you know I can’t leave well enough alone. I mean, the shirt itself DID give me permission to “just sew everything,” right? So I sewed something on it! Actually, embroidered something – a dainty little heart from my Petites collection.
This is one of those instant gratification projects. It’s so easy and fast to do and satisfies that “sew-something” urge without really sewing something. (I can’t believe I said that but I’m pretty sure you totally understand!) Here’s what I did:
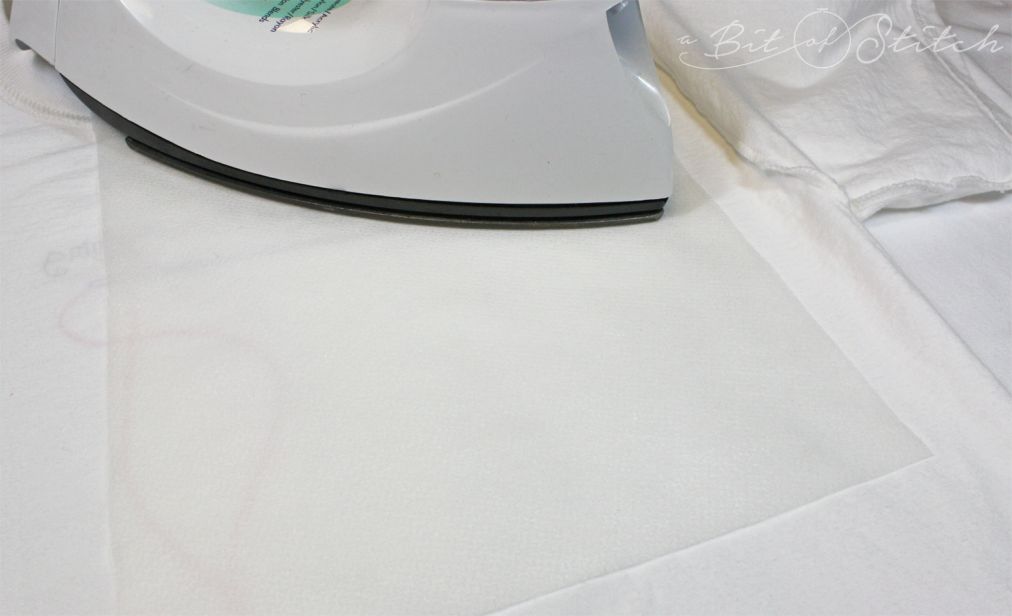
I lightly fused a piece of No-Show Mesh fusible cut-away stabilizer to the wrong side of the shirt in an area a bit bigger than the 4×4 hoop I was using. I love using this type of stabilizer for knits because it’s so lightweight and flexible and doesn’t add any bulk or extra stiffness. The trick is to LIGHTLY fuse because you are going to peel away the extra and trim it later. So I just fuse enough to make it hold and that’s it.
Then I drew perpendicular vertical and horizontal alignment lines with washable marker on a piece of soft tear-away stabilizer. I sprayed it lightly with temporary spray adhesive and then used the hoop placement guide (grid) to hoop it in my 4×4 hoop.

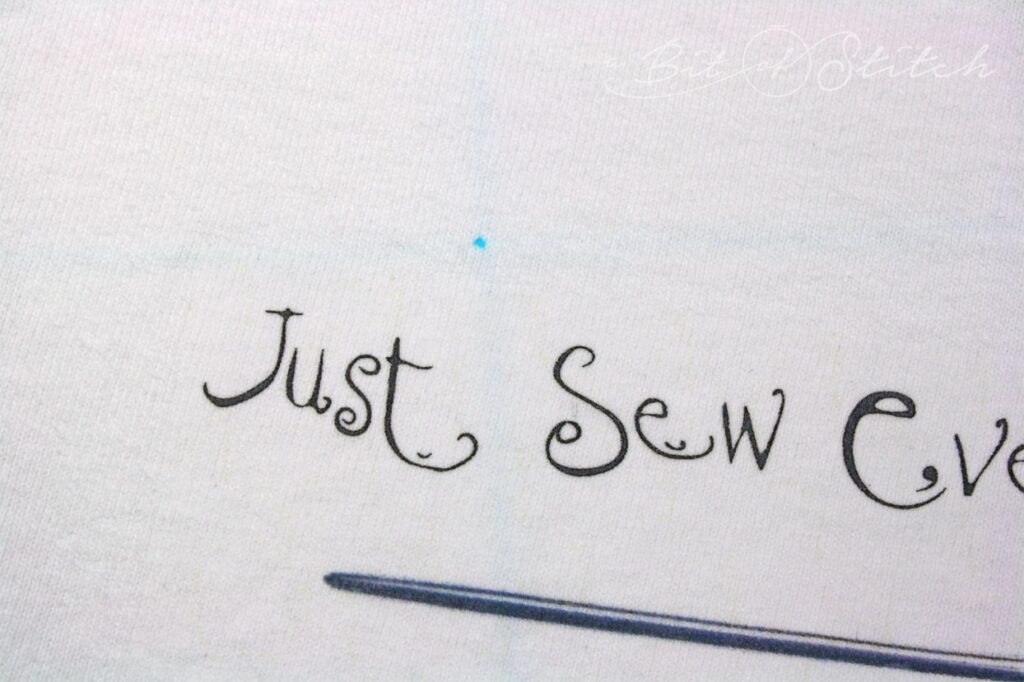
I marked the place where I wanted to put the heart embroidery on the T-shirt with a small dot; then I aligned that dot over the point where the two lines on my marked stabilizer intersected. That’s the center point of the hoop, and when the design is centered in the hoop it should stitch right there on that point.
As the T-shirt is white you can see the intersecting point of the crossed alignment lines through it. That is helpful!
This is a tiny design, so it’s quite okay to use pins to further secure the shirt to the hooped stabilizer. (Normally I would baste the project to the stabilizer, because one thing you don’t ever want to do is embroider over a pin or catch one in the foot as it passes over.)
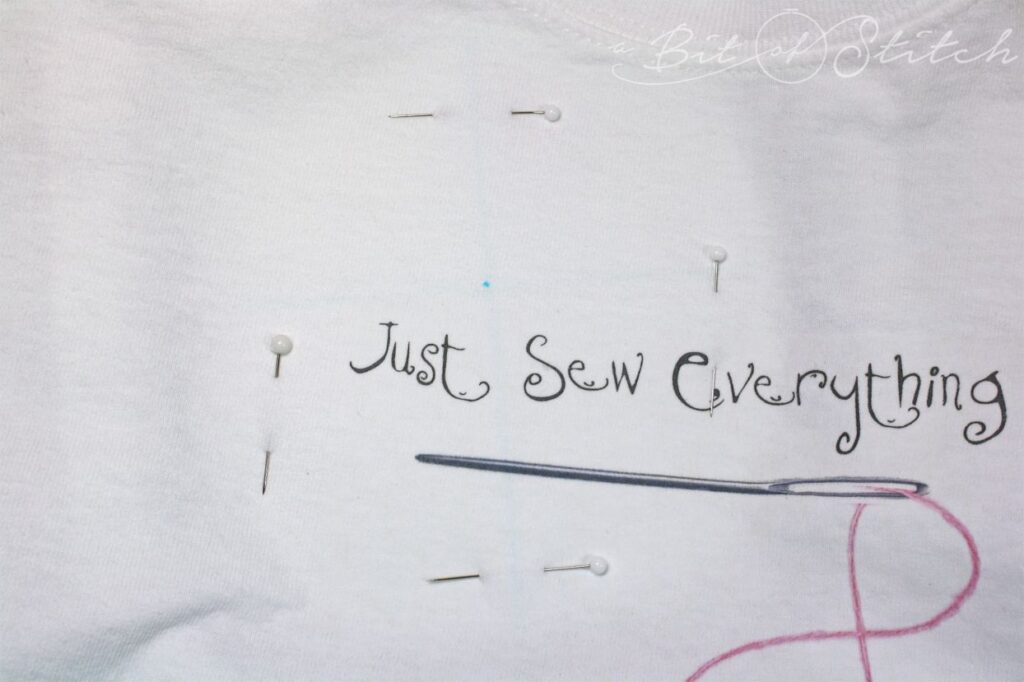
Temporary adhesive holds pretty good, but wrangling a large item in a small hoop can be tricky. Pins keep you from accidentally pulling it out of the hoop while you are getting it into the machine. Once I had the hoop in the machine, I made sure the shirt was not caught under the hoop or around the arm.
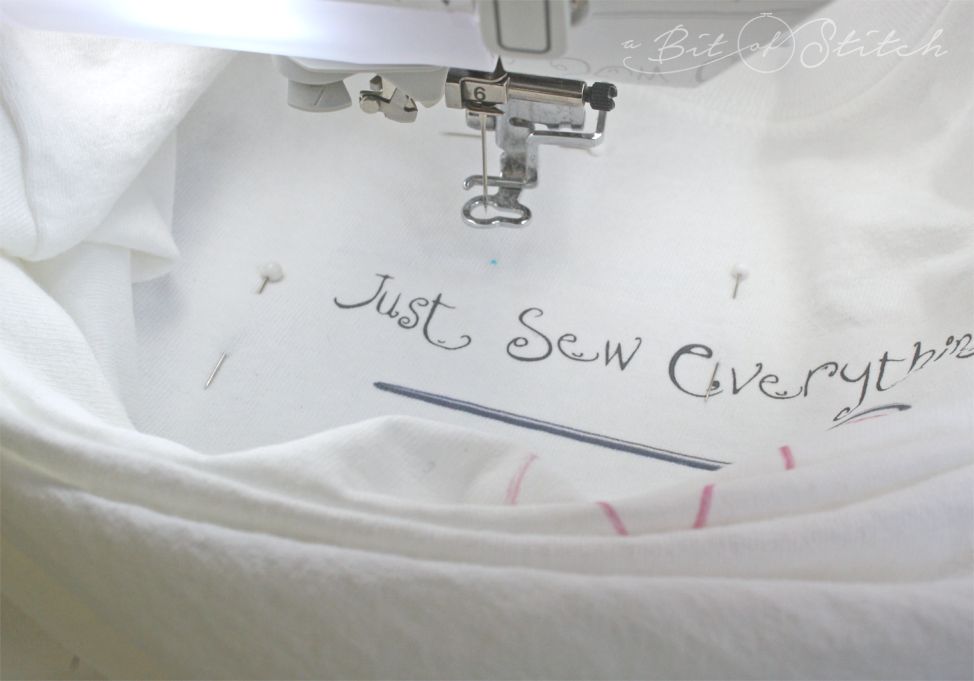
Even though I had centered my design within the stitching area, I always check to be absolutely sure that I am really in the center. So before I thread the needle, I hit the “center” button on my onboard design placement tool and then drop the needle into the fabric. If it lands right at the point I marked, then I’m good to go; if not, I can raise the needle and use the onboard edit/move tool to fix the placement before I begin.
With a cup of tea in hand I sat there and watched with an eagle eye while it stitched. Once finished I pulled off the soft tear-away and then gently peeled up the lightly fused on cut-away. My little Snips made short work of the trimming – and because they have very short, curved blades, I was able to cut right up next to the stitching on the wrong side. (Click HERE to find these snips!)

Pretty, pleasing, and the perfect way to put your own touch on a purchased T-shirt!
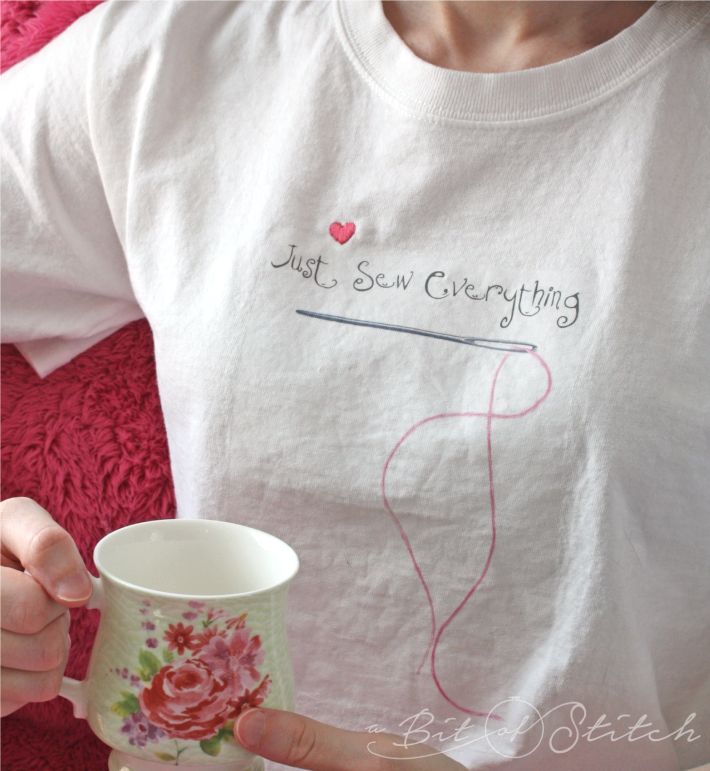
Click here to visit Classic Sewing magazine’s boutique and get a pretty T-shirt for you! You might decide to add a wee butterfly or a bitty flower instead of a heart, wouldn’t that be sweet?
Go on, just sew everything! 🙂
Evy
2 replies on “Put a Heart on it!”
So cute idea, thanks!
🙂