Hanging off the edge! Most days I’m doing this. Literally. How about you? All I can say is it’s a good thing I have sharp pointy things I can stab in place and hang on to – ha!
Well, I do like to live on the edge, what can I say? 🙂
Okay, enough silliness, let’s talk about finishing those edges. Nothing is quite a nice as a prettily finished edge. It’s like the cherry on the sundae – a little extra touch that may not really be necessary but sure is pretty and makes you go “oh wow, that’s nice!”
I’ve always been in love with couching yarn, embroidery floss, baby cording and other fun stuff right at the edge of things. Fuzzy stuff, like this fuzzy yarn:
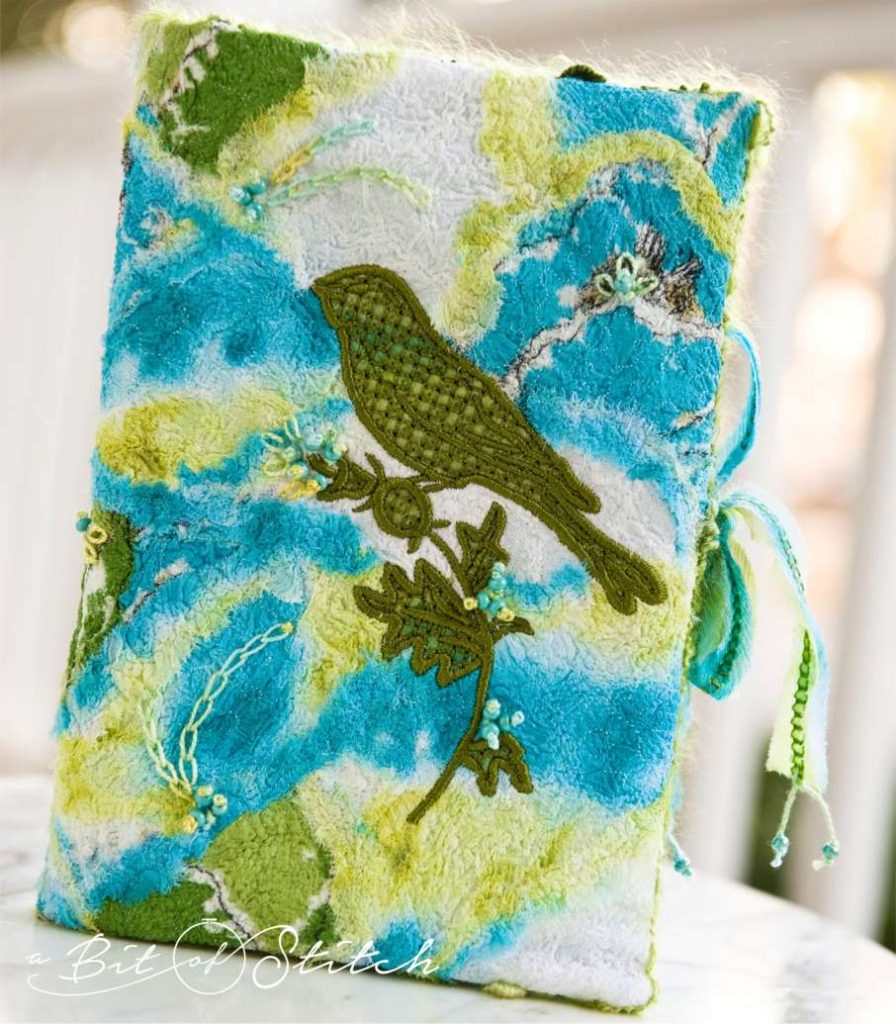
That’s a needle felted silk letter holder. I used some of the fuzzy yarn when creating the needle felted silk fabric for the project and when I constructed the holder the edge just looked too, well, hard. It needed softening.
Couching more fuzzy yarn right on the edge did the trick. I used my clear open toe foot and a long zigzag stitch. I set the width of the zigzag just enough to catch the yarn to the edge but not so wide I’d see it.
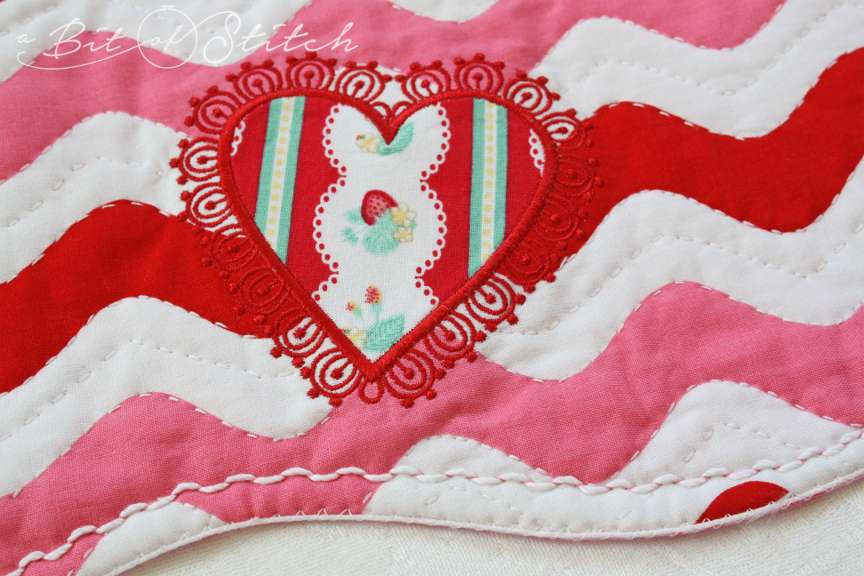
My trunk show samples get a lot of love. I used a zigzag stitch to couch white cotton sock-weight yarn to the edge of this Valentine’s table topper. After many years of use and lots of washing, it’s still holding up nicely! I love how the yarn adds that extra “crispness” to the edge of the topper:
So when I began to construct my latest Sashiko project (a purse) I found myself disappointed that I couldn’t hold my mouth quite right to Sashiko flip-stitch yarn “in-the-ditch” around my purse flap. I love how that edge looks. It makes the prettiest little wavy faux piping! (More about that in a later blog, I promise!) The corners of the flap were just too sharp to lay flat enough to accommodate that technique. Drat.
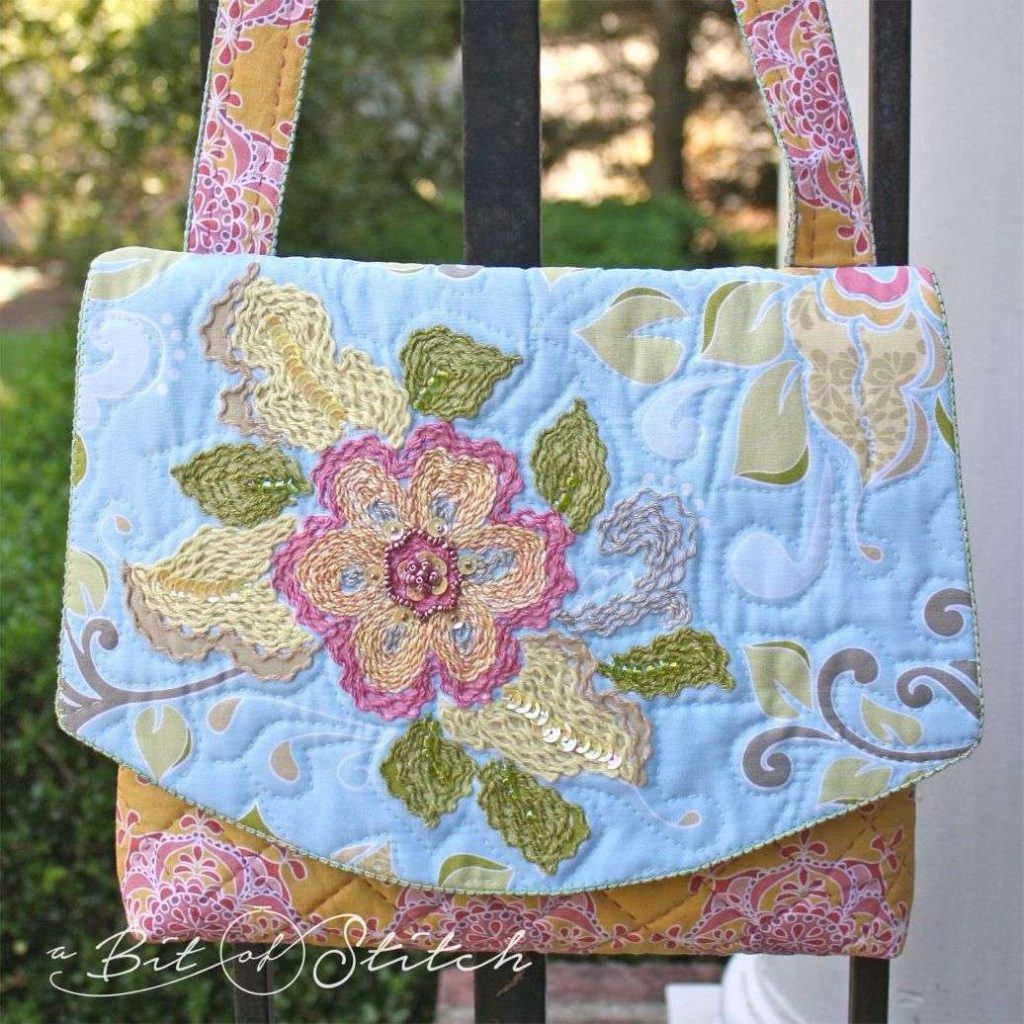
I did the purse flap my old fashioned way, using my open toe clear foot just because I was used to doing that – I mean, that foot will let you do ANYTHING. Here’s what the flap looked like when I was done. I used the blanket stitch with a width of 3.5 and length of 4 on my Baby Lock Ellegante. My yarn is cotton sock weight.

Well, that was fun… but I’m finding that the older I get, the more “help” I’m hunting to get stuff done. (That has nothing to do with fading mental ability, ahem, but rather with the urgent thought that I will never live long enough to do everything I want to do so let’s find a faster was to do this!)
Then I remembered all the wonderful feet I have for my Baby Lock machines and wondered if one of those might just make this job easier. So I set out to test them all. I tried the cording foot and the braiding foot and pretty much every other foot in my box that looked like a possibility. The cording foot is pretty cool actually, and it worked nicely for this application. I don’t know what your machine’s cording foot looks like, but my Baby Lock cording foot (BL accessory #ESG-CF3) has a place for three cords. There’s actually a little grooved metal bar that holds the cord in place as you stitch. I put the cord in the center groove, set the stitch width at 4 and length at 4. As I had already used the blanket stitch for the purse flap I wanted to continue that stitch for the strap too. It worked, but I had to put a little tension on the yarn to keep it from folding up under the needle as the machine backed up to take that extra backward stitch. The edging turned out VERY crisp and neat. Nice! However, if I use this foot again I’ll just use a zigzag stitch.
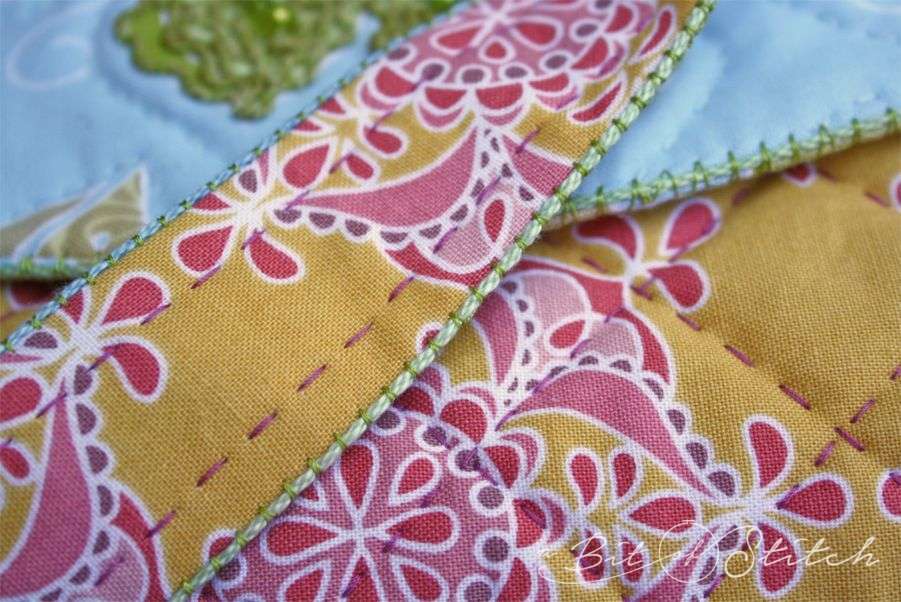
Yet I was still not entirely satisfied. I liked how my open toe foot allowed the yarn to ride softly under the foot so that I could control the tension of it. That resulted in an edge that has more definition – bumps, if you will – where the yarn poked out a bit past the stitching holding it in place. Like a pique edge, sort of! Then I discovered the felling foot and lookie here, it’s got an open place in the front and the needle opening is wide enough to accommodate a decorative stitch. PLUS, turn it over. SEE – there’s an arched groove on the underside that is just perfect for yarn! (BL accessory #ESG-FF)
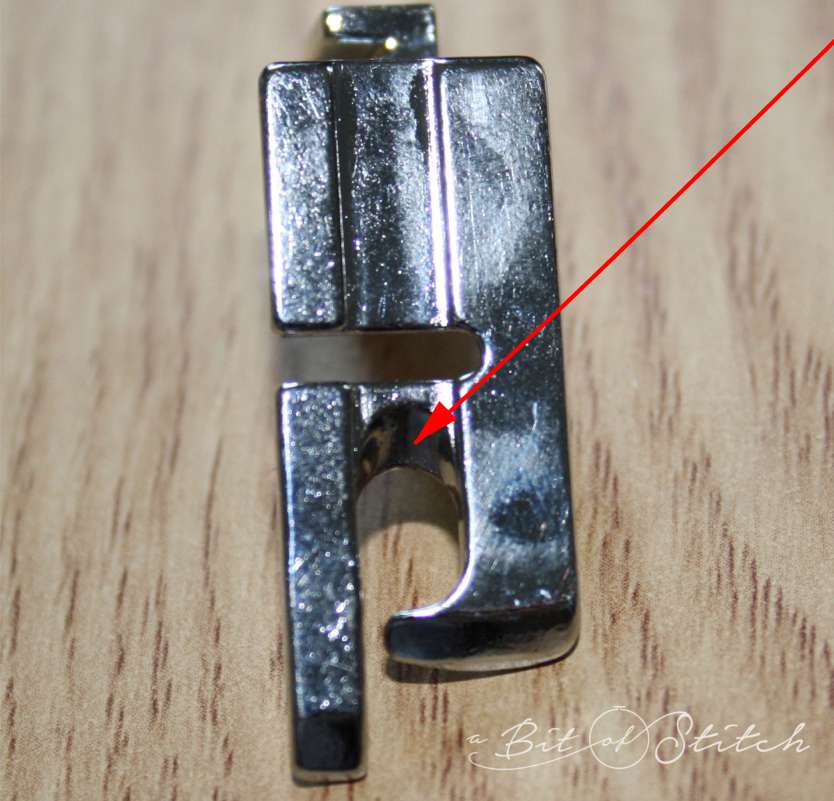
This sweet foot made my job so much easier. I had a guide, of sorts, as the opening in the foot front is narrower than the opening of my open toe foot. (No duh, that’s why it’s called OPEN toe, ha!) The grooved arch on the underside is high enough that it didn’t stress my yarn, so it wasn’t stretched like it was with the cording foot, allowing more ease for that pretty notched finish.
Okay, that was fun! If I wasn’t already hooked I’d be hooked all over again on “off the edge” fun stuff to do with yarn and stitches!
Happy edging!
Evy
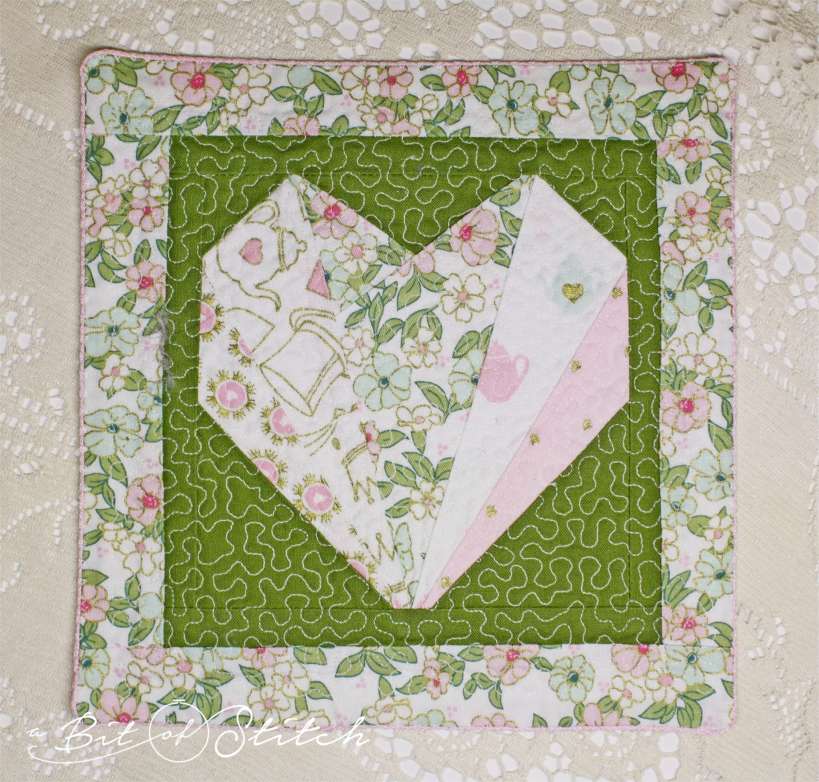
P.S. Check out this quilt block from my Easy Piece-y collection! I used the same technique to couch pink yarn to the edge of my finished heart block – click HERE to find that block!)
One reply on “Hanging off the Edge!”
My tip is: Keep all of your thread snips in a container, keep all of your leftover wash away stabilizer pieces in a bag, so that you will be able to use them again, you can make bowls, you can also use the thread in your quilts, by mixing up the leftover washaway pieces with alcohol & warm water, which makes it like starch. You can also use those thread snips by hanging them on a tree for the birds to make a nest. For the wash away pieces, you can also zigzag them tog. to reuse.