Let’s go undercover! (Yep, I’m shamelessly exploiting my grandson’s cuteness here, and isn’t he the cutest? Pardon this grandma, please – she just can’t help herself!)
Have you ever stitched a white snowman on a red shirt and ended up with a pink snowman? Or have you ever stitched a pretty appliqué or embroidery design on a boldly printed fabric and ended up with a design that looked like it had the measles? If you said yes, then you need to go undercover!
Most satin or fill stitch embroidery designs include underlay stitching. That’s the few stitching lines that run around the perimeter and across the shape of a filled stitch design area. They help support the stitching, keep the fabric from distorting as the machine stitches the fill area and also cover up the fabric underneath. Usually that’s all you need. However when stitching light colored designs on dark colored fabric – or bold prints – sometimes the background fabric shows through anyway. That’s actually a good thing. When designers add too much underlay stitching (trying to compensate for what you might choose to embroider their designs on) you end up with “bullet proof” embroidery. I see you nodding. We’ve all stitched designs that can stand on their own and stop a speeding train and it’s no fun.
So, when the underlay stitching cannot do the job right, you need an undercover material between your stitching and your fabric.
Two of my favorite undercover materials are silk organza and polypropylene. You can purchase the polypropylene undercover material in my shop – click HERE to find it.
Silk organza comes in many colors and if you don’t have the color you need, you can dye a bit in a bowl using Rit Dye. It doesn’t add to the weight or change the drape of the fabric. (I dye some for my shop and sell it in fat quarters – you can check that out HERE.)
Most polypropylene material is marketed as a stabilizer. But it has one big problem when used as a stabilizer – it melts when you iron it. And where do we iron our embroidery designs? ON THE BACK. Yep, right on top of that stabilizer. But that quality makes it a great undercover material because it’s lightweight, white and it melts when heat is applied to it. (It also works just fine for knit projects that do not need ironing.)
Using polypropylene undercover material is simple. Just place it on top of the fabric after you have stabilized and hooped your fabric and then sew your design on top of it. Rip away the excess and touch the tip of a hot mini-iron to the bits that stick out from underneath the stitching.
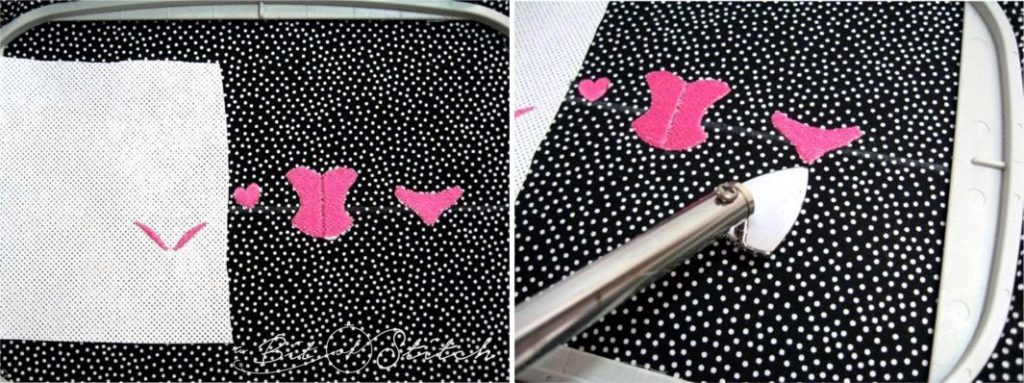
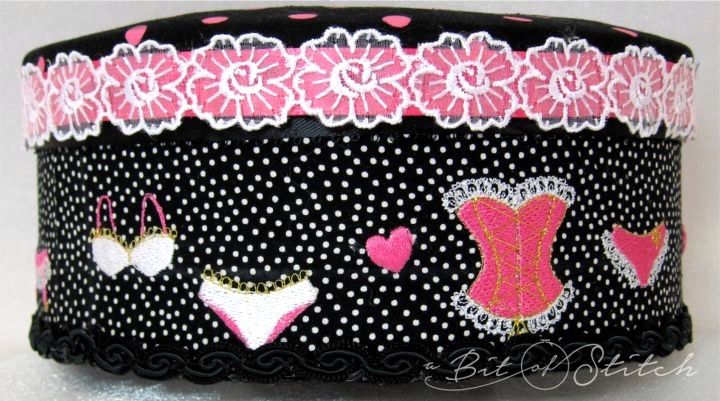
See how nicely those light colored designs “pop” on that black background!
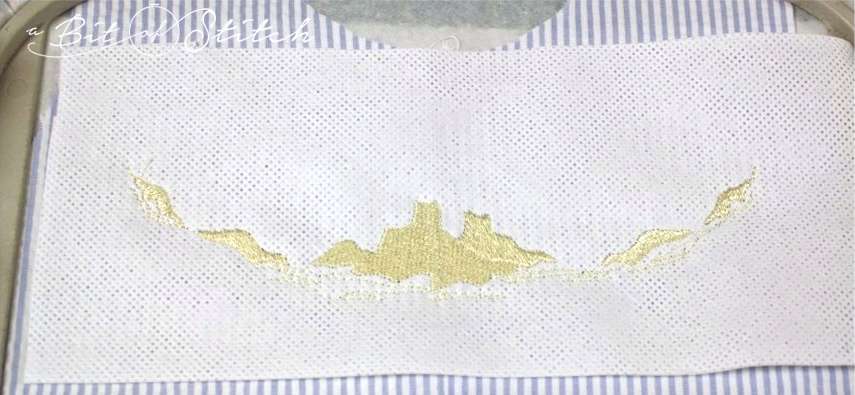
If your design has little running stitching details or tiny satin stitched lines that swirl out and away from the fill areas like the water lines in the beach scene below, remove the undercover material before you sew those. Those areas will most likely not need any undercover and it’s a pain to remove undercover material from tiny running stitched areas.

I used polypropylene undercover material to keep the striped fabric from shadowing “stripes” in the sandcastles of this design. After I stitched the sand castles I ripped away the polypropylene and then melted the bits that remained.

(Oops, there’s that cutie again!)
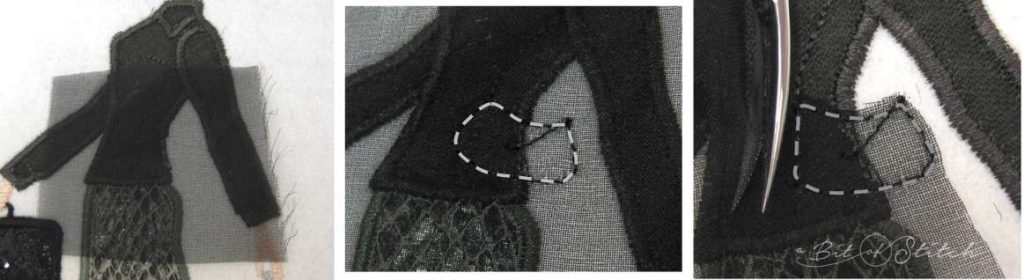
Sometimes you need to stitch a design on an area that will go across two very different colors. For example, the little purse on this design from the Traveling Girls set – half of the purse ended up on the white fabric and the other half on her dark shirt:
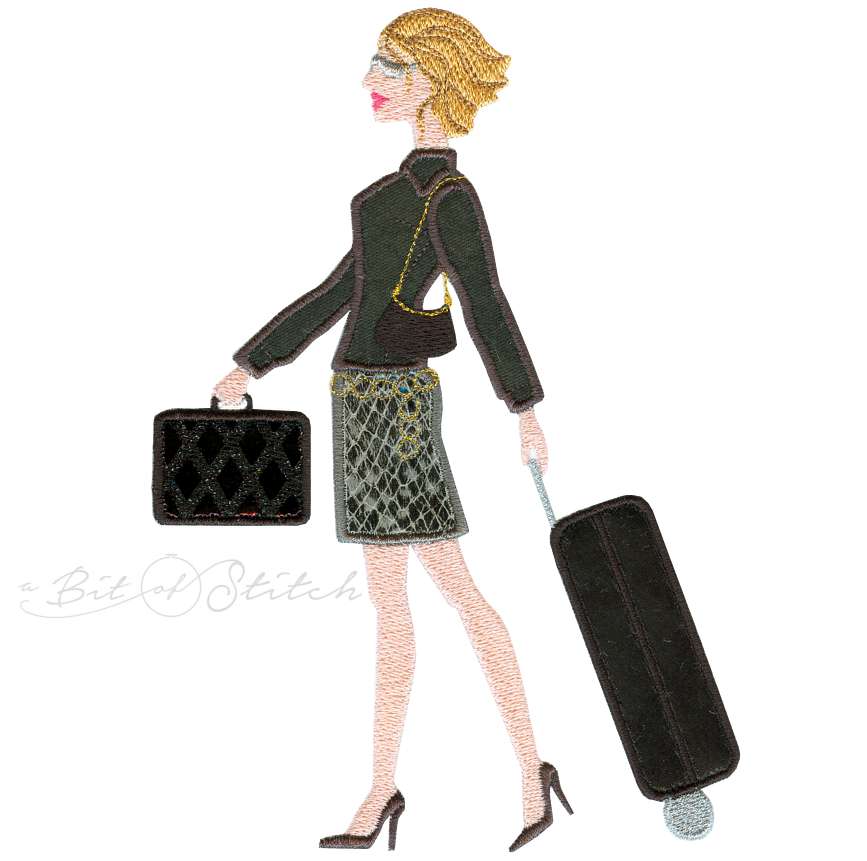
I placed a small piece of black silk organza over the area where the purse would stitch. I allowed the machine to sew just the outline stitches of the underlay stitching beneath the fill stitch purse (highlighted by the white dashed line in the photo below). Then I stopped the machine, cut the thread, removed the hoop and trimmed away the excess silk organza very close to the stitching outline. Then I resumed stitching. No two-tone purse!
What happens when you are appliquéing designs on fabric that is boldly printed, or seamed where the appliqué needs to go? Well, you CAN apply a layer of some thin fabric to the wrong side of your appliqué fabric with fusible webbing and then apply fusible webbing to that and complete your appliqué with the double layer of fabric. However that can make for a pretty stiff appliqué. If that’s not a problem, that is the easiest way to prevent show through on appliqués – but what if it IS a problem?
That’s when it might be best to actually remove the fabric that will be beneath the appliqué. Yep. Cut it out.
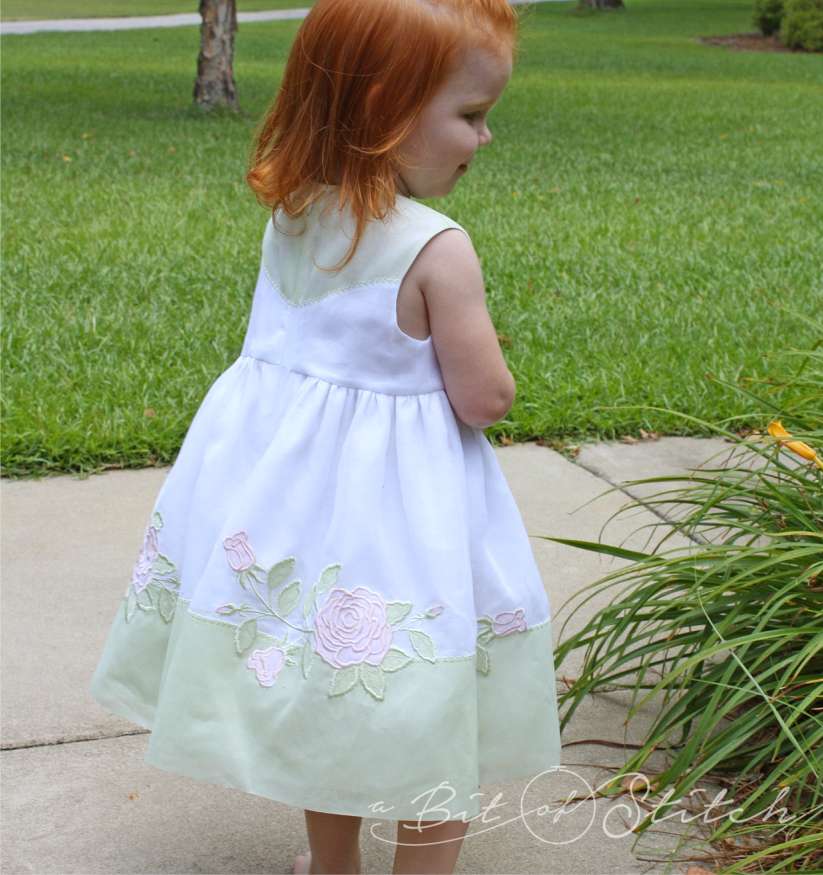
For instance, I decided I wanted to make this little dress using a sheer cotton organdy fabric. And because I am clearly insane, I wanted to use the same sheer fabric for my Elegant Roses appliqués. Heh.
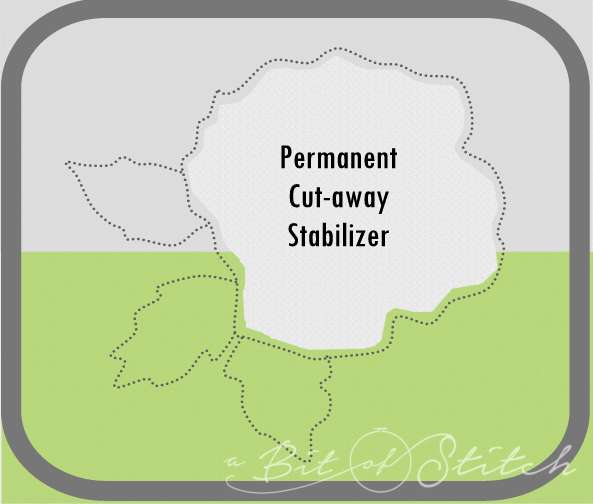
Sheer cut-away stabilizer behind my project fabric came to my rescue. It became my stabilizer AND my fabric in some places. Yeah, that’s not confusing! Okay, a picture is worth a lot of words, here goes…
I had already sewn the green border on the white skirt. Time for the appliqués. I ironed (very lightly) a piece of fusible cut-away stabilizer to the wrong side of the skirt in an area slightly larger than the hoop I was using. Then I hooped my stabilized fabric.
Next, I used my excellent (ahem) trimming snips to cut away the skirt fabric within the design’s appliqué outline. This is best done on a hard, flat surface… which is NOT your lap, unless your lap is hard and flat, ha! You don’t want to disturb the fabric in the hoop while you are trimming. I let about 1/8” of fabric remain on the inside of that appliqué outline knowing that my satin stitching would cover it.
Then I put the hoop back in the machine, floated an additional layer of soft tear-away stabilizer under the hoop (to support those satin stitches) and finished the design just as I usually would with an appliqué. That means I placed my fusible backed appliqué fabric over the outline stitching and continued from there as I normally would… stitching, trimming, fusing, and then satin stitching the design. When I was finished with my applique I removed the soft tear-away as completely as I could and then gently peeled up and trimmed away the excess sheer cut-away stabilizer from around my rose appliques. A good firm press on the wrong side finished it up.
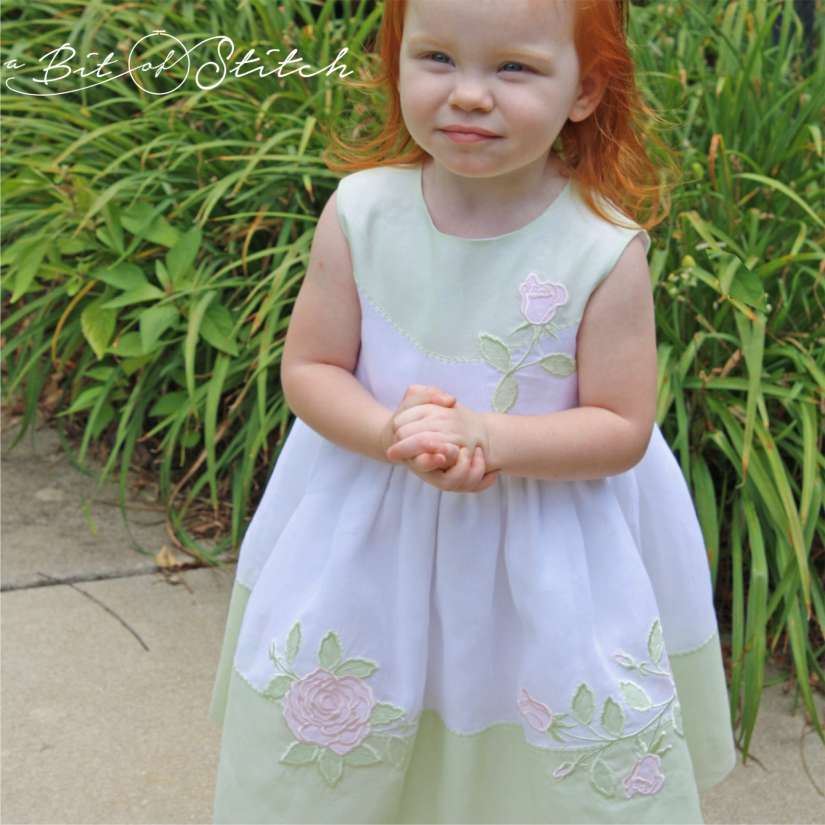
Pretty, isn’t it? And no two-tone flowers! I should note that as the leaves were green too, I didn’t worry about the underneath fabric for them unless they crossed the line – half in the white, half in the green.
Go forth and go undercover my stitching friends – you will love your embroidery designs even more!
Evy