Do you have a stash of machine embroidery designs? Any of them appliqués? Did you know that the first running stitch sequence can be used to create a “sewn in the hoop” project? Yes, it can – let me show you how! This is one of my favorite techniques and one I talk about often during my lectures, so if you’ve been in one of those lectures, here’s a closer look at what I was attempting to explain there. 😄
Nearly all appliqué designs have either a tack-down stitch sequence or a material outline and tack-down stitch sequence. We use those to apply the appliqué material to our project fabric when stitching out an appliqué design. That running stitch sequence is your “seam!” By sewing two layers of fabric together in the hoop and leaving an opening or creating an opening later for turning, you can easily “sew” in the hoop to make 3D projects using that stitch sequence.
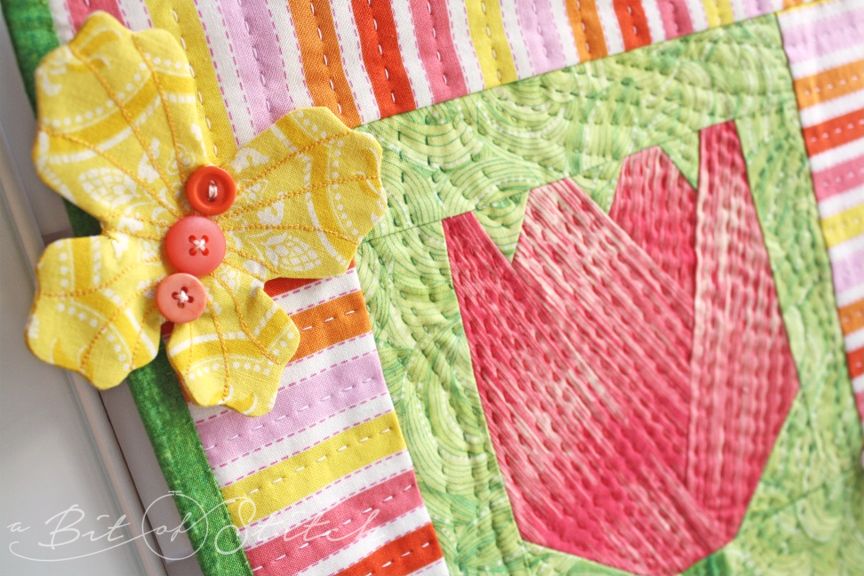
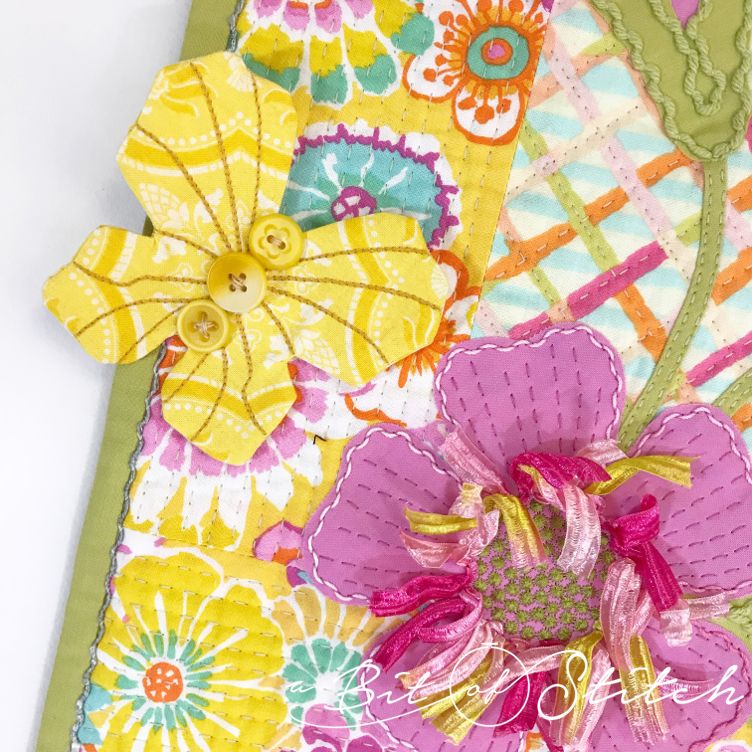
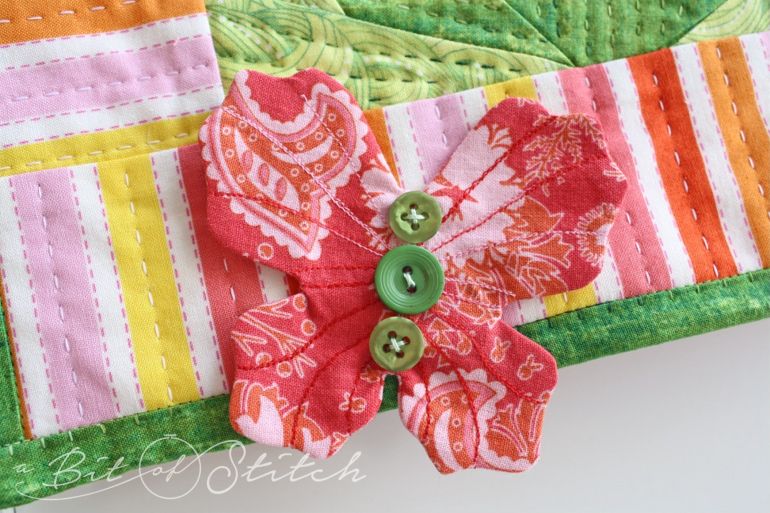
I wanted some 3D elements for my Easy Piece-y quilt block of the month project. Butterflies seemed like the perfect choice to accompany my cheerful tulip, so I hunted through my stash to see what I could make… as usual, working in the last minute and not wanting to take the time to digitize something new! I found the perfect butterfly shape in one of my older design sets.
Cool, huh? Want to make some? Let’s make this one.
I’ve made this tutorial a little easier by re-digitizing the design file to take out all the parts you don’t need. (Note: If you are following these directions to make sewn projects with designs from your own stash, you don’t have to edit out the parts you don’t need… just don’t sew those parts. The original butterfly design had a body part and extra detailing on the wings. I just skipped those.) Click HERE to find the newly edited butterfly design containing only the parts you will need.
Let’s get started! 😊
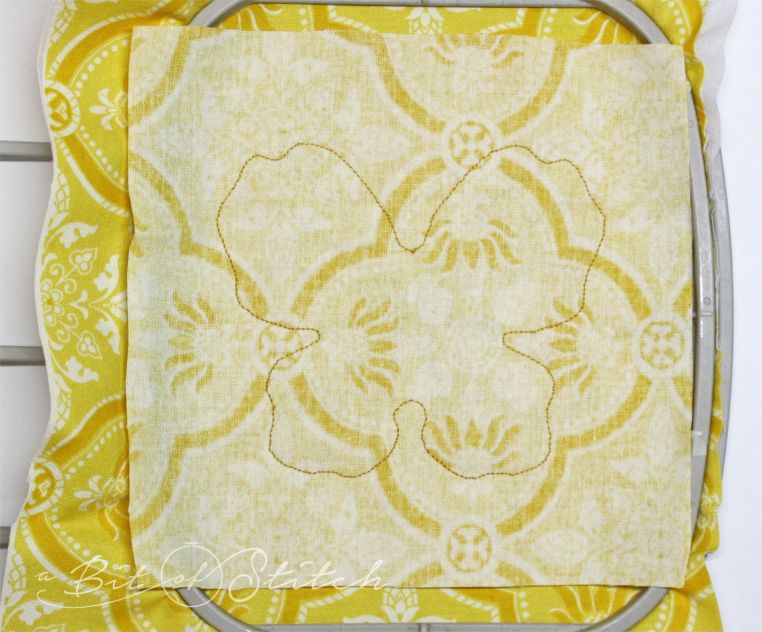
Gather up your supplies. You’ll need one block of quilt weight cotton fabric sized slightly larger than your 4×4 hoop. Back this block of fabric with a fusible, crisp tear-away stabilizer. Don’t fuse it on too much, just enough to hold the fabric lightly. (This butterfly design has a little bit of detail stitching, and because of that I am using stabilizer. Just so you know, stabilizer is not always necessary when stitching a simple running stitch outline.) Cut another block of the same fabric about 5” square.
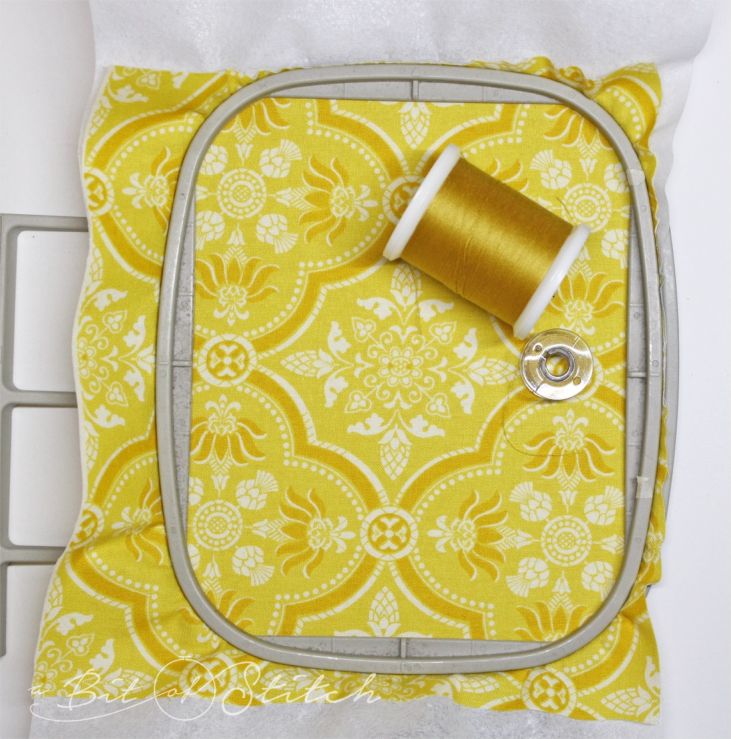
Choose matching sewing thread. Wind a partial bobbin with the same thread. Hoop the stabilized fabric right side up. Make your butterfly pretty with a printed fabric and center the fabric and design so that the wings will be evenly matched. This is when that on-board camera comes in handy!
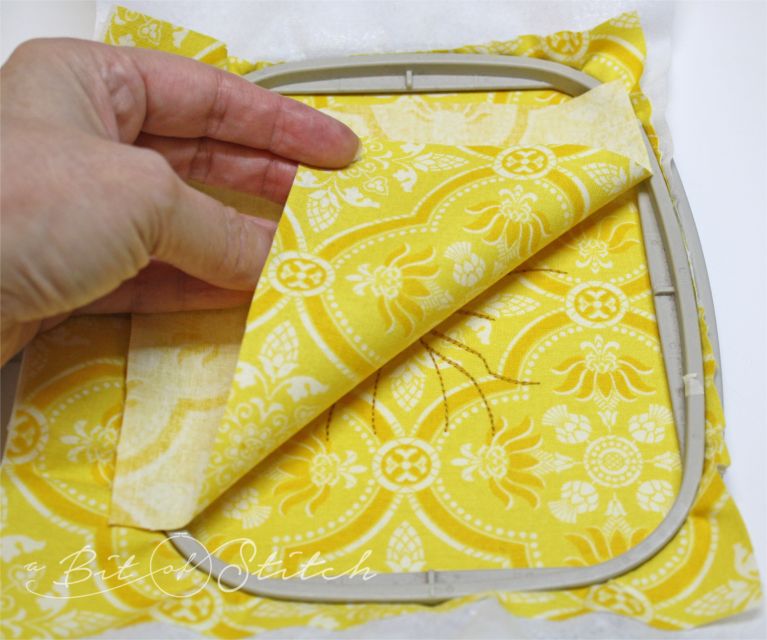
Sew the first stitch sequence. This is the vein detailing on the butterfly wings. I used a slightly darker thread color so they would stand out. Now place the 5” block of fabric on top of the hoop, wrong side up.
Sew the final stitch sequence. This is a single running stitch outline. If you chose a fancy fabric (something other than quilt weight cotton) and think that this line needs to be double strength, then by all means back up and sew it again!
Done! Now you are ready to pop it out of the hoop and remove the stabilizer. Take care not to dislodge the stitching while you do so! It helps to press your fingertip against the stitching line and tear the stabilizer against your fingertip.
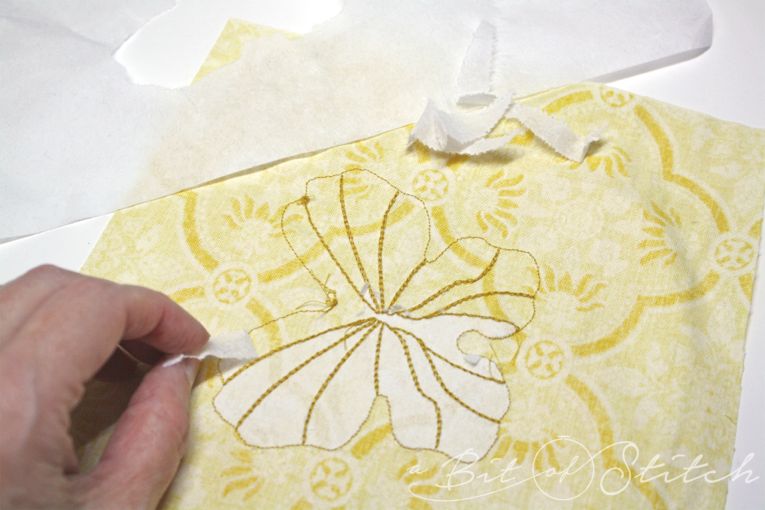
I find it helpful to very carefully remove the stabilizer around the outside of the design first. Then the inside parts peel away easily, and the detail stitching is tougher than the single running stitch outline so you don’t have to be as careful there.
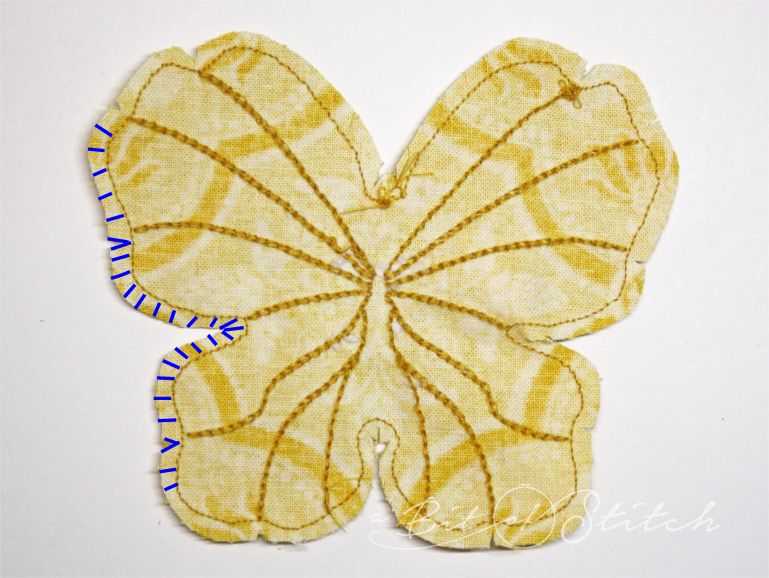
Cut out the butterfly leaving slightly less than ¼” selvage past the outline. Clip around the entire design. LOTS of clips work better than a few! Take out some notches of fabric here and there at the sharper curves. I’ve noted some clipping in blue to give you an idea about how close that clipping should be.
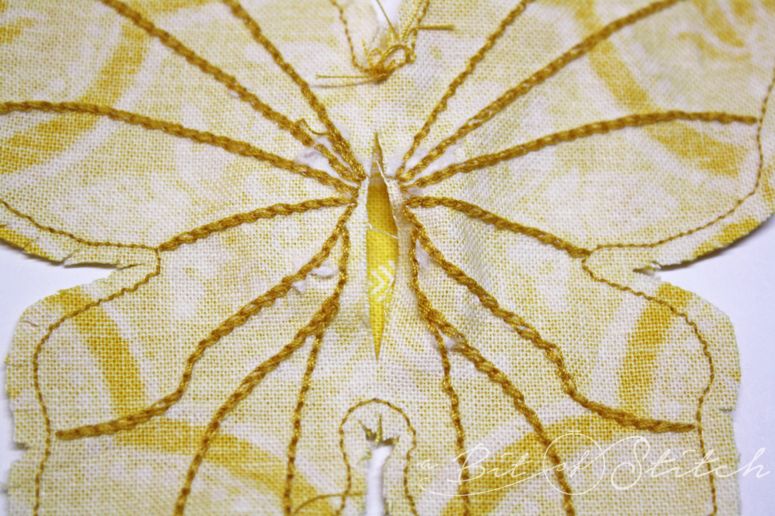
Sometimes I pick out stitches on the outline stitching to create an opening. But this isn’t a good design to do so because there aren’t any really straight edges. Sometimes I create an opening in the fabric applied for the back. But for quick projects I just create an opening by cutting one in a place I can cover up later. So go ahead and cut an opening in the very center of the butterfly between the two spread wings. Cut only one layer of fabric (as shown above) and make the opening just big enough to get two fingertips inside.
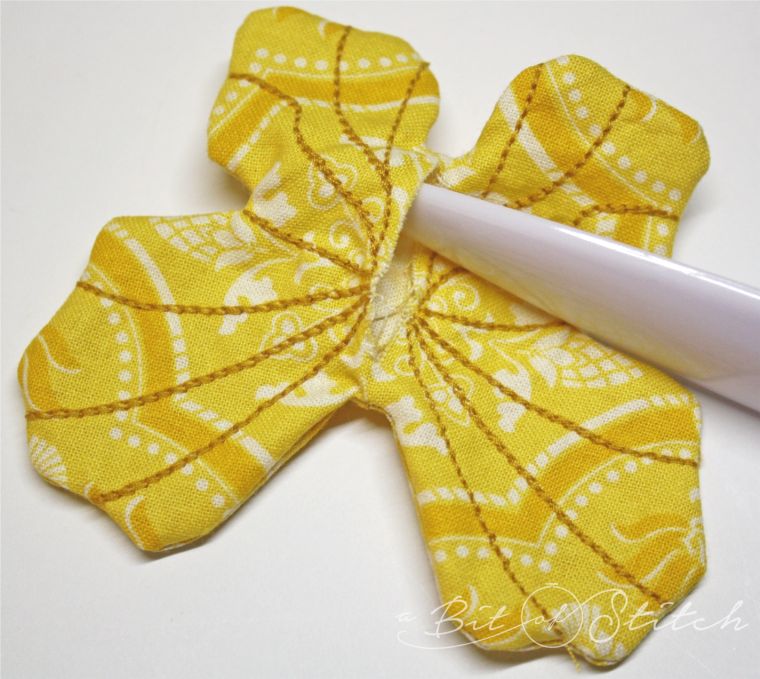
Turn the butterfly right side out. Use your Dritz Point Turner! It has nice rounded ends that won’t poke through the stitching line.
Once you have wiggled all the edges smooth, give the butterfly a good press. Pull the opening pieces flush with each other as you do so.
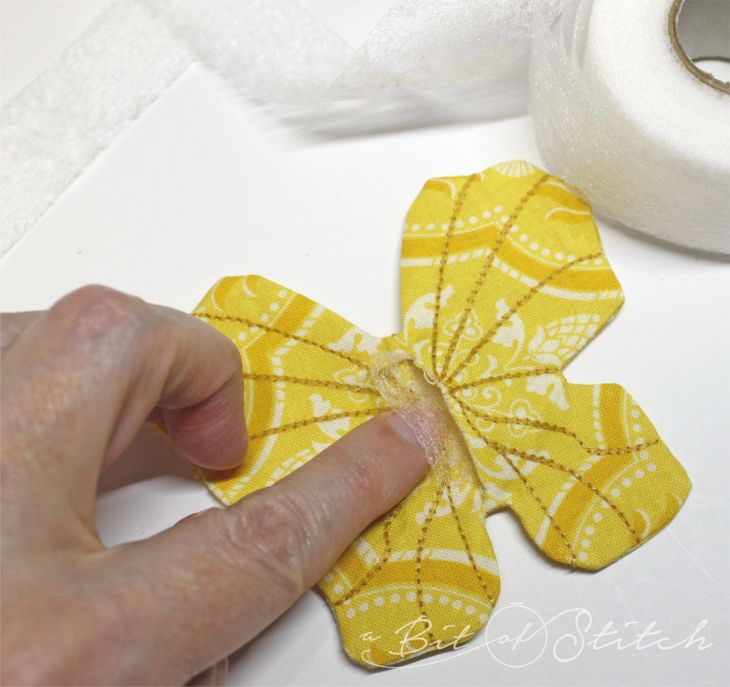
Poke a bit of fusible web inside the opening. Align it so that it will be directly under the opening, catching both sides generously.
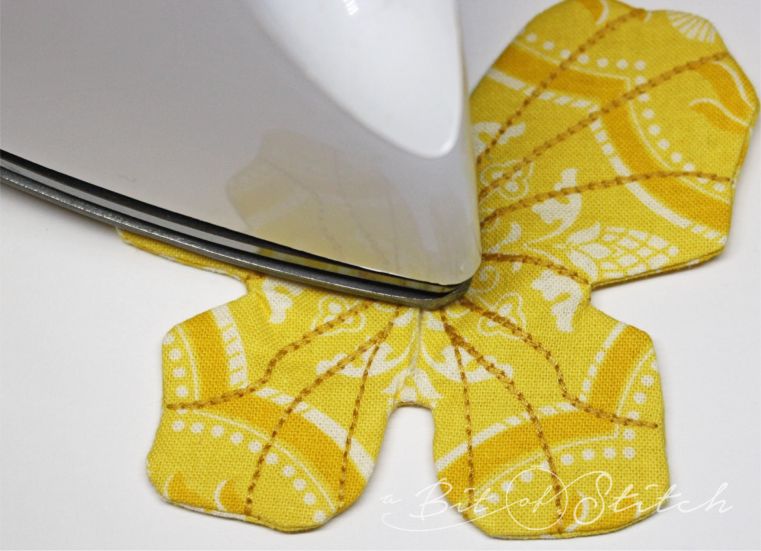
Fuse the opening shut with a hot iron.
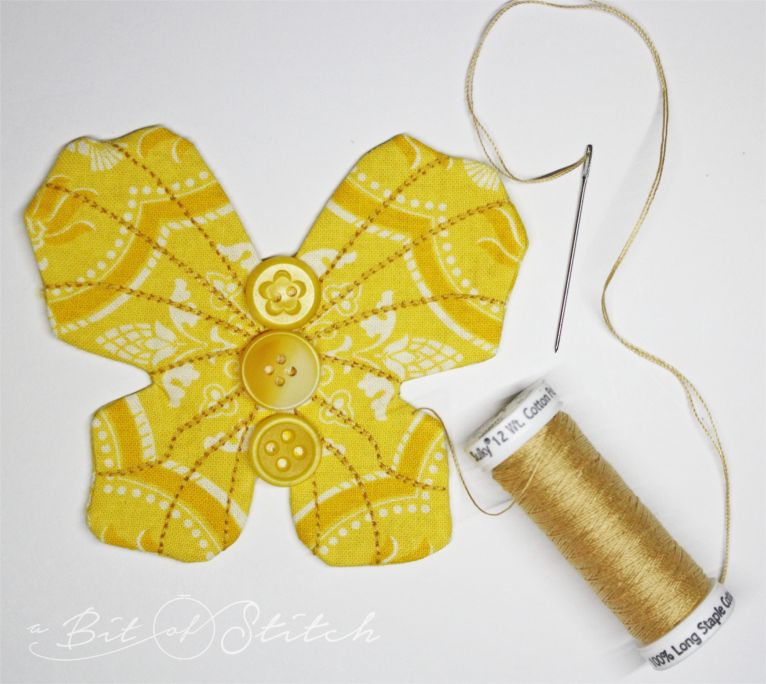
I liked the look of buttons for butterfly bodies, but you could easily substitute a pretty piece of rickrack trim, ribbon, or a bit of felt cut into a body shape. I love to use Sulky’s Petites 12 wt. cotton thread for sewing on buttons. Less sewing and less tangling! Click HERE to go see all the colors this lovely thread comes in.
That was easy! I hope this post has inspired you to take a long, close look at your machine embroidery stash and all the possibilities it holds. Happy Stitching!
Evy
P.S. Take my class at “The Sewing Collection” and learn more cool tricks for getting the most out of your embroidery machine! Click HERE to get all the details.
2 replies on “Stretch Your Stash! Butterfly Project”
Awesome idea and instructions!
Thank you so much! 🤗