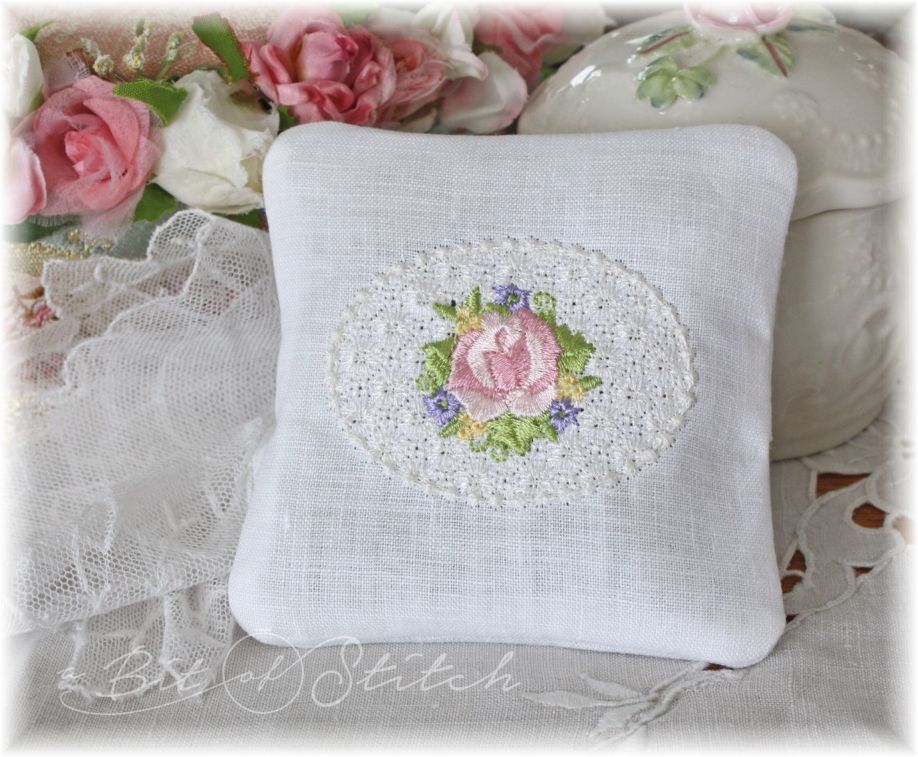
Just in time for Mother’s Day! Make this quick and easy sachet in your hoop using the frame tool feature on your embroidery machine. These are so easy; you’ll want to make a boxful!
Here’s what you’ll need:
- 1 fat quarter or approximately 9” x 20” of quilt weight cotton, cotton organdy, handkerchief linen or damask in a color of your choice (I used white)
- Sewing thread to match the fabric
- Any suitable embroidery design that is approximately 2” x 3” in size – or at least no larger than 3” in any direction – Click HERE, HERE, HERE, and HERE to find perfectly sized designs for tiny places just like this sachet (and a free lace frame design suitable for framing tiny designs!)
- Embroidery threads for your design
- Lavender petals (or other pretty smelling sachet ingredient)
- 4×4 hoop
Now you’re ready to get started! 😀
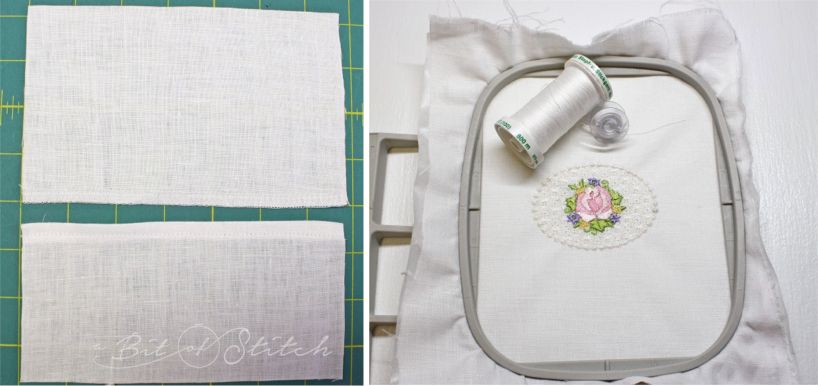
Cut two blocks of fabric approximately 8” wide by 4” tall. Serge across one long side of each block. Turn under the serged edge on one block, press and stitch to hem it.
Cut another block of fabric slightly larger than the 4×4 hoop. Stabilize this fabric with one layer of a lightweight tear-away such as Totally Stable by Sulky. Hoop the fabric and embroider the design. If you are using the Framed Flower Motif design (free offer), embroider the lace frame portion and then float an additional layer of soft tear-away under the hoop before you stitch the flowers in the center. If you are using a design of your choice, use a stabilizer that is suitable for your fabric and the design density.
Center the embroidery design before you begin stitching. Don’t remove the fabric from the hoop when you are done…keep reading!
Thread the embroidery machine with regular sewing thread in the top and bobbin in a color that matches the fabric.
Locate the frame tool function on your embroidery machine. Usually it’s on the home screen somewhere. (On my Baby Lock Destiny I’ll click on “Embroidery” and there it is on the left.)
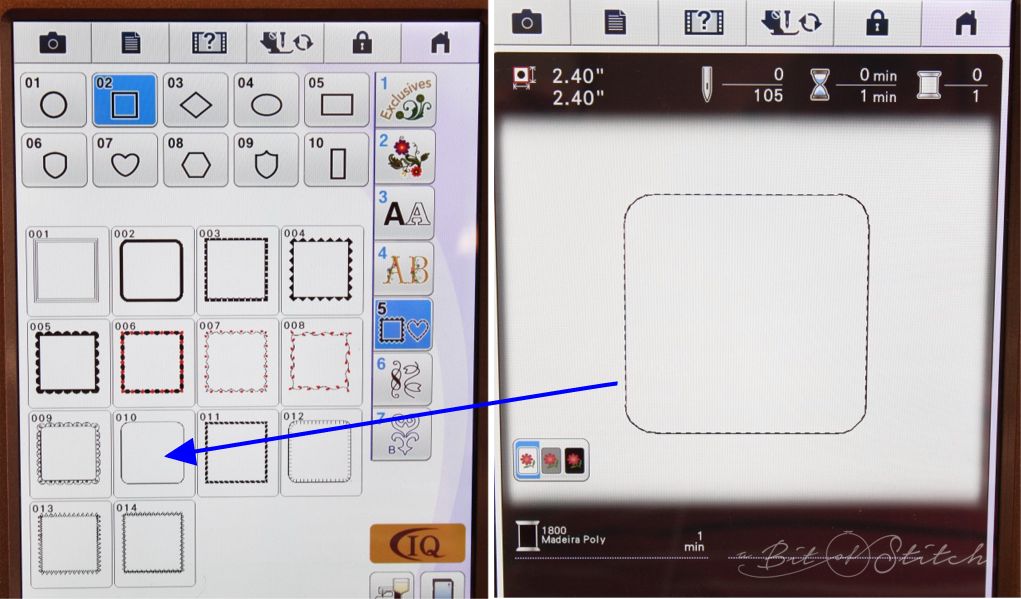
Choose the single running stitch outline under the square frame choices.
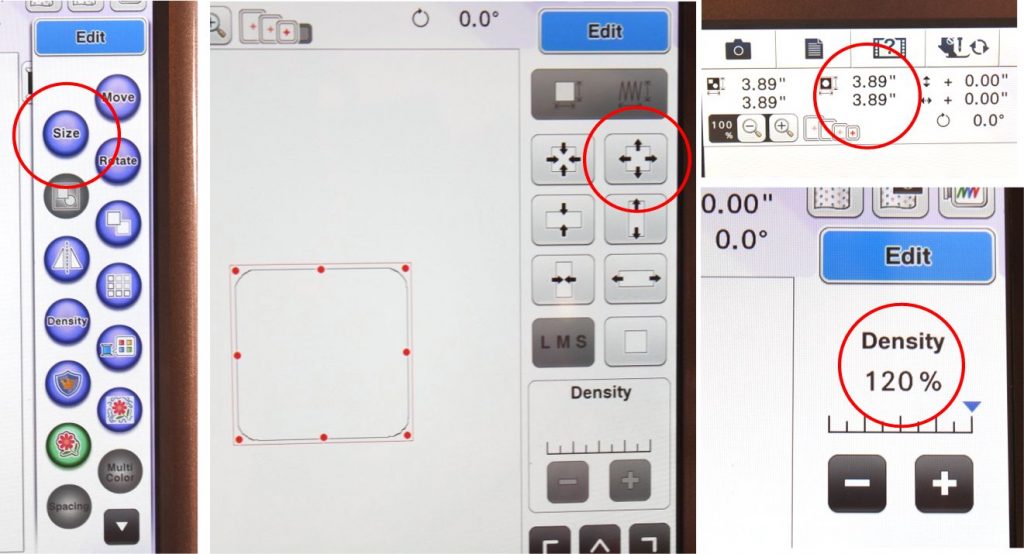
In your editing tool box choose size and resize the box to fit within the 4×4 hoop. I resized my box to 3.89” x 3.89” which is just about right for this pretty little framed flower design.
Some machines will allow you to change the stitch density of the frame designs. If so, run that number up as far as it will go. On my Baby Lock Destiny that’s 120% which is a pretty nice regular sewing seam! If your machine only has a long basting stitch for this frame you might consider using one of the other frames. Experiment by testing a few to see which will work best for “sewing” in the hoop.
If you wish to sew the frame around the embroidered design before you add the back fabric pieces, go ahead and do that. That’s not really necessary as long as you center the frame design just like you centered the embroidery design. It will work!
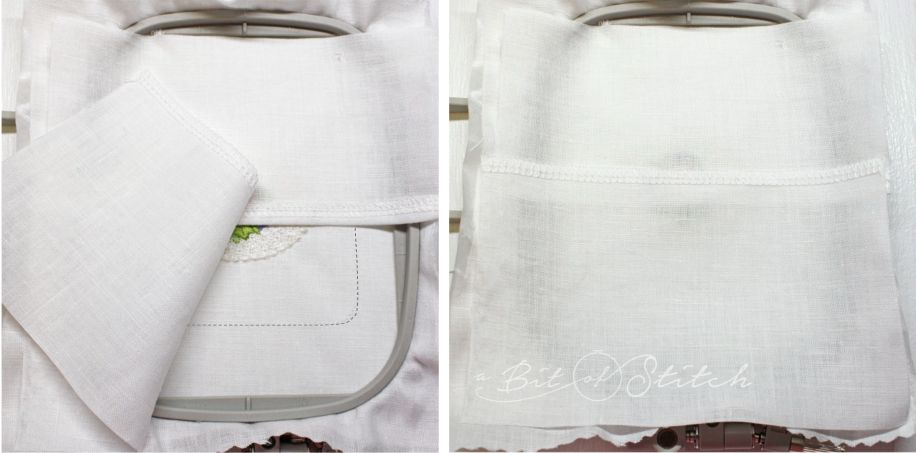
Lay the hemmed block of fabric across the hoop, aligning the hemmed edge slightly lower than the center of the embroidered design. Make sure this fabric piece is facing right side down. Next, place the block with the serged edge on top, right across the middle and slightly above the hem on the piece of fabric underneath.

Sew the frame design. Watch the embroidery foot carefully; when it goes over that flap of fabric on one side it may catch. So pay attention and use a wooden skewer to help keep that bit in place as you stitch across it.
You may wish to sew around twice. If so, just repeat the frame stitching.
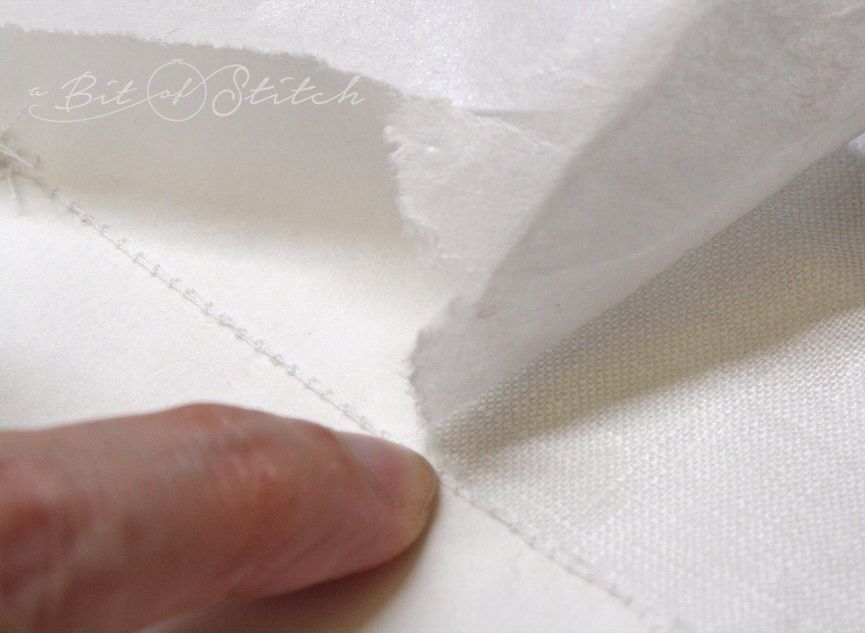
Remove the fabric from the hoop and tear away the stabilizers. When ripping along the frame seam stitching, press your finger on the line of stitches and tear toward it. This will help prevent dislodging those stitches!
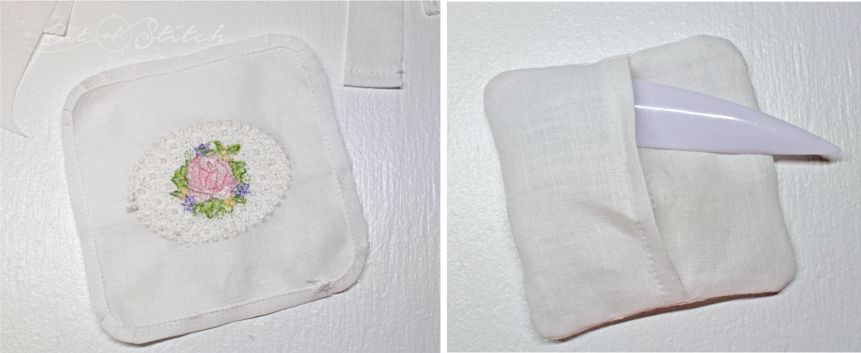
Cut out the sachet leaving a fat ¼” selvage past the stitching line. Clip the corners and turn right side out. Use your Dritz Point Turner tool! That curved edge is the perfect thing for smoothing out rounded edges if your sachet has rounded corners.

Press the finished sachet lightly from the wrong side if necessary. Whip up a little packet of sweet smelling something to slip inside. This is very easily done with silk organza and your serger. Click HERE to find silk organza, perfect for this use!
Pop that packet inside your sachet. Wasn’t that easy? Now go make one for every “mother” friend on your list and a dozen or so for yourself!
Happy Mother’s Day to you – thanks for reading!
Evy

6 replies on “Sachet Sweetness”
Evy this is just "sew" cute! You do such beautiful items! Thank you for sharing! I love it and "sew" will my two sisters!
Lovely! Thanks.
Thank you! I'm glad you like it 🙂
You are welcome!
thank you so much- what a great idea for my mom-in-law. She is in a care facility, and it is difficult to make her anything. This will tuck in her undies drawer- and everything will be nicely scented- lavender is her favourite!
You are so welcome! 🙂