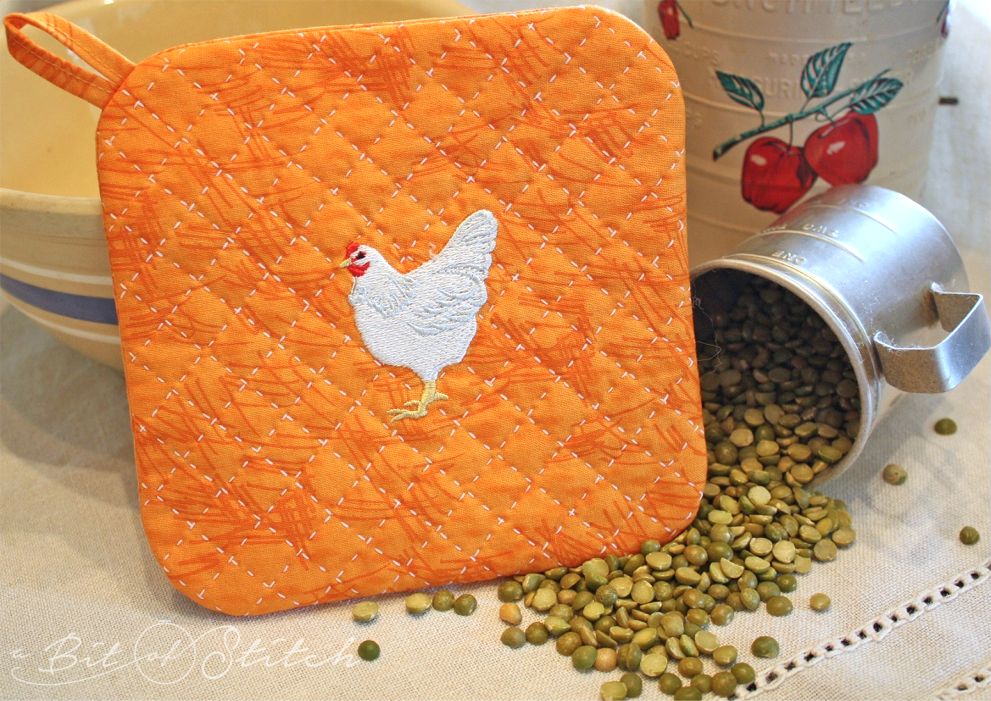
I’ve been amazed at how easy it is to stitch up quick and uniquely pretty projects with my new Baby lock Destiny! With quite literally a few simple clicks I can create in-the-hoop happiness from scratch! Follow along with me and let’s make a classic, fun hot mat to nest a hot pot come dinner time. Now that’s something to crow about. 😀 ha!
You will need:
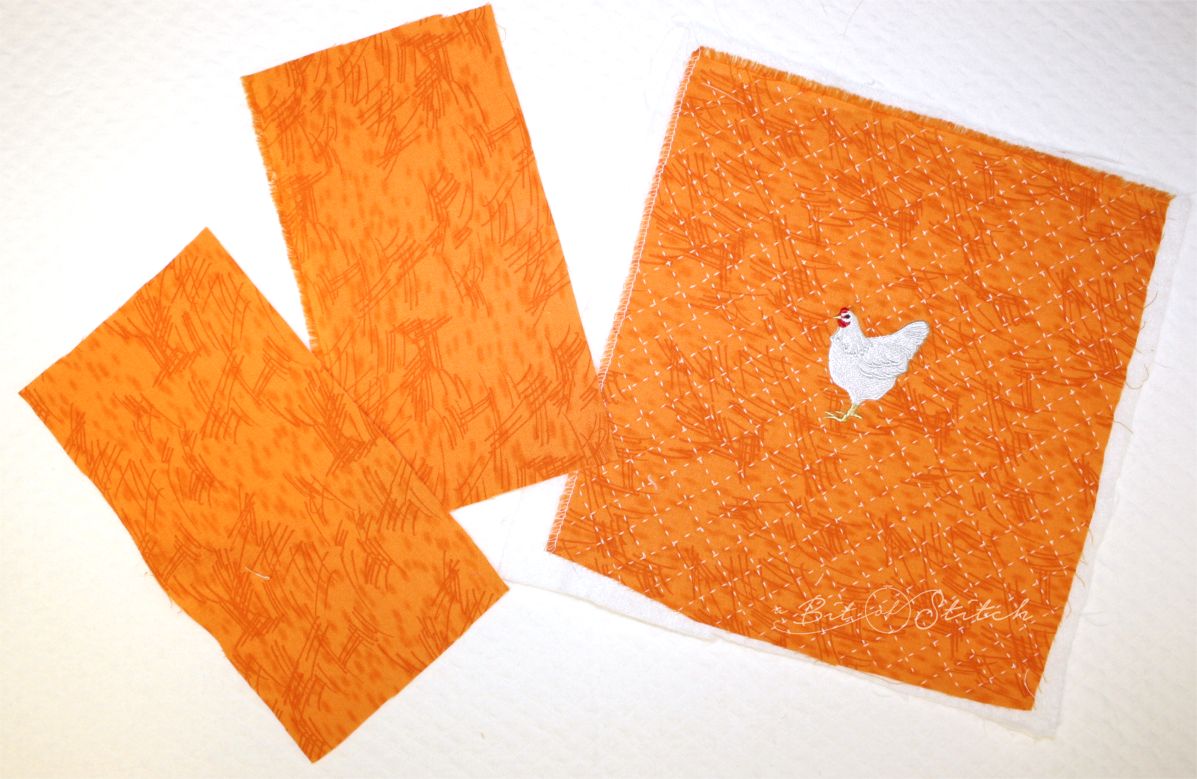
- Two 8” x 8″ blocks of fabric
- One 9” x 9″ block of batting
- An embroidery design of your choice (I used the little hen from my Farm Animals set)
- Baby Lock Destiny
Embroider one 8” block of fabric. Remove all stabilizers and press well from the wrong side. Place batting behind the fabric and quilt as you wish.
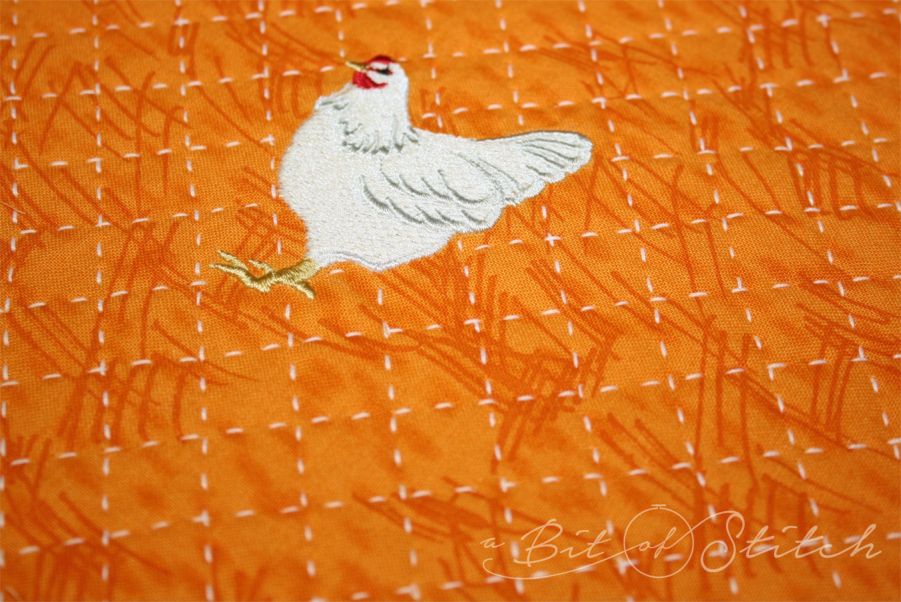
Look at those sweet, sassy Sashiko stitches! This is a great little project for the Baby Lock Sashiko machine. I set my stitch and space lengths at 3 and did the “Sashiko hop” over the hen embroidery design. (Check out my Sashiko Techniques Tutorial Book to learn about that technique and more!)
Split the other 8” block in half.
Right sides together sew the split 8” block back together leaving a 3.5” opening in the center. Press the seams open.

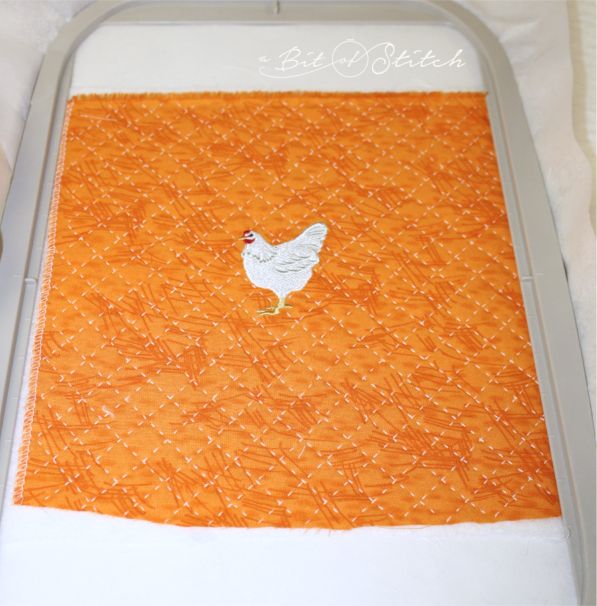
Hoop a piece of tear-away stabilizer in the 8×12 hoop. Place the quilted, embroidered fabric block right side up, centered in the hoop on the stabilizer. Put the hoop into the machine.
Choose IQ Designer. When the first screen opens choose the shape tool as shown in the photo below on the right.

See all those shapes, wow! (If you’ve been in one of my classes and heard me talk about patch sewing in-the-hoop just think, ALL of those are “patch” designs!)
For this project be sure the first button at the top is highlighted blue on the first screen because we just want to stitch the outline of the shape. I chose the square with the rounded off corners as shown in the center photo. Click OK as shown in the photo below on the far right.
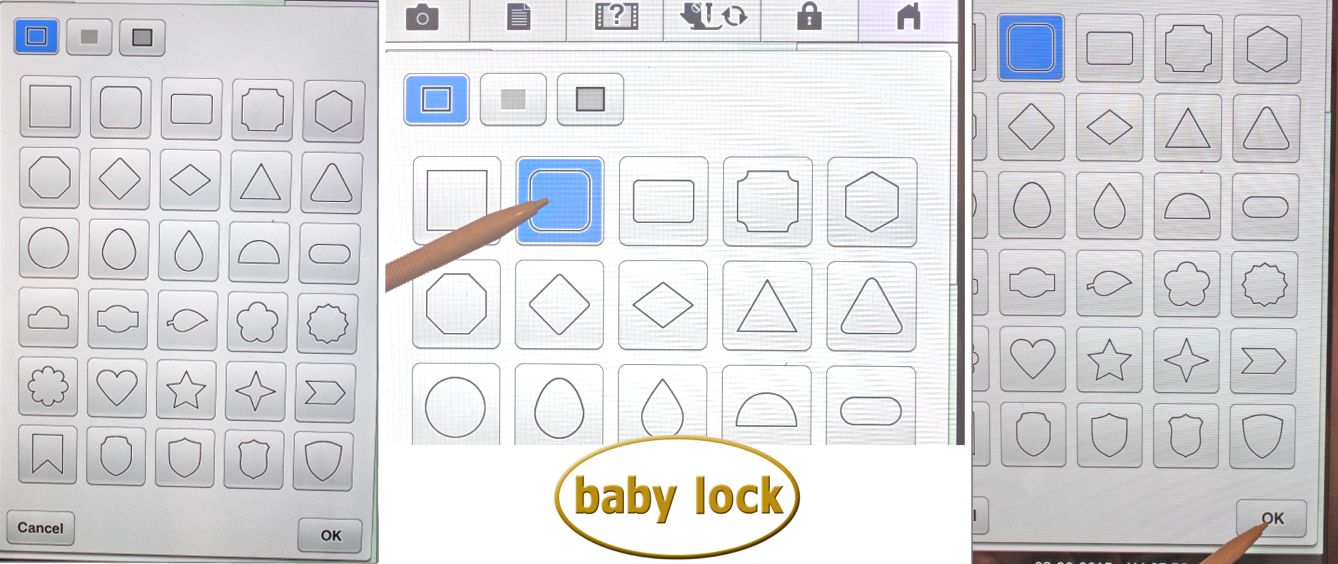
The next screen will take you to where you can choose the type of outline stitch and apply various adjustments to it. Select the center button at the top left hand corner as shown in the photo below on the left which is highlighted blue. That’s the simple running stitch outline. (It will stitch twice, so it’s good and sturdy.) Click OK. The middle photo below should be what your screen looks like now. Click “Set” and then on the next screen click OK.

This brings you to the embroidery screen. Your design is ready to stitch!

You want to see where the box will be stitched so take a photograph of what’s in your hoop with Destiny’s built in camera! To do so, click the little camera icon at the top right hand corner of the screen as shown in the photo in the upper left below. It will warn you that the hoop will move. Make sure you and anything around your machine is out of the way and click OK. Woo-hoo! You now have a photo of what’s in your hoop with the block outline design showing on top. Cool beans, eh?

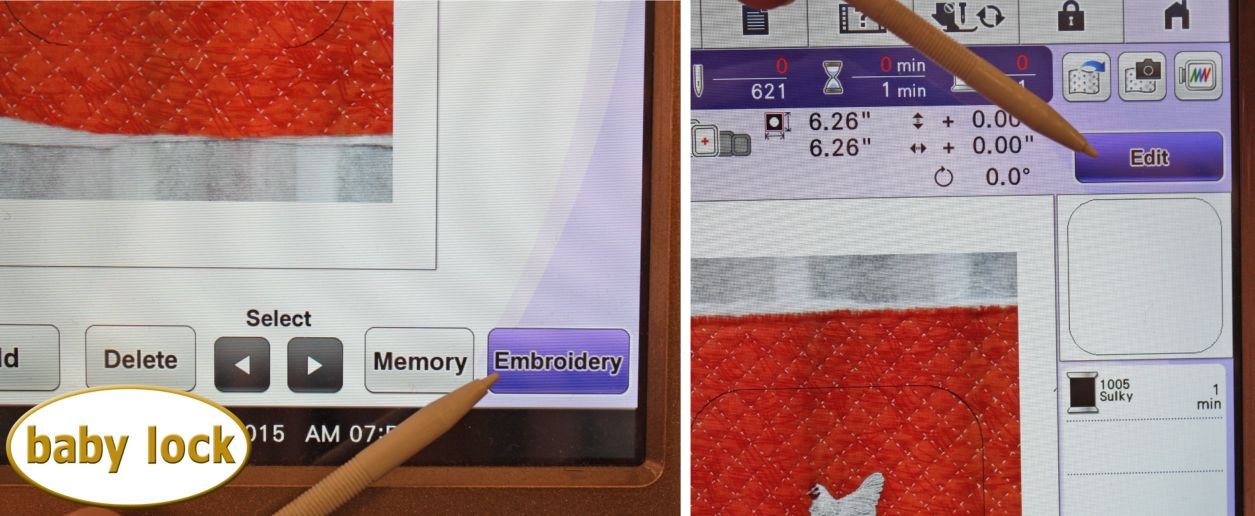
Click on the “Embroidery” button at the lower left hand corner. Then click on the Edit button on the next screen.
Choose “move” from the new little screen that opens so you can move the block outline design around and get it properly positioned on your quilted fabric. You can either touch the design with your pointer and physically drag it around on the screen – now that’s pretty awesome – (the hoop will move as you do so, so watch out for that) OR you can use the arrow buttons on the lower left to move the design around. I centered the chicken embroidery within my outline design.
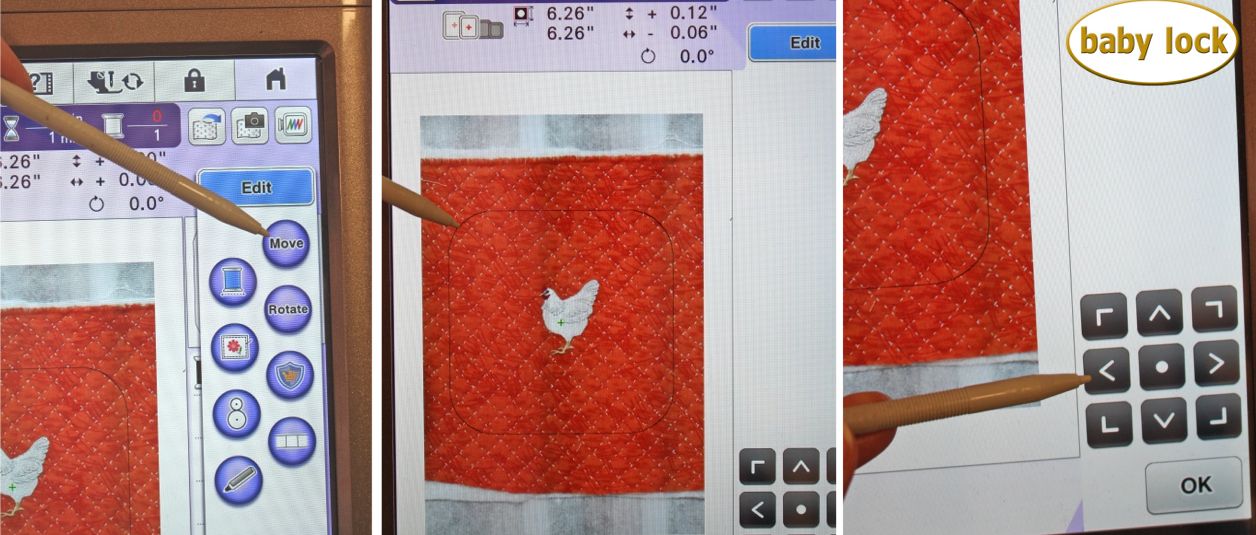
Click OK to close that screen. Then click the “edit” button again to close that screen. Now you are ready to sew. As you can see by the photo below on the right, you can see exactly where the outline will stitch on the fabric. Awesome.

Let the machine sew around the block outline once just to give you a placement for the backing fabric. You can stop the machine when it starts on the second go-round, cut the thread and then press “0” on the thread sequence window to revert to the beginning of the outline again. (The thread sequence window is found by clicking on the icon at the bottom that has a needle and a -/+ picture on it.)

Place the joined 8” block of backing fabric wrong side up over the stitched outline. Center the joined seam within the stitching outline. Add a loop hanger if you wish in a corner between the layers. You can use ribbon, cord or make a loop by double-double folding a narrow strip of fabric to about ¼” wide and sewing it together length-ways. Use a piece of cellophane tape to hold the loop in place at one corner as shown in the photo on the upper right.

Place pieces of cellophane tape over the seams on the backing fabric where the outline will stitch so that the foot won’t catch in them as it passes over. Scotch Brand Magic tape works great for this. It won’t gum up your needle and it removes easily.
Sew the block outline again. Remove the fabric from the hoop. Carefully tear-away the stabilizer. Cut out the shape leaving a ¼” selvage past the stitching line. Clip the corners.

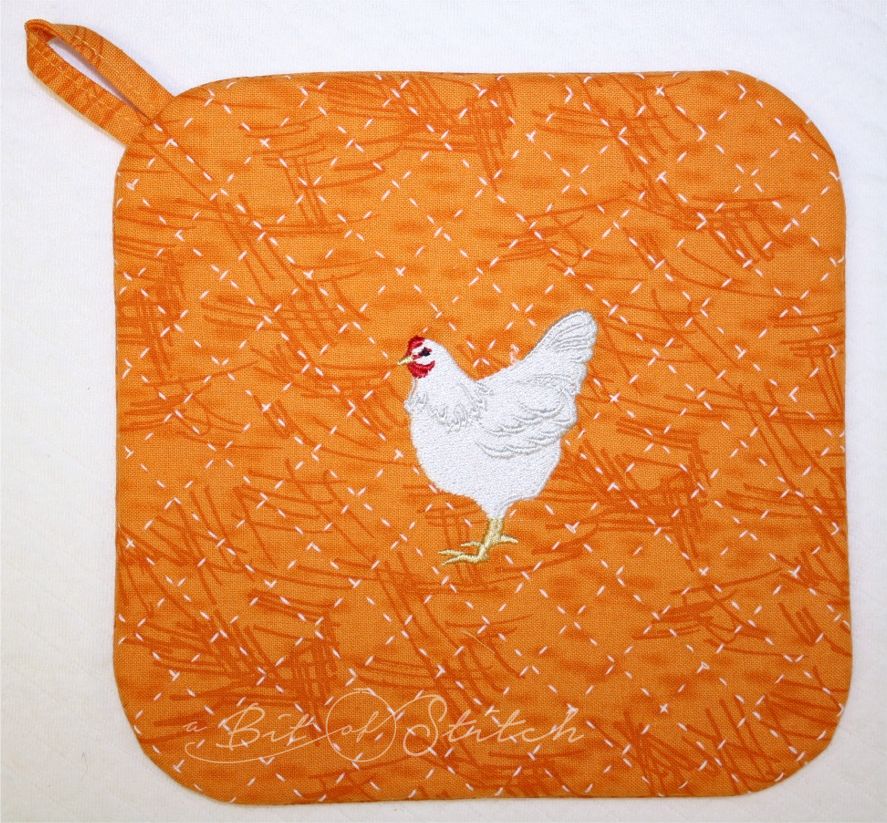
Turn right side out, hand sew up the opening (or use a bit of fusible web tape to secure it) and give your project a good press. Voila! You’ve made a pretty hot mat!
Wonder what else you can create with this neat technique? How about lavender filled sachets, rice or buckwheat filled bags for cool/warm packs? Eye masks, anyone? Go play with your Destiny and make a pretty today 🙂
Happy Stitching!
Evy
One reply on “Nest Your Hot Pot!”
Thank you so much for the great tutorial. Love, love, love all your designs!