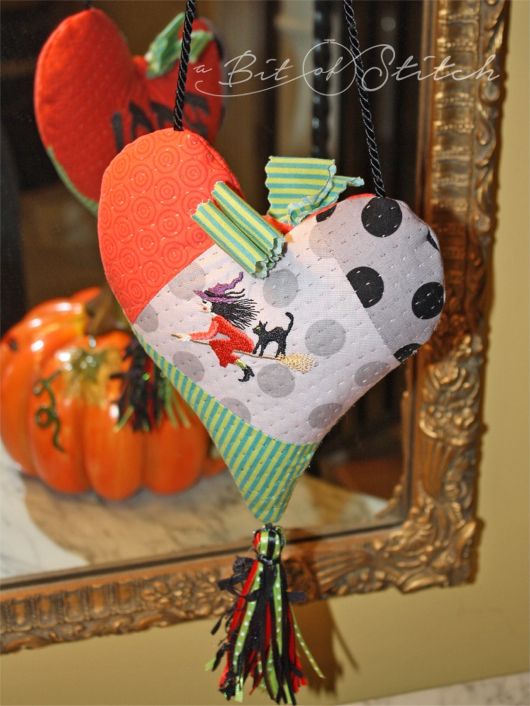
Make a pretty with me today! The weather is turning (maybe, possibly, hopefully) a little bit brisk here in SC and that puts me in the mood for sewing something new for the house. AND, Sassy and I have not had much time to play lately so I needed, ahem, to remind her that I still loved her. What better project that a no-stress crazy-pieced, quilted, stuffed heart!
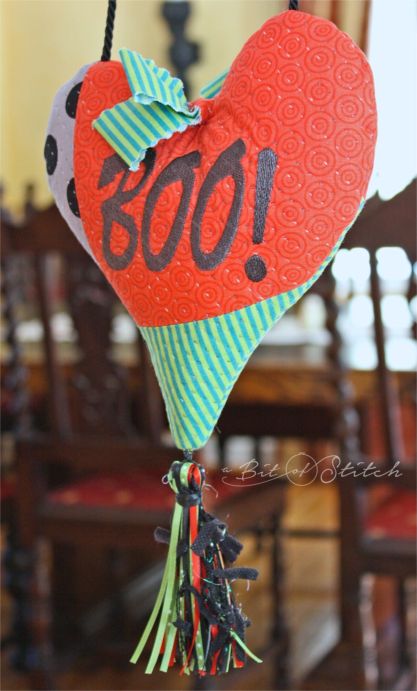
Since I have rather few décor items of the spooky nature (the children being all grown and gone – sigh) I thought I’d make this a Halloween project. You could make it an anything-you-want project. Just choose embroidery designs that tickle your fancy, or don’t use embroidery designs at all, if that floats your boat better. The designs on my Halloween heart are from my Frightfully Nice and Halloween Extravaganza collections. This stuffed heart would be equally sweet with a hedgehog, harvest squirrel, autumn leaves or even a monogram! Most 4×4 designs should fit nicely.
Let’s get started. I used cotton fabrics from Riley Blake Designs, Quilter’s Dream cotton/poly batting, various 1/8” wide satin ribbons, black flag yarn, fiberfill and skinny twisted satin cording for a hanger.
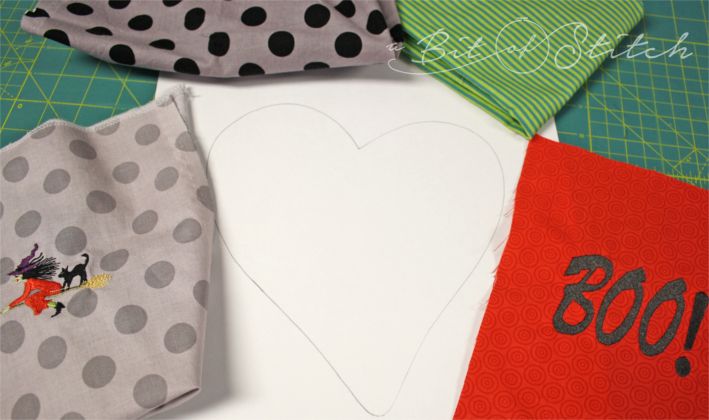
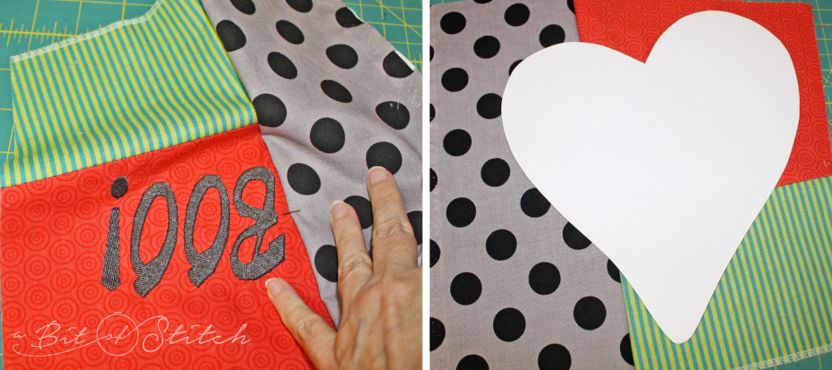
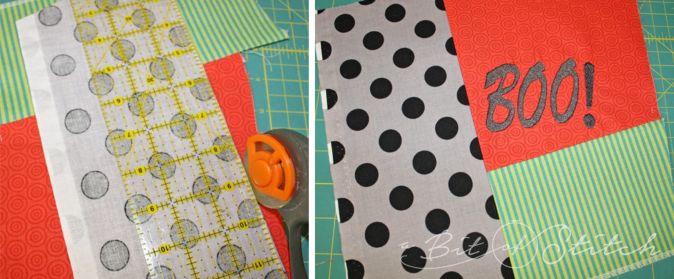
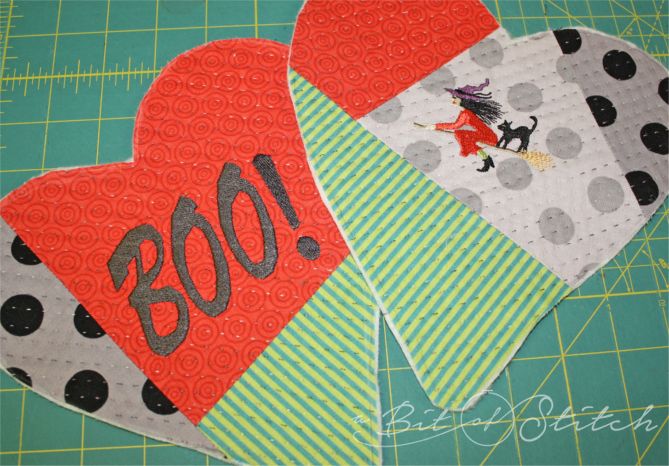
On a piece of paper, draw a simple heart shape large enough to accommodate your chosen embroidery design; if the heart is a bit lop-sided, that’s even better – more spooky! Cut it out to use as a pattern. Choose the main fabric. For one side I chose a red/orange circle print and I embroidered “Boo!” on it. For the other side I chose a gray/gray big dotted fabric and I embroidered the little witch on a broom on that one. Make sure the embroidery design you choose will fit into the heart easily with room around it to accommodate the other fabric pieces.
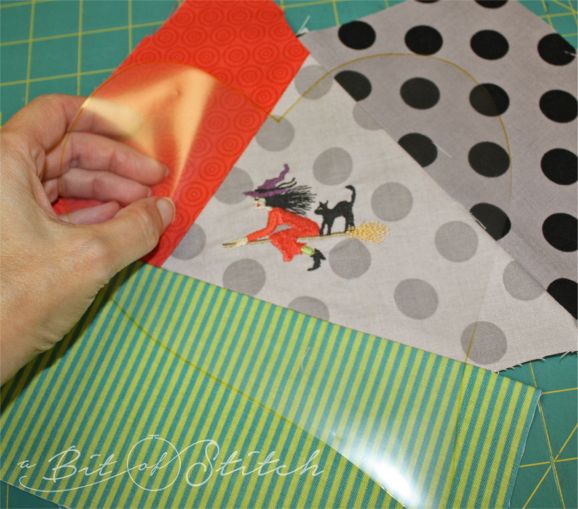
(This is truly crazy piecing. I just kind of squinted and didn’t over-think it.) Pick another fabric scrap. Slap it down wrong side up on the right side of the embroidered fabric piece somewhere close to the embroidery design and pin it in place. Check to be sure that seam won’t be catching the embroidery design before you sew. (It helps to have a straight edge on this new fabric piece so you can use it to align the foot with as you sew it to the background (embroidered) fabric piece. OR, if you are lucky enough to have one of Baby Lock’s awesome machines that has a laser light guide, you are set!) Sew with a ½” seam allowance or slightly less, leaving room to trim some off later.
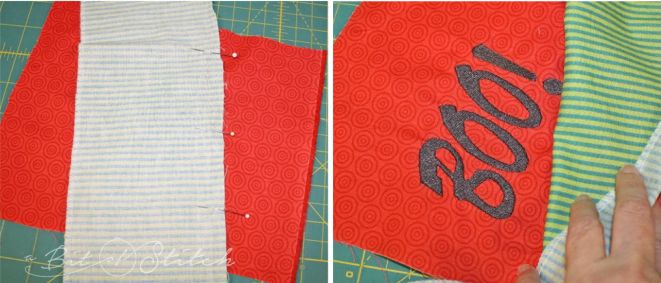
Smooth the fabric over the seam and check with your pattern as you whack off some of the excess of this new piece as shown in photo #1 below. Next, flip the fabric piece wrong side up and use a ruler and rotary cutter to trim through both layers leaving a ¼” selvage past the seam as shown in photo #2 below. Then press the seam open and check the pattern against the newly pieced fabric again, photos #3 and 4 below.

Add another piece where you need to just as you did for the first.
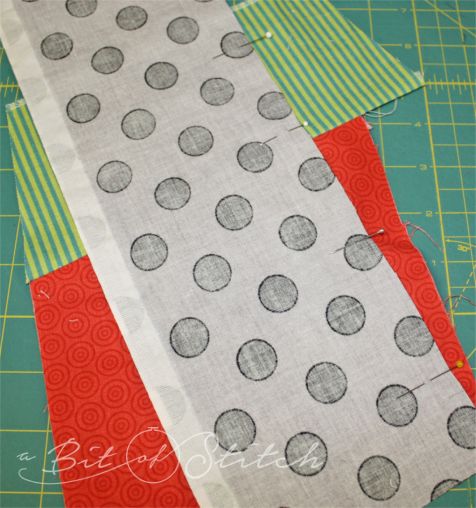
Check to be sure the design won’t be stitched over and the heart will fit on the new fabric again.
Trim the seam allowance and press again.
If you are having trouble keeping track of where your embroidery design is, trace the pattern on heavy weight clear or frosted plastic. Some fancy boutique shopping bags work great for this or you can use plastic page protectors (the kind you put paper in inside a notebook.)
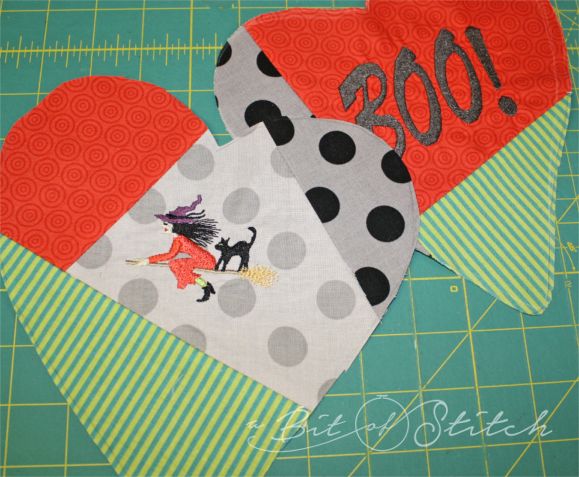
Cut out the hearts; make sure you flip the pattern for one side so that they will fit together correctly when sewn. (You’ll need two hearts that are mirror images in shape.)
Time to quilt! Rough cut the batting slightly larger than the cut-out hearts. Quilt as you desire.
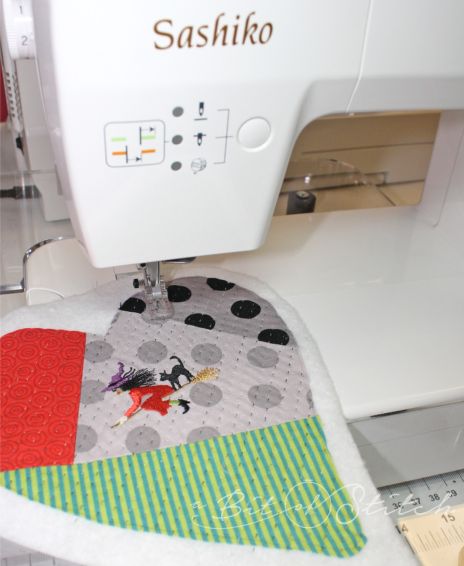
I used my sweet Sashiko machine to quilt my hearts. I set the stitch length at 2 and the space length at 5. I love how it just “picks” the fabric with that stitch setting – like little dots of thread – so cool! As always, when quilting with Baby Lock’s Sashiko machine use good thread – I used Madeira Cotona in color #514 which is one of their wonderful new variegated cotton quilting threads. Remember to set the presser foot pressure dial to 4. That’s the dial on the very top of the machine at the left. This is a good setting for one layer of thin batting and one layer of fabric. Do the Sashiko hop over and around the embroidery design! Since this is a wonky heart, I didn’t worry about straight lines of quilting. I just used the presser foot as my guide and didn’t even try to keep the rows straight. It turned out delightfully off kilter. (Do you ever have off kilter days? THIS is the project for that kind of day!)
Trim away the excess quilt batting when you are finished.
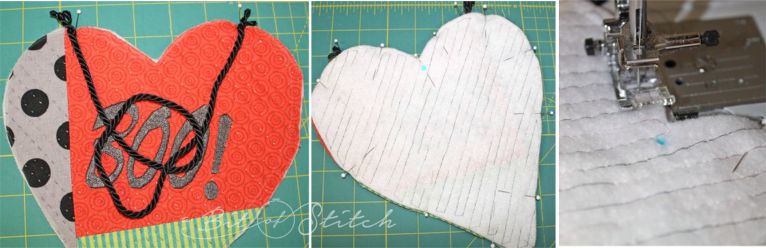
Cut the desired length of cording for the hanger. 18” seemed about right for where I planned to hang mine. Pin the cut ends to the tops of the heart on both sides and curl up the excess in the center as shown in the photo on the left below. Mark the point of the heart on your stitching line (I used approximately ½” seam allowance), pin and sew. When you come to the point stop one stitch away from it, take one or two stitches across the point and then continue up the other side. Don’t forget to leave an opening for turning on one side and back-tack both ends of the stitching line.
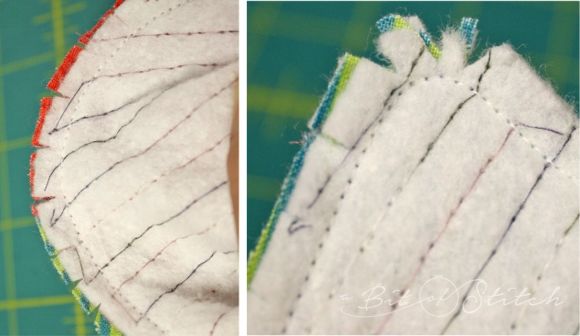
Clip the curves. Don’t stint on clips. Use plenty! Just don’t clip completely TO the stitching line. Clip the point, removing tiny triangles of fabric as shown in the photo below right. Turn the heart right side out.
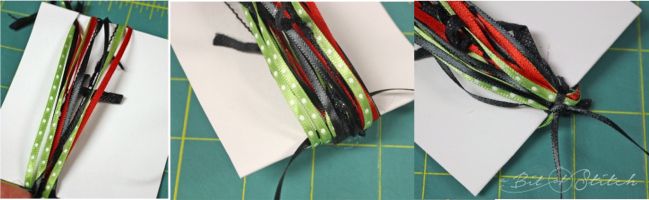
Make a tassel! You can use whatever combination of ribbon and yarn you may have on hand. I used a red, black, green dotted and skinny flagged black yarn. Cut a piece of cardboard 4” wide. Cut a small slit in the center of one side. Gather all the different ribbons/yarns together and catch the ends in the cardboard’s slit. I wrapped the ribbons/yarns around the cardboard approximately 10 times. You might want a bigger tassel or a skinnier one – wrap more or less to do so. Slip an 6” length of ribbon under the wrapped bundle at the fold and knot tightly as shown in the photos below.
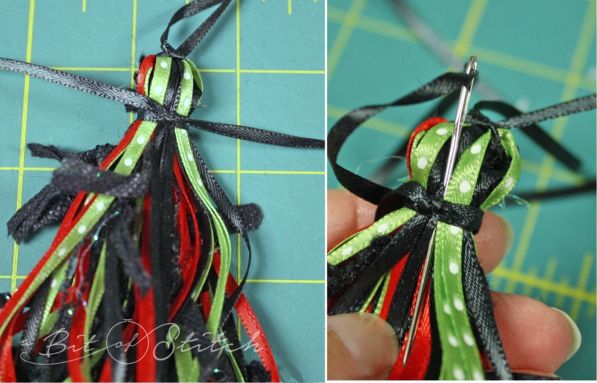
Slide the bundle off the cardboard. Cut another 8” piece of ribbon and tie it snugly around the top of the bundle to make a tassel “head” as shown below. Wrap some of the excess ribbon tie around the tassel and then thread both ends down and through the center of the tassel using a large eyed blunt needle. You can leave the loops or you can cut them open. If the ends are uneven and you want to make them even, flatten the bunch with a ruler and whack across the ends with a rotary cutter.
Insert the ribbon tie at the top of the tassel into a large eyed blunt needle and wiggle it into the bottom point of the heart. Pull it through until the tassel head rests slightly under the tip of the heart’s bottom point. Make a nice big knot with the excess ribbon inside the heart and then sew the knot to the seam allowance selvage on the inside. (You’ll need to turn the heart partially inside out to do this properly.)

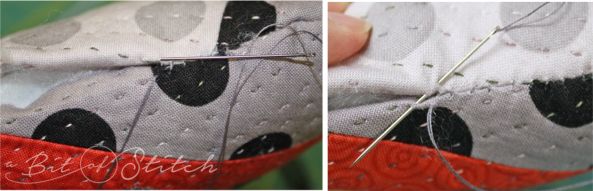
Stuff the heart with fiberfill. Hand sew the opening closed by slipping your needle through the seam allowance selvage from side to side and pulling the stitches snug. This way you can hide most of the thread within the seam allowance and only tiny stitches will show on the outside edge. When you come to the end take two or three stitches in place then slide your needle down and out the “ditch” of the seam a little way, take a couple or three stitches in place there and clip the thread. No knots to show!
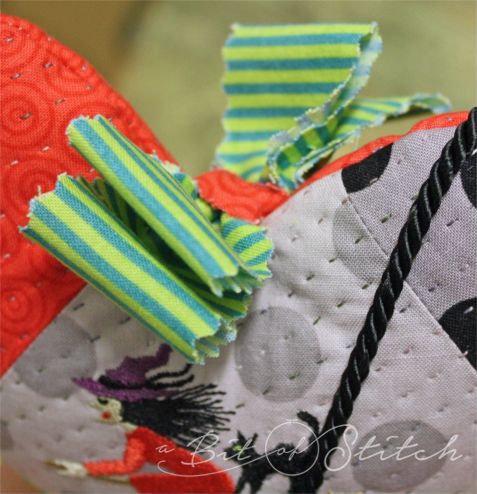
Make it even cuter, add a bow! (I’m still having withdrawals now that my girls have long past out-grown hair bows. They may still be getting therapy for over-bow-idness in their young, tender years, so I guess we’re even.) Whack out a 16” by 1.5” piece of fabric with pinking shears or a wavy edged rotary cutter. Starch the fabric strip. Fold it up like a butterfly making all legs even, or not – if you are having one of those days, heh. Now fold all legs toward one side and whip stitch through the layers up the fold. Fold the legs two to each side and wrap the thread tail around the middle to squeeze it together. Take a stitch or two to secure.

Cut another small piece of a different fabric – about 5/8” wide and 2” long. Wrap and sew this piece around the center of the bow and then sew in place. Sew the bow slightly off-kilter to the center of the heart at the top.
You might get really creative and add other fun stuff like beads, dangling charms or buttons. Slip something sweet smelling in with the stuffing and have a hanging sachet!
Thanks for playing today – I hope you had fun!
Evy
14 replies on “Have a Hearty Halloween!”
Love your Halloween heart and your instructions and photos are fabulous! Your witch is adorable!
Gail
You are the best!!! thanks so much all the creative ideas. hugs, ellen
Evey, this is totally adorable. I love this idea. I really love how the sashiko machine does a nice hand quilting look! Stephanie in MI
Love the hearts you are the BEST!!!
This is a creative project indeed. Thanks for sharing!!
Darn! I had a nice long comment, but it just disappeared 🙁 Suffice it to say Thank you! I love it!!
This is a great, the heart is adorable, I wish I had time to fit it in before Fright Night! Thank you for the detailed instructions. I want to do a travel laundry bag for a birthday next week. I love the idea of a pillowcase for it and I think I am going to embroider your Lingerie Fashions on the cuff at the top.
jane
You're so creative! I'm delighted of all your outstanding work & your sharing with us, you make us ask for more! Thanks so much from the bottom of my heart! Keep on doing such great job!
Could see this with some of your girly designs as well! You are so generous with your project ideas & directions.
"Witchy woman on the move" is my title for this fright night delight. Love this heart hanging from my car mirror.
Love that you come up with new ideas to keep us sewing!
Mary H
How fun! 🙂
Thank you for your nice comment 🙂
Awesome project! A fun way to use scraps too!