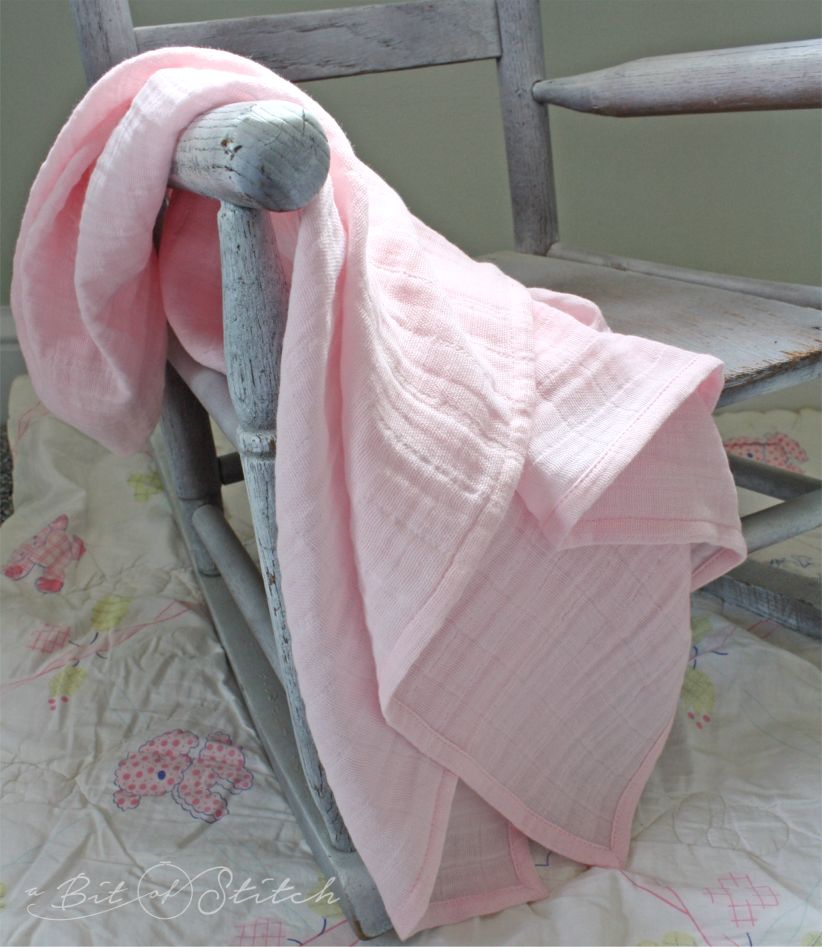
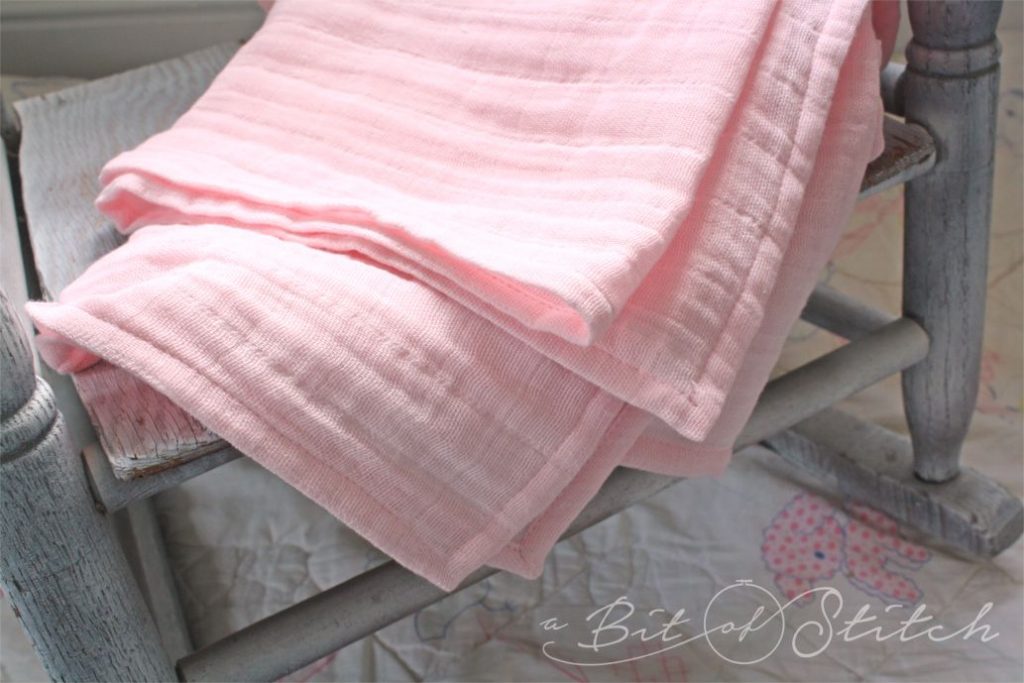
I’m still in a double gauze mood – LOVE this stuff for baby things. Right now I’m busy hemming blankets for my house. Gramma needs blankies for baby visits too, right? (That’s my story and I’m sticking to it. Riley Blake Designs just came out with a beautiful line of double gauze solids and prints. I am in so much trouble…)
One thing I learned really fast was that hemming one layer of double gauze can be tricky. I fully admit that I am picky about nice, even hems. Double gauze doesn’t seem to feel the same, argh. However, there are work-arounds!
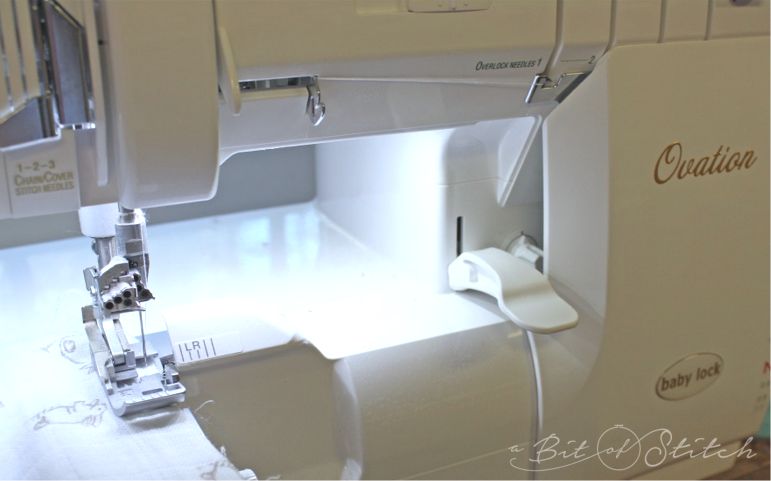
First of all, the serger is your friend. Yes, I do know that I can use my super-duper Baby Lock Ovation to make a lovely rolled hem with pretty thread, but it really makes me happy to have a nice, smoothly finished, turned-under hem on this soft, flimsy fabric. (I told you I am picky!) Without that first serged edge though, there would be no nicely turned under hem. I LOVE my Ovation. It gives me that neatly finished edge with no stretching – wonderful for fabrics like gauze!
Also, cutting on the straight grain is a must. Thankfully, really nice double gauze has good lines to follow. See my previous post about double gauze burp cloths for more info on that. So, cut your blanket blocks true and even. I’ve been making 45” square blankets. Most double gauze is 54″ to 60″ wide, so a 45″ blanket takes 1.25 yards of fabric and you’ll have leftovers for burp cloths. HOWEVER, not all fabric sellers cut this fabric as they should. To be safe, get 1.5 yards so you’ll have room to trim the block even if necessary.
Cut your blanket block on the grain and then serge all four edges. Try not to cut more than a hair of fabric off when serging, but if that’s not possible for you, just remember to keep it even.
Find the 45-degree angle line on your cutting mat, line up a corner of the blanket as shown in the photo below, and then trace a water-soluble or chalk line 1” away from the point.
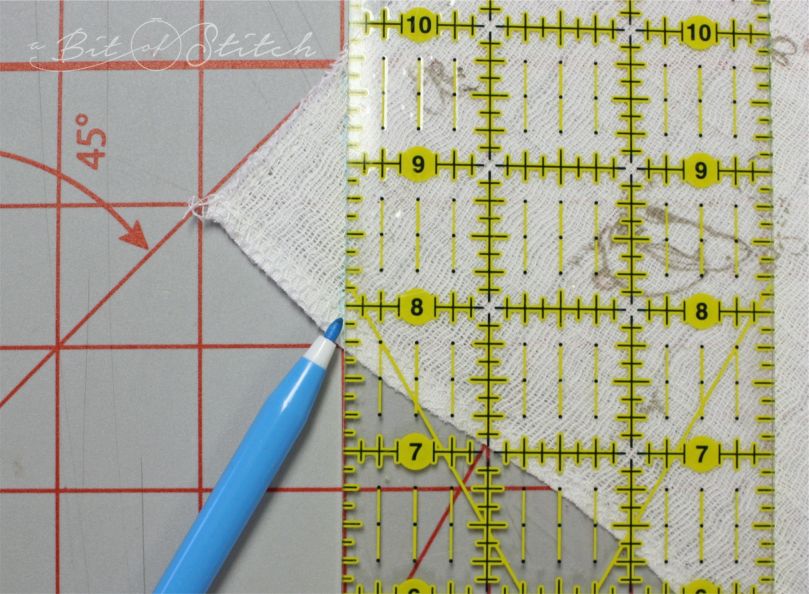
Fold the corner on the line.
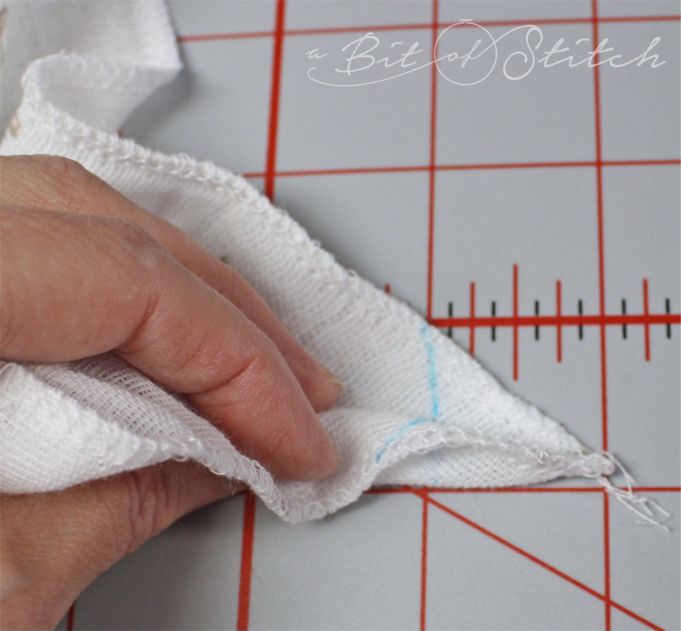
Mark a small dot ½” from the fold and pin the corner to hold the fold in place.
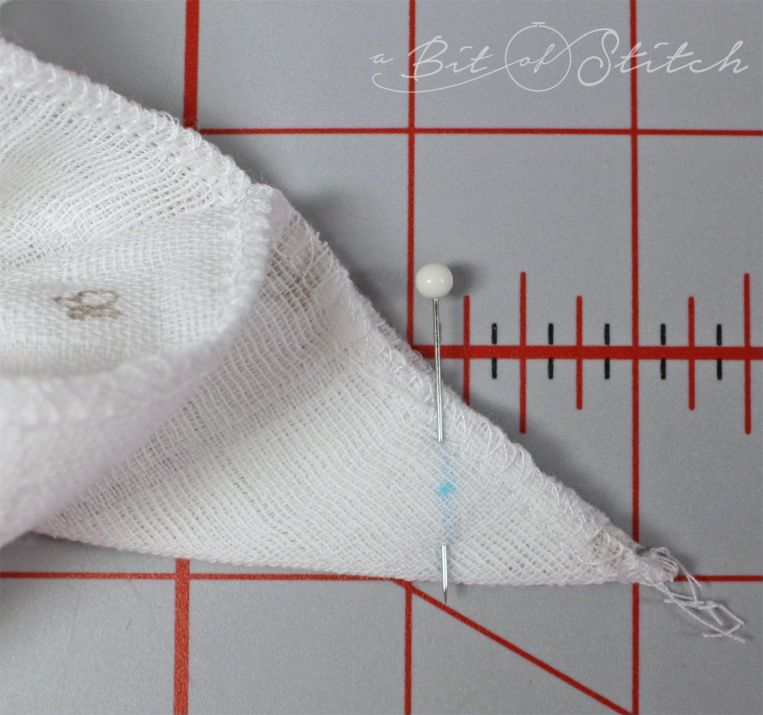
Sew from the dot to the fold and back again. It’s easier to start at the marked dot and sew toward the fold and then just reverse back to the dot. Clip the corner, but don’t clip too close to the stitching line. Leave at least 1/4” there, more would probably be better. Repeat these steps for the remaining three corners.
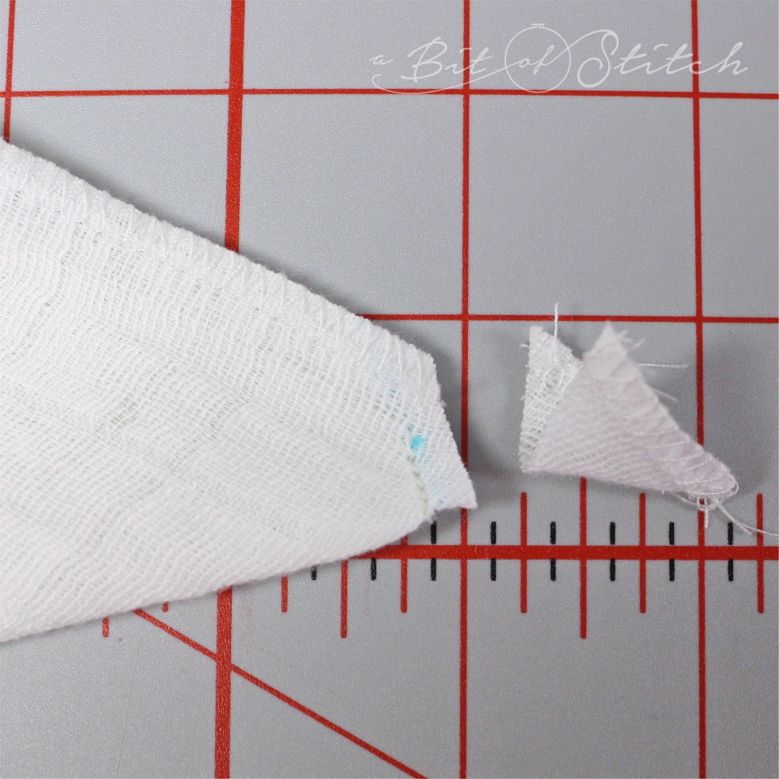
Turn the corners right-side-out. Use something with a rounded tip to poke out the corners, if necessary, but make sure you don’t poke through a corner. (Ask me how I know about that!) Turn down the edges of the blanket 1” all around and press well, especially at the corners.

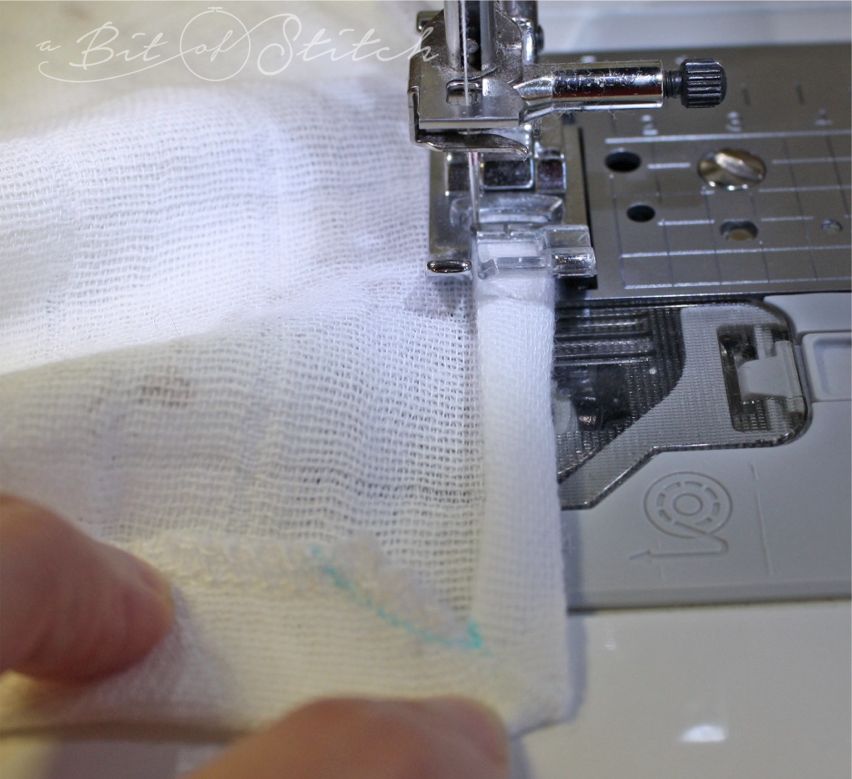
Fold under ½” as you sew, tucking the serged edge in nice and neat. Keep your stitches straight and close to the edge. If you have a super-duper Baby Lock machine like the Unity or Destiny with that cool guide beam, use it! I would have been using my Destiny for this project, just because of that guide beam, but she was busy with embroidery 🙂
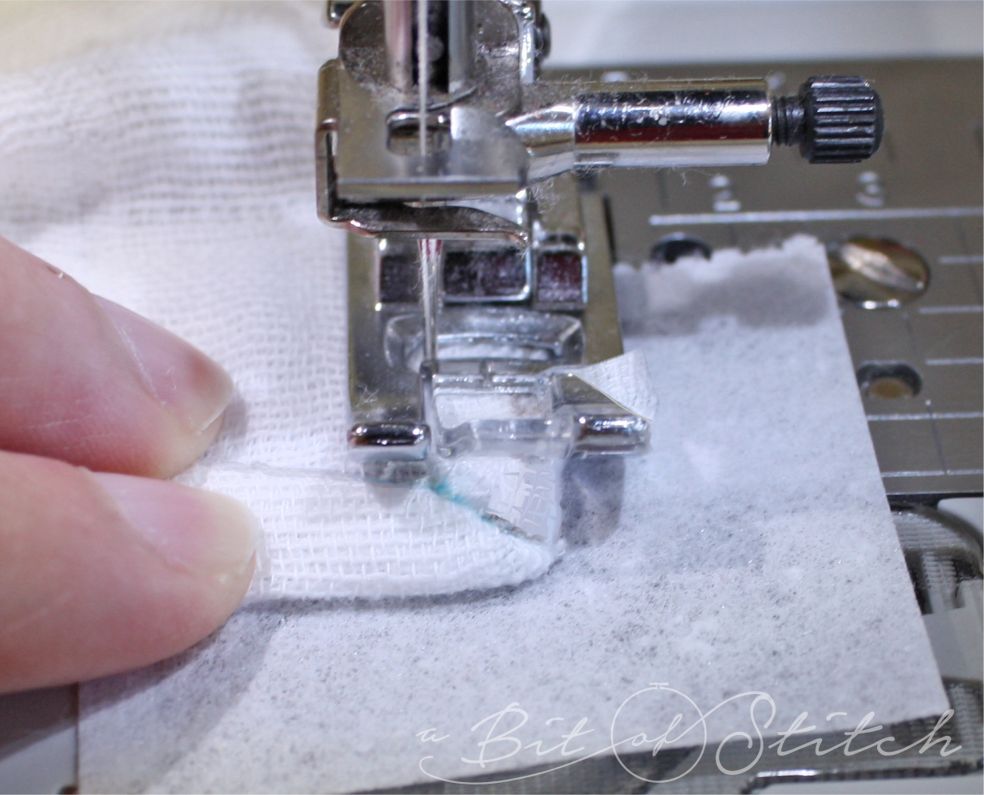
When you get to a corner, slip a piece of wash-away stabilizer or very crisp and very easy-to-remove, tear-away stabilizer under the corner. Sew to the corner seam, turn, start tucking the next edge under, and continue. This little bit of stabilizer will save your goose on those corners!
Keep the fold straight, don’t stretch the fabric and don’t let it get off-grain while you sew. I found it helpful to keep a little tension on the outside fold’s edge while I worked.
I used the J foot that came with my Baby Lock Ellegante. This is my fall back favorite foot and works just fine for most things. With the needle in the left position, it was pretty easy to keep the open slot of the toe aligned with the folded edge of my hem, and that kept my stitches right on the edge where they needed to be. However, I did experiment with other feet. Didn’t have good luck with the rolled hem foot as no matter what I did, the edge wanted to ripple. I guess the tension you need to use to keep the fabric in the foot is just too much for this soft fabric. Then I tried the Felling Foot.
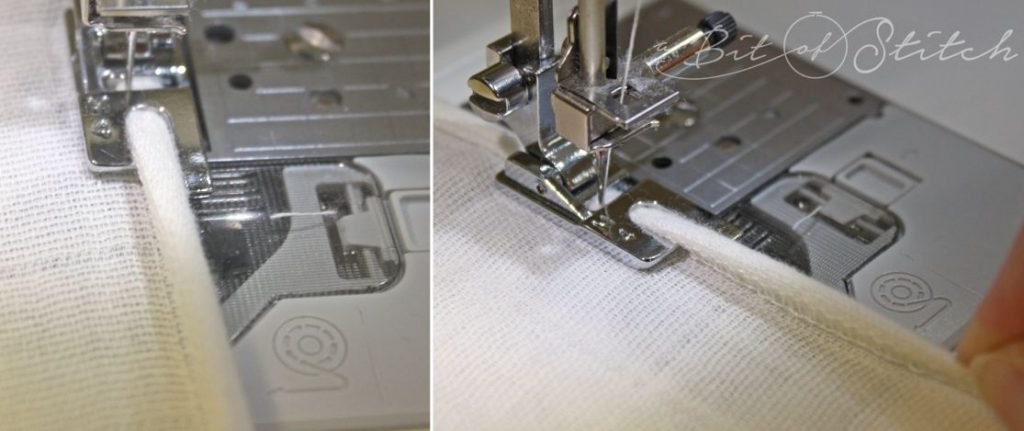
That actually worked very well. There is a little curled toe on the left side of the foot that I could slip under the fold, and the bar across the top held the fold perfectly in place while I stitched. If you are making a lot of blankets you might want to dust off your Felling foot!
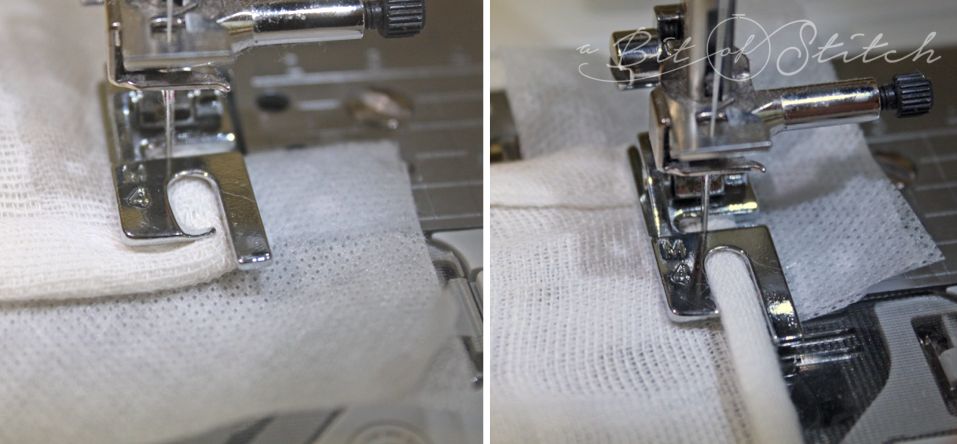
The corners were trickier with the Felling foot, though. I found that I needed to stop, lift the foot above the fold to release the toe underneath and sew with the curled toe on top until I got to the point beyond the corner where I could once again slip the toe under the fold. Just a slight adjustment, but still easy to do!
I am so happy with my hems AND corners!
Now I want to make wee garments from double gauze!
Evy
2 replies on “Double Gauze Tips & Tricks!”
Thank you for so much usable information. I have never seen on gauze before. My neice will be a grandmother this next year. She found gauze fabric she loved for a blanket “ to keep at grandma’s home”! Her daughter wants me to make items for the nursery and I want to make sure everything is perfect starting with the gauze blanket! Thanks again. Your blog is always so helpful with great tips and pictures to explain things!
Thank you so much for those kind words! I’m glad it was helpful. 💗