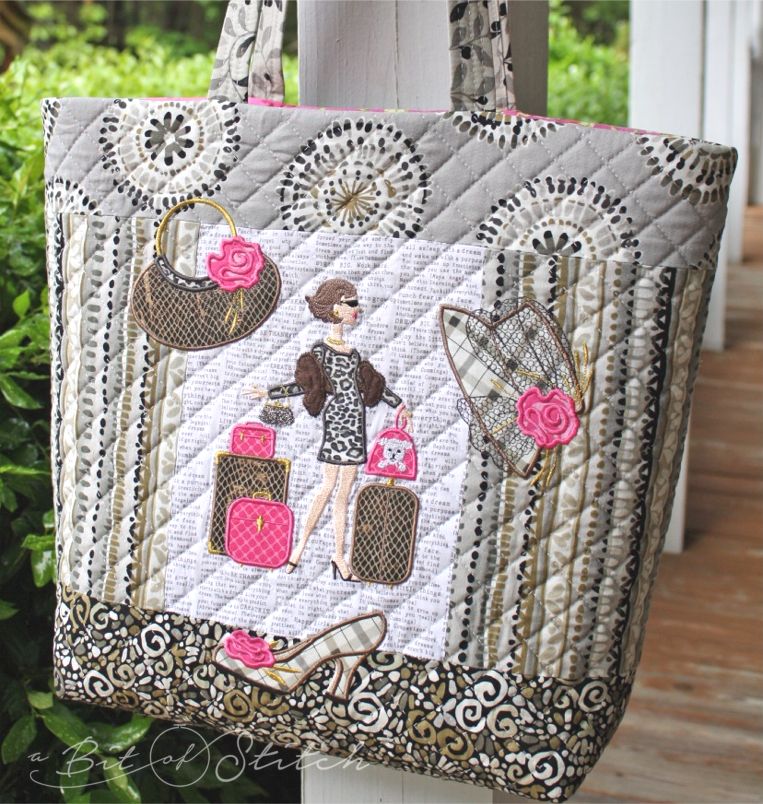
Traveling soon? I don’t know about you, but I’m thinking about a place with mountains and crisp breezes and it’s only May here in South Carolina, yikes! What in the world will I be thinking in July? Just in case you are planning a trip – or not – you need a new tote, right? I’m sure enjoying my new Malibu tote. Want to make one too?
Follow along with me and we’ll make it together! This project will come in three installments. It’s easy – I promise – and best of all it will allow you to showcase some of your “personal resource center/stash” machine appliqué designs that I know you have, ha!
Supply List for the project:
- Fabrics for the tote (see chart below for piece sizes; you will also need two 3″ x 33″ strips for straps)
- Lining fabric (at least ¾ yard, 42” wide)
- 2 pieces of byAnnie’s Soft and Stable (at least 22” x 20” each)
- 2 pieces of very firm cut-away stabilizer cut 1” x 33” each
- Clover’s narrow fusible web tape
- Clover’s fabric folding pen
- Water-soluble marker or chalk
- Machine appliqué designs of your choice (I used THESE)
- Sulky’s Totally Stable fusible tear-away stabilizer
- Light to medium weight regular tear-away stabilizer
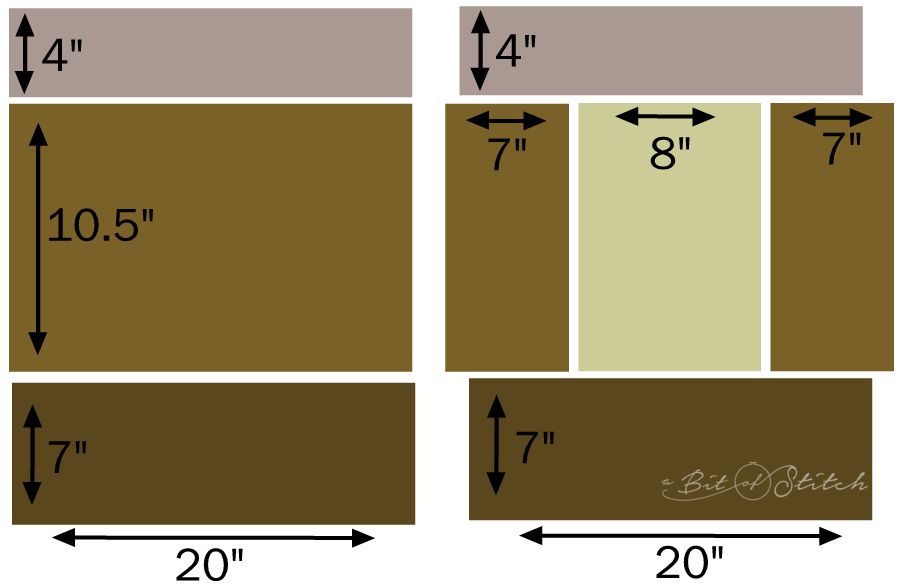
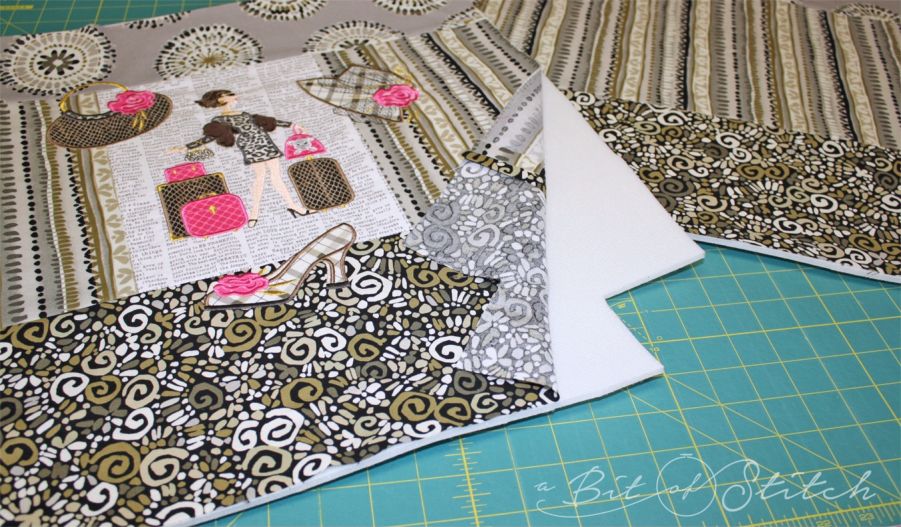
Cut out your chosen tote fabric according to this chart. For the main portion of my tote I reached way back in my stash and dug up some fabrid from Michele D’Amore’s “Habitat” collection. So tickled to find the perfect use for it! The fabric under my fashion girl was a print from Riley Blake designs: “The Cottage Garden, Gray – Newsprint” by The Quilted Fish.
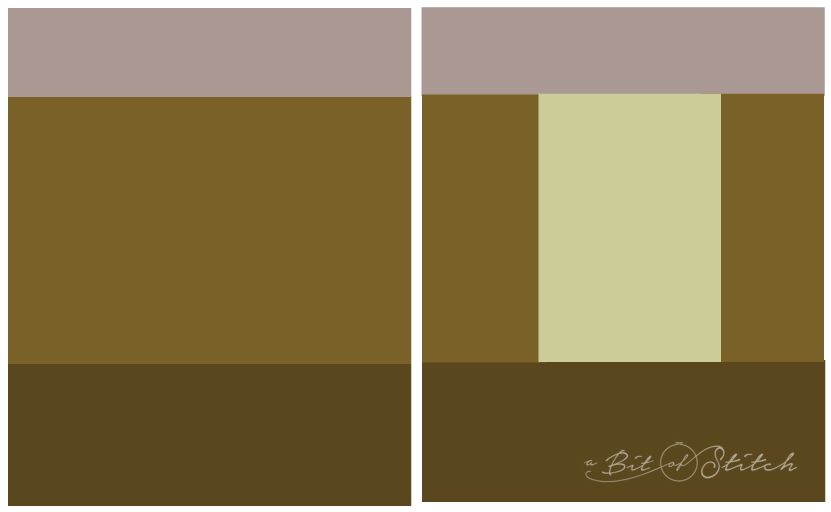
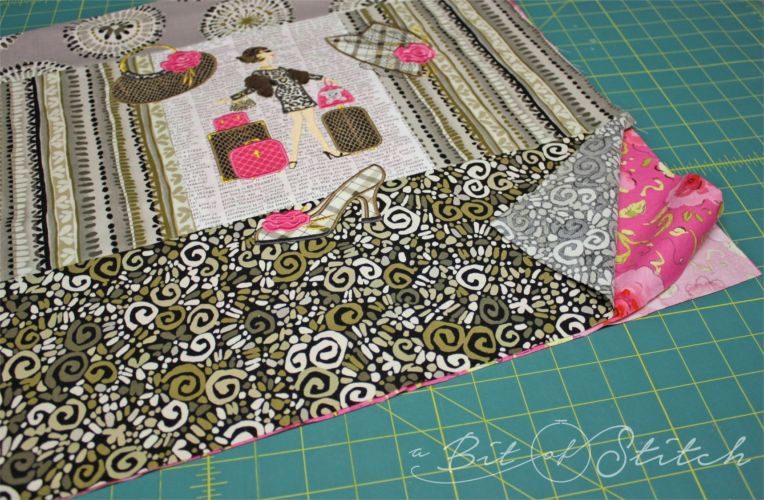
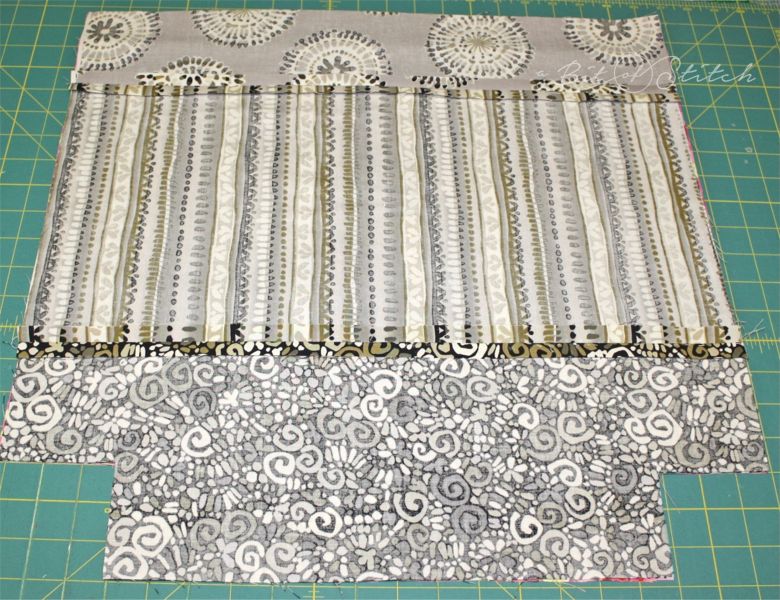
Press and starch each block and sew together in the layout as shown with a ½” seam allowance. Press all the seams open as you go. You should now have two pieces, a tote back and a tote front. The tote front has the 8” inset fabric in the center.
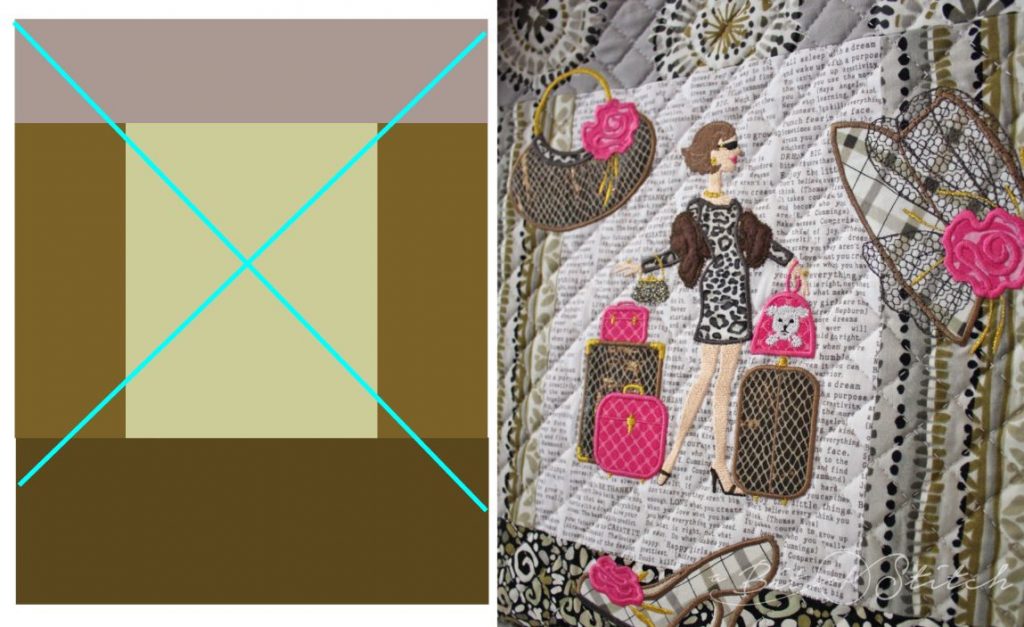
Choose your embroidery designs! I used “Malibu” from my Traveling Girls collection. She’s a 5×7 appliqué design and fit perfectly inside the inset for the front. Then I chose three 4×4 appliqué designs from my La Moda Appliques collection (which is now retired). Later, I put those specific designs together in a special set – Malibu Tote Special Design Package – just for this project! If you have never done an appliqué design before and you want to try it, please read my “Amazing Appliqué” post. For best results in layout, hooping and aligning the designs properly, print paper templates of all your designs. Use your hoop grid to correctly align the design within the hoop. (For more about that, read my “Borderline Crazy” post.)
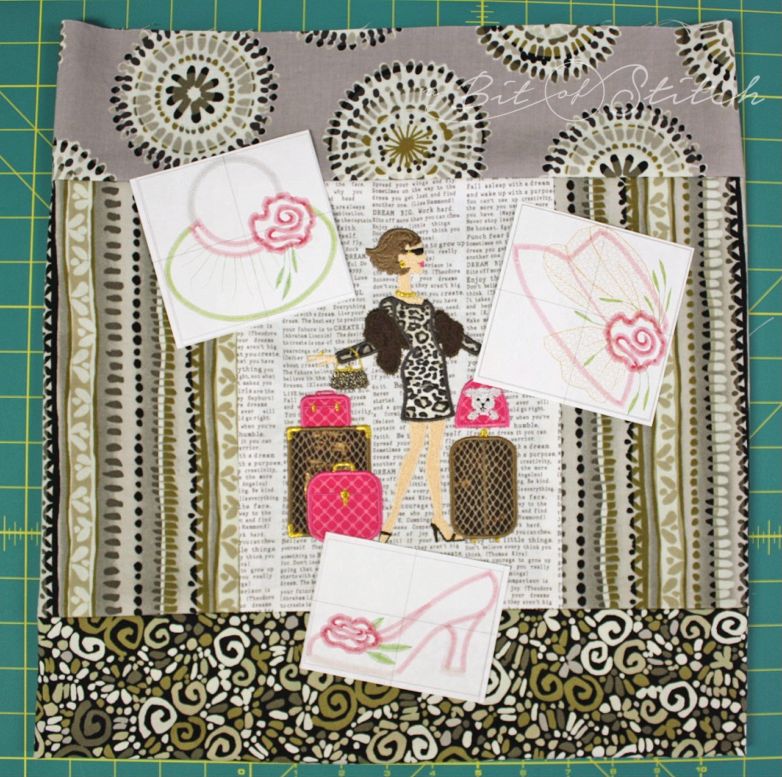
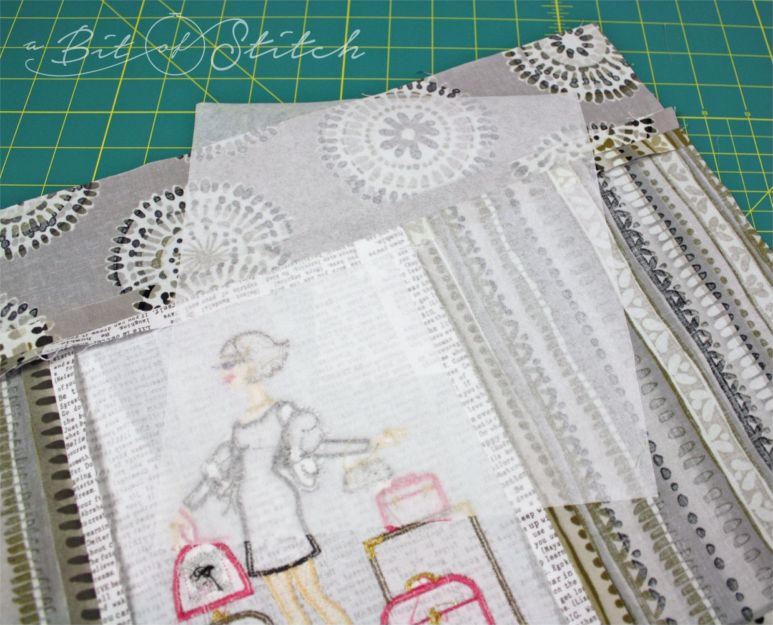
Keep the designs within the area that will become the front side of the tote. You’ll need at least 3” between the outside edge of the design and the raw edge of the fabric. Stabilize the center part of the tote front fabric with Totally Stable in an area larger than the hoop you will be using. For best results for most designs, you’ll probably need another layer of stabilizer.
Float that piece under the hoop before you begin stitching (using a piece of regular tear-away stabilizer cut slightly larger than the hoop). Embroider the center design. Remove the stabilizers and press from the wrong side.
Fuse more Totally Stable to the wrong side of the fabric, covering the area under the additional designs. It’s okay for the stabilizer to extend past the edge. That might be necessary in order to have something in the hoop in that area. Just make sure the stabilizer is larger than the area to be hooped.
Once you have finished all the embroidery, remove the stabilizers and press from the wrong side.
Cut two pieces of lining fabric the same size as the tote bag front and back fabric.
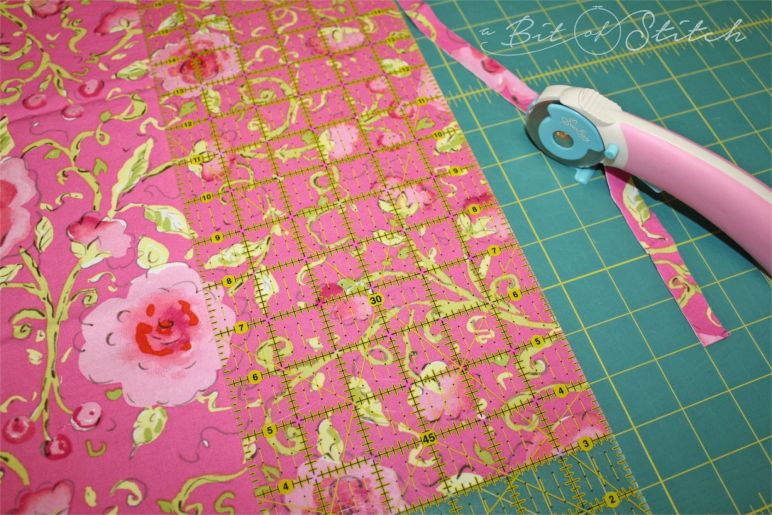
Cut out 3” boxes on the bottom corners of the tote front and back pieces and the lining pieces. Be precise – use your ruler! 🙂
Trim ½” off the top edge of both lining pieces.
Cut two pieces of Soft and Stable to match the tote front and back pieces. If you are planning to use your Sashiko machine to quilt this project, cut the Soft and Stable in blocks larger than the tote pieces and don’t cut out the corners yet.
Quilt the front and back tote pieces. When using Baby Lock’s Sashiko machine, a stitch length of 4 and a space length of 3.5 is nice. Remember to change the presser foot pressure dial to 4 or 4.5. Mark the tote fabric with two cross-hatched lines squared with each other on the diagonal across the fabric as shown. Use your quilt guide for evenly spaced lines.
Place the tote front on the Soft and Stable and quilt as desired. Repeat for the tote back piece. (Include just the Soft and Stable and the tote fabric, not the lining. That will be added later, just hang on to it.)
Got a Baby Lock Sashiko machine? This is a great project to practice doing the “Sashiko hop” with! (That technique is covered in my Sashiko Techniques Tutorial Book.) Whatever kind of quilting you choose to do – Sashiko or regular sewing machine quilting – don’t quilt into the appliqué designs. Free motion stipple quilting looks pretty on this project too. You will discover how fun it is to quilt on byAnnie’s Soft and Stable. (I love this stuff!)
Okay, that’s it for this session. To continue, go read part 2!
Happy Stitching!
Evy
16 replies on “Malibu Tote (Part 1)”
That looks like me! I'll be heading off to Vegas next month to gamble and shop!
I love this bag.
I already have the newsprint fabric!
What a fun bag! I'd love to take it on my trip next month.
What a fun bag! I'd love to take it on my trip next month.
I'm adding your tote to my project's list. Such a beautiful bag. Love IT!!!
Great tote for all!
Beautiful bag although my favorite color is black :o)
How cute is this? I am sure we all need a new tote!!
So pretty! You have beautiful designs!
Love the bag–thanks for the tutorial!
Oh, what a fabulous tote. Thanks, Evy.
Janet Malwitz
Wonderful tote. I love the designs!
I can't wait to get started! ♡ Love this tote bag.
Evy, can't wait to get started and will see you in Atlanta.
Love to make purses. Would love to make this one next