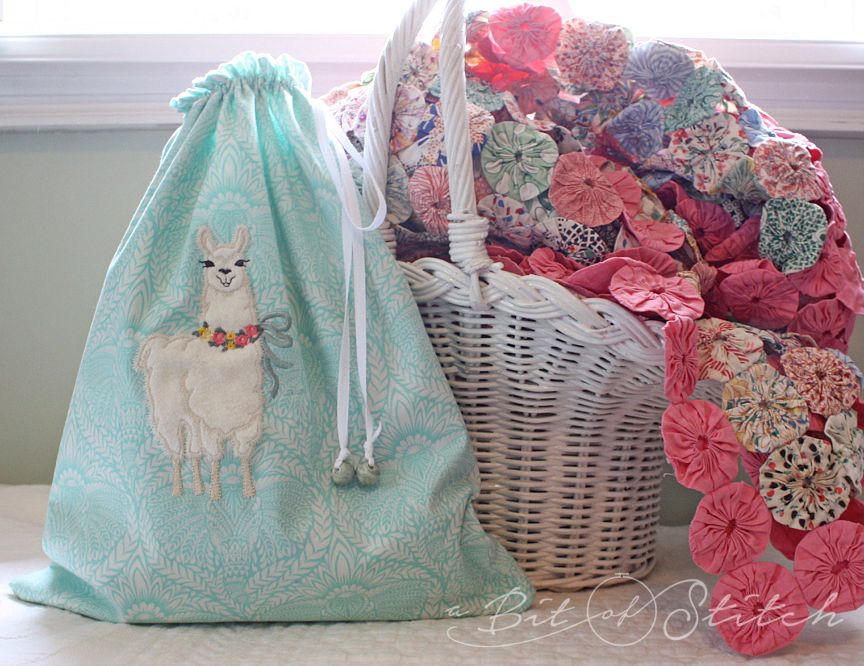
The fastest draw in the west…okay, it’s actually the fastest drawstring bag in the southeast, but let’s not get picky – this is an awesome quick and easy gift-giving project for all ages! Not only can it be the gift packaging, but it can be the gift as well. And it’s a great stash-buster… ahem, something that’s rather nice all on its own, right? (Click HERE to find the llama designs!)
Here’s what you need:
- A piece of fabric twice as tall and twice as wide as the desired size of your finished bag, plus one extra inch both ways for seam allowances.
- Something to draw it up with – ribbon, cord, twill tape or whatever you have that will make a sturdy drawstring
- Sewing thread
- Optional: big hole beads to put on the ends of the drawstring cord and embroidery designs (if you want to get fancy!)
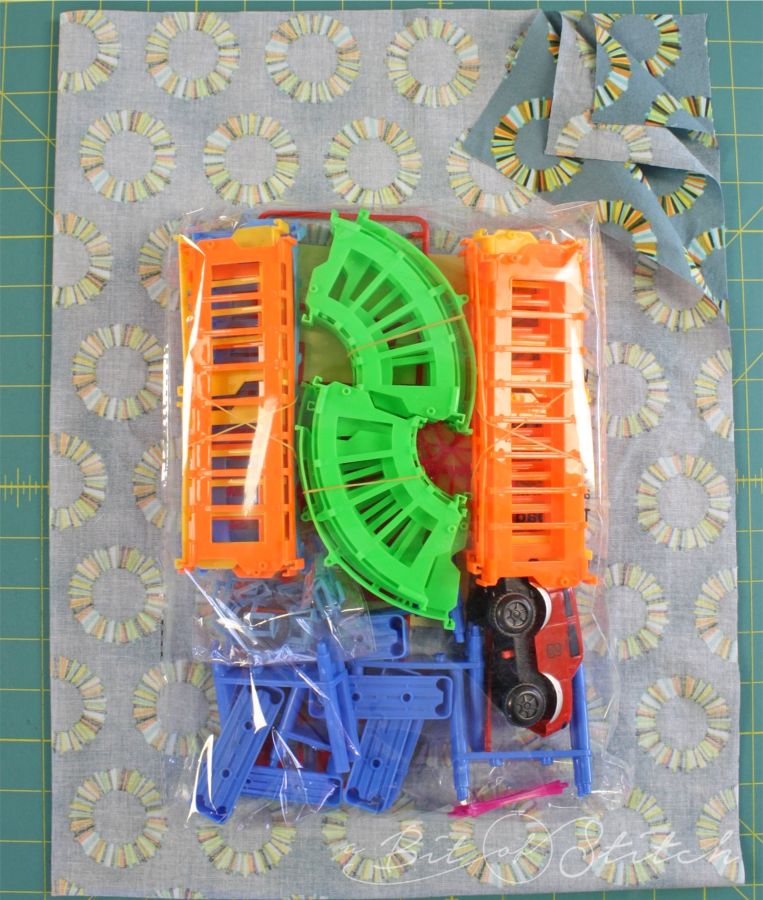
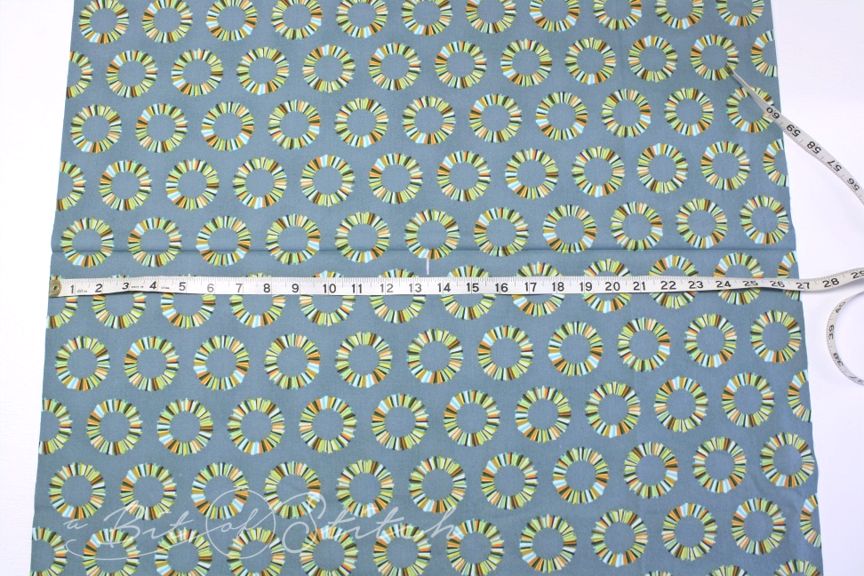
Let’s get started. I have this set of toy car tracks for my grandson and, yeah, there are lots of little parts which I’m sure his momma is going to love (not!)… but Gramma is fixing that ‘cause I’m making him a bag to keep those pesky parts in! So I needed four times as much fabric as the bunch of stuff I wanted the bag to hold.
I cut a big piece of fabric and folded it in half, then in half again. You can see all four layers up there at the right hand corner of the photo. The left and bottom edges are folds. When you choose what size your bag needs to be, make sure you leave plenty of room for drawing up the top and for the seam allowances. (This is just an example of how to quickly tell how much fabric you will need.)
There is a super fast option for creating the opening for the drawstring, and there is another option that requires one more step – a buttonhole. The only advantage of having a buttonhole is that you can use it to put the drawstring opening anywhere you want. For instance, if it is a gift-giving bag like the one I’m making here, you might want the bow tie to be in the center of the bag when it’s finished, like this:
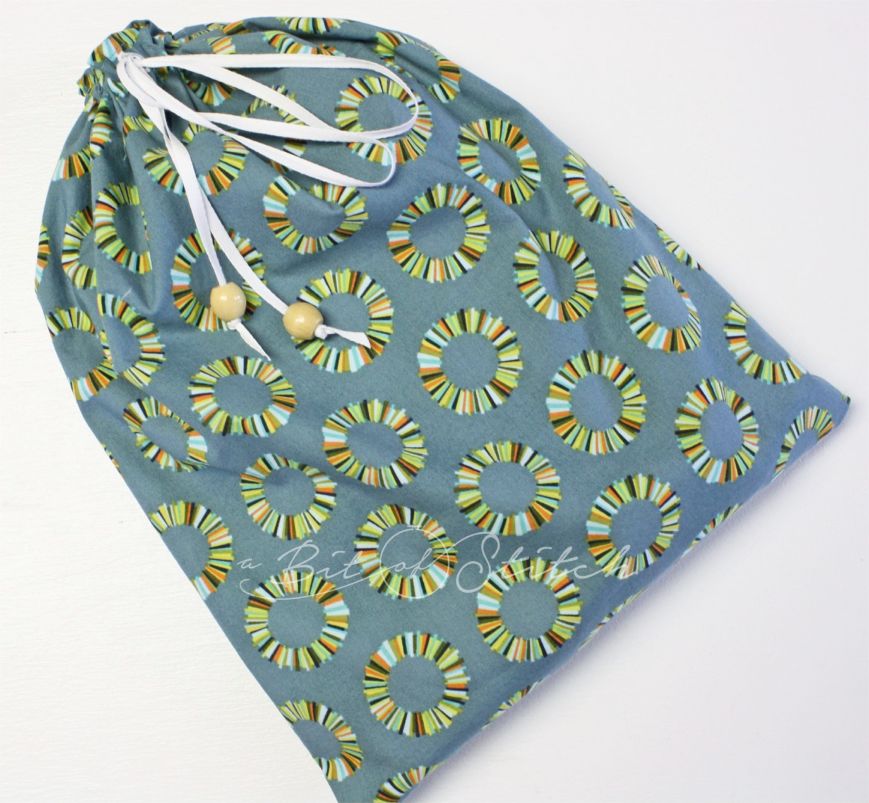
But if it’s a bag for storage and the bag IS the gift, you can just make the drawstring opening in the seam, and the tie ends up on one side like this toy bag:
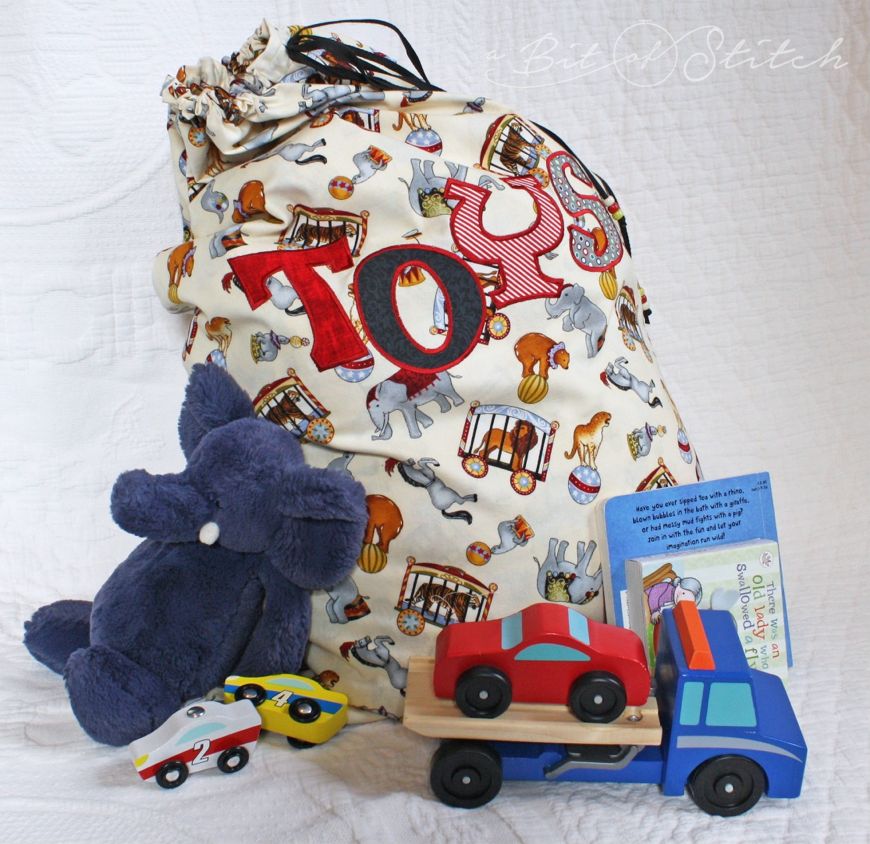
(Knobby Letters appliqué shown on the bag – click HERE to find them!) If you choose the buttonhole method, draw or crease a horizontal line through the center of the fabric block (you can simply fold the block in half from top to bottom and iron the fold to crease), and then find the midpoint of that line by measuring its length and dividing by two. Mark the position of your buttonhole just below the midpoint like this:
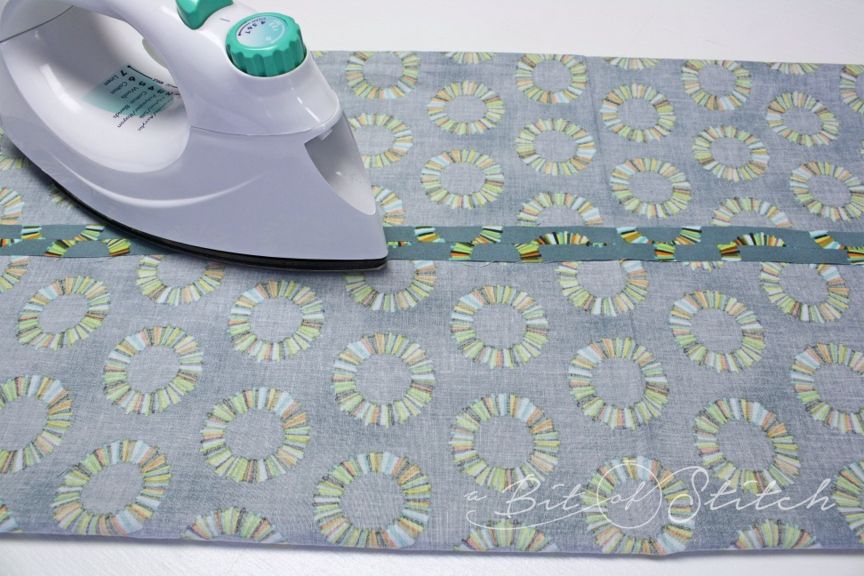
Go ahead and sew in the buttonhole before you proceed. It’s helpful to use a bit of stabilizer beneath the buttonhole stitching to keep it neat and sturdy.
More options! If you want to add embroidery, a patch, or a pocket, then do that before you sew up the bag. Here are your options for that:
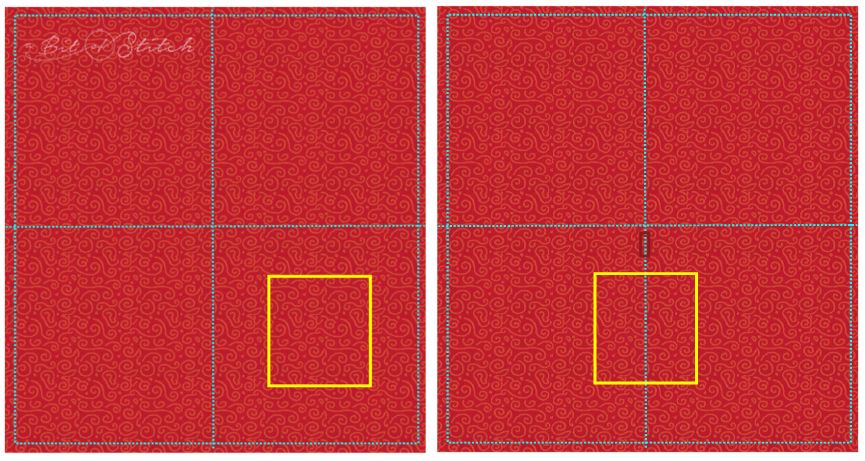
The blue dotted lines show the fold marks (the bisecting horizontal and vertical lines) and the seam allowance areas (the box all around the edges). The two block sections on the top half of each graphic will become the lining of the bag. The two bottom block sections will become the outside of the bag. If your drawstring opening will be in the seam, then put your embroidery within the yellow box in the image above on the left. If your drawstring opening will be a buttonhole in the center front of the bag, then put your embroidery within the yellow box in the image above on the right.
Important Note! If your fabric has a directional print like this:
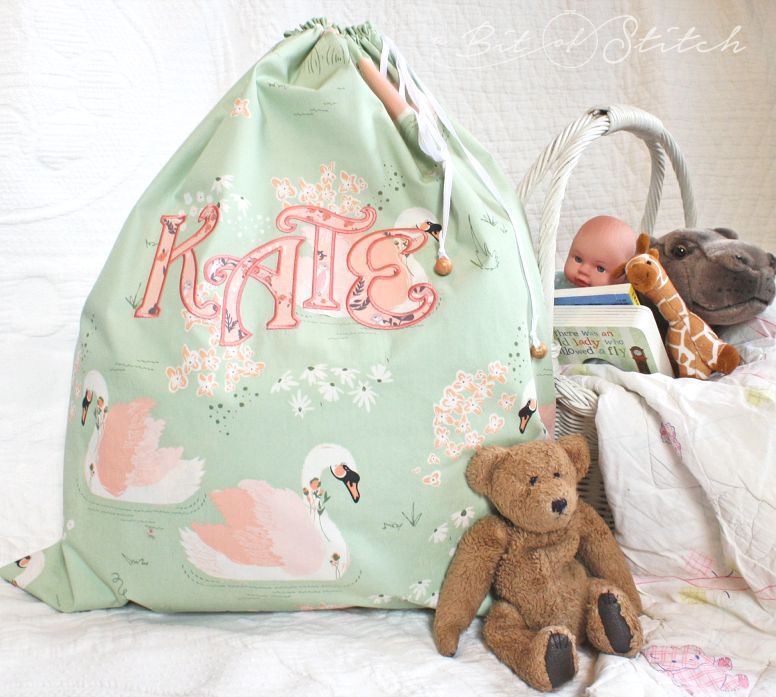
…then make sure when you fold the bag to finish the bottom seam, the print will be heading in the right direction on the finished bag. (Curly Appliqué Alphabet shown here for the name, click HERE to find it!)
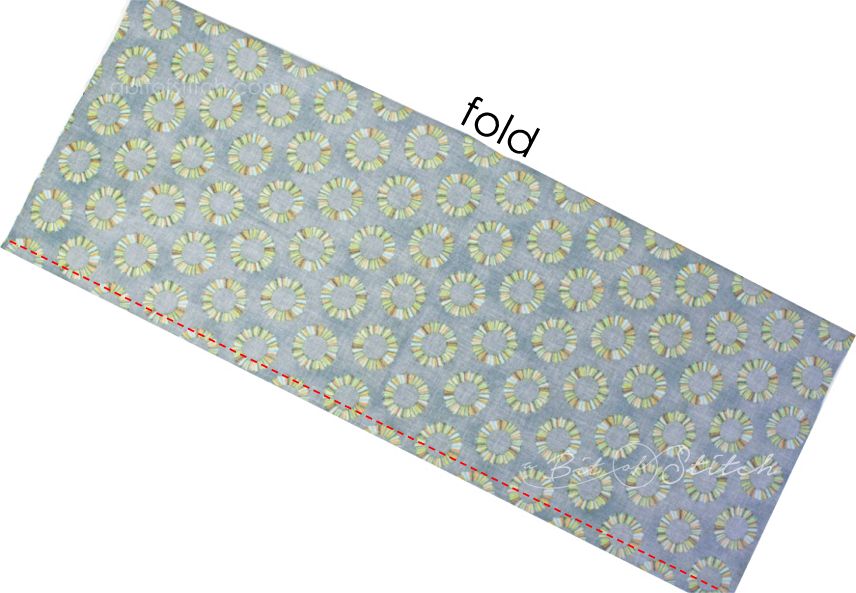
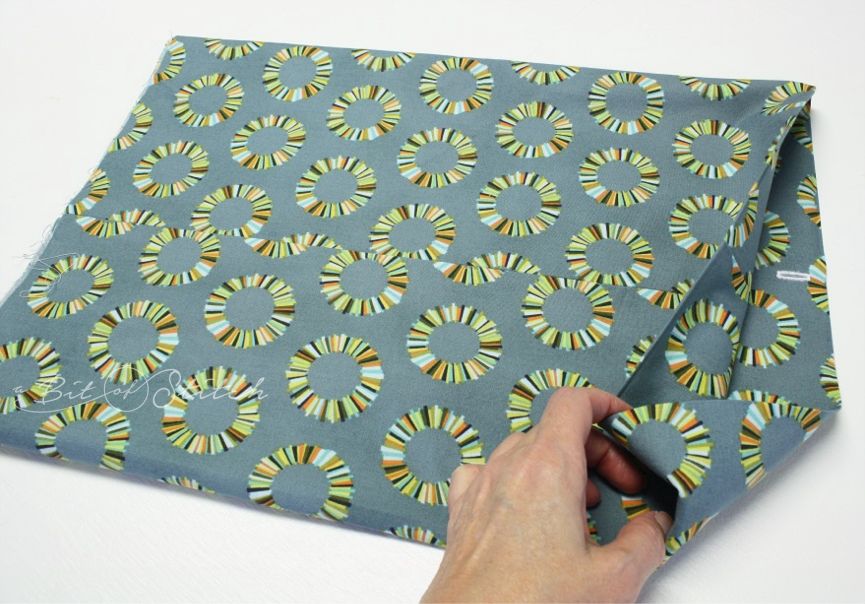
Okay, let’s whip this bag up. Fold the fabric right sides together along the longest sides (if there are longer sides; your bag might be even) and sew together with a ½” seam allowance.
Press the seam allowance open. Take care not to crease the tube elsewhere while you are ironing.
Turn the tube right side out. Fold what will be the right side of the bag down into the inside, and align all the raw edges. (Important! This folded edge will be at the top of the bag, so make sure you choose the end of the tube that is at the bottom of your directional print to fold down into the inside.) If you put embroidery on the bag, that should now be on the inside during this step. If you have a buttonhole, that should be on the inside too.
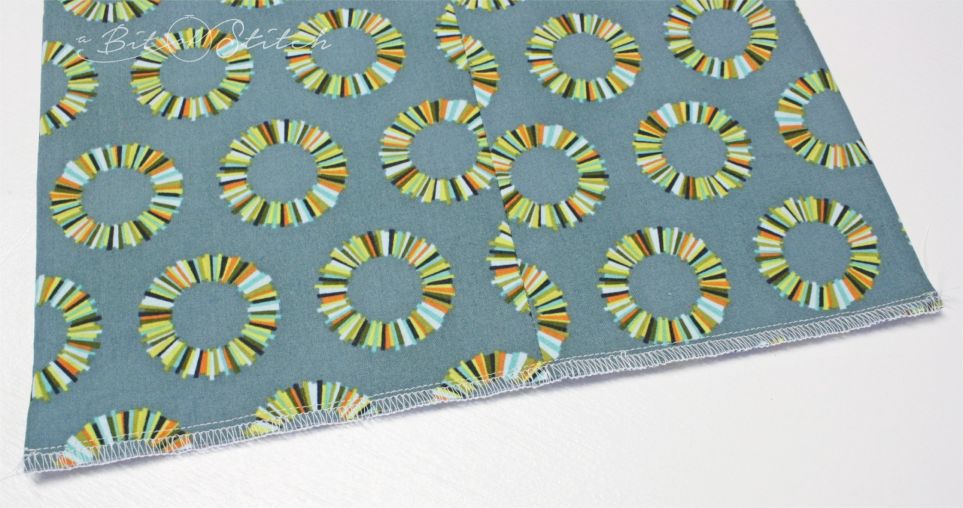
Sew across all four layers of raw edges. Serge or zigzag to finish.
At this point you might want to turn the bag right side out to sew the casing if you have a free-arm machine and can stick the bag over it. Or, if you want to use a nice seam guide like my Baby Lock stick-on one, sew from the inside of the bag. You need to sew all around the top of the bag, immediately below the buttonhole if you made one, or at least 1” from the top of the bag if you didn’t. Let the start and stop of your seam line overlap a bit to secure the ends. If you want, you can sew another seam all around the top to make a tighter casing, this time about 3/8” from the top folded edge.
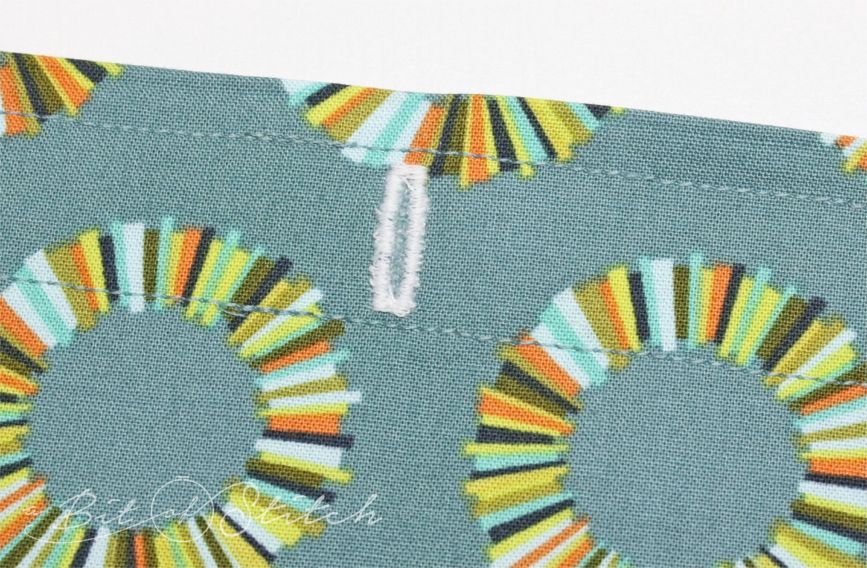
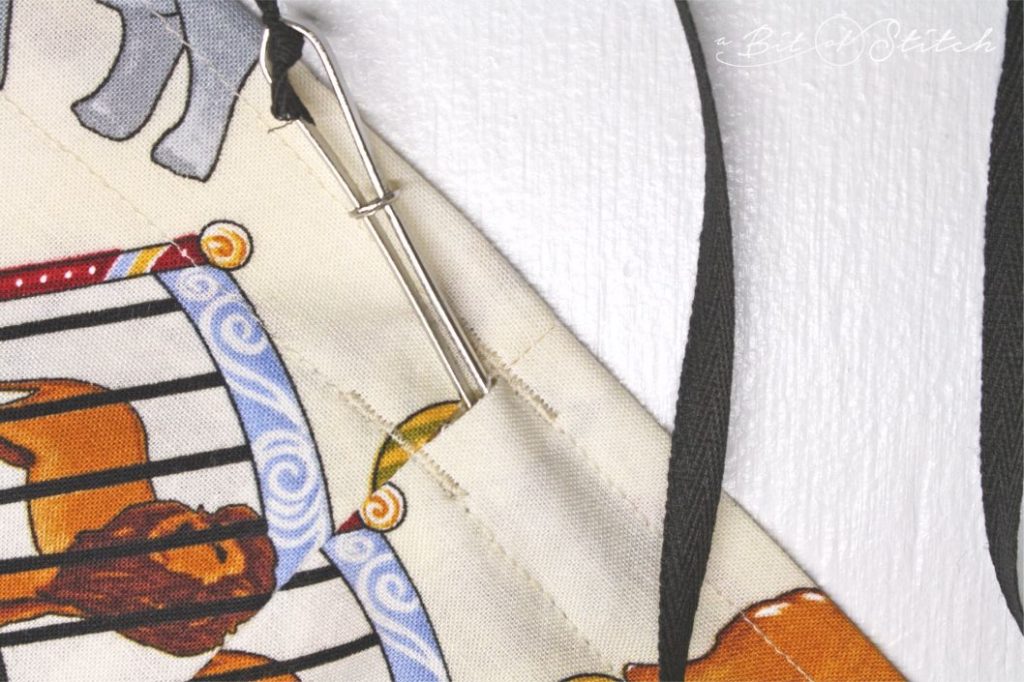
If you choose to put the drawstring opening in the side seam, then bar-tack across the casing stitching lines at the side seam of the bag to stabilize it. When you go to insert the string, you’ll need to pick out the stitches along the seam between the bar-tacks as shown below.
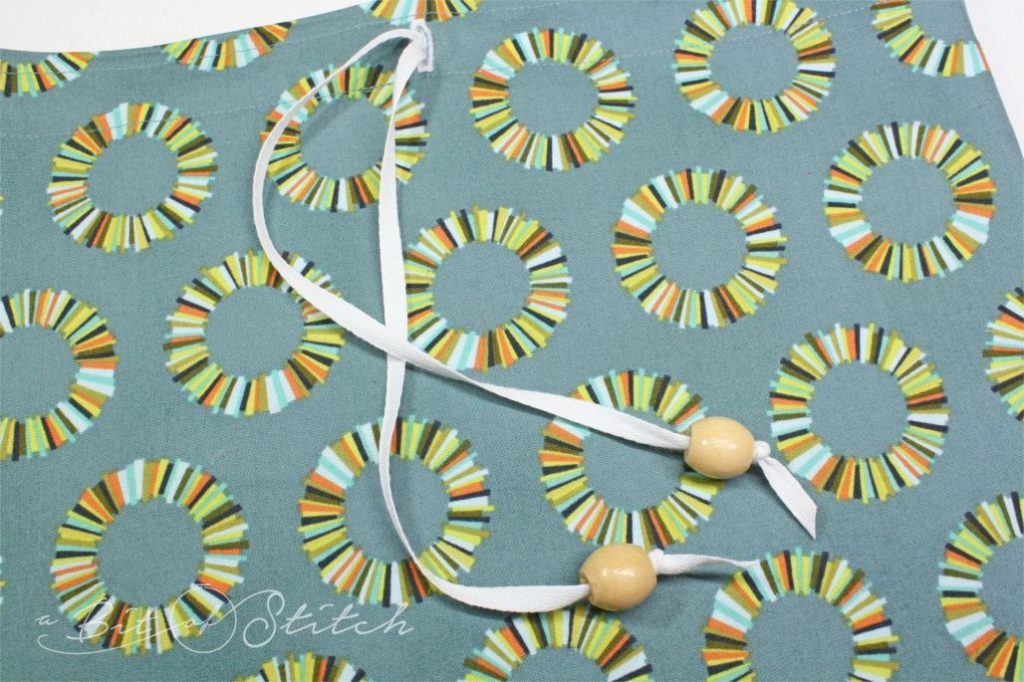
Thread big holed beads onto the ends of your drawstring if you like:
Bam, finished! That was easy, wasn’t it? What are you going to put in your “fastest drawstring bag in the southeast” bags? Shoes, laundry, groceries, games, fabric? Make great big bags for lots of stuff or wee little bags for something special!
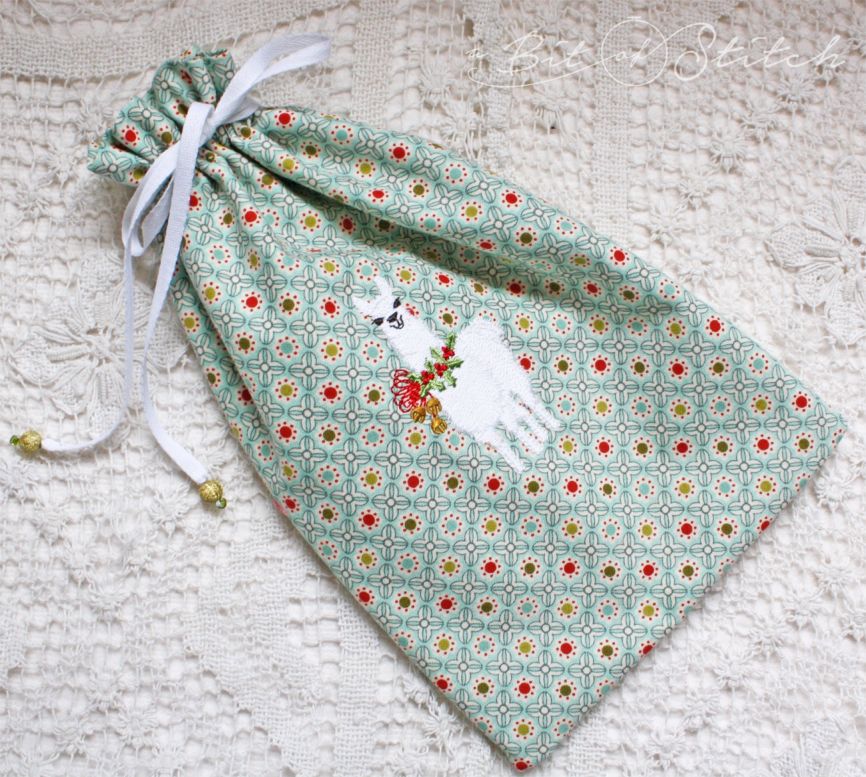
(Click HERE to find the fun little festive llamas!) I hope you enjoyed this little tutorial – make lots of bags!
Evy
2 replies on “Fastest Draw in the West!”
Absolute precious like all you do. Thanks
Thank you! ☺