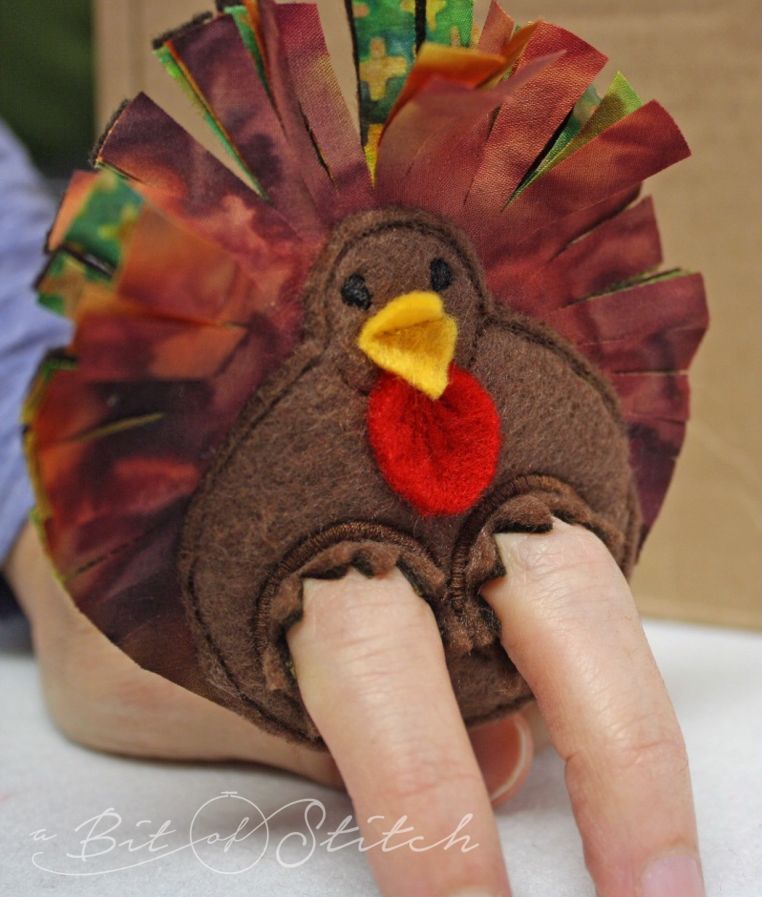
“Run, run, as fast as you can, you can’t catch me – I’m… Tom the turkey?”
Okay, getting my holiday jingles crossed here but if there ever was a good line for a turkey around Thanksgiving it would be that one, ha!
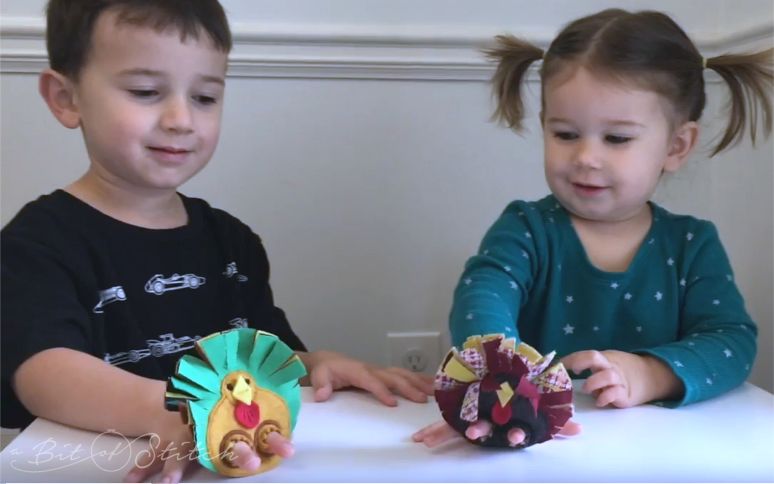
Here’s a turkey that won’t have to skedaddle – make this fine fellow from felt and fabric and keep a little one occupied (thankfully) for a bit while you mash the potatoes this Thanksgiving!
Here’s what you’ll need:
- Tom the Turkey embroidery design (The free offer has expired, but you can still get him HERE for a few dollars!)
- Embroidery machine with a 4×4 hoop
- Dark brown felt (big enough to fit in the 4×4 hoop)
- Lighter brown felt (4″x4” piece)
- Small piece each of red and bright gold felt
- At least three 5″x5” blocks of cotton fabrics that are colored on both sides (batik fabrics work great)
- Sewing thread to match felt (brown, red, gold)
- Black embroidery thread
- Scissors (short blades, long blades and small curved blades)
- A cup of tea (optional)
Print out the PDF Beak & Wattle pattern that is included with the design and cut them out. Then cut out a red felt wattle and a gold felt beak.
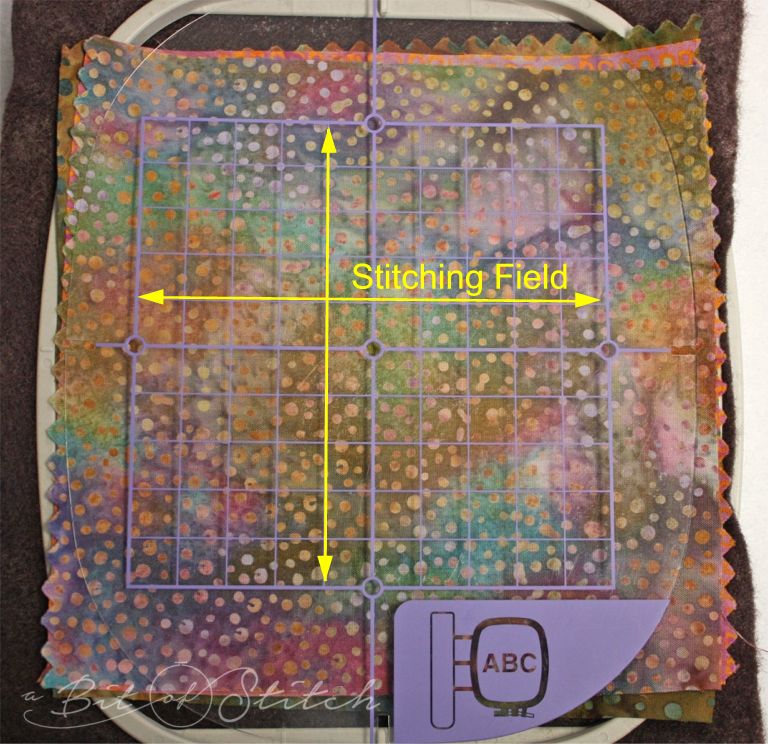
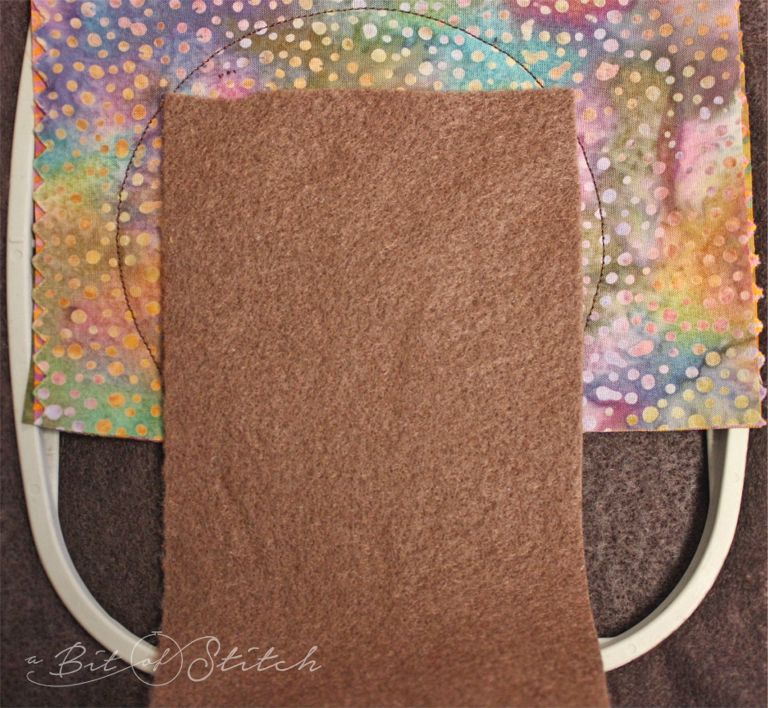
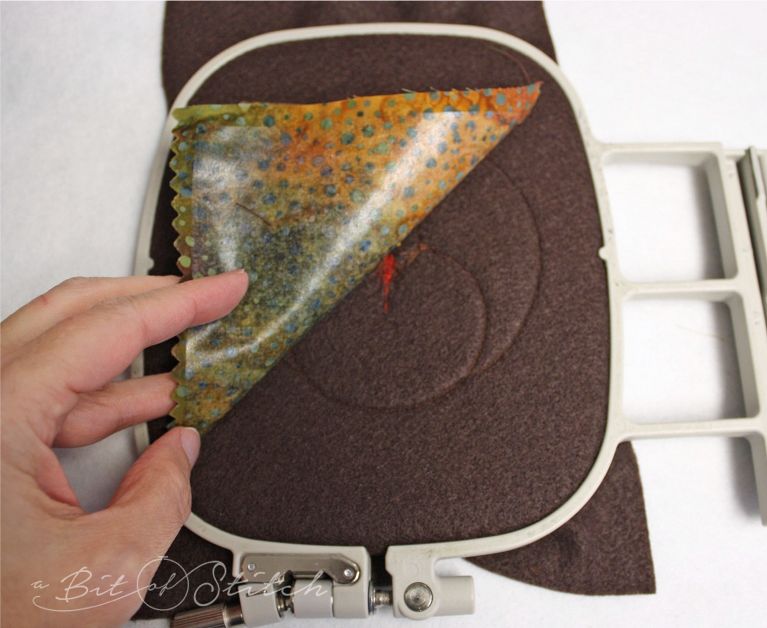
This turkey has a “feathered” fabric tail. Choose fabrics, like batiks, that are the same on both sides for prettiest results. Cut at least 3 different prints/colors into 5” blocks. Hoop the dark brown felt and stack the 3 printed blocks on top. Be sure to cover the stitching field. If you don’t know where that is you can use your onboard design perimeter finding tool or just check the plastic hoop placement grid.
Thread the machine in top and bobbin with regular sewing thread in a color that matches the brown felt. You can either put a darker brown in the bobbin and a lighter brown (to match the lighter brown felt) in the top or just choose a shade of brown that blends nicely with both. Sew the first stitch sequence while you carefully and gently hold the stacked fabric blocks in place.
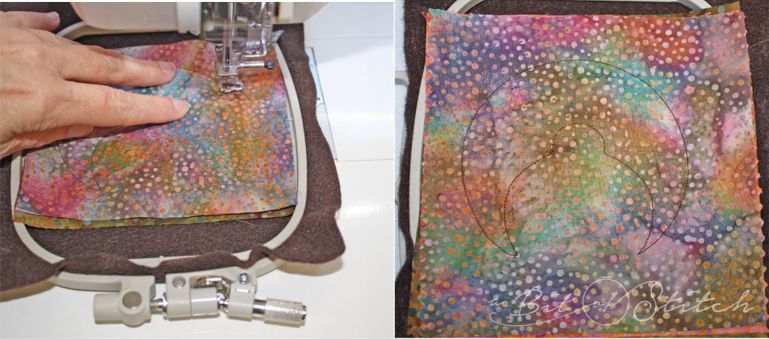
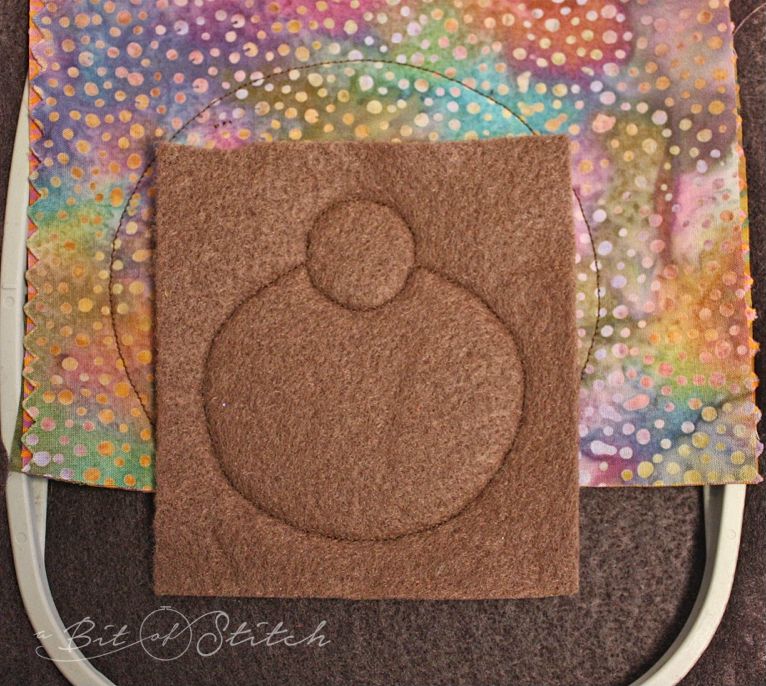
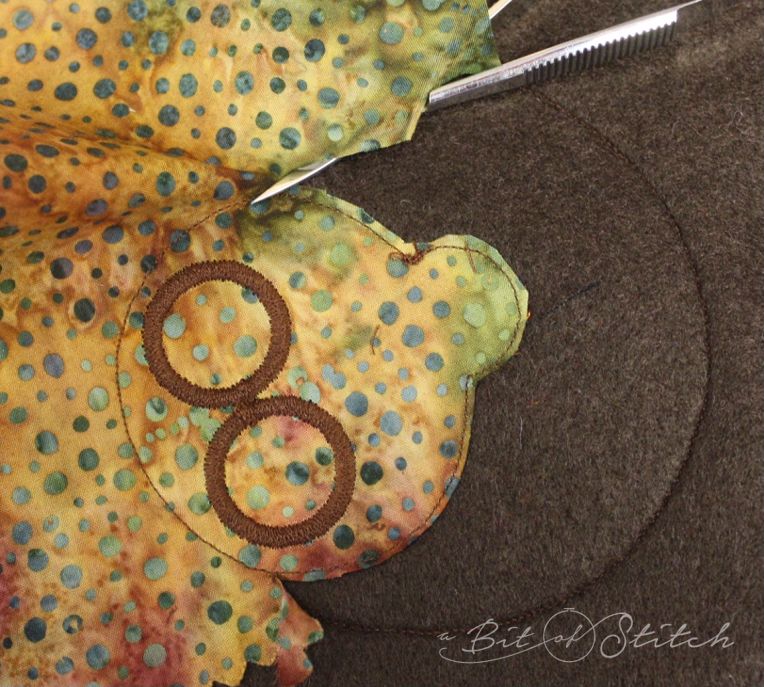
Remove the hoop from the machine (don’t remove the felt from the hoop!) and cut away the fabric layers straight across the bottom of the stitched outline as shown below.
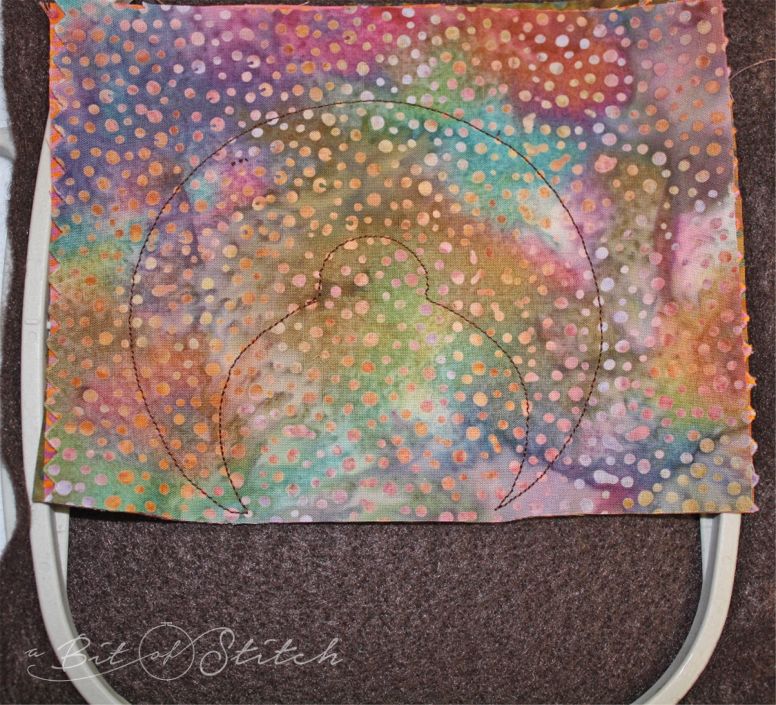
Next, use your short, curved-bladed scissors (or these Snips!) to trim away the fabric layers within the body part of the outline. Leave a small selvage past the stitching line.

Place the lighter brown felt block over the inside body outline shape. Be sure the felt covers it completely.
Sew the 2nd stitch sequence.
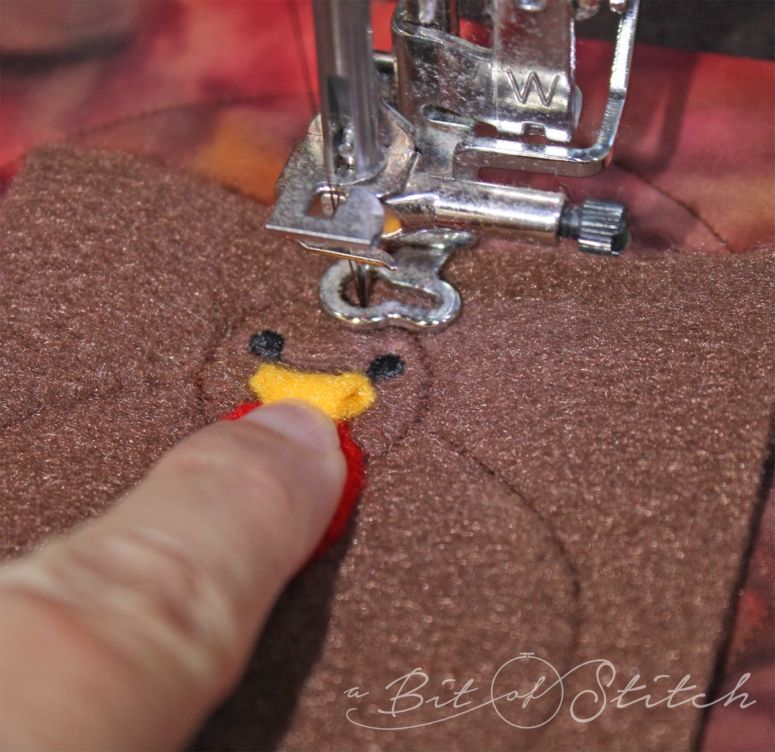
Thread the machine with black embroidery thread in the top. (Usually I would suggest that you change the bobbin thread back to embroidery weight bobbin thread, but as these eyes are so tiny it is really not necessary for this project.) Sew the 3rd stitch sequence to complete the eyes.
Thread the machine on top with red sewing thread. Sew the 4th stitch sequence. This is the placement line for Tom’s wattle. (WHAT a weird word, but oddly satisfying to say, heh!)
Fold the red felt wattle in half and line up the center of the wattle with the placement line.
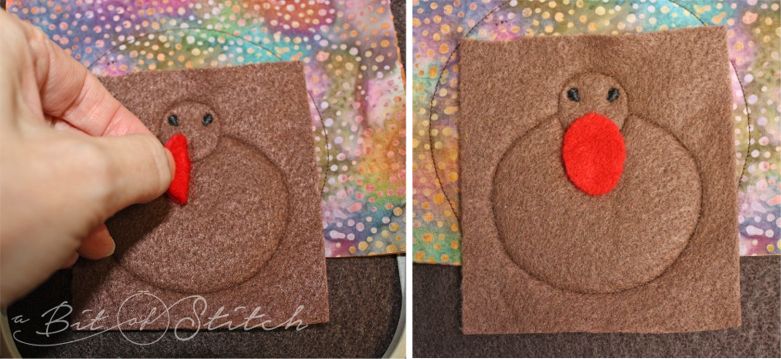
You might need to put a bit of cellophane tape on the top edge of the wattle to keep the machine’s foot from catching in it as it stitches up and down. Make sure the tape is stuck so it won’t come off on the foot.
Sew the 5th stitch sequence. Clip the top right and left sides of the wattle to remove a little felt there to make more room for the beak placement.
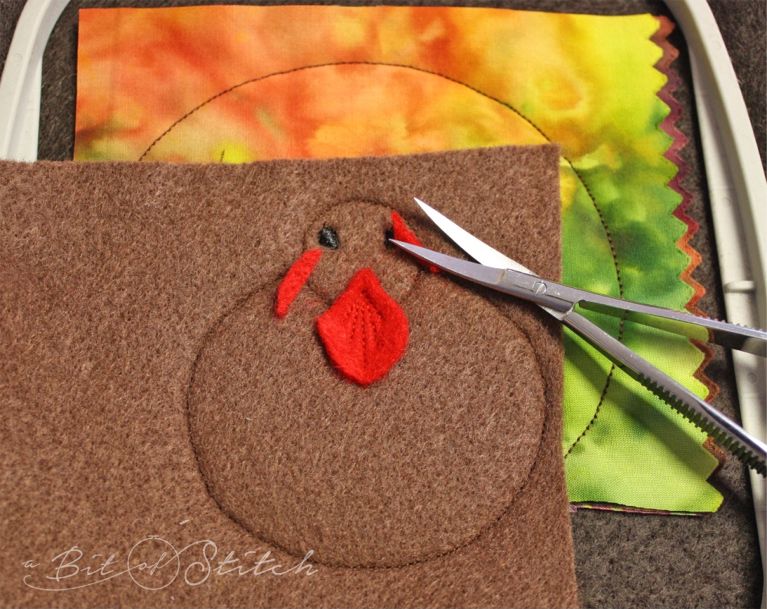
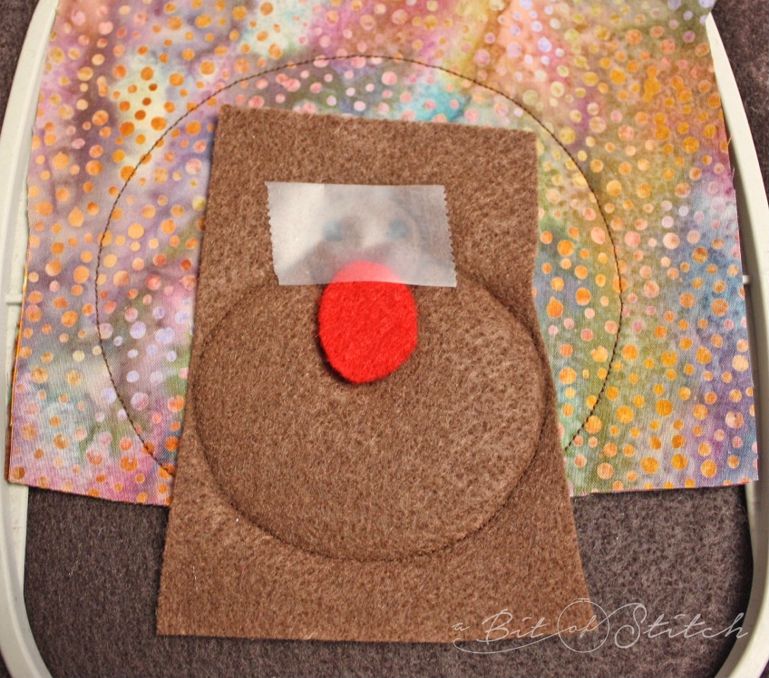
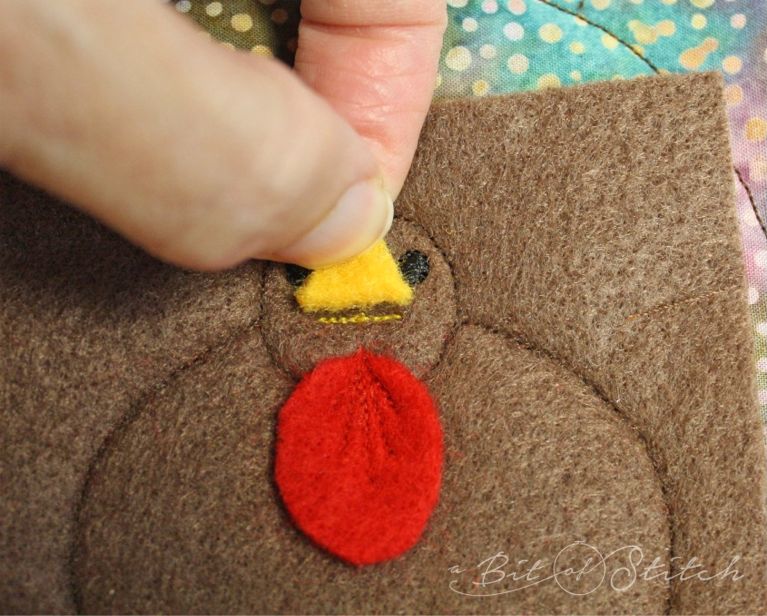
Thread the machine on top with gold sewing thread. Sew the 6th stitch sequence. This is the placement line for the beak. Fold the beak in half and line up the center of the beak with the placement line. Sew the 7th stitch sequence to secure the beak. The stitching begins in the middle and travels to one side and then the other so you shouldn’t have trouble with the machine foot getting caught, but if it makes you nervous, tape the beak in place then sew it down. (Note – Scotch brand “Magic” tape works great for projects like this one as it leaves no sticky residue on fabric or needle and tears off cleanly and easily.)
Thread the machine in the top with brown thread.
To make the back pretty, you can add a piece of fabric to cover up the thread knots there. This step is optional, Tom will play just fine without it, so if you don’t want to take the time, just skip this step and advance your machine to the final stitch sequence. If you do want to cover the back messiness, here is what you do. Cut a 4×4” block of one of the fabrics you used for the feathers or plain brown cotton fabric. Fuse a piece of fusible web to the wrong side. I like Steam-a-seam 2 and Wonder Under 805. Peel off the release paper and place the fabric fusible side against the wrong side of the hooped felt. It will probably cling just fine to the felt (especially if you are using Steam-a-seam 2, which is sticky) but if it seems to want to slide around spray the fabric – not the felt in the hoop – with a light spray of temporary spray adhesive to hold it in place.
Sew the 8th stitch sequence. Watch his beak; if it extends past the top edge of the head fold it down while the needle passes by.
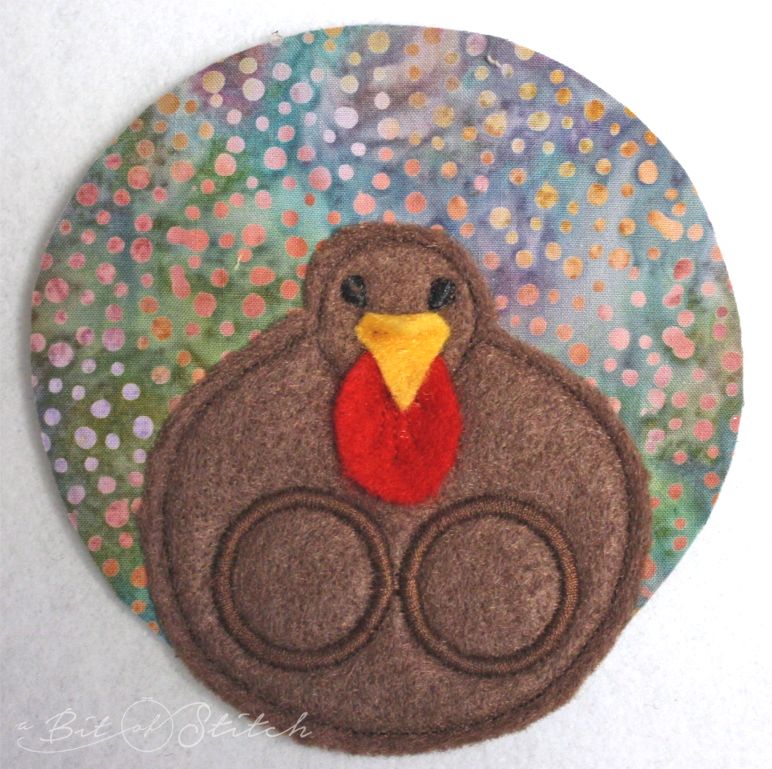
Sew the final stitch sequence. These are Tom’s leg holes, sized for little fingers so if your fingers won’t fit don’t worry, little fingers will have plenty of room!
Remove the felt from the hoop. Trim away the fabric on the wrong side of the hoop leaving a tiny selvage just past the body outline stitching. Iron to fuse the fabric to the felt.
Trim away the excess light brown body felt on the front of the puppet, leaving a tiny selvage past the edge of the stitching outline. Cut away the rest of the excess felt and fabric layers following the stitching line around the tail and under the body’s bottom edge. Cut ON the stitching line around his fabric tail, cutting the stitching off as you go. Trim just past the stitching line on the bottom of the body, cutting away the back layer of felt there but leave a little selvage edge. Your puppet should look like this now:
Clip through all layers to form his feathers. To keep them sort of even, begin clipping at the center top of his head, cutting in toward the bird’s body and down around his shoulders. You can leave a little space between the end of your clip and the body as you go around the shoulder area as shown below.
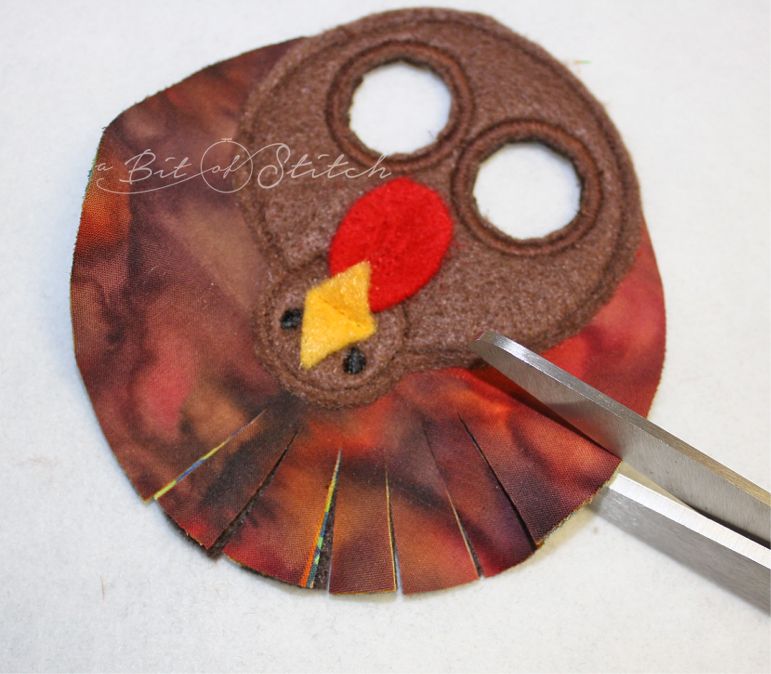
Choices! You can cut out the leg holes completely (try not to clip the satin stitching there – if you do mend it with seam sealant) OR you can clip in a radius within the circle and leave the pointy bits to act like feathers at the top of his legs.
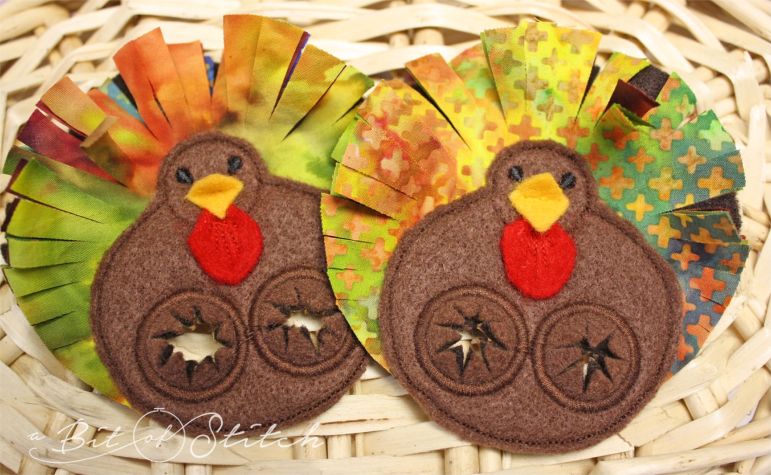
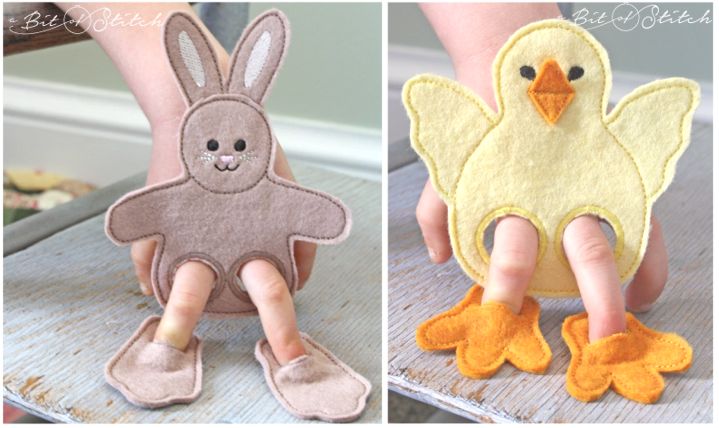
I hope you enjoy this project and make LOTS of Tom Turkeys for your wee friends! If you caught the finger puppet fever, check out these finger puppets – more fun!

My grandson has discovered some new playmates. 😀 Yay for quiet toys!
Till next time! I hope you have a WONDERFUL, safe and happy Thanksgiving. Eat well, laugh lots, hug your loved ones and take a nap. (And sneak off to your sewing room to make a pretty or two if you can!)
Evy
P.S. Click HERE to watch Lydia Maria’s Youtube video tutorial of making these turkey finger puppets with two little cuties!