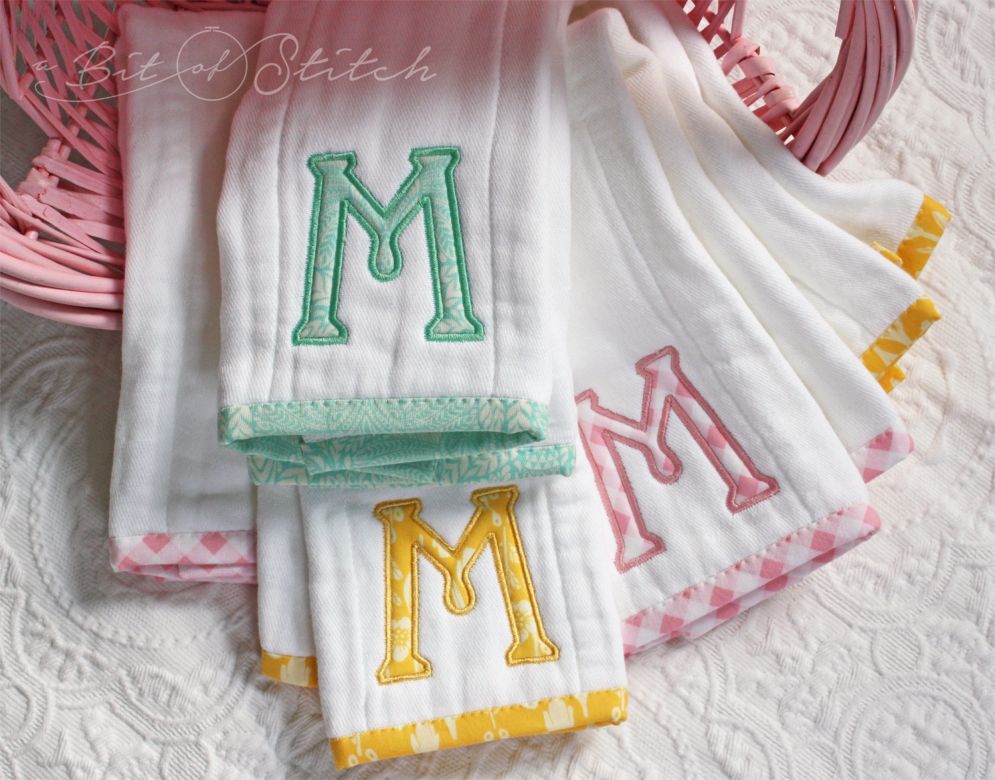
There’s not much that is more useful than a soft, cushy burp cloth when it comes to baby tending, is there? I love giving burp cloths as new baby gifts because I know that they will be well used and loved, especially when it’s super easy to make them pretty too!
Once upon a time I thought the only way to bind anything had to involve cutting bias fabric strips and doing a LOT of handwork. Thank goodness for my quilting friends who taught me that bindings can be straight grain and stitched down by machine. Here’s my new favorite method for adding pretty fabric ends to pre-folded diapers for burp-cloths. I hope you’ll try it!
You will need pre-washed, pre-folded diapers. Find them in packs at big box retailers, online, and at some baby specialty shops. (I love finding the colored ones!) You’ll also need some nice quilt weight cotton fabric cut into two strips that are 2″ wide and 1” longer than the short ends of the diaper. (Note: You don’t have to pre-wash, but some brands of pre-folded diapers will shrink a lot, so it’s nice to get that out of the way so your pretty bound ends don’t curl up later.)
Choose a right side. One side of a pre-folded diaper is usually prettier than the other; you can tell by examining the stitching on the extra folded part in the middle.
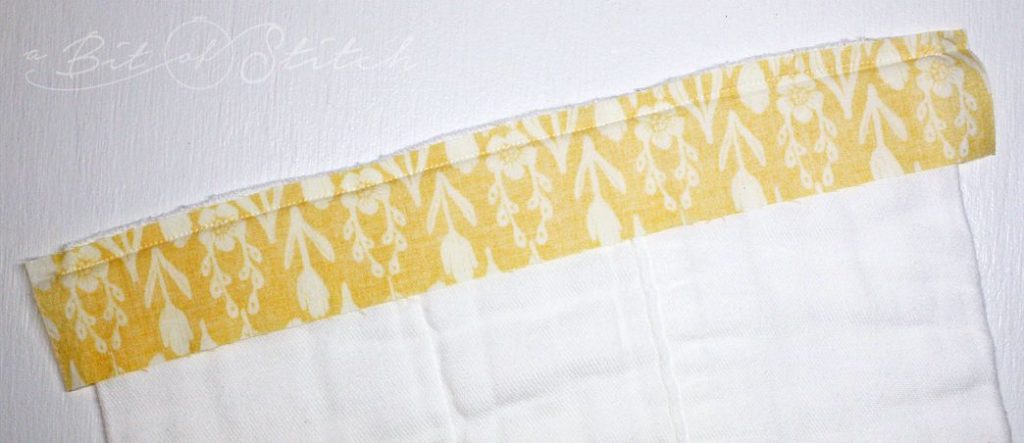
Align one fabric strip with one short end of the diaper: Place the fabric strip wrong side up on the WRONG side of the diaper. Make sure you leave a little extra fabric hanging off at both ends, as shown in the photo above. Sew the fabric strip to the diaper with a 3/8” seam allowance. (You’ll notice that there’s serging on both short ends of the diaper, and it might not be very straight. Just sew the fabric strip on as straight as you can; don’t worry if it doesn’t meet exactly flush with every bit of the edge.)
Repeat for the other end of the diaper.
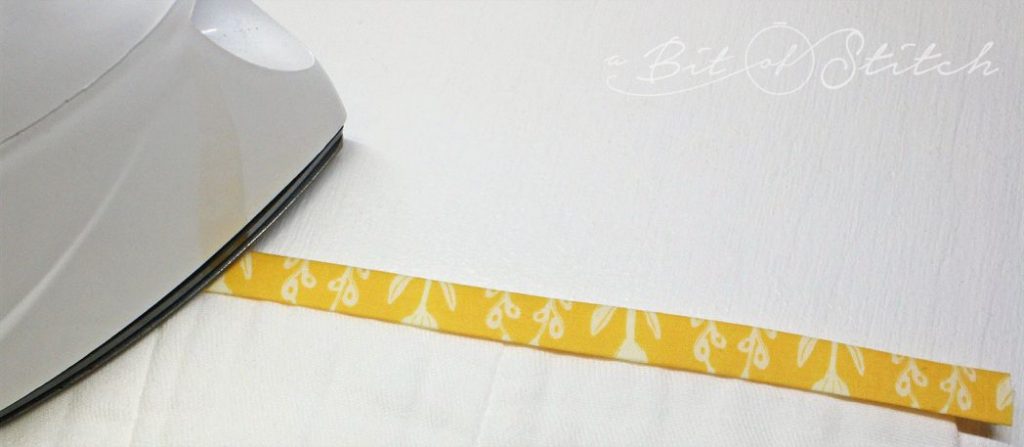
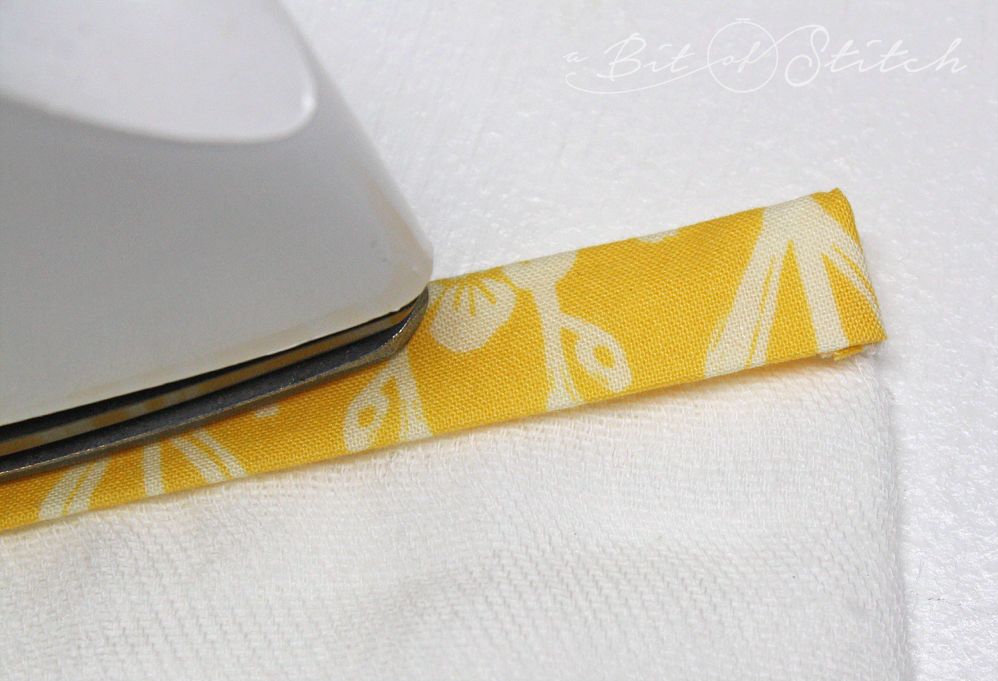
Press each fabric strip over the finished end of the diaper.
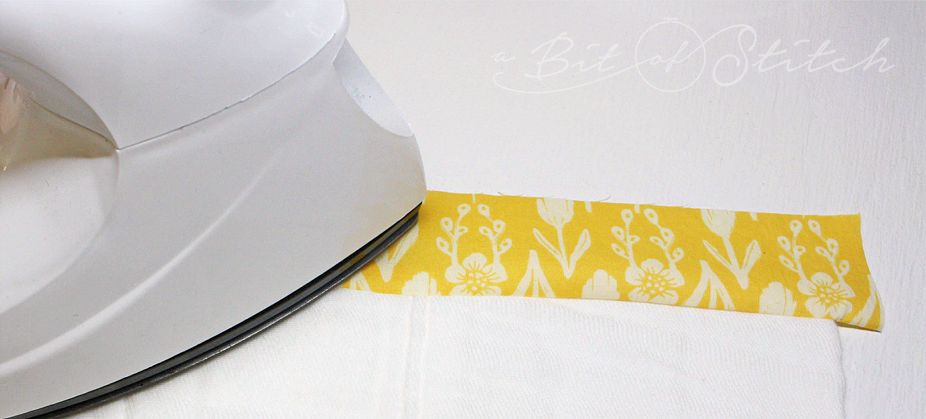
From the right side of the diaper, press one fabric strip under 3/8” to ½”, all the way across. Repeat for the strip at the other end.
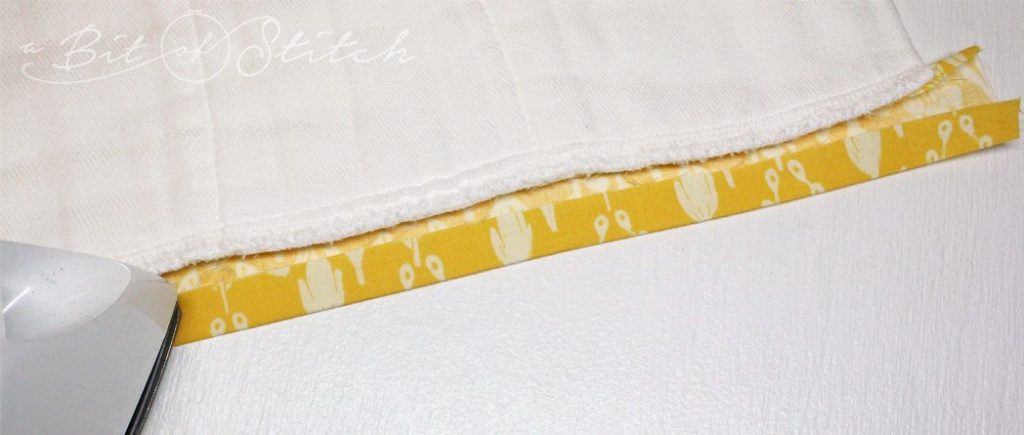
Next, press the folded edge of one fabric strip over to meet the seam, covering the serged edge of the diaper. Repeat for the strip at the other end. Make a good crease at the newly folded ends.
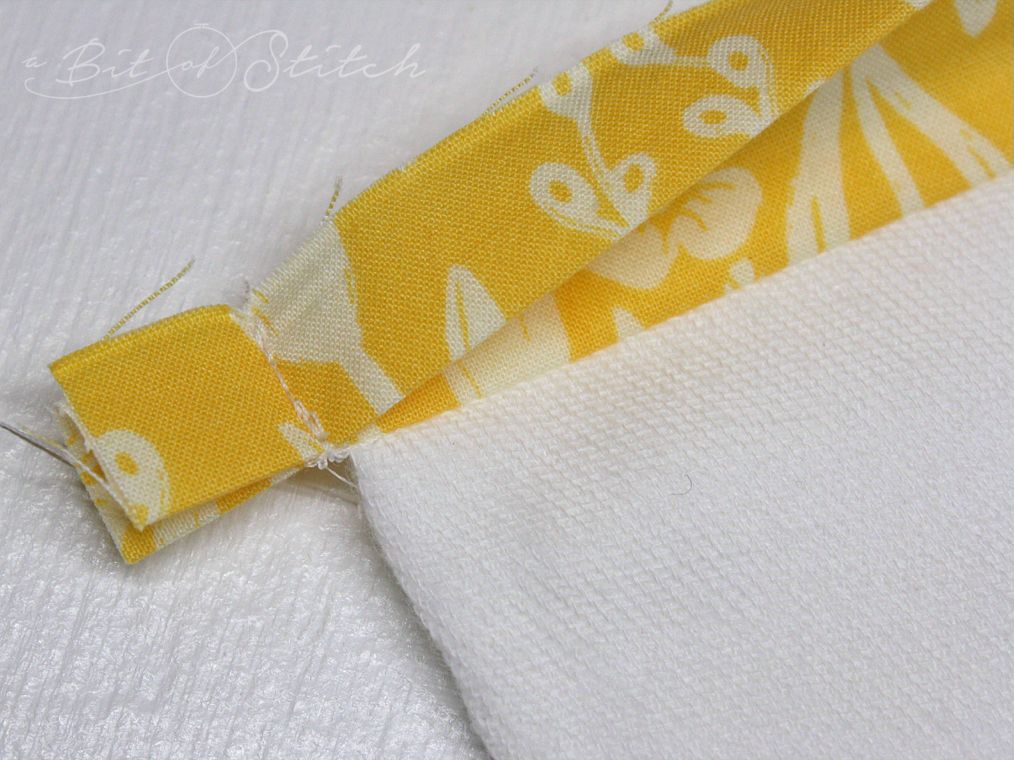
Unfold the strips along the crease you just made and fold them backwards to the wrong side of the diaper. Align the first fold’s edge with the seam (where the strip is sewn to the diaper). Sew across the short ends of each strip a scant 1/8” away from the diaper’s edge as shown above. Back-tack securely.
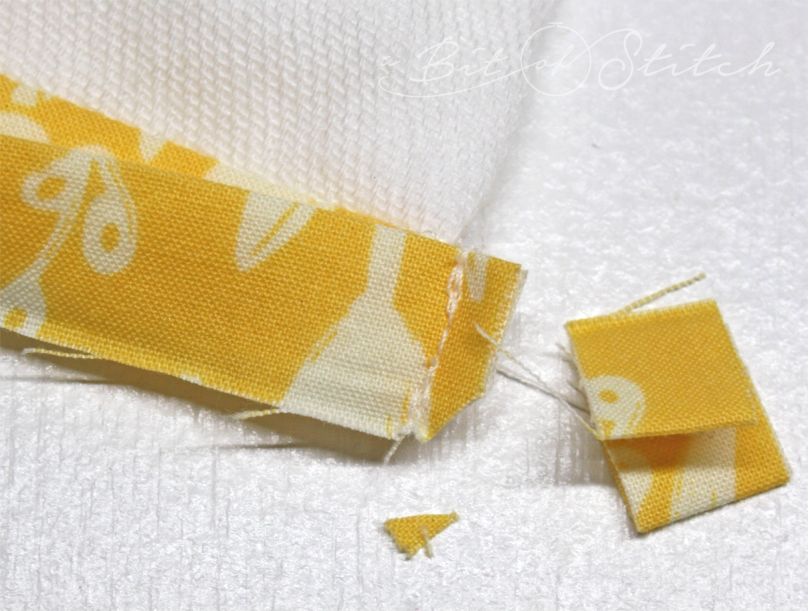
At both ends of each strip: Trim the seam (leaving a small selvage) and clip the corner a tiny bit as shown above.
Refold the fabric strips back to the right side, poking out the corners smoothly. Re-press if necessary.
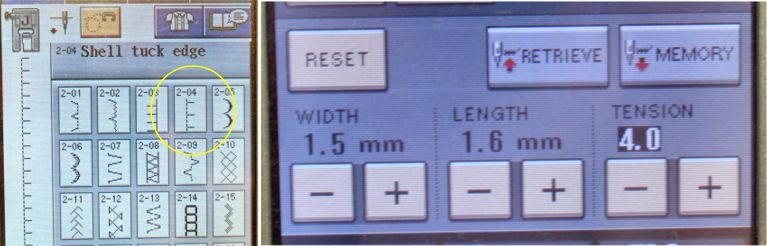
Choose a good appliqué type stitch from your machine’s motif stitch menu. I love using the Shell Tuck Edge on my Baby Lock. This stitch has a “bite” stitch that goes sideways from a line of regular stitching, so it’s nice and secure. I set my Shell Tuck Edge stitch at a width of 1.5 mm and length of 1.6 mm. You might want to practice on a scrap of fabric to see what stitch and settings you like best.
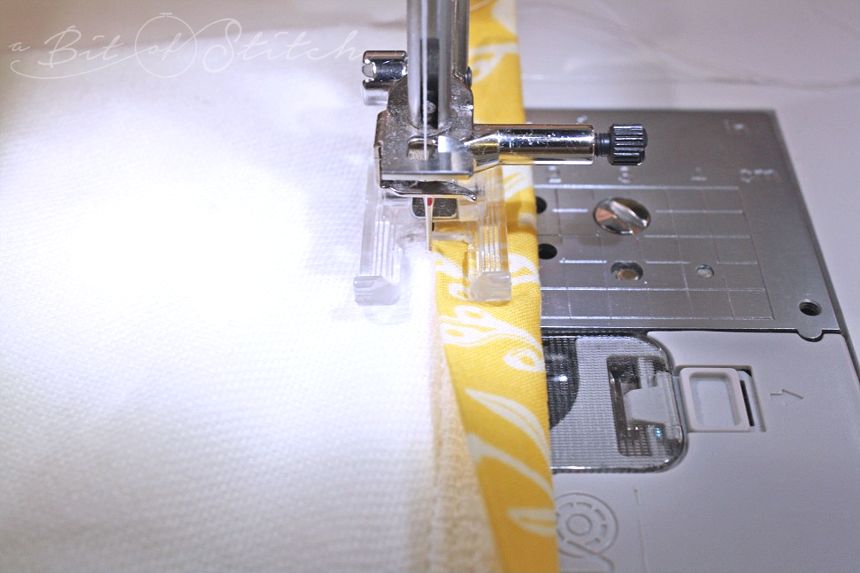
A clear open toe foot is a great choice for doing this type of stitching if you are like me and want to SEE exactly where the needle is landing. You might also like the edge stitch foot which has a guide to help you follow the fold. Experiment to see which foot is easiest for you to use.
Here’s the tricky part: It’s rather difficult to start on the end of a bit of fabric that’s thick. Sometimes that causes a nest of wonky stitching, yikes! So try this – instead of starting with your needle at the very end, put your presser foot fully on the fabric at the end, as shown in the illustration below on the left:
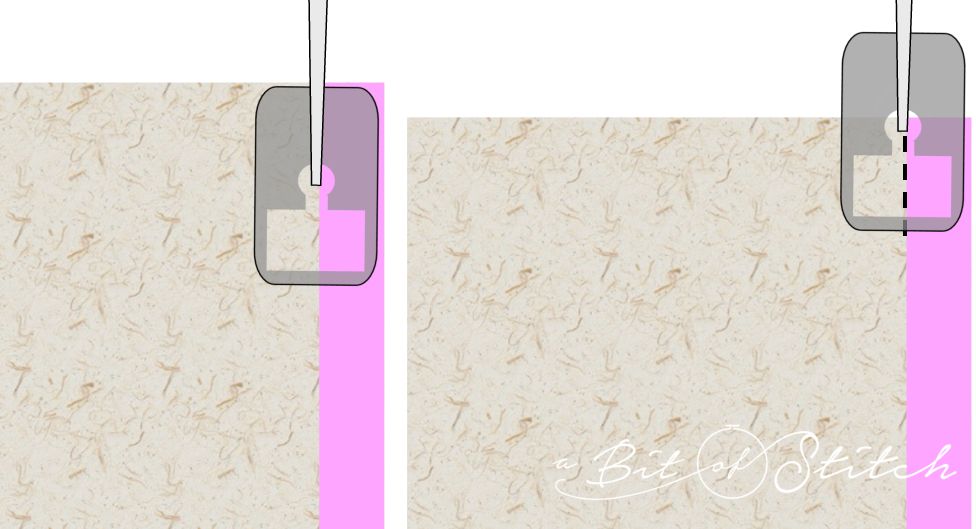
Starting with a REGULAR stitch (not the pretty shell stitch yet) and the center needle position, sew backwards immediately beside the fold, right where you will be sewing the shell stitching (see illustration above on the right). Remember, you are sewing from the right side of the diaper next to the folded over edge of the fabric strip which has not been sewn down yet.
Stop two or three stitches away from the edge; leave the presser foot down. Raise the needle and set the machine to the shell stitch motif. Sew immediately next to the fold so that the “bite” stitch catches the folded edge while the regular stitching line between the “bites” ends up only on the diaper part next to that folded edge.
When you get to the opposite end, stop a couple of stitches away from the edge, raise the needle (leave the foot down) and reset the machine for regular sewing, center needle position. Then sew backwards right at the fold (not on it) to secure your thread tail.
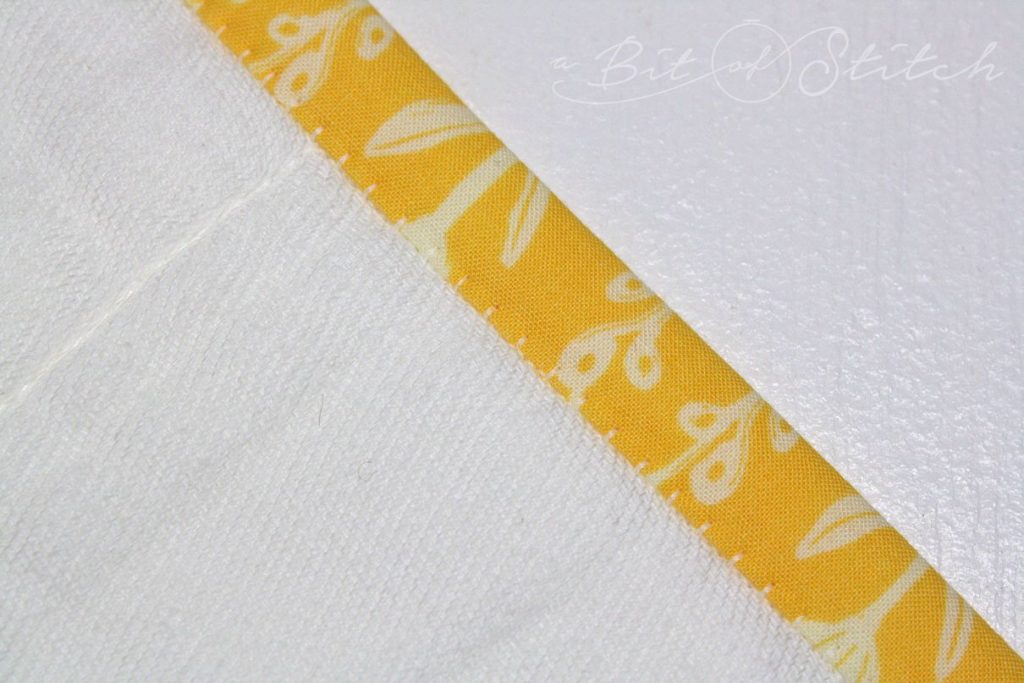
Pretty, isn’t it! And faster than hand sewing, woo-hoo!
Add some pretty appliqués!
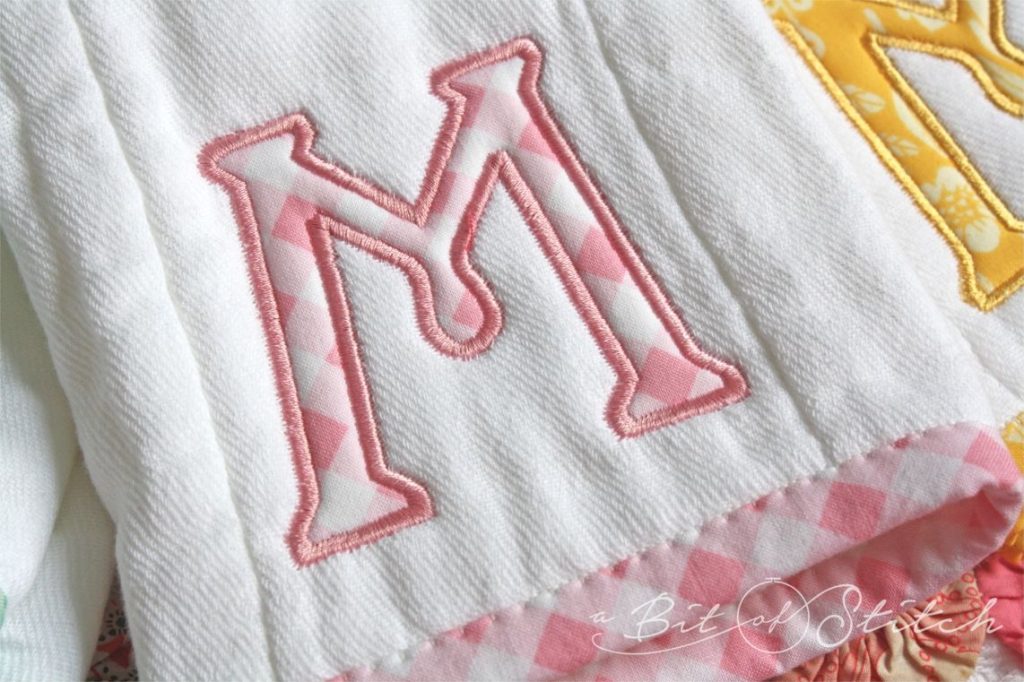
This appliqué design is from the Curly Appliqué Alphabet collection. One thing to remember is that for projects like this that will be well-washed, it’s best to add fusible web behind your appliqué material. Click HERE to read a blog post about appliqué. Use those little curved bladed trimming scissors to keep from cutting into the diaper when you trim, and don’t forget to use a press cloth when you fuse the appliqué!
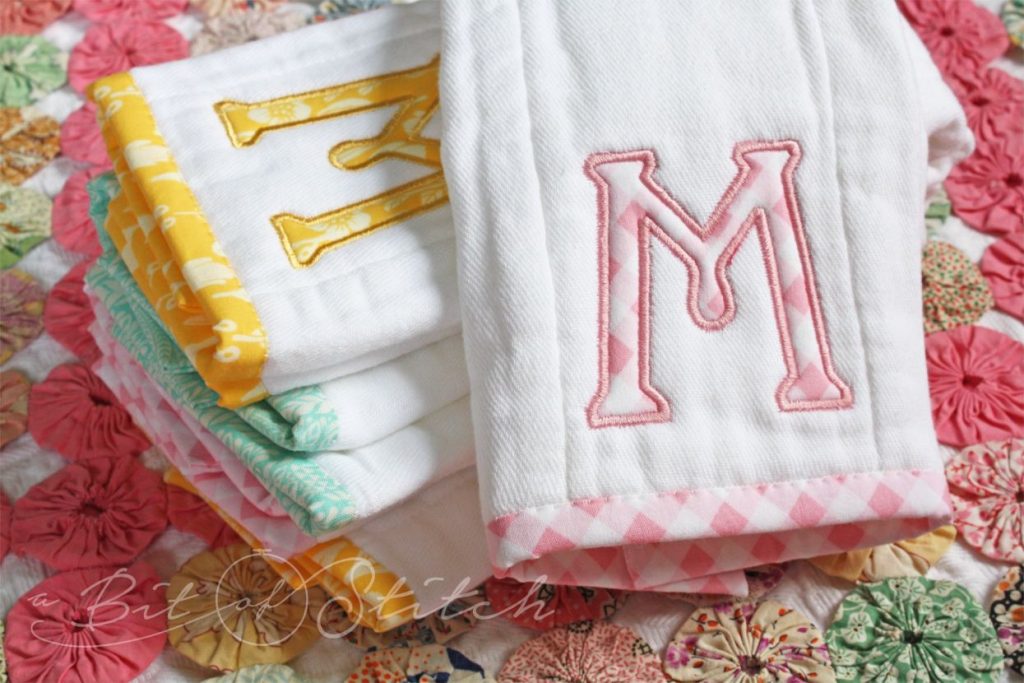
I hope you find a lot of use for this little binding technique. I’m quite hooked on it! It ends up on so many of my projects – not just burp cloths – because it’s fast and neat!
Thanks for reading!
Evy
4 replies on “Binding Burpies!”
Love all your great ideas, thanks so much for sharing them!
Have a wonderful weekend & be well.
Thank you! Same to you!
Your ideas are always the BEST! I miss taking classes from you at Martha’s…when they open up again, I will be the first to sign up! Blessings!! 😉
Thank you so much!! We look forward to hopefully seeing you again! 😀