Cottage Mama Dainty Darling Blog Tour
I’m so tickled to be part of the Cottage Mama’s Dainty Darling fabric tour! When Lindsay told me last year that she had a new fabric collection coming out with Riley Blake Designs, I knew I’d love it at first sight – everything Lindsay does is just so pretty – and I was right… I LOVE these sweet prints!
AND, did you know that she also has machine embroidery designs that match? How awesome is that! Since machine embroidery is my cuppa tea anyway, this is a win-win for me – pretty fabric and pretty embroideries!
There are several really dear prints in the Dainty Darling fabric collection, but the two that really spoke to me were these little dainty florals – so sweetly vintage!

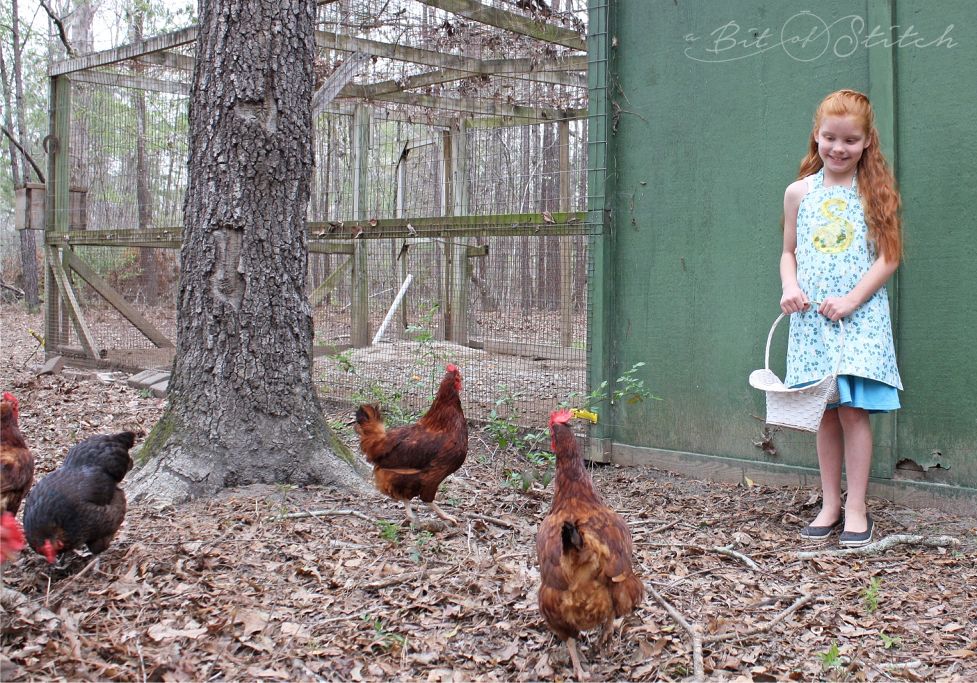
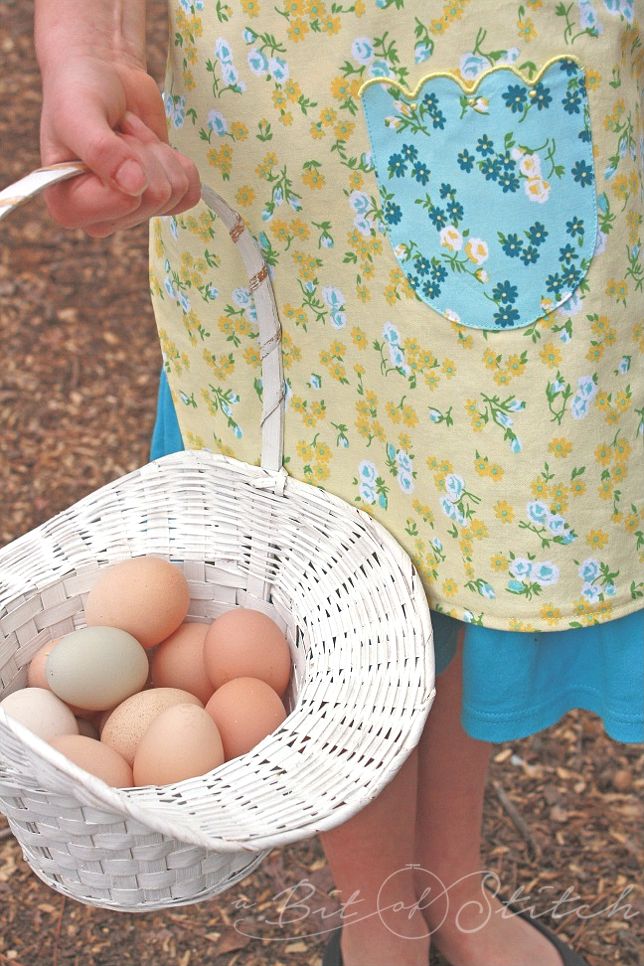
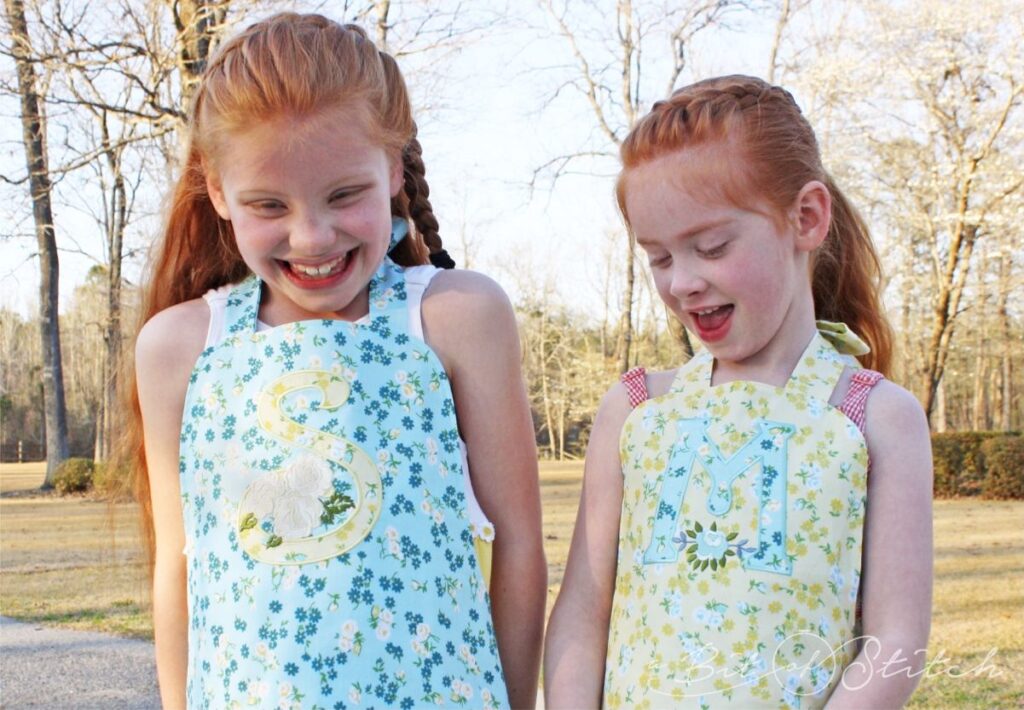
Don’t you think this fabric is perfect for aprons? I sure did! These aprons are reversible. One side has a pretty monogram and the other has a cute little made-in-the-hoop pocket!
Want to make some aprons for your sweeties? Follow along with me here and let’s do that.
Here’s what you’ll need:
- The free “Lucy’s Apron” pattern – download that HERE
- 1 yard each of Dainty Daisy Yellow and Dainty Daisy Aqua fabric from The Cottage Mama (or fabric of your choice)
- Sewing thread to match both fabrics
- Embroidery designs if desired – You can find the floral Dainty Darling embroidery designs on The Cottage Mama website HERE, and you can find the large Curly Appliqué Alphabet letters HERE and the Pocket Fun set HERE from A Bit of Stitch. Of course you don’t have to appliqué or embroider your aprons, but it sure does add a sweet touch, doesn’t it?! (Want to see more alphabet appliqués? Find some HERE!)
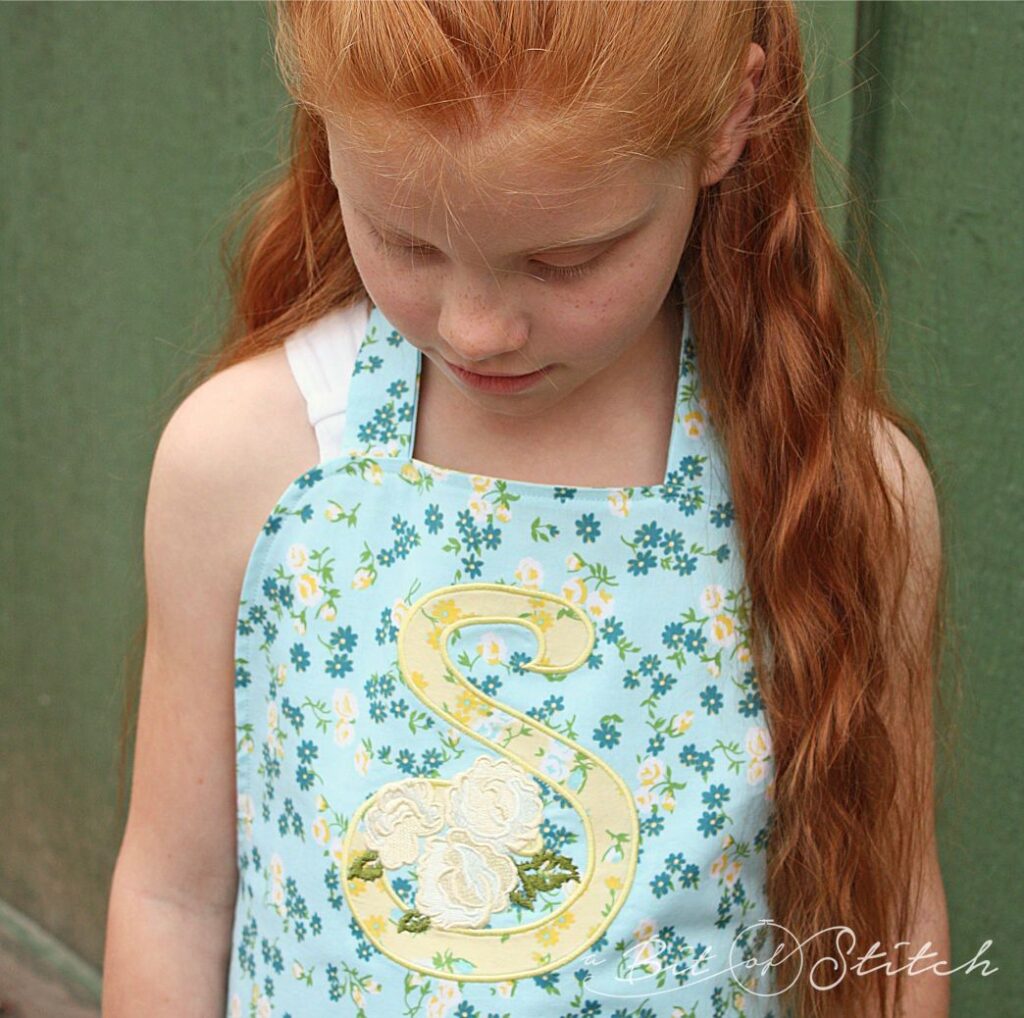
I used my editing software to combine the large “S” appliqué from my Curly Appliqué Alphabet (Large Size) design set with one of the Dainty Darling embroidery designs. As I was applying this light yellow fabric onto the slightly darker blue fabric, I prevented show-through by removing the fabric behind the appliqué. (Click HERE to read more about that little trick!)
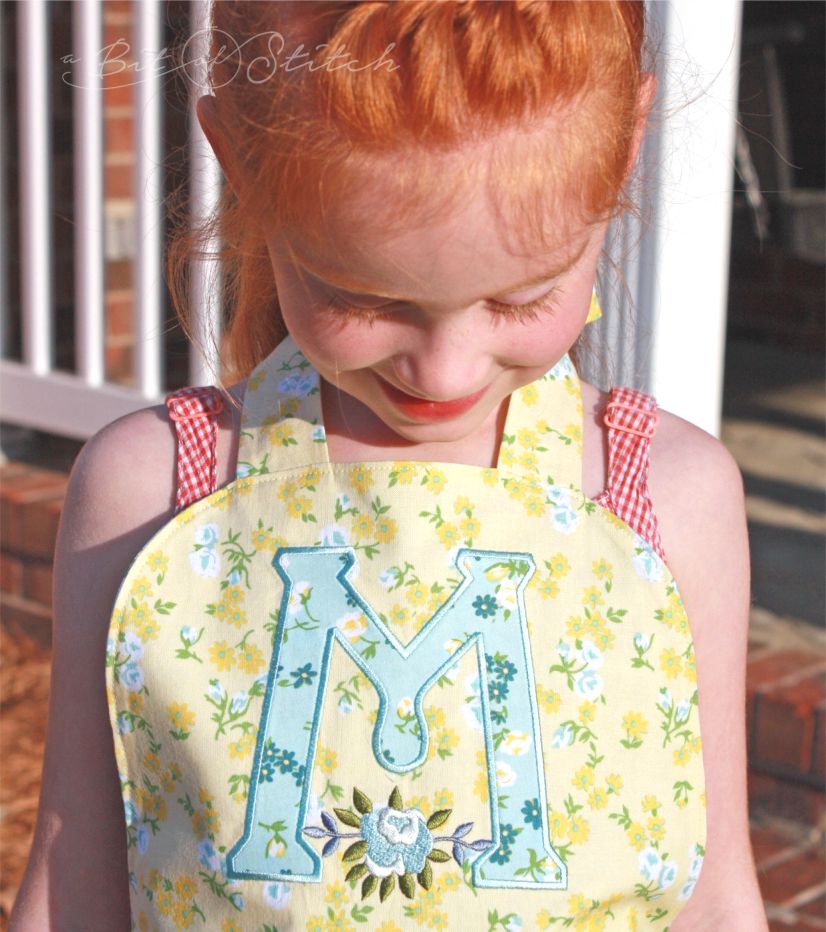
The monogram on this apron is from the same Curly Appliqué Alphabet set with another Dainty Darling embroidery design. (I think my little red-headed sweetie thought it was pretty cool!)
I like to start with pre-shrunk fabric, especially for children’s things. I back all of my appliqué fabrics with fusible web as that keeps them pretty for the life of the garment. (If you need help with machine embroidery appliqué, click HERE to read more about that.)
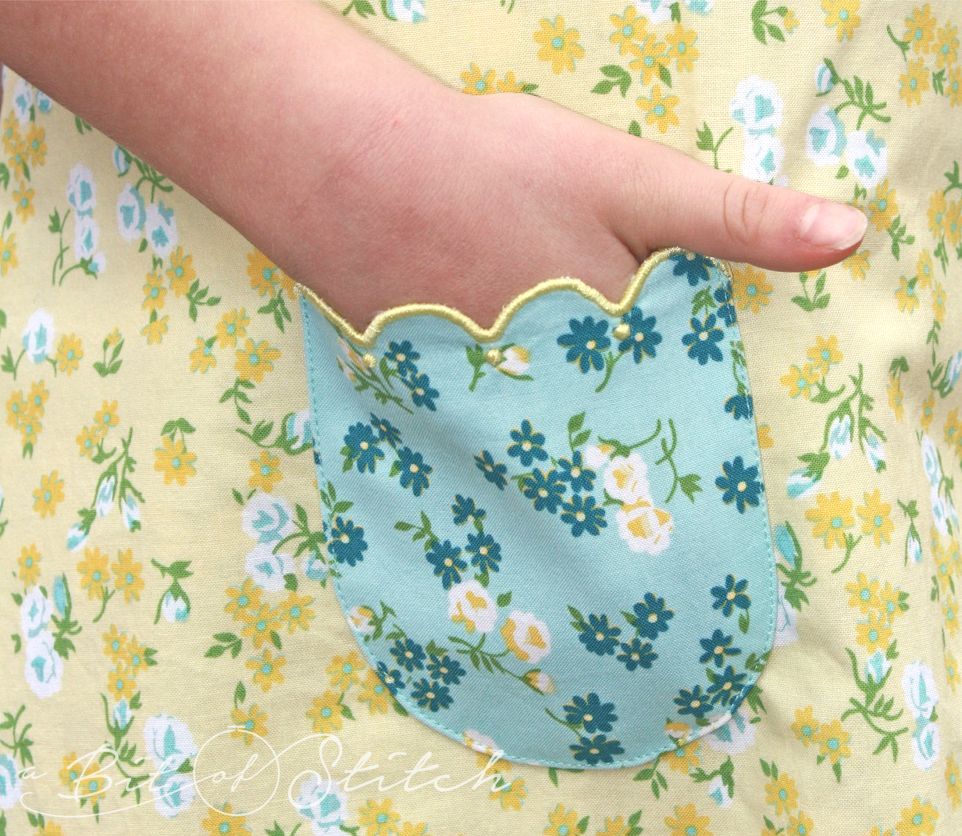
Aprons should have pockets! These in-the-hoop pockets are as fun to make as they are to use. This one comes from my Pocket Fun collection and is just the right size for a little hand. (Click HERE and HERE to see more in-the-hoop pockets!)
Print out and put together the pattern according to the directions on it. You’ll need to add the skirt portion by extending the bottom as long as you want your apron to be. I added 12” to the apron pattern for the two aprons shown.
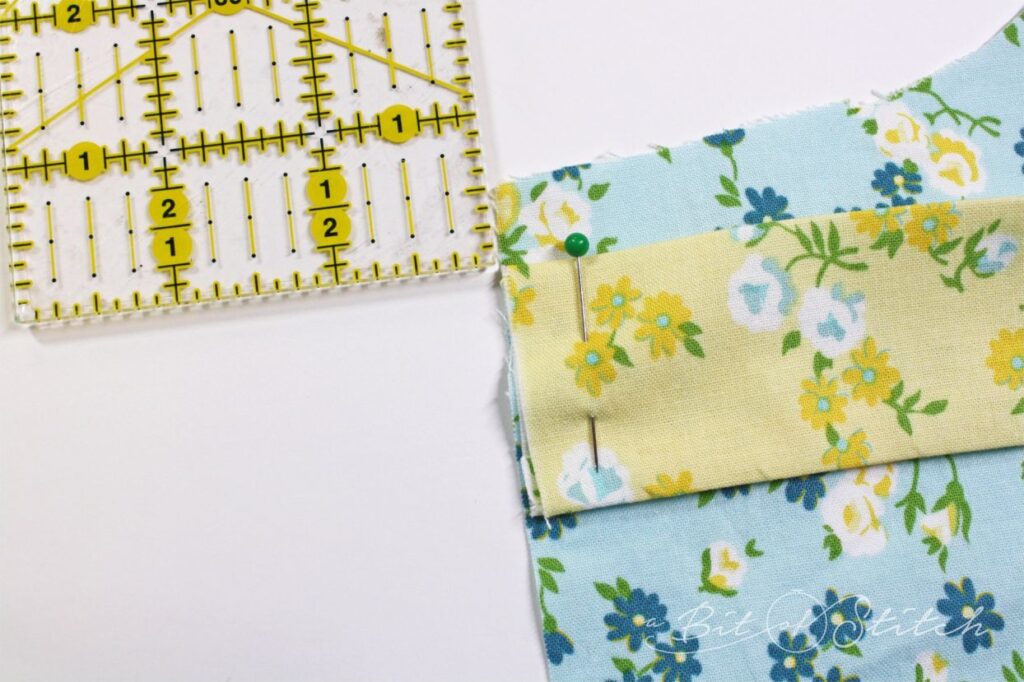
Use the apron pattern to cut out one apron piece from each of the two fabrics.
Cut out the ties as indicated on the pattern. They should be cut on the straight grain. Fold in half lengthways, right sides together, and sew with a 3/8” seam allowance; leave one short end open. I finished the ends of both sets of ties (neck and waist) at an angle. Turn them right side out and press.
If you plan to add pockets or embroidery, go ahead and accomplish that before you construct the aprons.
Pin the waist ties at the upper back edges of one apron fabric piece. Each tie should be placed so that its raw edge is aligned with the edge of the apron, ½” down from the top sloping edge. Pin both waist ties in place.
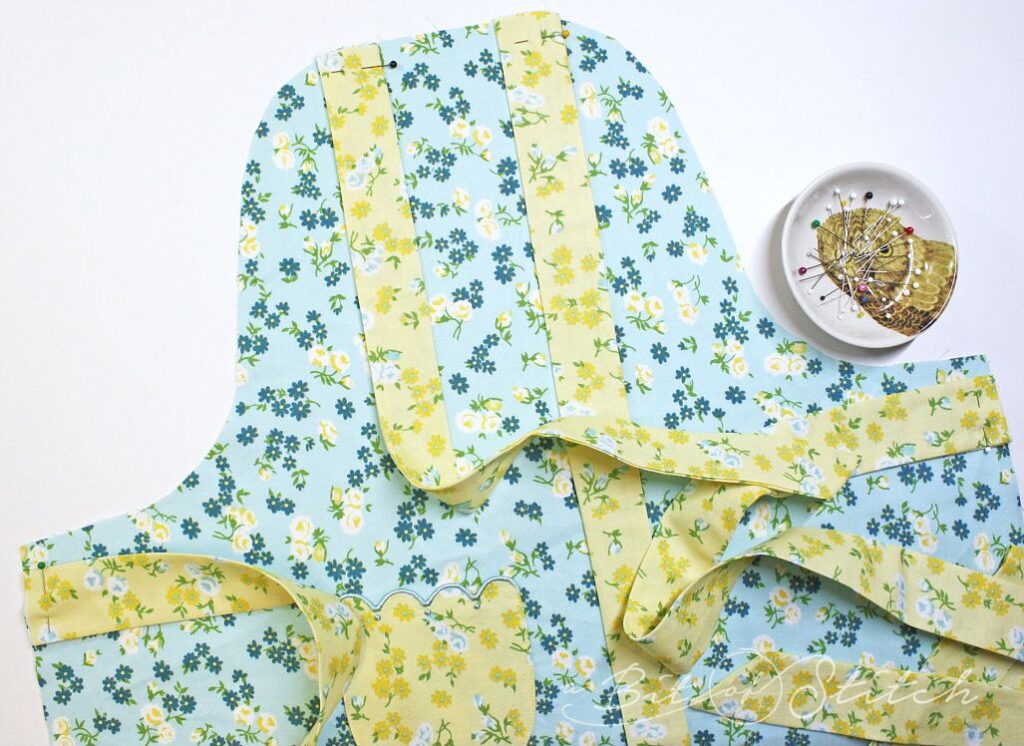
Pin the neck ties along the flattest part of the apron bib as shown.
Overlay that apron fabric piece with the other apron fabric piece – right sides together as shown – and pin through all layers.

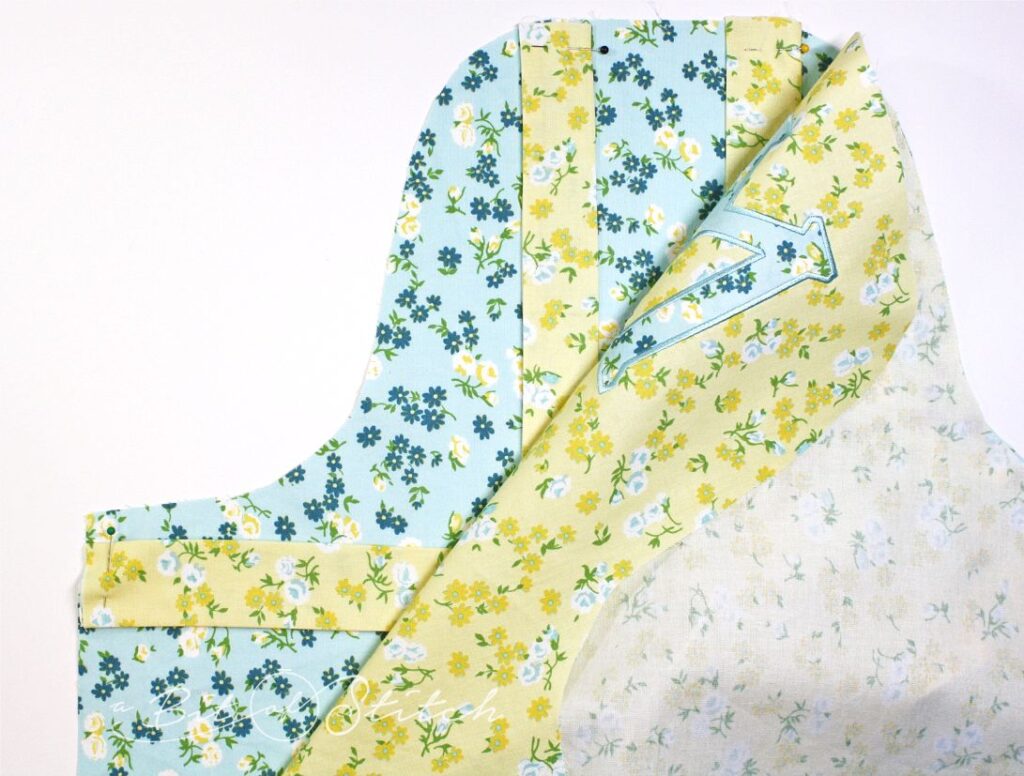
Sew all the way around the apron with a ½” seam allowance. Make sure you don’t catch the ties in the seam. Leave an opening on one lower back straight edge near the bottom.
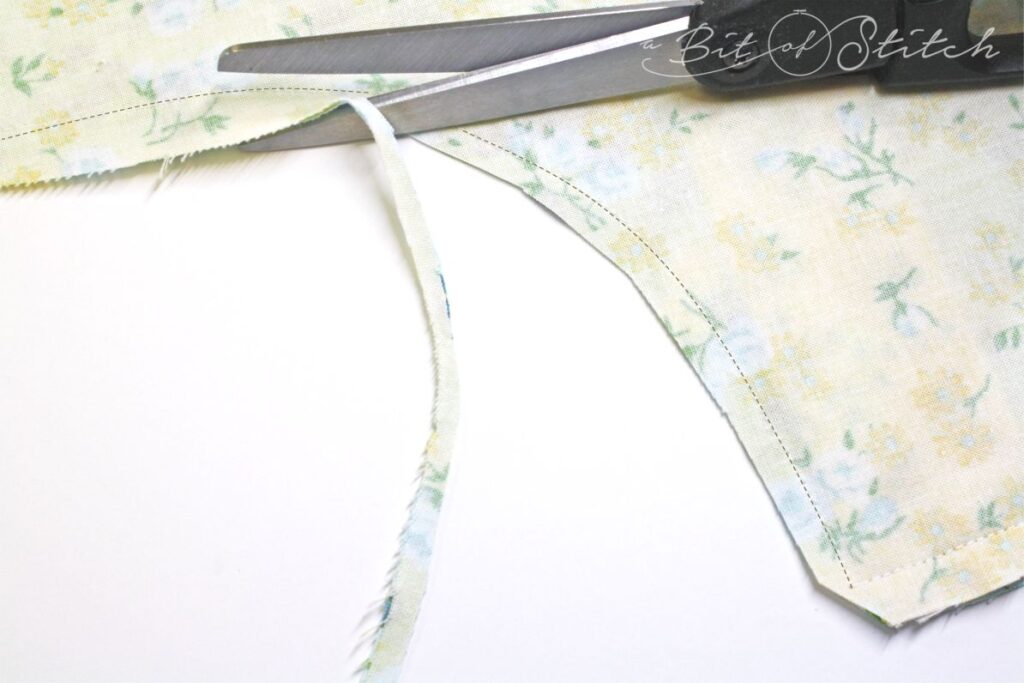
Trim the selvages on the curved parts around the top.

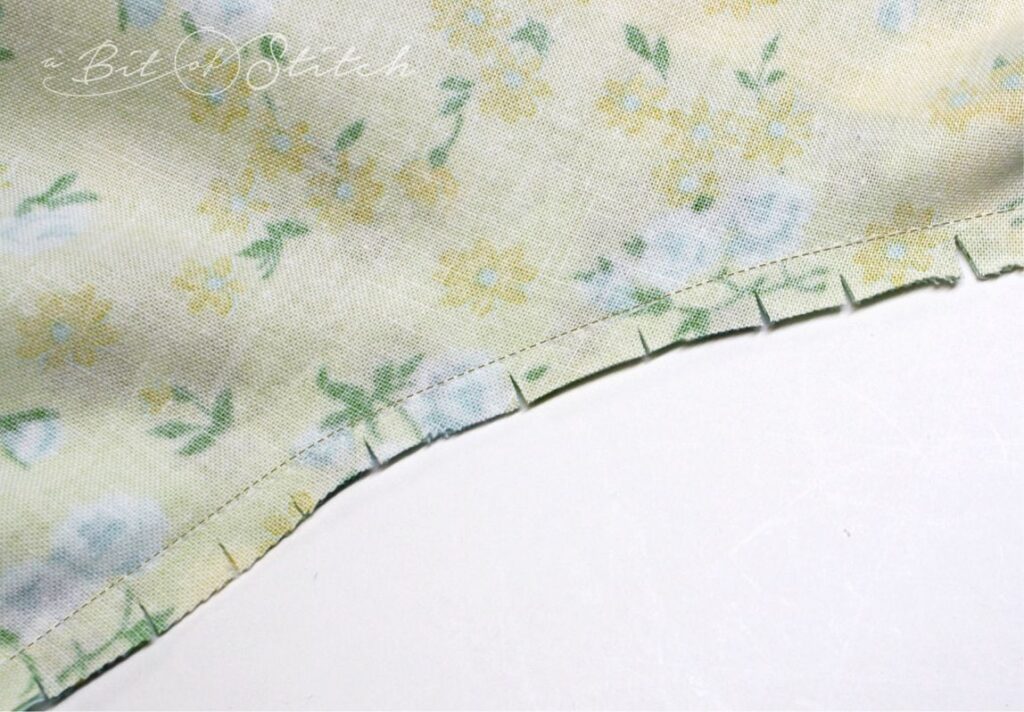
Clip the curves.
Before you turn the apron right side out, you might want to stay stitch the opening seam allowance selvage.
I like to sew one line of stitching, starting and stopping a short ways past where the opening begins and ends, on both sides of the selvages. This keeps the fabric from stretching out of shape there at the opening while you are turning the apron right side out.
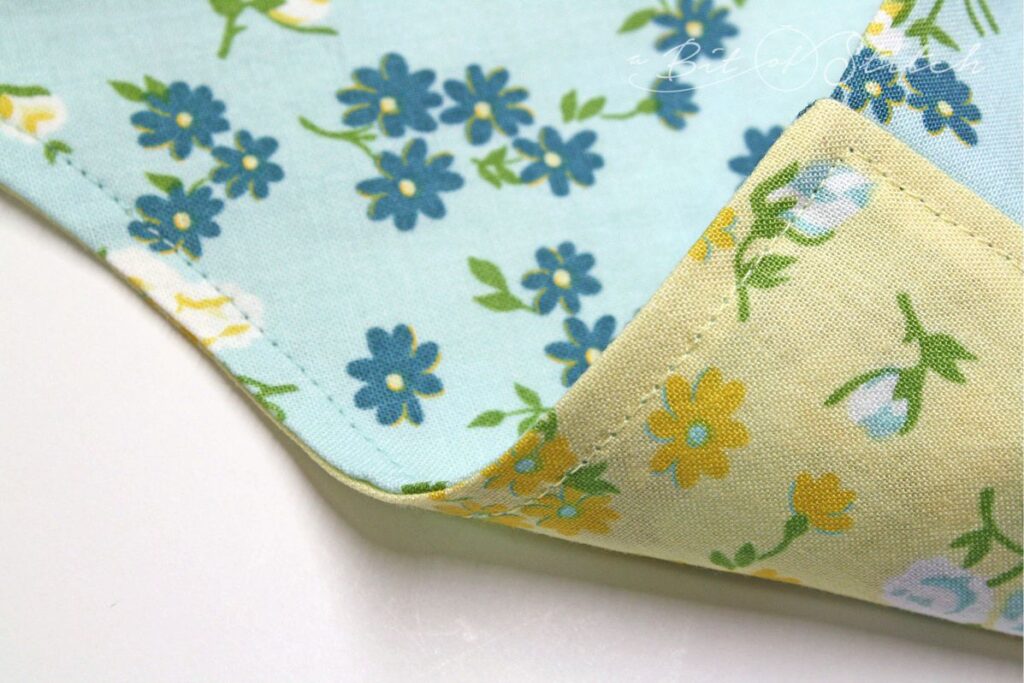
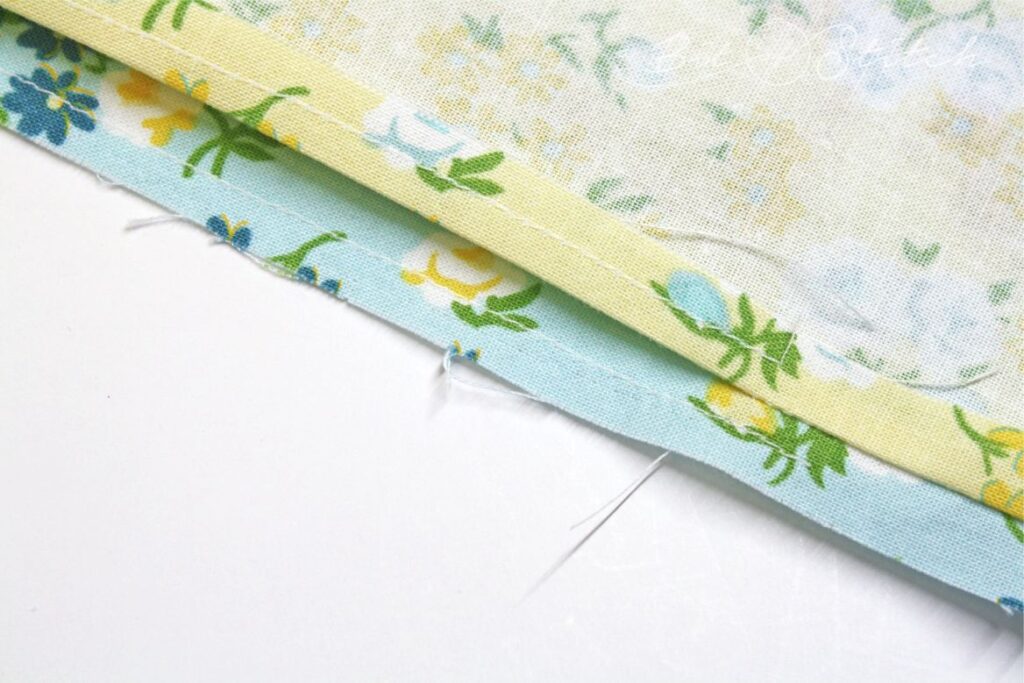
Top stitch all the way around the apron, closing up the opening as you sew. For prettiest results match the thread in both the bobbin and on top with the fabric. You can see that I used yellow thread in my bobbin for the yellow fabric side and blue thread in the top for the blue fabric side. Pretty, isn’t it – a nice touch!
Fun, simple and sweet! I hope you enjoy this little apron project – thanks for reading!
Evy
Photo credits: Amber Purcell
One reply on “Dainty Darling Aprons!”
Lovely, thanks.