I love to sew – even when it’s detailed, intricate, and painstaking, all the sweet little fiddly bits just make me happy. BUT, I’ll be the first to admit that some days my “sew time” and what I want to make in that “sew time” are not really compatible, you know what I mean? I bet you do. So when I decided to create new handkerchief motif designs and needed a couple (okay, who am I kidding… a BUNCH!) of prettily hemmed hankies to embroider, I got a little desperate. Good thing Mother Invention was hanging around!
So, do you need to miter a corner or two but are not really feeling up to those antics? Here’s a little cheat to make that process a bit faster! (And keep reading to the end and see me meeting the 31st century! …yes, THIRTY-FIRST, I’ve fallen into the future!)
First you’ll need some nice, crisp handkerchief weight fabric. I go to Farmhouse Fabrics online for my heirloom fabric needs – they’ve got it all! Handkerchief linen, cotton lawn, cotton batiste… you name it and they’ve got it in several beautiful colors and oh-my-goodness pretty prints.
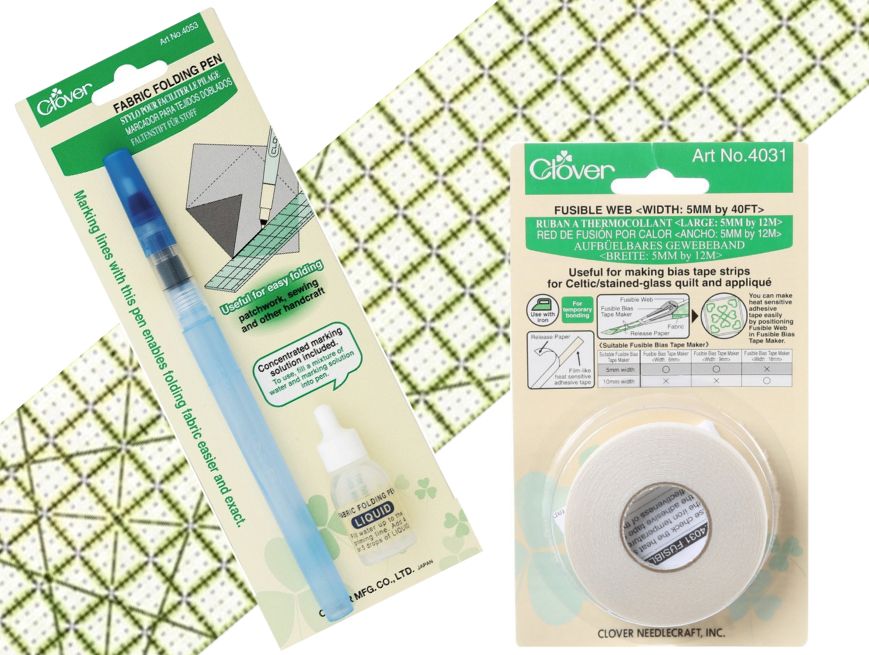
Next you’ll need these three items or your favorite variation of them: a fabric folding pen (vitally important), a nice see-through ruler with good marks, and some type of fusible web tape.
Iron your fabric nice and crisp with starch or fabric sizing, then cut out your block. Try to keep the fabric block on the straight grain as much as you can. Starch helps, and if you have one of those nice big square 12” rulers, they’re pretty much perfect for cutting out hankies.
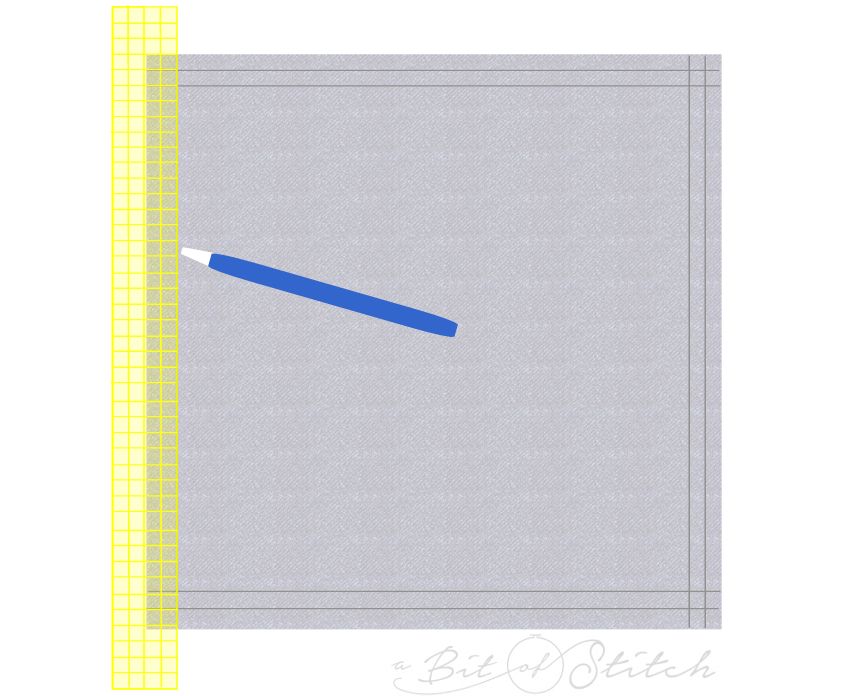
Use the fabric folding pen and your ruler to mark a folding line 1” away from each outer edge of the block. Then mark another folding line ½” away from each outer edge. Mark all the way to the end of the block at each corner.
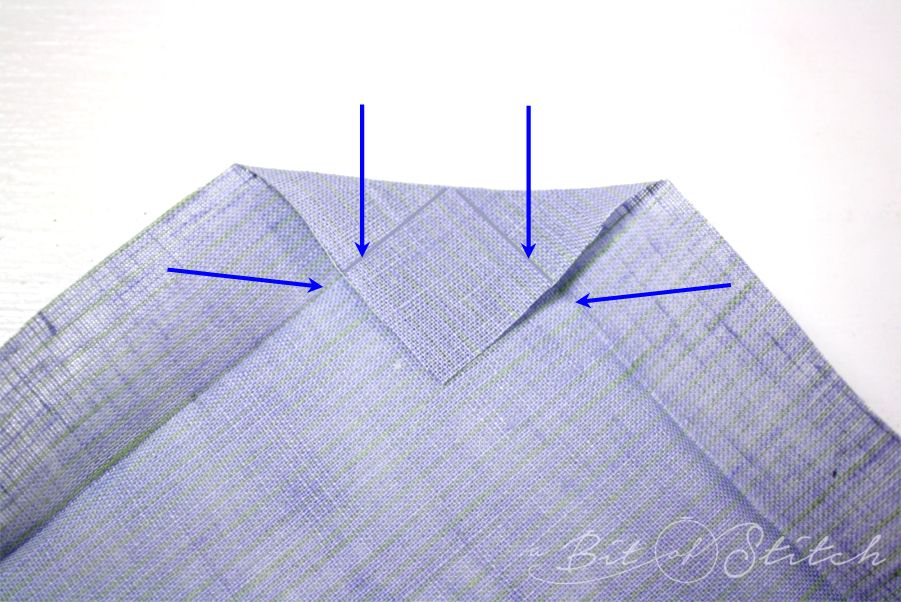
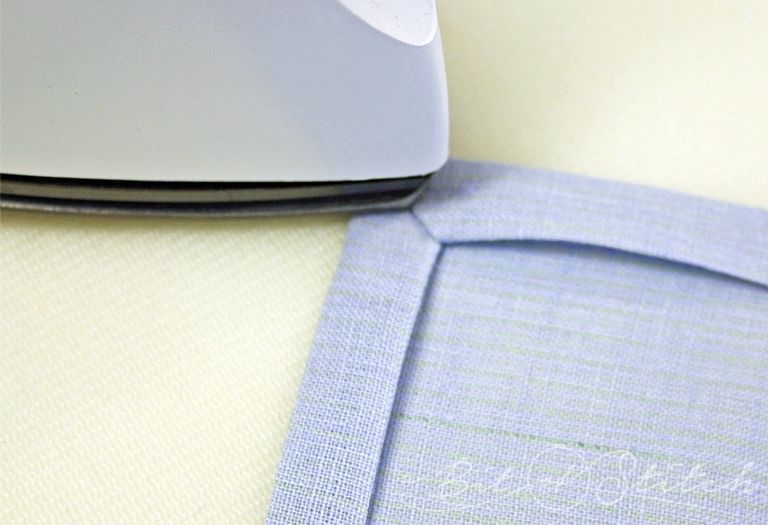
Fold over and press the fabric on the 1” marks. Press all the way across all four sides, creasing the corners well. Now unfold the edges and fold over the point of each corner as shown above. You should be able to align the crease marks on the corner fabric with the crease marks on that 1” fold (see the arrows above). Give the corners a quick press to crease that new fold.
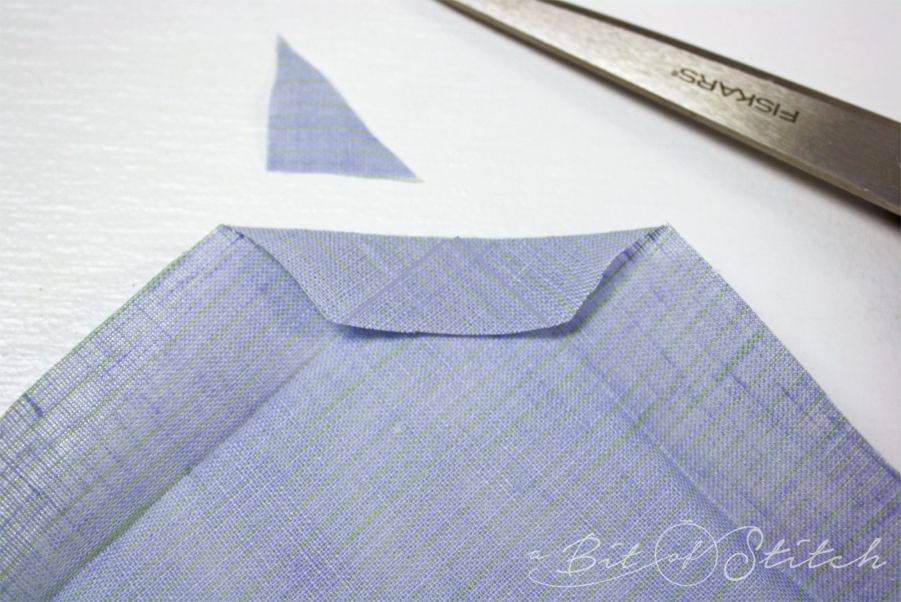
Cut off the tip of each corner, cutting straight across from one 1” fold line to the other as shown above.
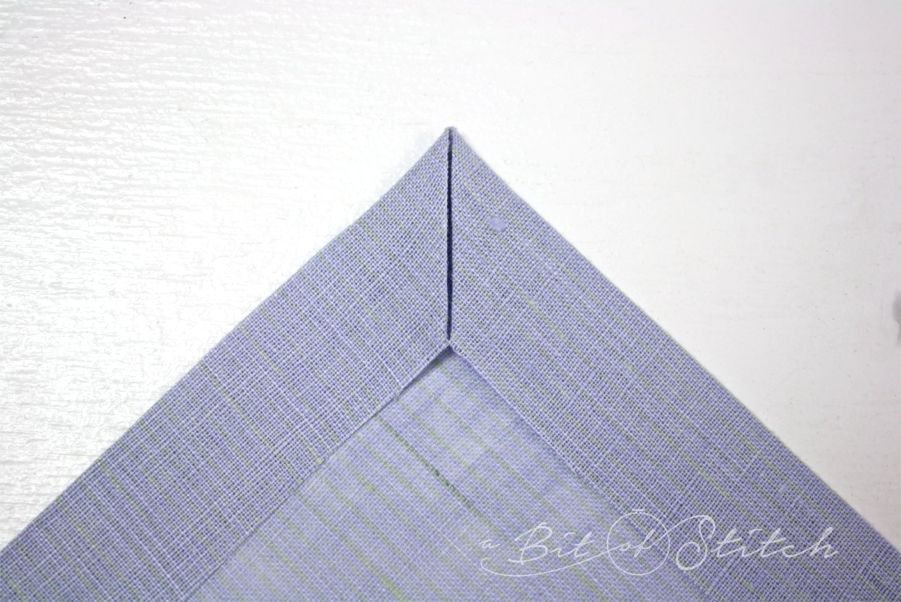
Now fold the fabric back over on the 1” marks again and press well. The corners should meet and miter themselves just like that.
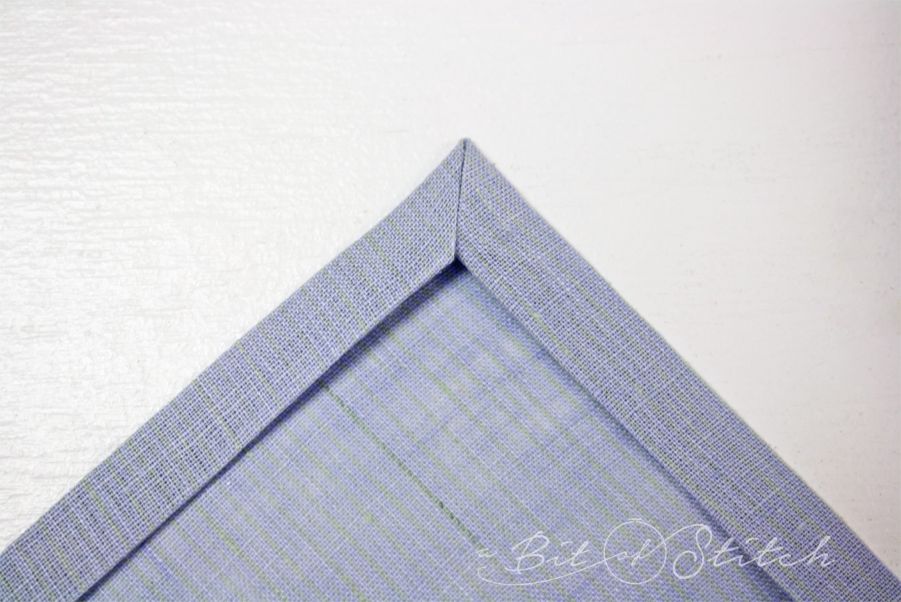
Next, tuck under the raw edges of the hem, folding on the ½” fold lines, and press well. At about this time you will have fallen totally in love with your fabric folding pen if you had not already!
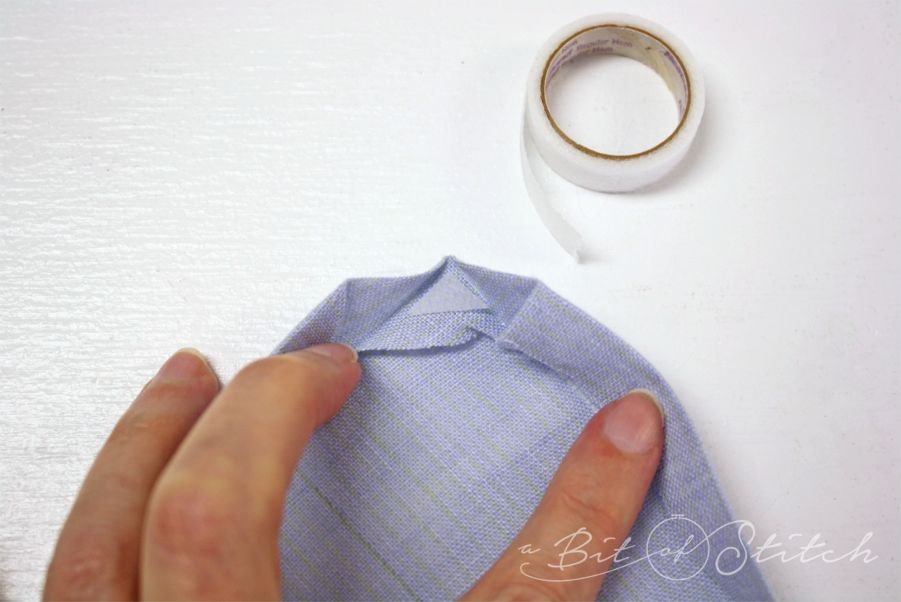
Cut a small triangle of fusible web tape and tuck it up into the tip of each corner under the miter as shown above. You only need a LITTLE triangle, just for the tip as shown.
Press all four corners to fuse the tape and mitered corner in place nice and secure.
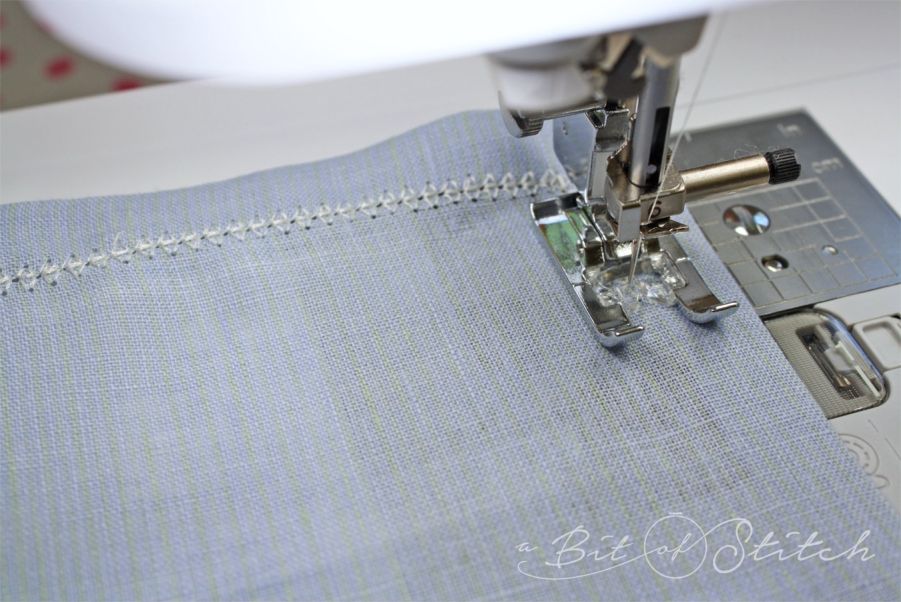
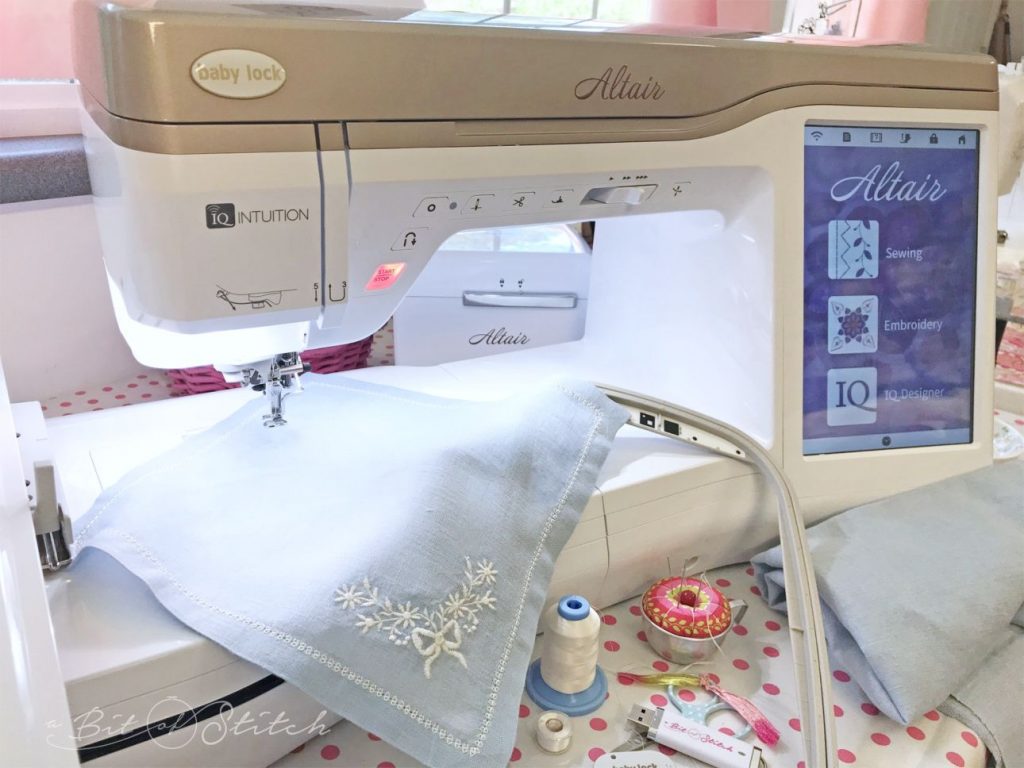
Choose a pretty hemming stitch on your sewing machine and thread the machine in the top and bobbin with the same type and color of thread. I adore using shiny embroidery thread for this step! My Baby Lock Altair has a ton of lovely heirloom type stitches that are perfect for creating detailed hems. Scroll through and see what your machine has; do a few test runs on scraps to get your settings down before you hem your hankie.
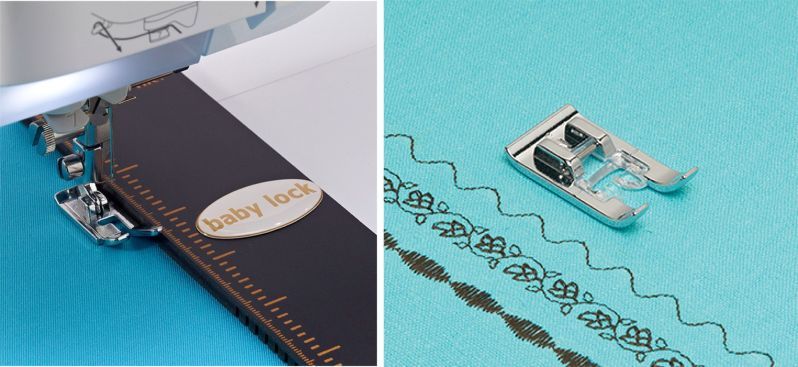
A foot that has a nice wide opening but still holds the fabric down firmly works best – for me that’s Baby Lock’s “Monogramming” foot which works great for motifs.
Since you are using a decorative stitch you’ll be sewing from the right side. If you cannot see through the fabric to easily follow the edge of the fold, draw a line immediately on top of it on the right side for a visual. Turn on that guide beam (if your machine has one) and use it. I was delighted that my Altair has that wonderful feature too!
I love my Baby Lock Flexible Seam Guide because it’s long and sticks nicely to my machine. Instead of aligning it with the foot, I align it with the edge of my fabric and sew gently to let the fabric ride right alongside it, being careful not to let it flip up or scrunch.
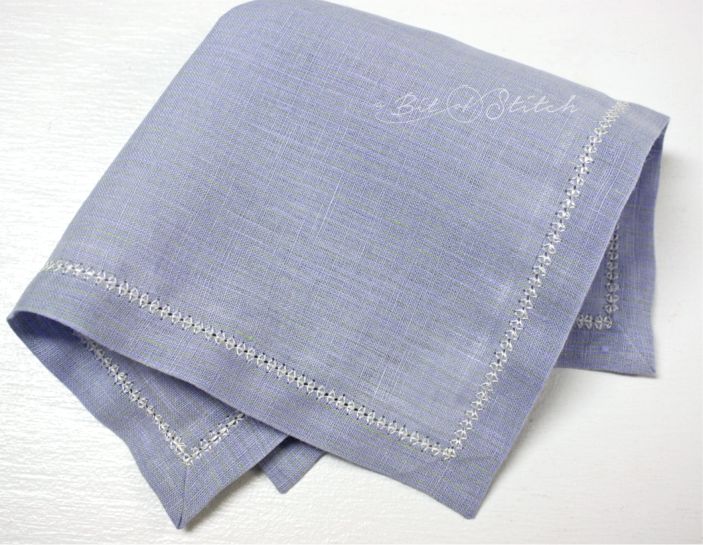
Success!
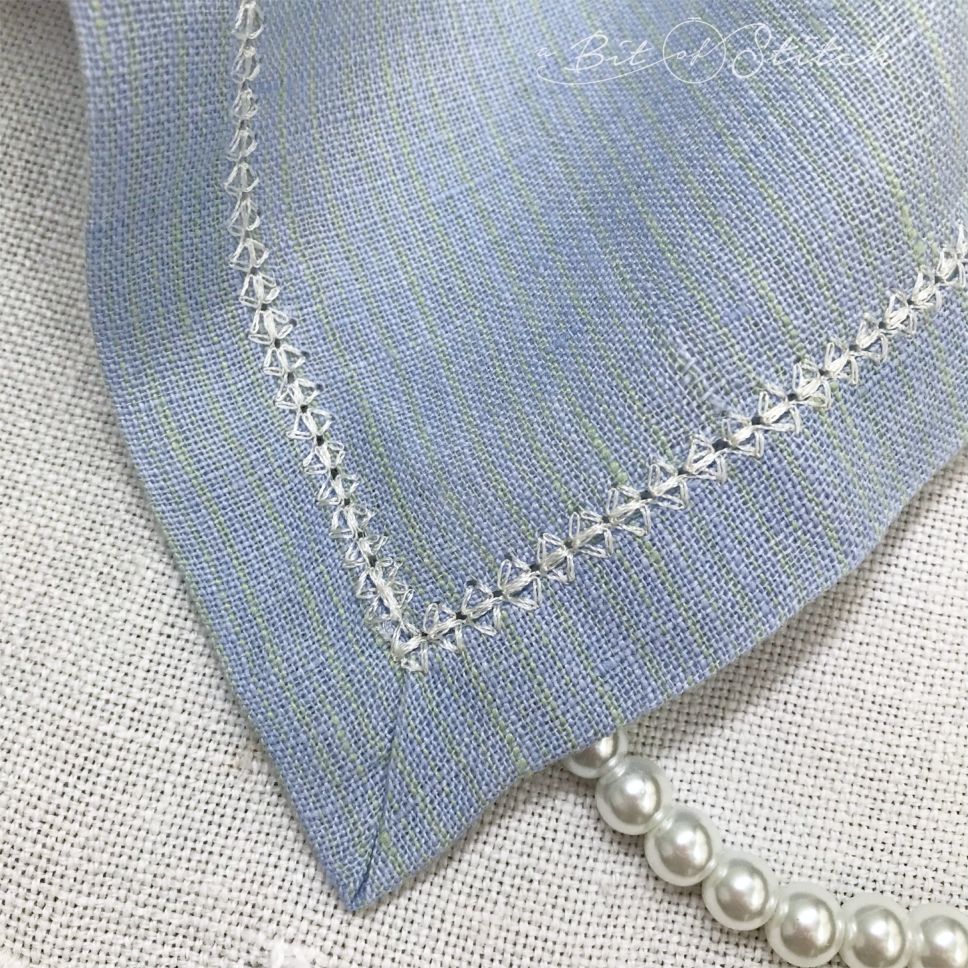
This is what the corner looks like from the wrong side. As pretty as the right side!
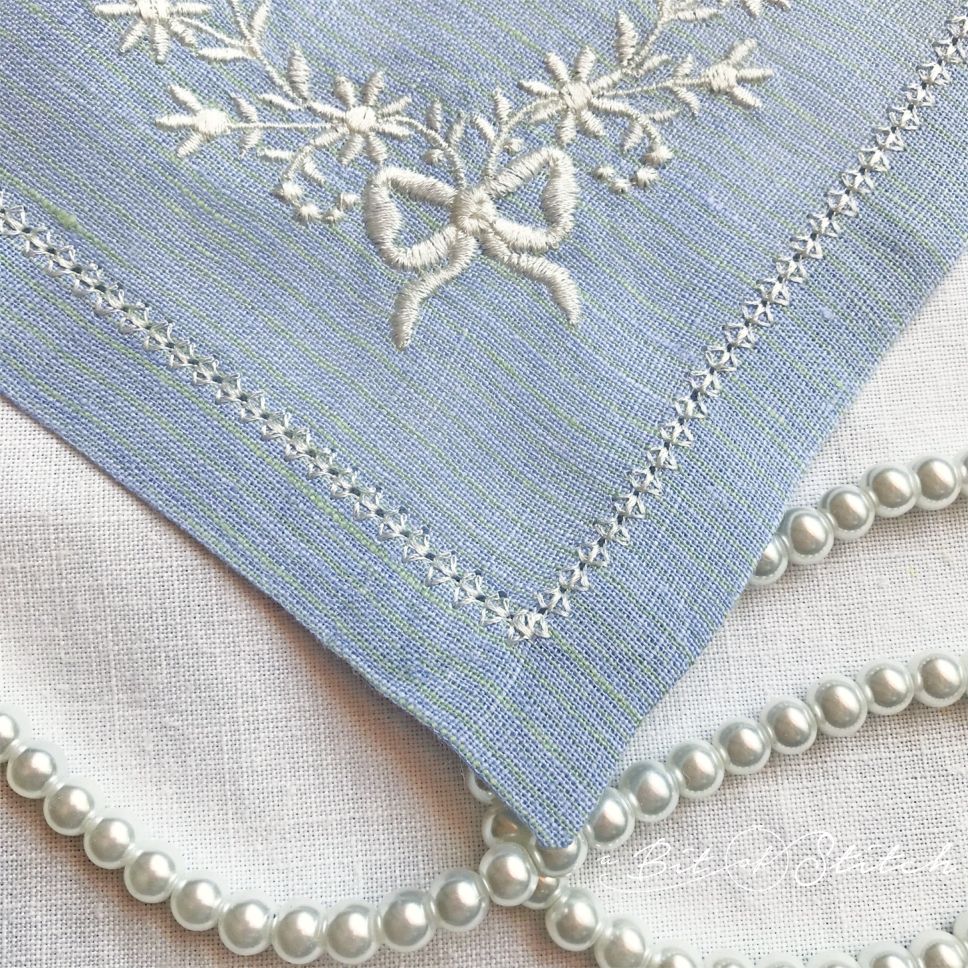
See! Now all you need is some beautiful embroidery to finish it off. I had a bit of fun with the new IQ Positioning App and my Baby Lock Altair.
Oh. My. Goodness. I did not realize how easy it was going to be! As a rather “tech challenged” person, this was one of the last things I explored on my new Altair. Yeah… silly me. Anyhoo, I downloaded the free app and followed the prompts to get my phone talking to my machine and my home’s wireless connection. All of which I probably could have done with one eye open whilst folding laundry – it was THAT easy, and I didn’t once have to call my son or ask the Google.
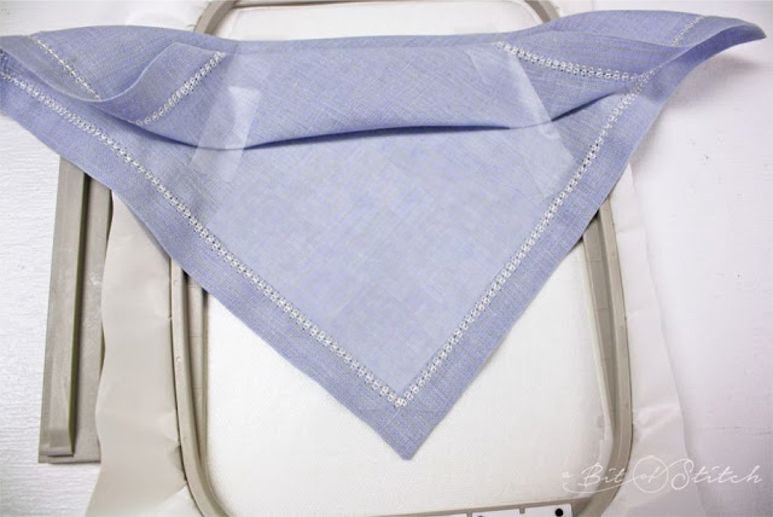
First I got my newly hemmed miter-cheat hankie in the hoop. This called for Dissolve-Away Mesh Self-Adhesive stabilizer hooped release paper side up, paper scored and removed to expose the sticky side after hooping. I tried to get the hankie pretty well centered, not really worrying too much as I knew I could rotate and move the design onscreen as needed later, but I was careful not to cover up the techie stuff on the hoop. My phone needed those to “read” the hoop.
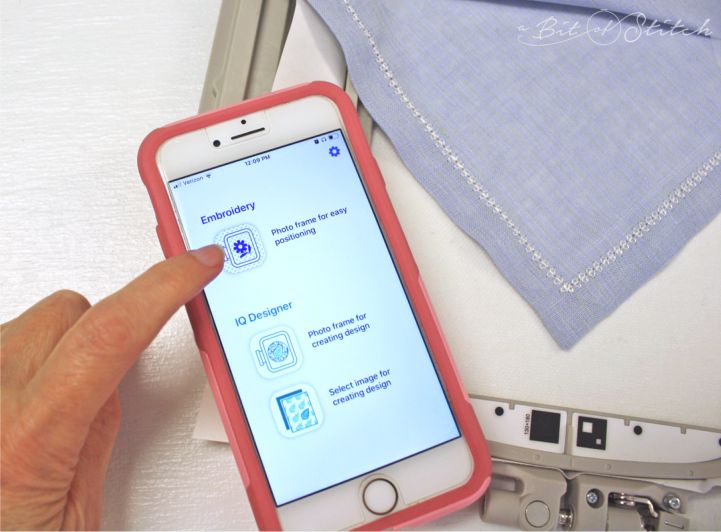
Then I set the hooped hankie on my table, opened my IQ Positioning App and clicked the top choice, “Photo frame for easy positioning.” That smart little app did its magic; I just held the phone and moved it until the whole hoop was in the photo frame, and *SNAP* – it took the photo. All by its little self, EEP!
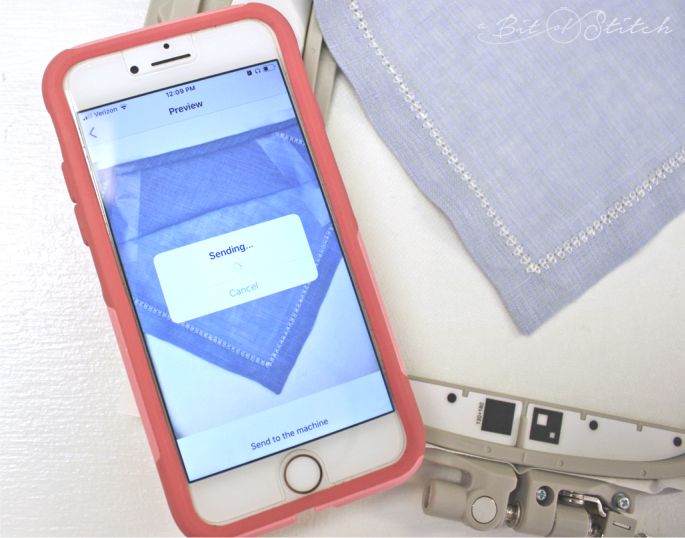
And it said “Sending…”
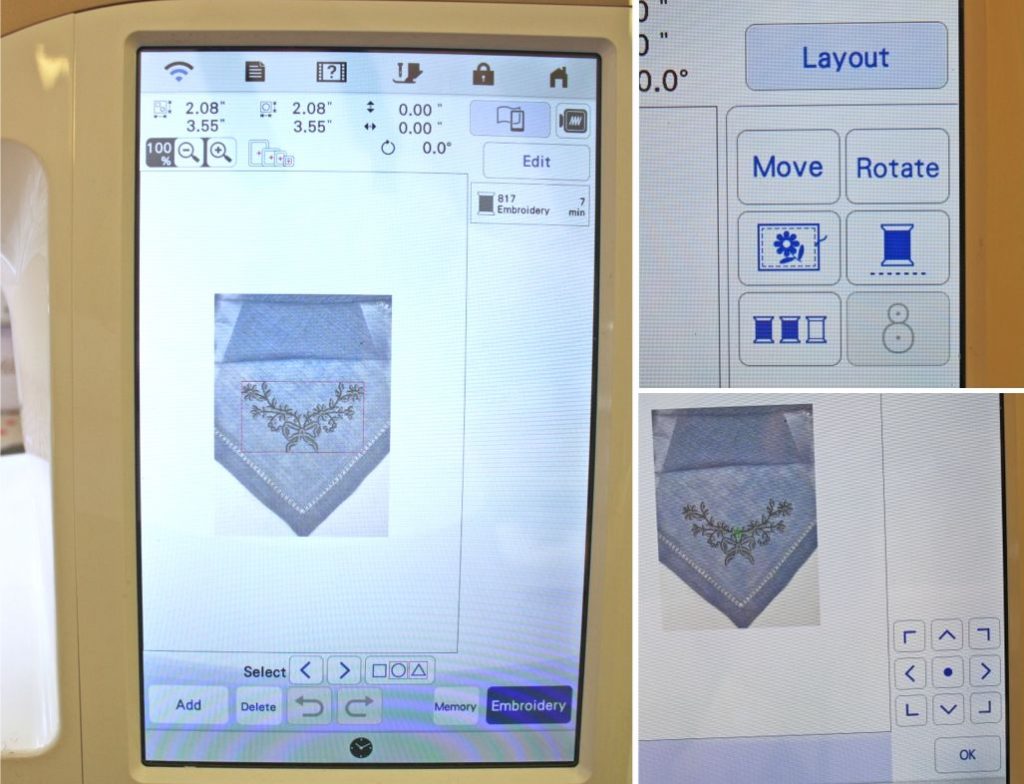
And – *BING* – there it was on my Altair! Wowsie! I may have done a little happy dance, but let’s keep that between us…
I wish I could take a really good photo of what the screen looked like because it’s a photo, not a scan. The difference is quite amazing and I’m not easily amazed, but I sat there and admired it a full minute before I got busy and used the onboard tools to position my pretty little design right where it needed to go.
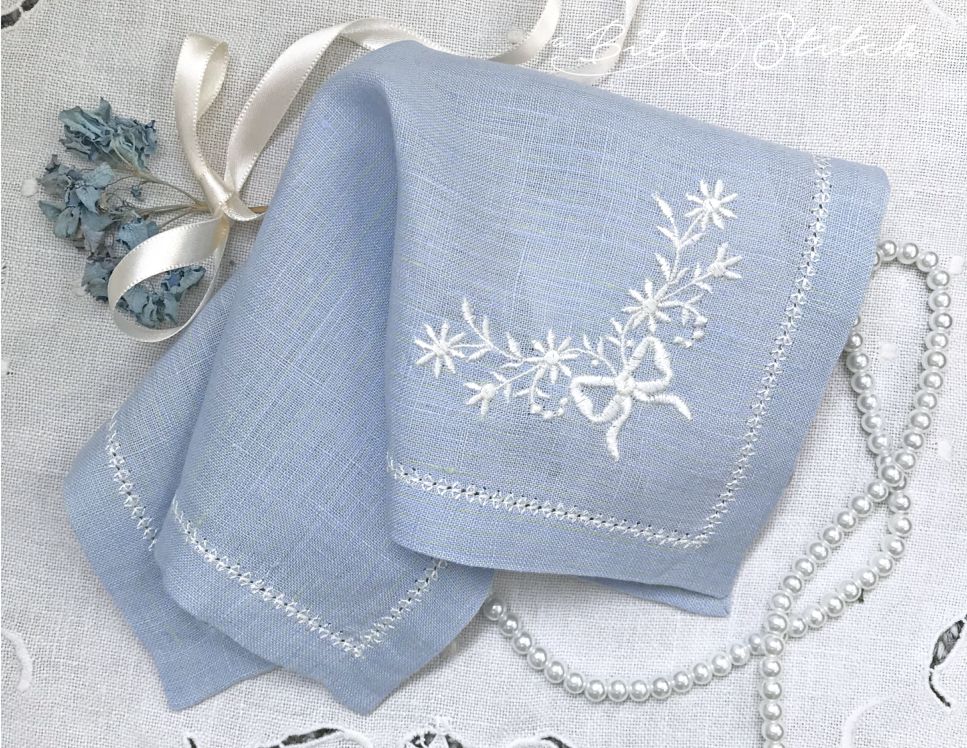
Voila! Sew much fun! Now to make another one, or twelve. 😊
Happy Stitching!
Evy
Click HERE to find these handkerchief designs in the A Bit of Stitch shop!
One reply on “I Miter’ Cheated!”
Wow, what a great tutorial. I have been trying to make hand stitched handkerchiefs. I first tried to order them, what a fiasco, tried to straighten grain after removing their stitching, couldn't even pull a thread. Tried to find good handkerchief linen. ( Can't believe it was at Farmhouse Fabrics all along. I get most ALL of my fabric there. Now, I do wish that I had that machine and placement app, but I think that with the good fabric and the folding pen (which I had kept telling myself I didn't need) I can probably actually create a handkerchief. Next goal-uncle's birthday in August. Fingers crossed. Thanks so much!!! PS love your new website!