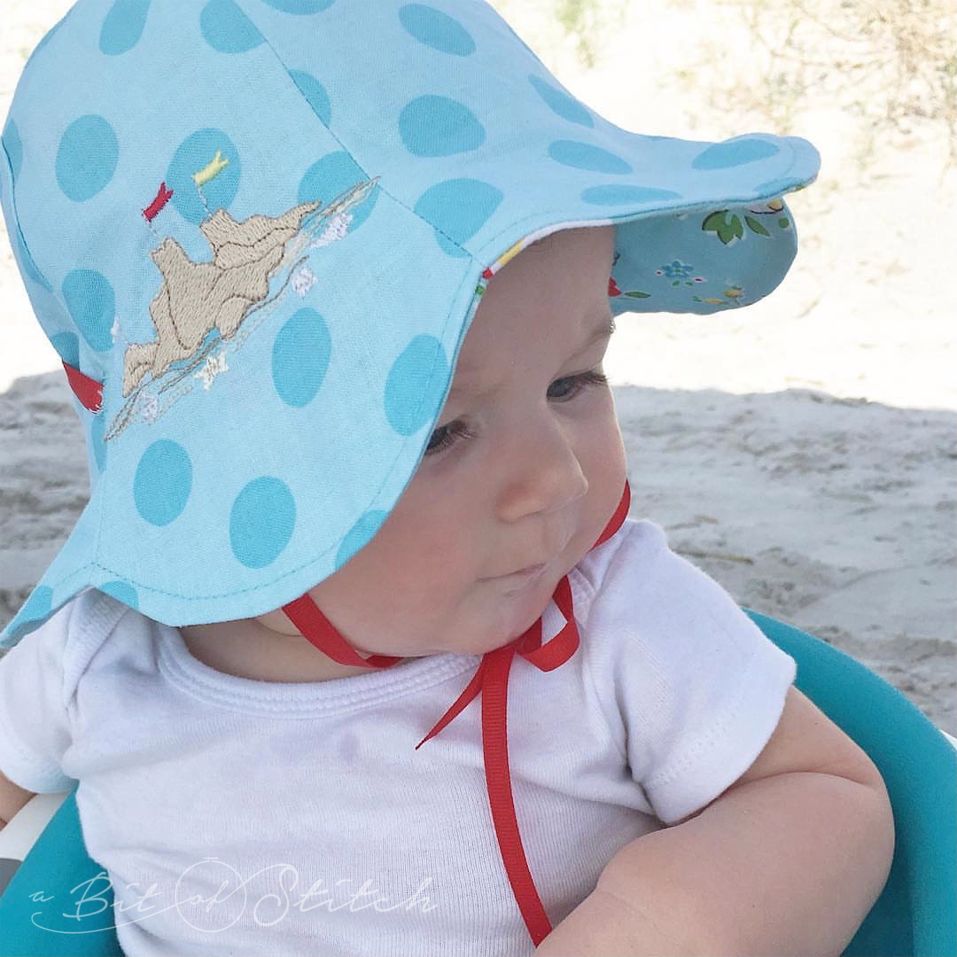
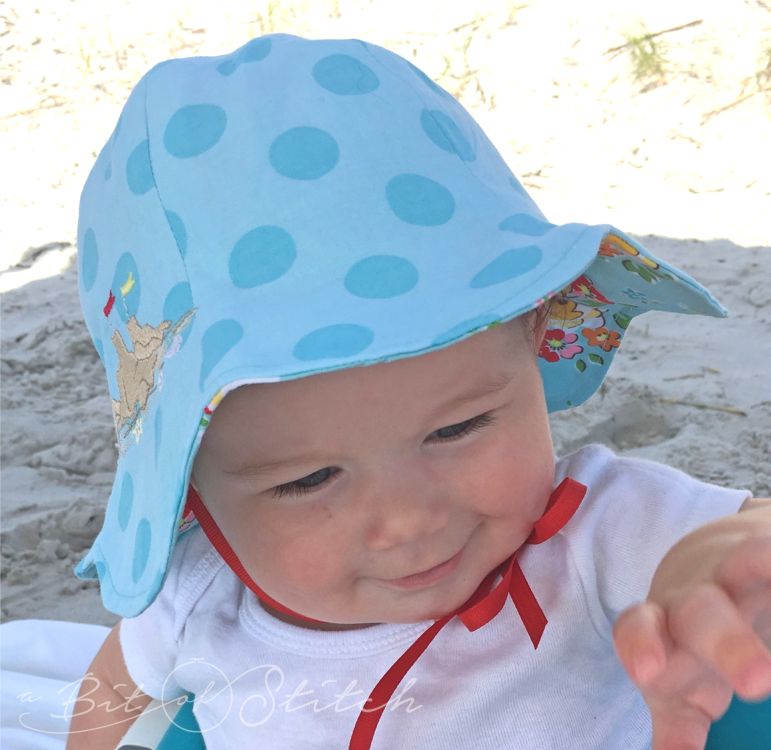
I just fell in love with The Cottage Mama’s Tulip Petal Sun Hat pattern, and since Baby Kate was heading to the beach for the first time, of course she needed Gramma to make her one! I had trouble deciding which cute Riley Blake print to use for the outside, so I decided to make my Tulip Petal hat reversible. Two hats in one!
Want to make one too? Go to The Cottage Mama’s blog and look for her “Free Summer Sewing Patterns for Girls” post. Scroll down to find the “Tulip Petal Sun Hat” pattern (click on the words written under the hat photo on her blog). Then download the hat pattern, print it, and follow along Lindsay’s excellent instructions in her blog post to begin your hat.
Note: Baby Kate is 5 months and although she is a very healthy sized baby, I did have to resize this pattern smaller to fit her. I just printed the PDF at 80% instead of 100% and that did the trick. For smaller babies, you might want to print a few pattern pieces out at different percentages to see what will work best.
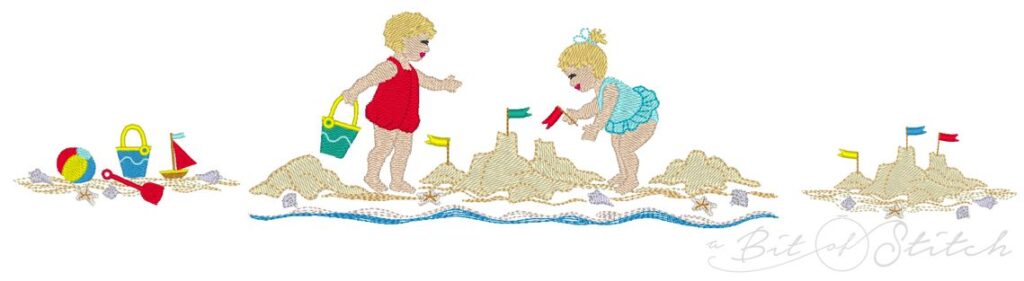
You know I would “need” to put embroidery on one side – No kidding, right? That was easy as I had the perfect beach themed baby designs! The little sandcastle is from my Baby’s Beach Fun collection.
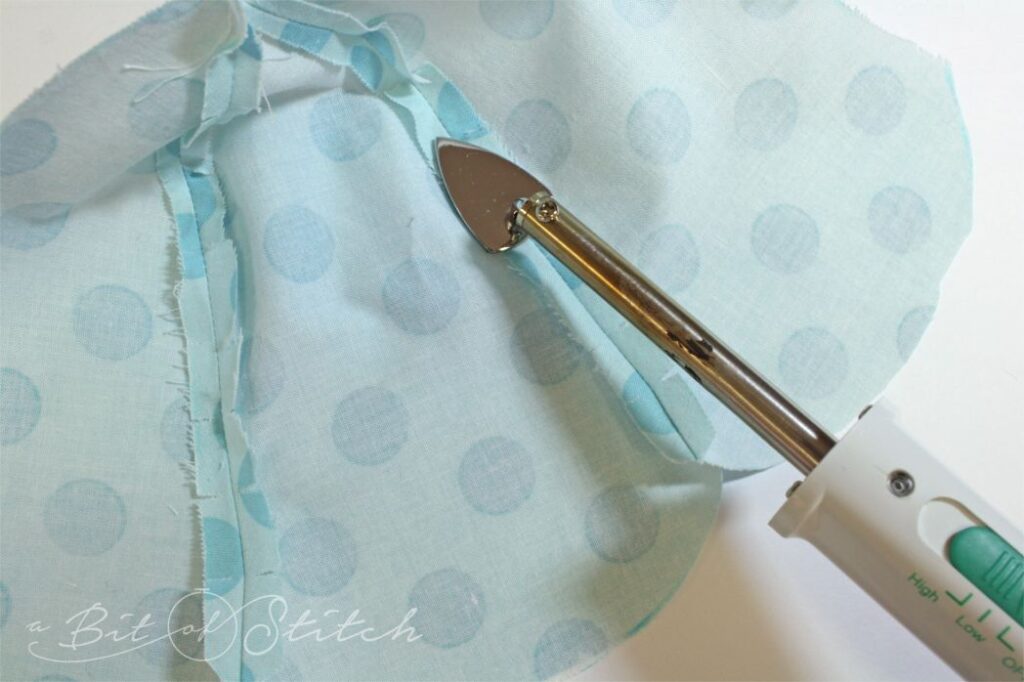
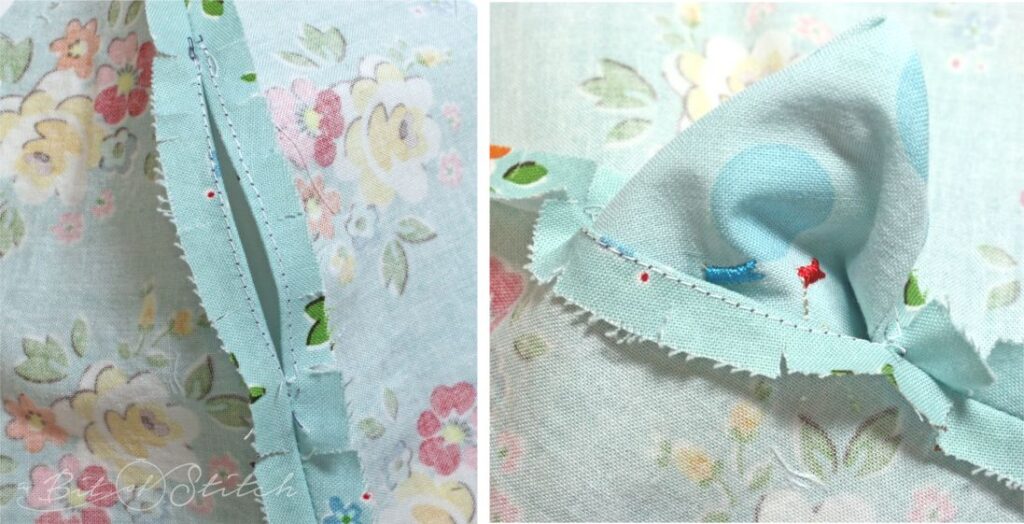
After joining three pieces together I clipped my seam allowance selvages and pressed them open using my Clover mini iron. Oh my, that little iron works so much better for little curved areas than my regular iron! Just spritz the fabric with water – voila, steam!
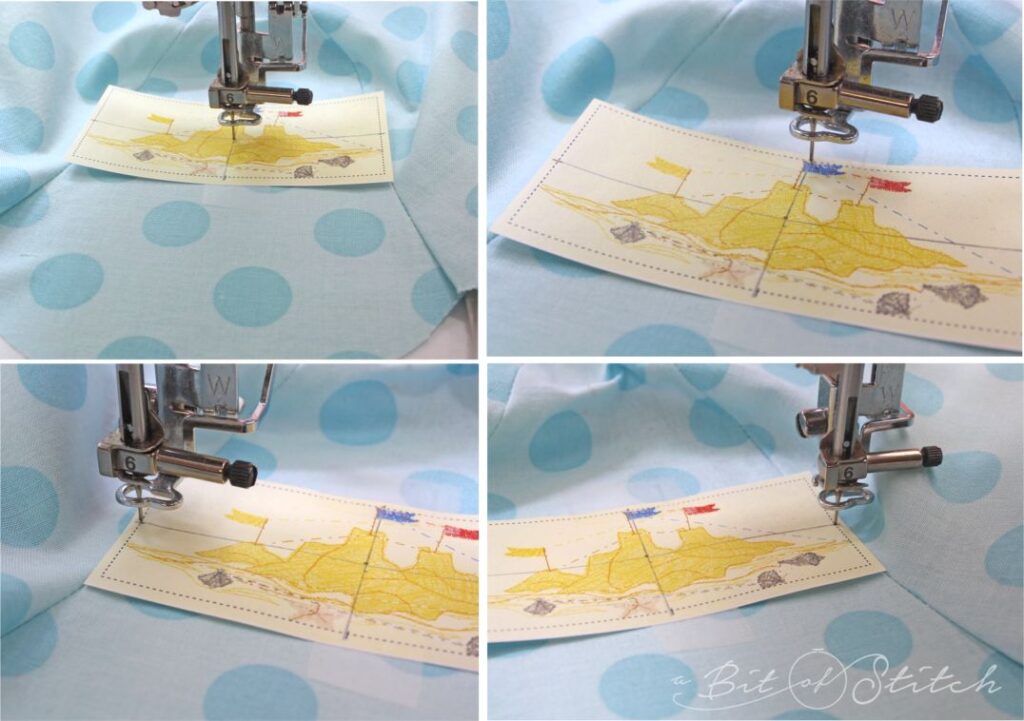
It’s helpful to print paper templates of your embroidery designs when you need to be precise with placement. (Unless you have a Baby Lock Destiny of course, then you can just scan the fabric in the hoop and drag the design on the machine screen to where you need it to be – Oh. My. Goodness. That is so easy!) Paper templates usually have the horizontal and vertical centering marks to make placement easy. I wanted the sandcastle to sit right at the crown, so I lined up the bottom of the design so that it would be where the brim would break naturally. I found it easier to stick my hat portion to stabilizer that had been sprayed lightly with temporary spray adhesive than to hoop it.
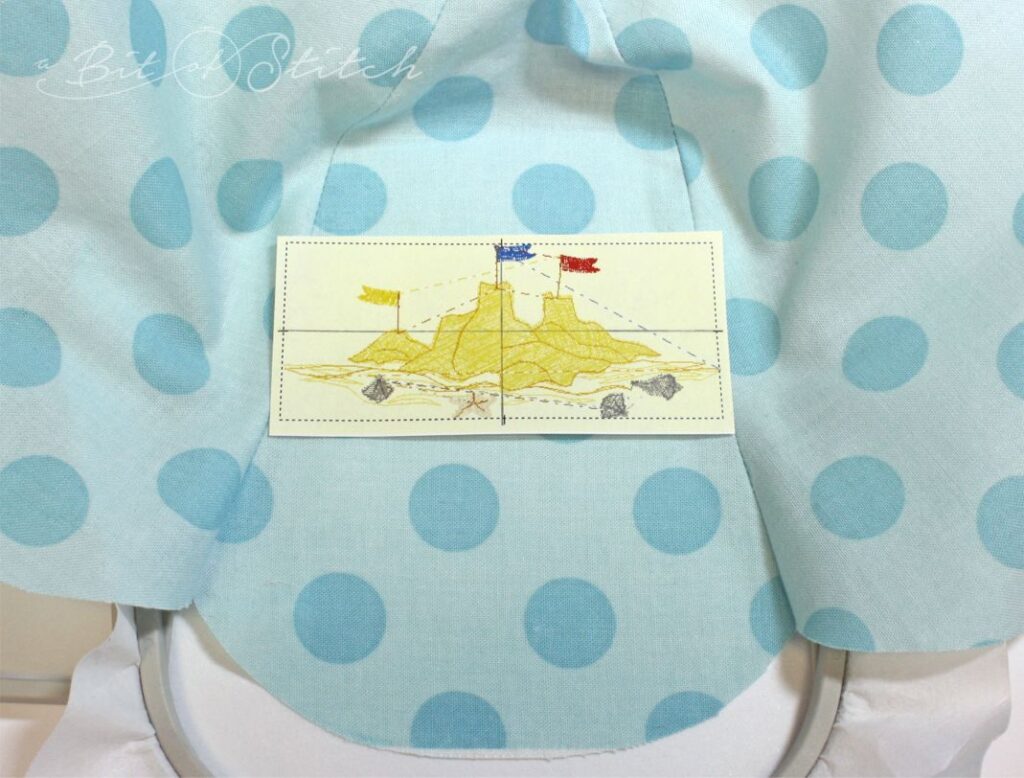
Sans built-in camera, the best way to align a design is by using the on-board design placement tool – the little trial key that allows you to trace the outline of the design by traveling to certain points. Use that key to find the center, top/bottom and left/right points on the horizontal/vertical placement lines. Drop the needle (by pressing the needle down button) into each point, moving from point to point. You will easily be able to see if your design is correctly aligned and can make adjustments as necessary with the edit/move tool in the machine if the needle doesn’t land on point.
Note: If your machine does not have this trial key, use your hoop placement grid and paper template to correctly align the design. CLICK HERE to read more about aligning designs using templates and/or trial keys.
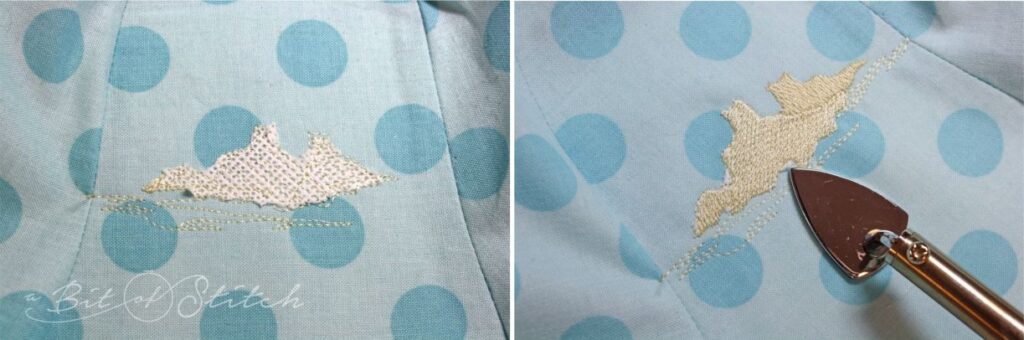
Sometimes when you stitch very light colored thread on printed background fabric, the print tends to color the stitched area in a not-so-nice way. I solve this issue by using undercover material made of 100% polypropylene. (Click HERE to see more about that.) In this design, part of the sand stitches below the actual castle and I didn’t need undercover material there, so I allowed those stitches to sew first. When the machine began stitching the underlay stitches tracing the shape of the castle, I stopped the machine, cut the thread, and placed a piece of undercover material over that area.
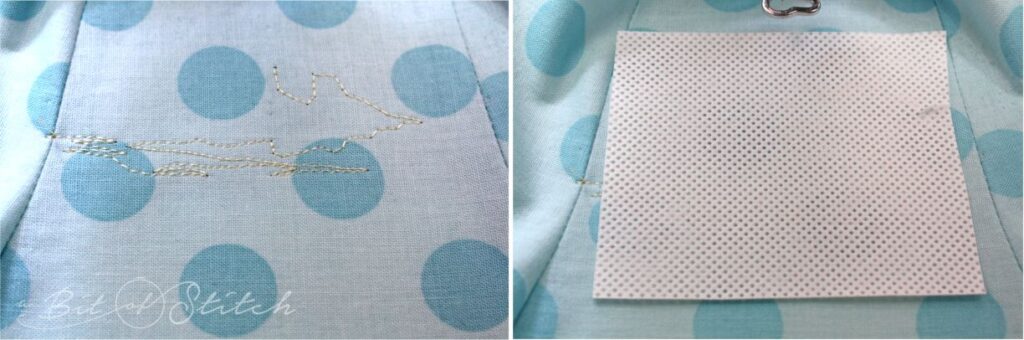
I closely watched the design stitch all of the underlay stitching, stopped the machine right as it began the fill of the castle, and carefully removed as much of the undercover material before I continued. (It’s always a good idea to test stitch designs so you know how they will proceed!)
This undercover material is soft and very light, so it won’t change the look or feel of the finished design. Best of all, any bits that stick out past the design can be melted away with the tip of your mini iron!
I decided to leave the opening for turning in one of the hat’s side seams instead of the brim. (I was trying to find the straightest point, and that seemed easier to me, but you can put this opening anywhere you choose.) I like to stay stitch openings through which I am planning on man-handling fabric as I have the terrible tendency to be rough, so I did that first, sewing a line of stitches just on the outside of where the seam allowance was. When I sewed the seam, I began on each side a slight distance before the stay stitching line ended. I clipped my curves once again, even at the opening.
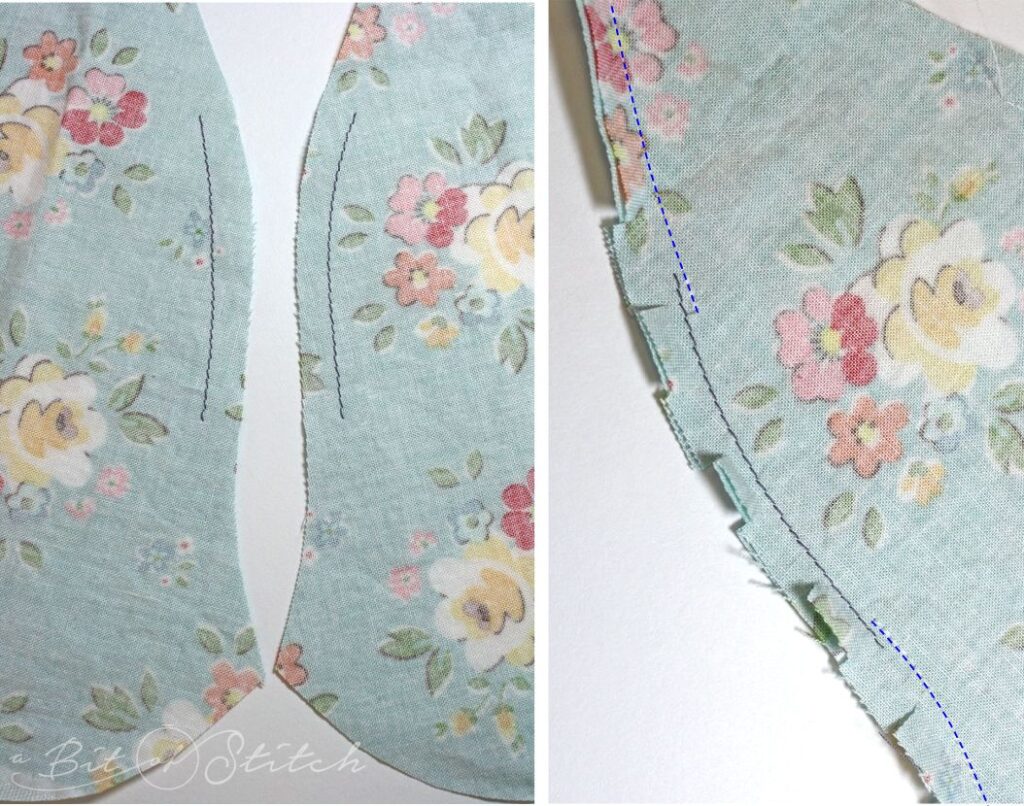
Once again, the mini-iron came in handy for pressing that seam allowance selvage, allowing me to very precisely press the slight curve of the opening. The stay stitching needs to be slightly to the inside so it won’t show on the outside when finished. This gave me a nice, sturdy spot to turn my hat right side out.
Once the hat was complete, pressed well and opening slip stitched closed, I sewed two tiny buttonholes using my Baby Lock buttonhole foot through all layers at the brim area of the hat, one on each side, positioned so they will sit right above the ears.
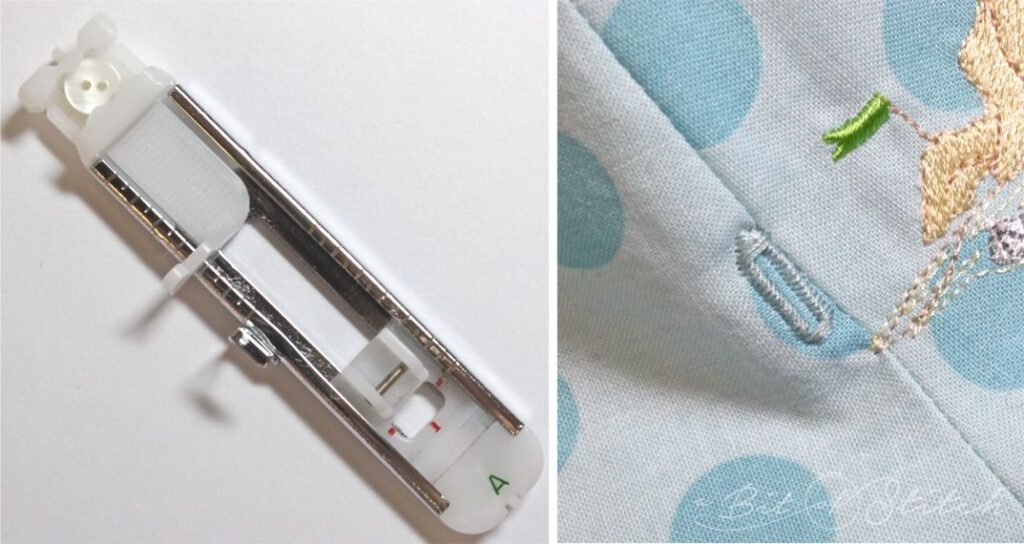
A long length of ¼” grosgrain ribbon threaded through the buttonholes and up around the brim at the back made a perfect, easily removable and replaceable tie. If you do not add embroidery, or if your embroidery is lower on the brim, you could allow the ribbon to lie across the front of the hat or even over the top. Either way, it keeps the hat on the baby in a breeze!
Thank you, Lindsay, for this great free pattern! I have a feeling I’m going to be making many more Tulip Petal hats as baby Kate sure seems to be enjoying her first one!
Thanks for reading! Stay tuned – more fun summer sewing projects coming up! Please feel free to leave me a note and tell me if you enjoyed this post and what you’d like to read MORE about. 😄
Evy
8 replies on “Tulip Petal Sun Hat Made Reversible”
LOVE LOVE LOVE BABY KATE!!! she is so munchable! the perfect model too. oh yeah and the sun hat just adorable! congrats gandmom BABY KATE IS A BEAUTY!!!! GOD BLESS
LOVE LOVE LOVE BABY KATE!!! she is so munchable! the perfect model too. oh yeah and the sun hat just adorable! congrats gandmom BABY KATE IS A BEAUTY!!!! GOD BLESS
What a lovely baby! What a nice hat! Thanks a lot for the tutorial!
We have a 14 month old grand and will try making this for her. I tried hard for a Kate, love that name, but we have a Sloane. Thanks for the tutorial. Great idea adding the buttonholes.
Thank you Leslie! I'm so smitten with her 🙂
Thank you! You are welcome, glad you enjoyed it!
You are welcome! Thanks for reading!
Hello Evy.Thank you so much for sharing this work. We love this pattern and we have thought that it would be perfect for our little nephew. He is now 4 months old. We have just found the pattern in the Lindsay´s webpage. Now we are struggling to adapt it to a smaller size as the pdf is for babies between 2 and 5 years old. Could you please tell us how you modifyed it for your granddaughter? We´ve read carefully your instructions but we are afraid that we are not understanding them properly. Thank you for your attention. All the best. Carmen and Gema.