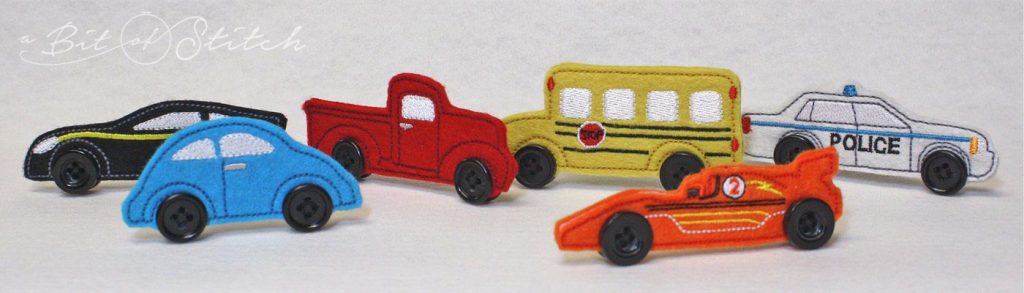
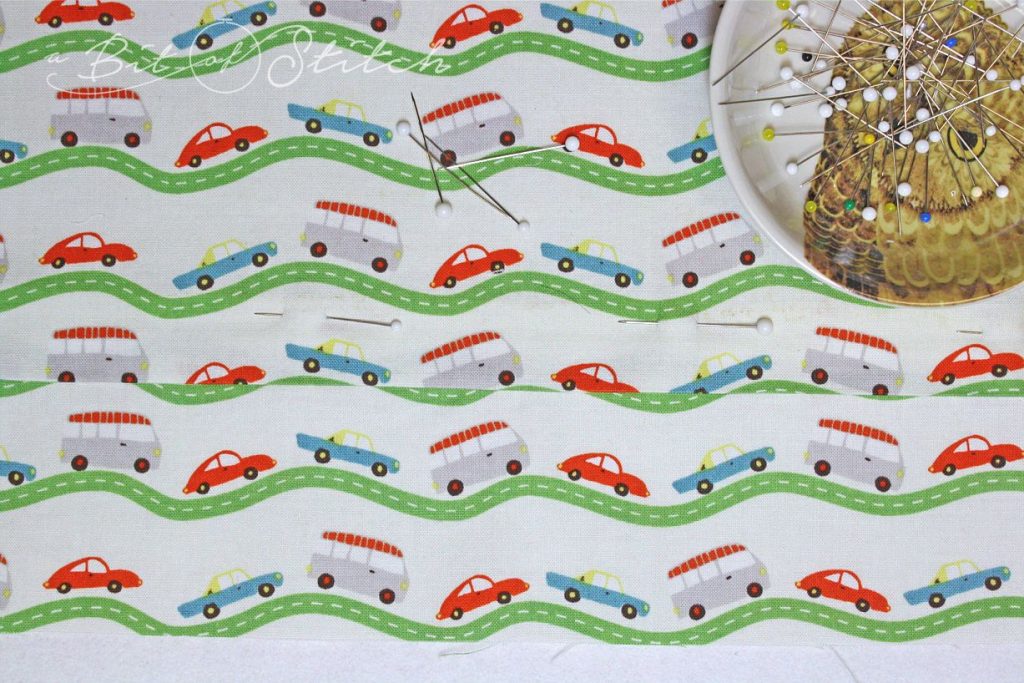
How cute is this fabric from Riley Blake Designs! I love pretty much everything they come out with, but this Wheels 2 print by Deena Rutter just fired up my imagination. Of course it meant I had to make car designs… and not just sew-them-on-something designs, but play-with-me designs! Check out this little set of made-in-the-hoop felt vehicles that perfectly coordinates with this fabric – Vroom!
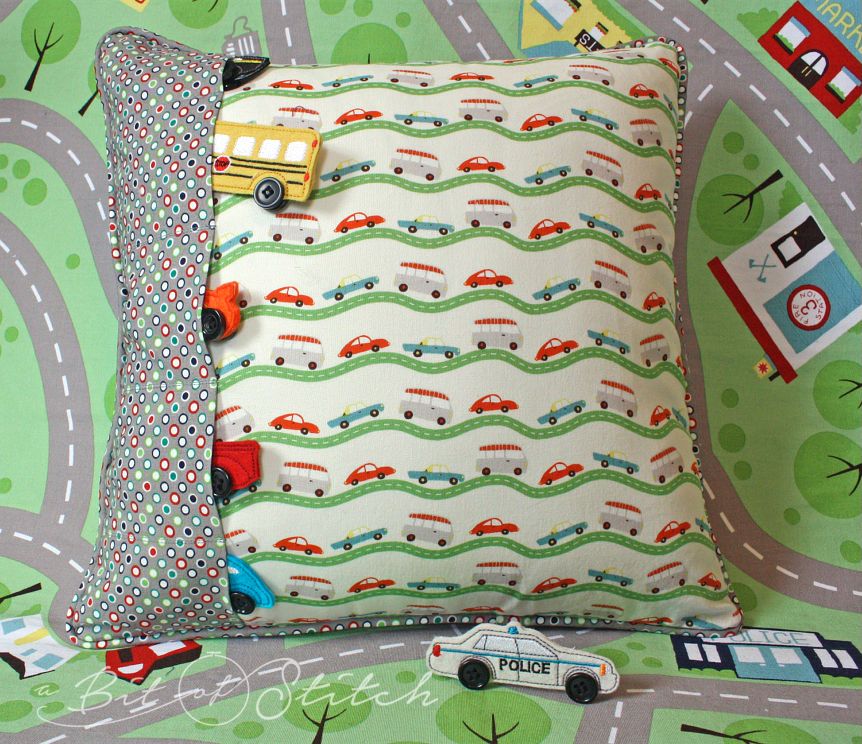
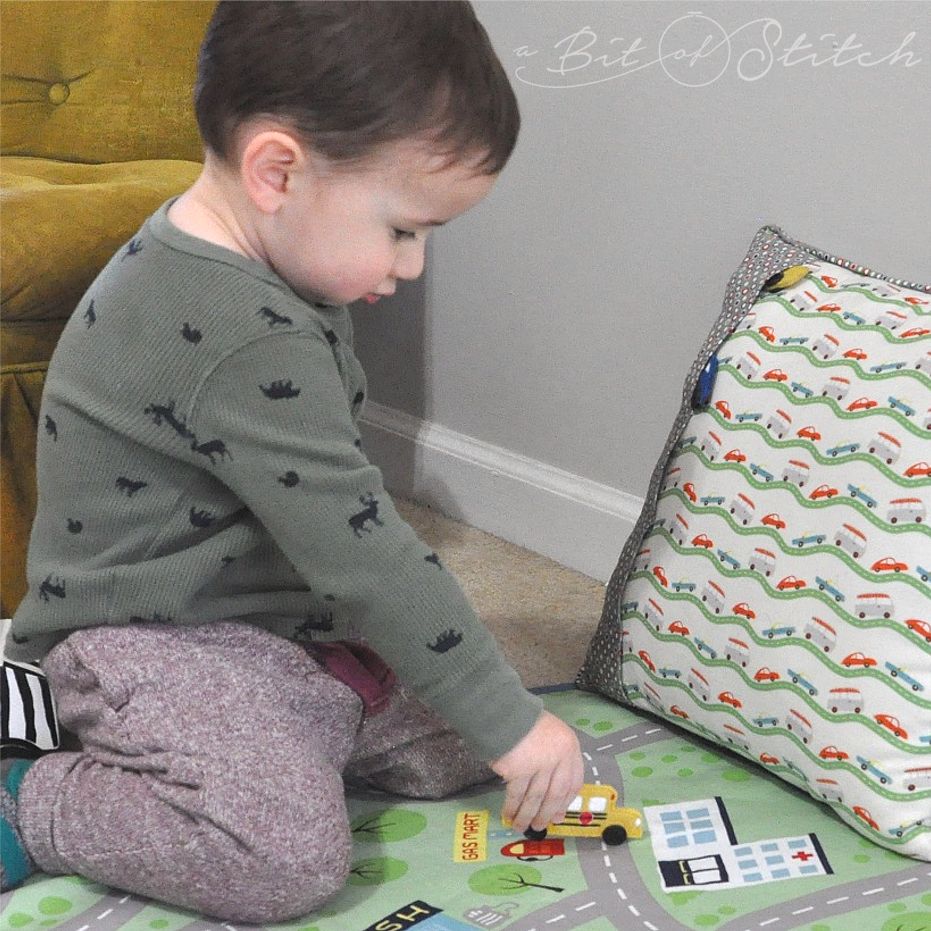
One thing led to another (as usual) and soon I “needed” to make a place for Des to park his little felt cars. Pockets make great garages! Because this is for a child, I made my pillow cover removable with a hidden zipper so the cover can be washed easily.
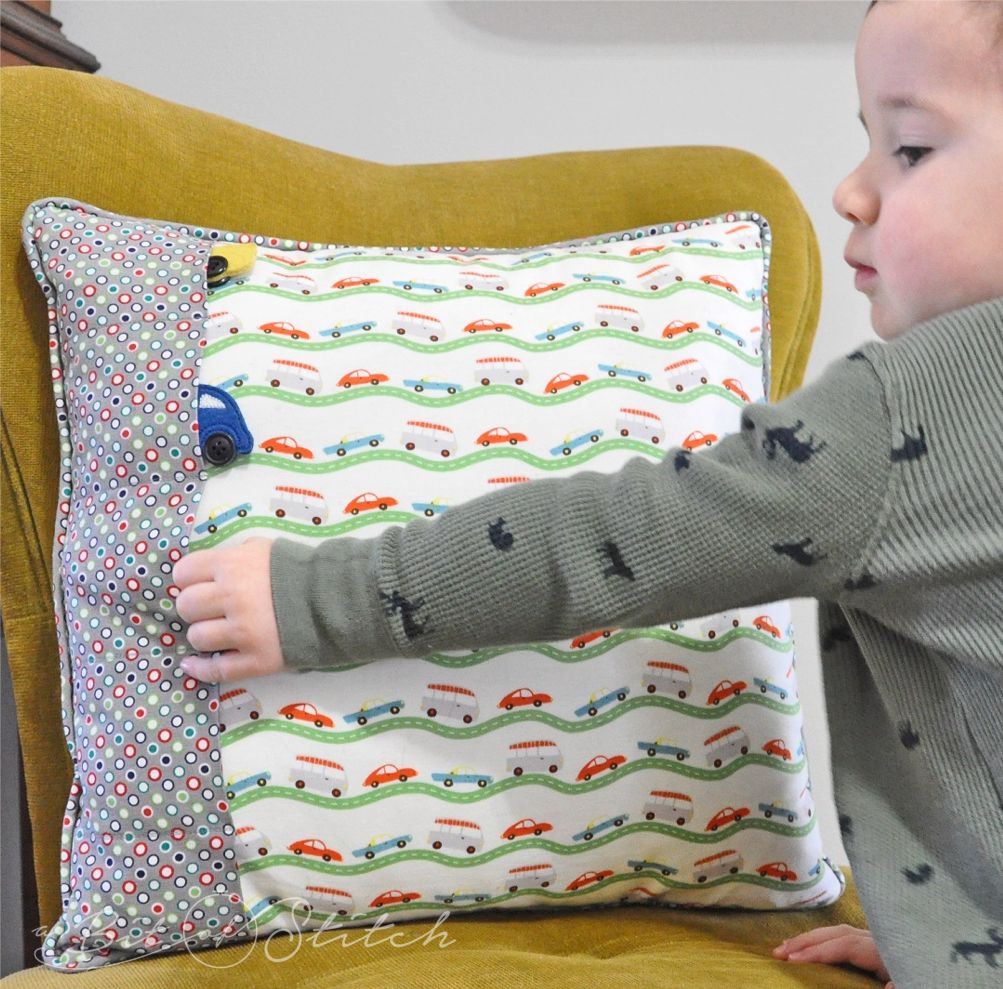
Want to make a pocket pillow for your little? These pockets will hold miniature vehicles of any kind, wee stuffed animals, or even tiny books.
You’ll need fabric for the pillow cover and contrasting pocket. You’ll also need a 22” zipper, sewing thread, and a purchased (or made) 14” pillow form. If you wish to add piping as shown, you’ll need about 62” of covered piping. You can either make your own with extra coordinating fabric and ¼” cord-to-cover, or use purchased ¼” wide piping. I recommend that you pre-wash your fabrics.
The fabrics used for my pillow are Riley Blake’s Wheels 2 Road Cream for the main part of the pillow cover and Wheels 2 Dots Gray for the pockets and piping. There are lots of cute prints in this line, so check them all out before you choose!
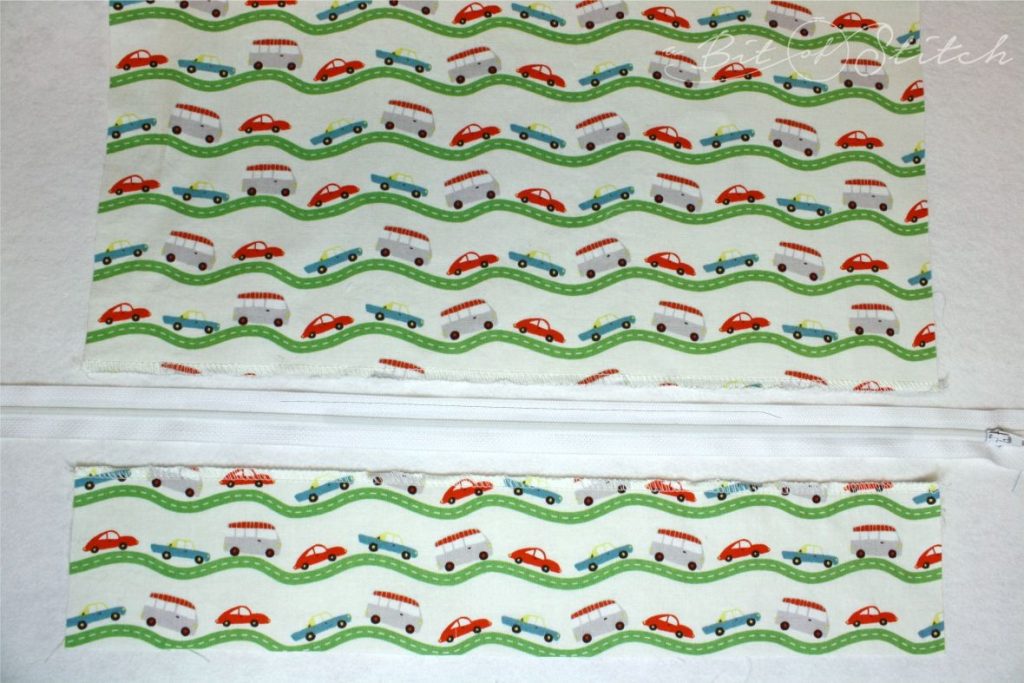
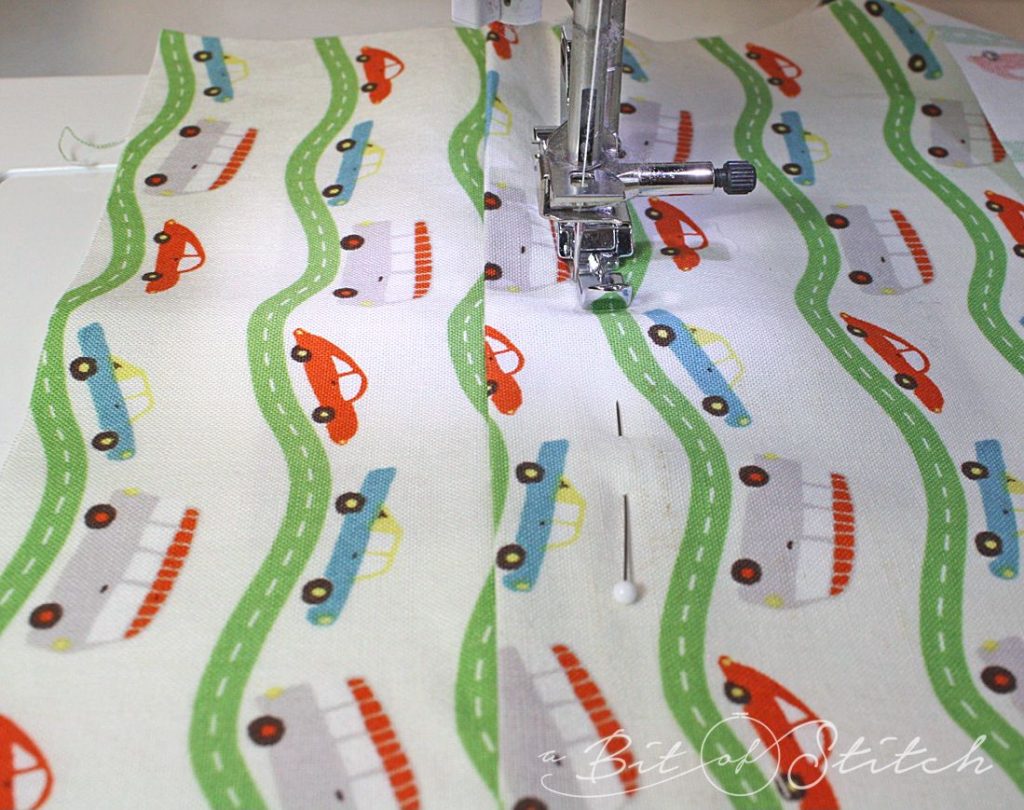
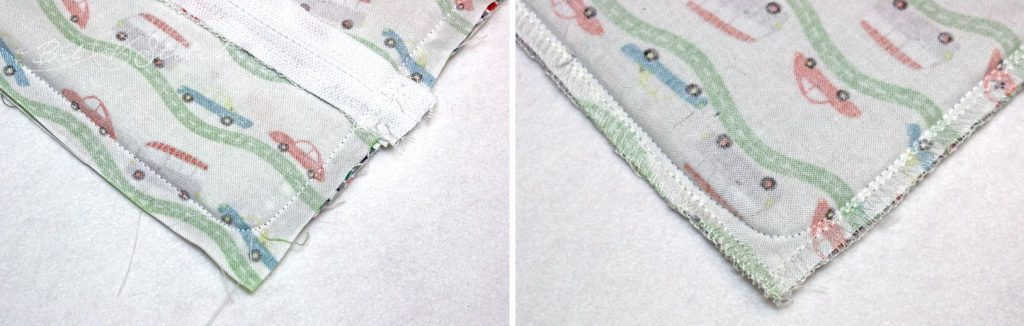
Cut a 15” square for the front pillow piece. Cut two pieces, 15” wide by 13.5” tall and 15” wide by 2.75” tall, for the back pillow piece. (The short piece will be on the bottom of the pillow back, the tall piece on the top as shown above.) If your fabric has a directional print like the little car print I used, keep that in mind while you are cutting. Serge or zigzag the bottom 15” end of the tall piece and the top 15” end of the short piece.
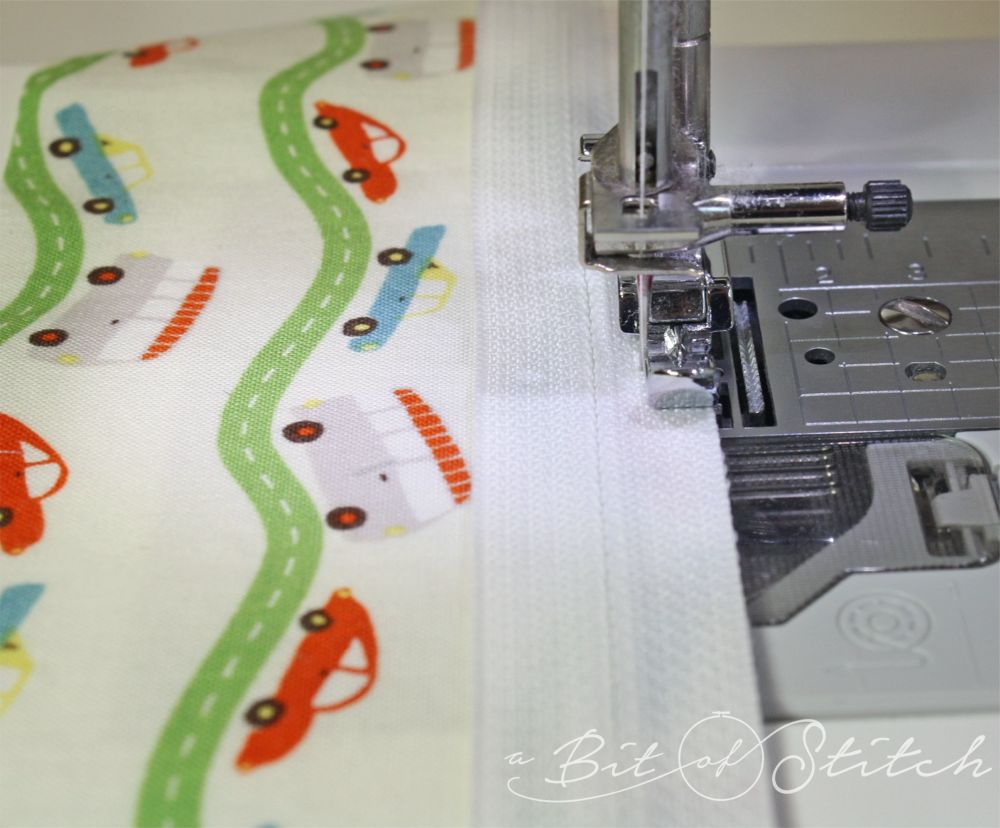
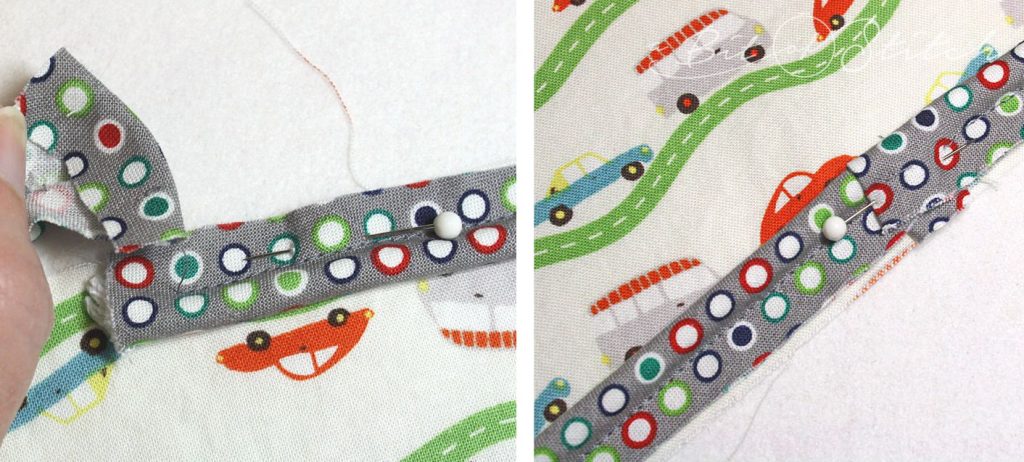
Place the zipper and the top serged edge of the short piece right sides together and sew the zipper to the fabric with your narrow zipper foot. Allow the zipper to extend past the edges at both ends.
Repeat for the other side, sewing the zipper to the bottom serged edge of the tall piece, right sides together.
Finger press the seam along the zipper on the short fabric piece and top stitch close to the seam.
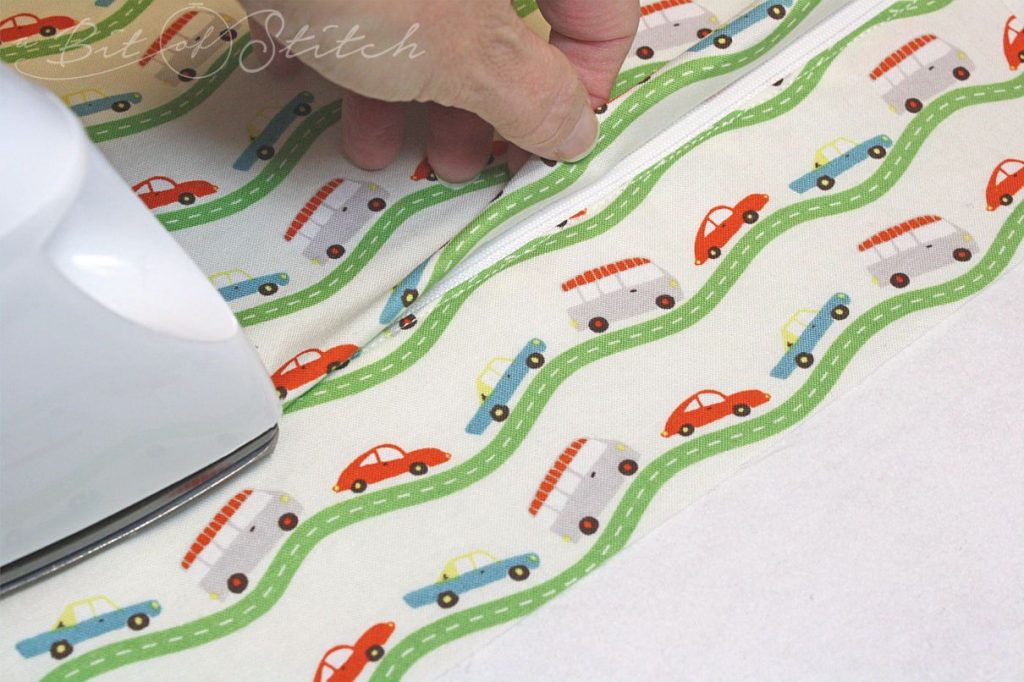
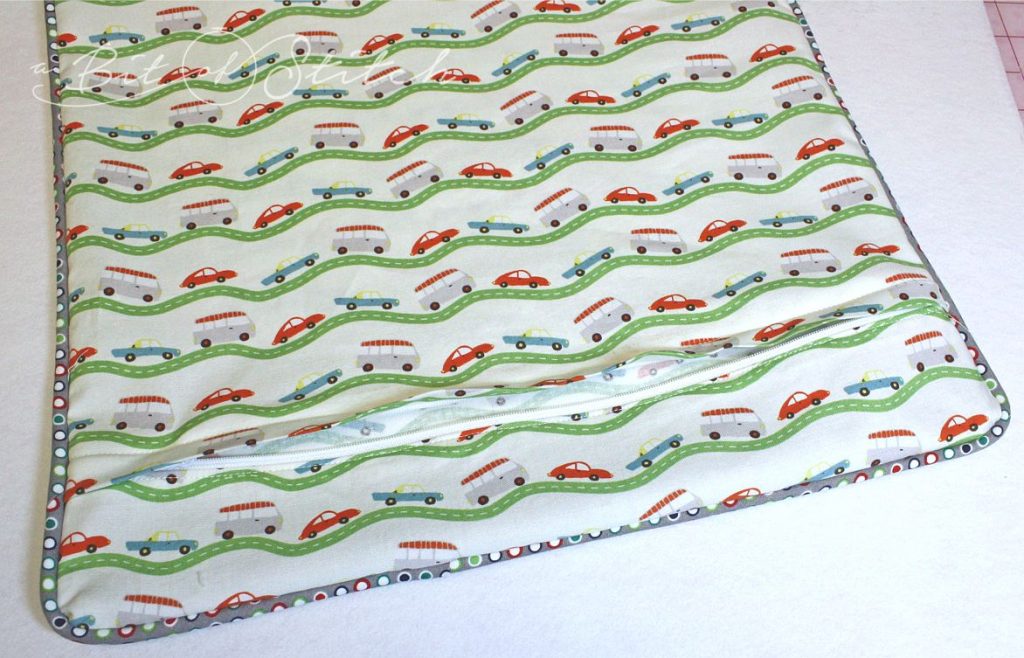
Create a fold in the top (taller) fabric piece that comes down far enough to cover the zipper, and press to crease the folded edge.
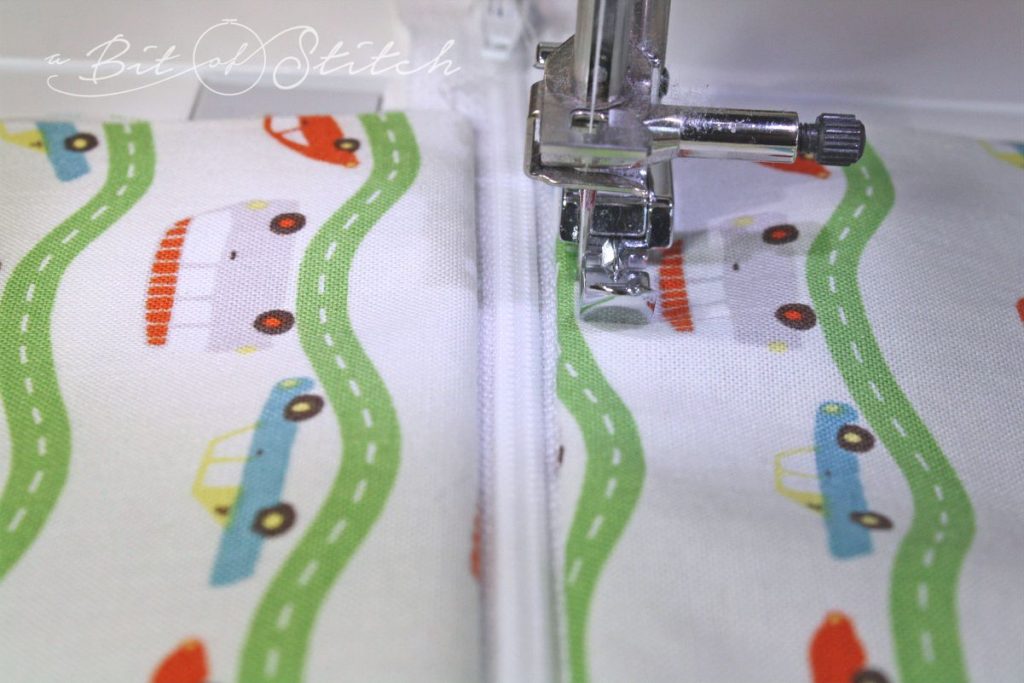
Pin the fabric to the zipper above the fold and above the zipper teeth.
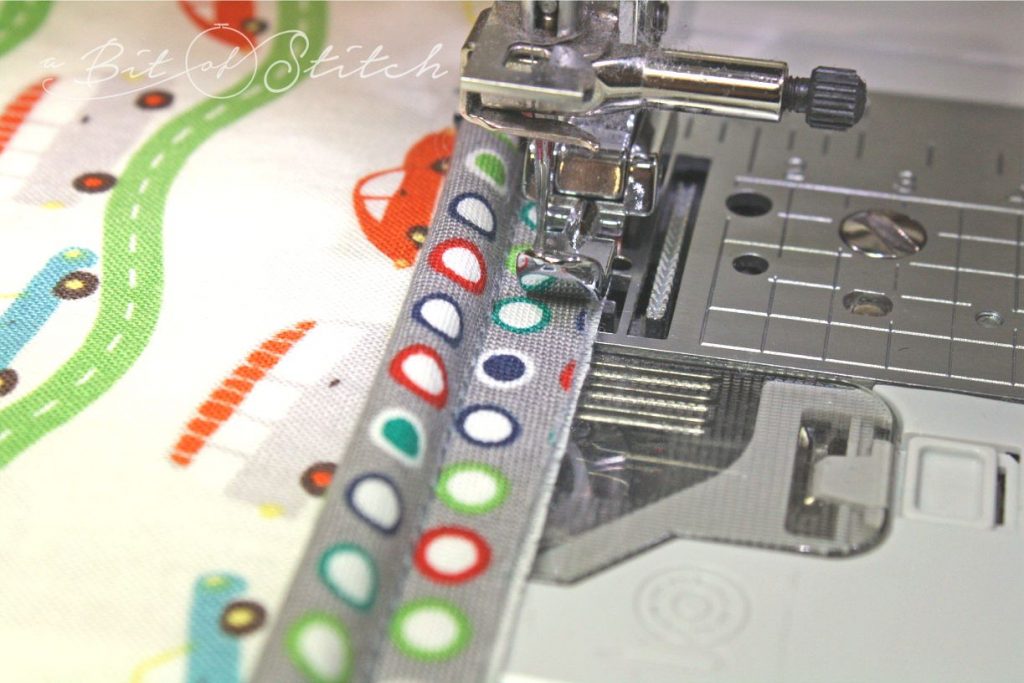
Sew just above the teeth (you can feel them through the fabric) across the fabric, catching the zipper underneath. DON’T stretch the fabric or the flap will try to lift when finished. Another way to attach the top piece of the pillow back is to just create a flap and sew it to the top edge of the zipper without sewing it to the zipper first. Some fabrics will lie best when done that way.
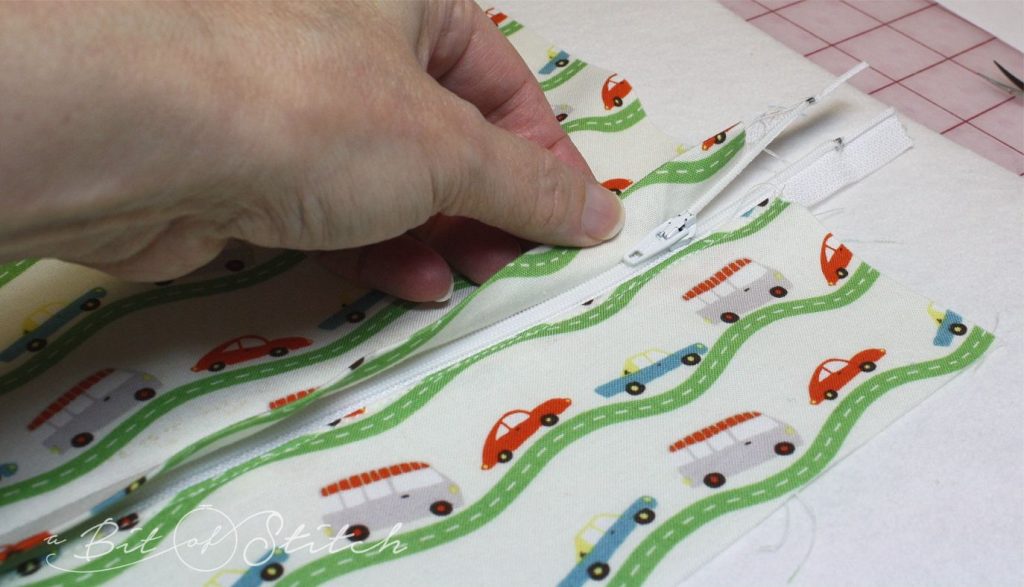
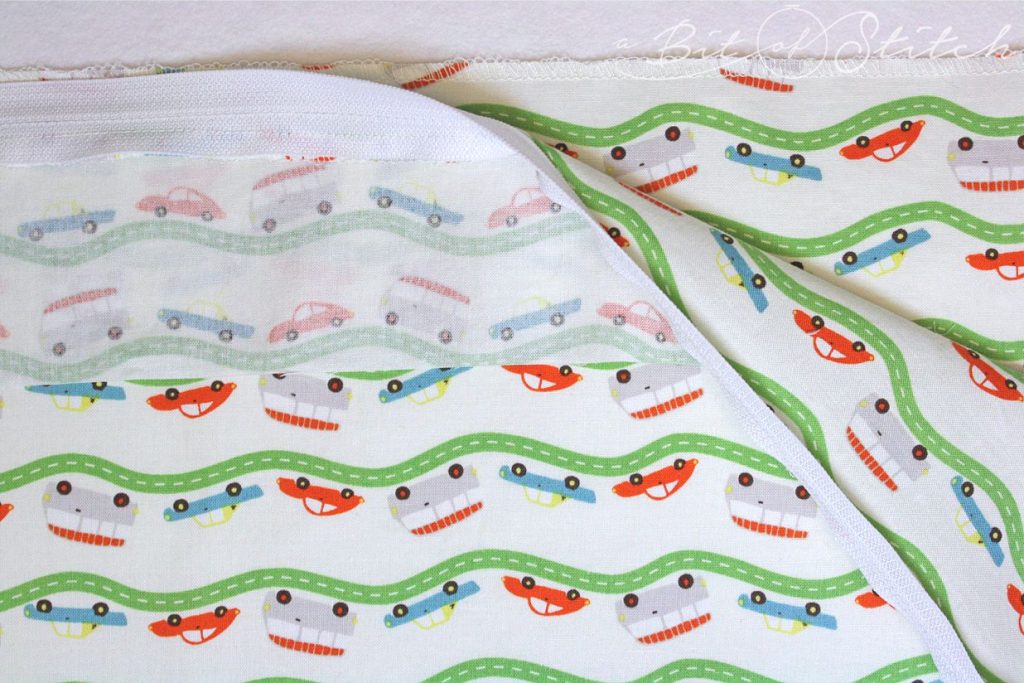
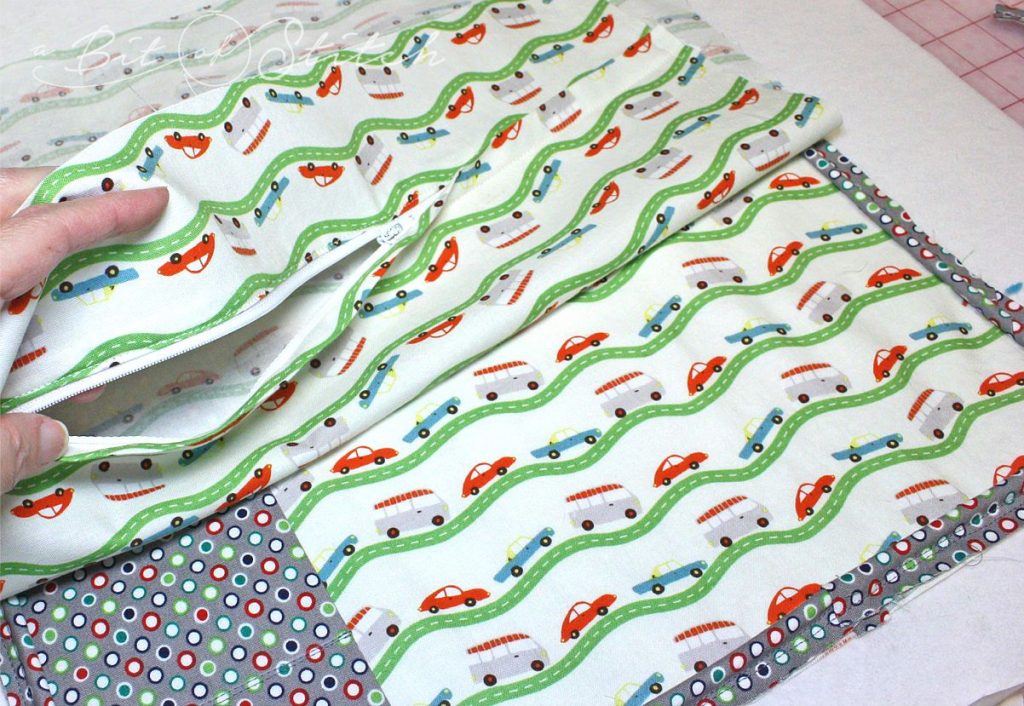
The zipper should be neatly covered. Move the zipper pull into the pillow cover area.
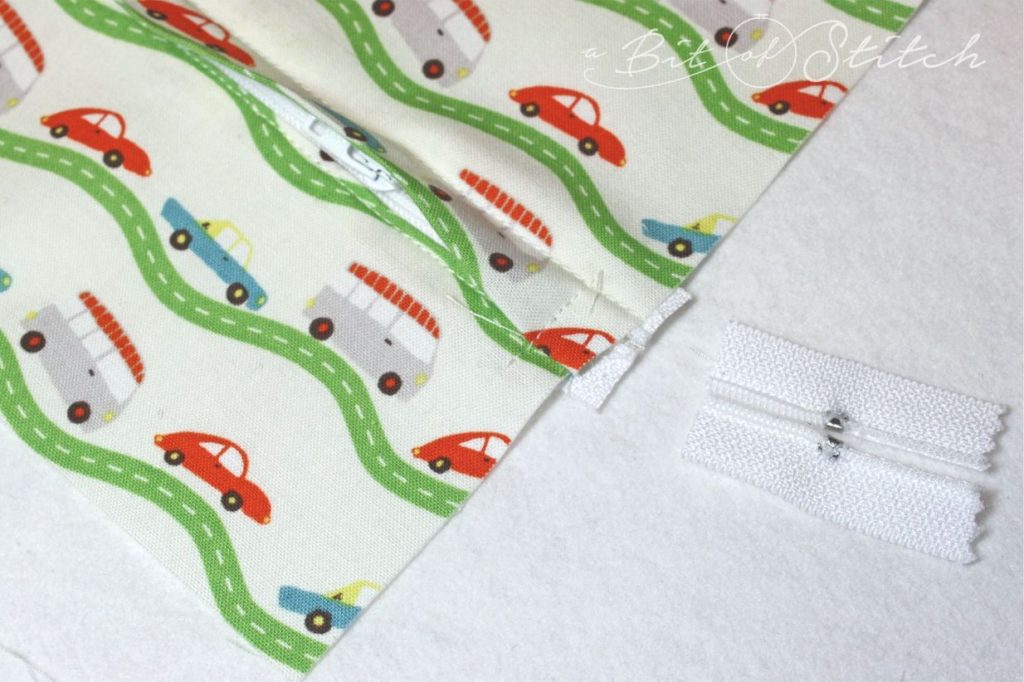
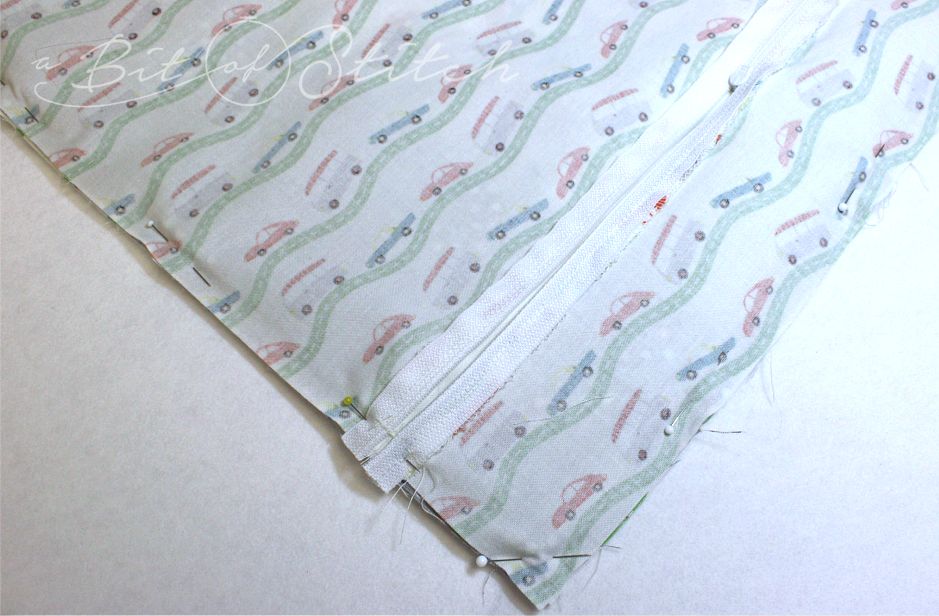
Sew across the ends of the zipper along the selvage edges of the pillow back. Clip off the excess zipper ends.
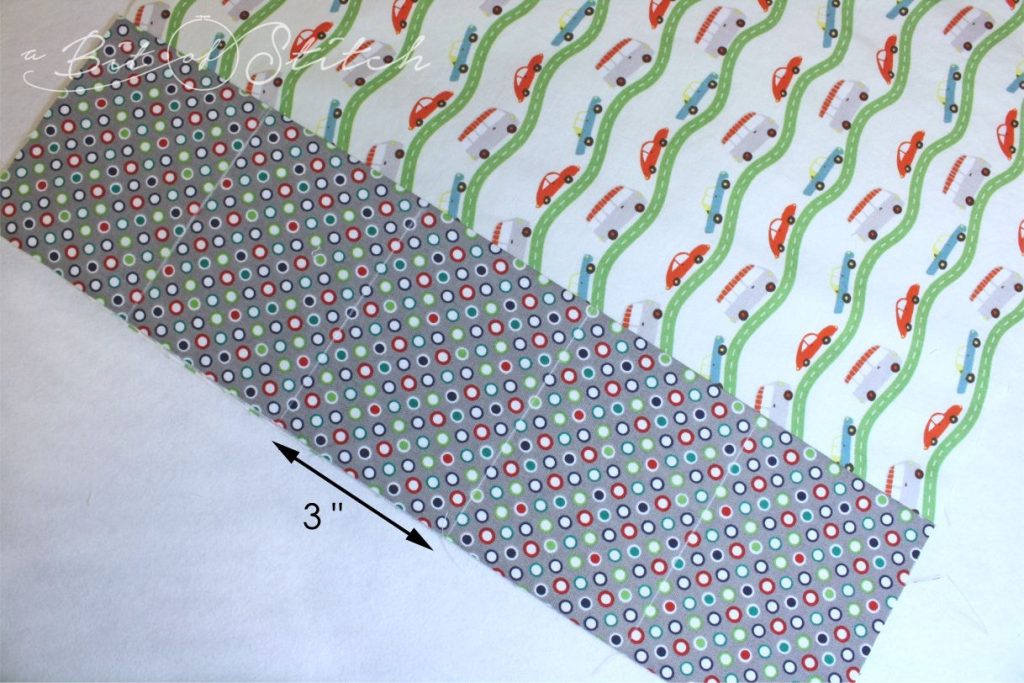
Fold the pocket fabric in half, long side to long side, and press. Divide it into 3” segments and mark straight lines at each division. Align the raw edges of the pocket fabric and pillow front fabric. Pin in place.
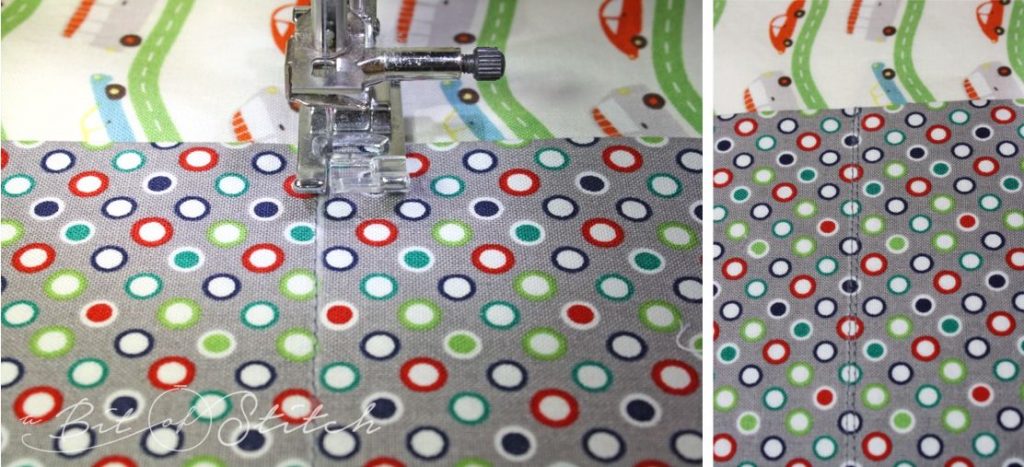
Beginning at the selvage edge, sew along each marked line, stop at the end of the pocket fabric, lift the foot, turn the fabric around, and sew back across the pocket fabric a tiny distance away from the first line of stitching. The photo on the right above shows what the finished stitching should look like. This double line makes a very sturdy pocket seam!
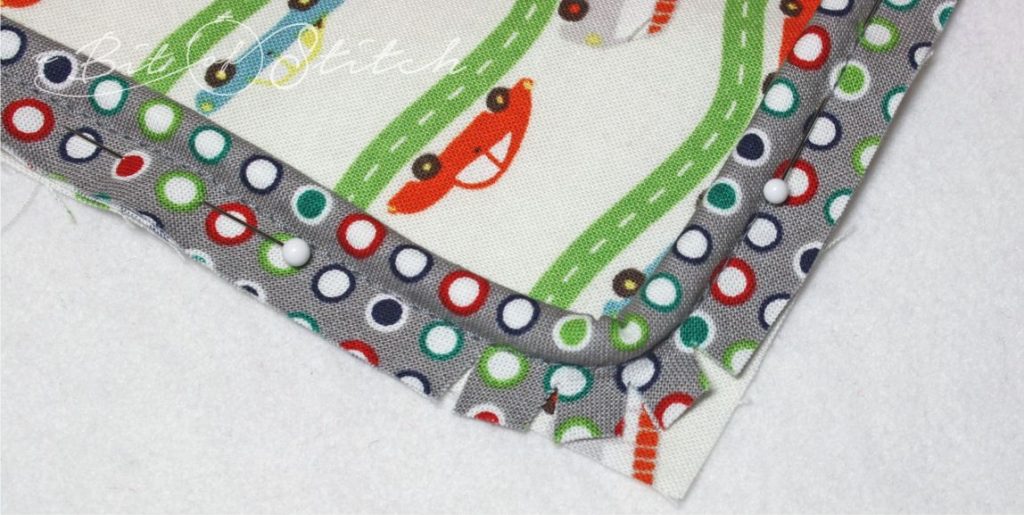
To add piping, make sure the selvage edge of the piping has been trimmed to no less than 3/8” and no more than ½” when using your own covered cording. (Purchased cording can be used as it is.) I like to clip the corners so the piping will round nicely and stitch on easily. For best results, I always sew the piping to only one side of the pillow cover first.
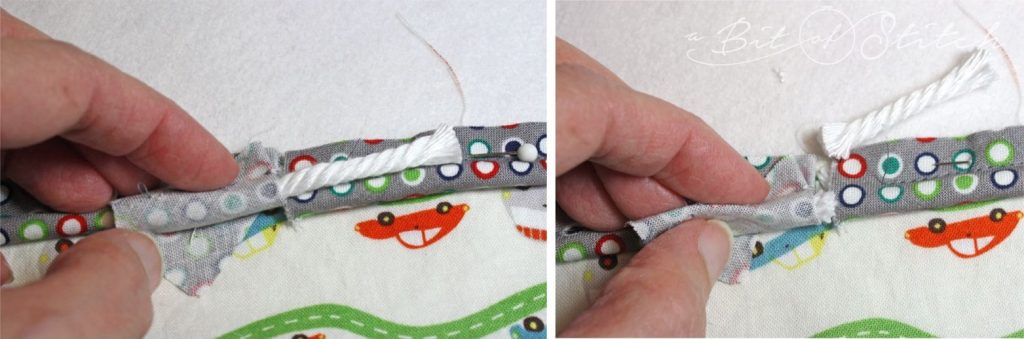
To make a nice neat finish where the piping meets, peel the fabric back from one end of the cording and cut the cords so that the ends are flush with each other.
Fold the peeled away fabric back on itself (beyond the end of the cord, wrong sides together) and wrap the folded end around the other end of the covered cord. Pin securely.
Sew the piping on using your narrow zipper foot. Don’t try to get too close to the cord yet.
Make sure the zipper is open enough to get your hand in, and align the pillow back with the pillow front.
Pin the two pieces together. The piping should be between the layers.
Use your narrow zipper foot to sew all layers together. Now you need to get as close to the cording as you can. Finish the edges with your serger or by zigzag stitching. (Yes, your serger foot will ride over the piping; just don’t let the knife cut into the piping!) You don’t really need to clip the corners if your seam allowance selvage is less than ½”. That little extra bit will fill out the pillow corners where the form won’t reach.
Unzip the rest of the way and turn right side out. Finished! Easy, wasn’t it? This is my favorite pillow cover to make and I hope you will enjoy it too!
Evy
3 replies on “Car Garage Pillow”
The design of the pillow is really awesome. Thanks for the sharing.
Buy Cloth Stand Online | Buy Laundry Bag Online
You are welcome! I hope you make one!!!
So lovely, like all you do, very much appreciated always. Thanks.