Don’t you love it when you have an “Ah HA!” moment and discover something that fixes that thing that’s been bugging you in your sewing adventures? YES, you do? Well, I had a major “Ah HA!” moment this year and it has been an awesome discovery: how to make my buttonholes look really, really good – crisp, clean and super sturdy!
I’ve loved the buttonhole foot attachment that has come with each of my Baby Lock sewing machines and I’ve used them faithfully for years. I love how easy this sweet little foot makes the job of sewing buttonholes! However, I’ve always had a beef with the buttonholes as I just didn’t feel the stitching was close enough. I wanted a REALLY tight zigzag, no fabric showing through at all. Yeah, I know that may not be practical, but that’s what I wanted anyway. Sometimes on very special garments I would resort to… *gasp* …hand sewing a buttonhole in. (Yes, I’m that crazy!)
Lo and behold, I recently discovered that my buttonhole attachment has a cording guide on the bottom so you can add cording to your buttonholes while you sew them! Oh. My. Goodness. This has been a game changer. Now I love ALL my machine sewing buttonholes.
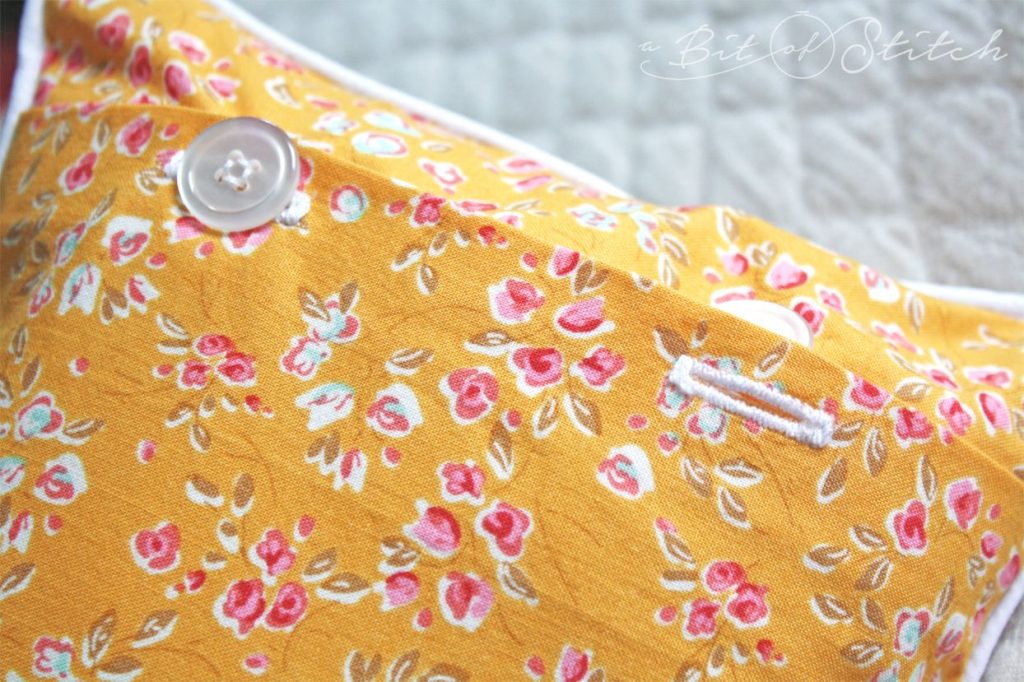
I mean, look at this:
And this:
And this:
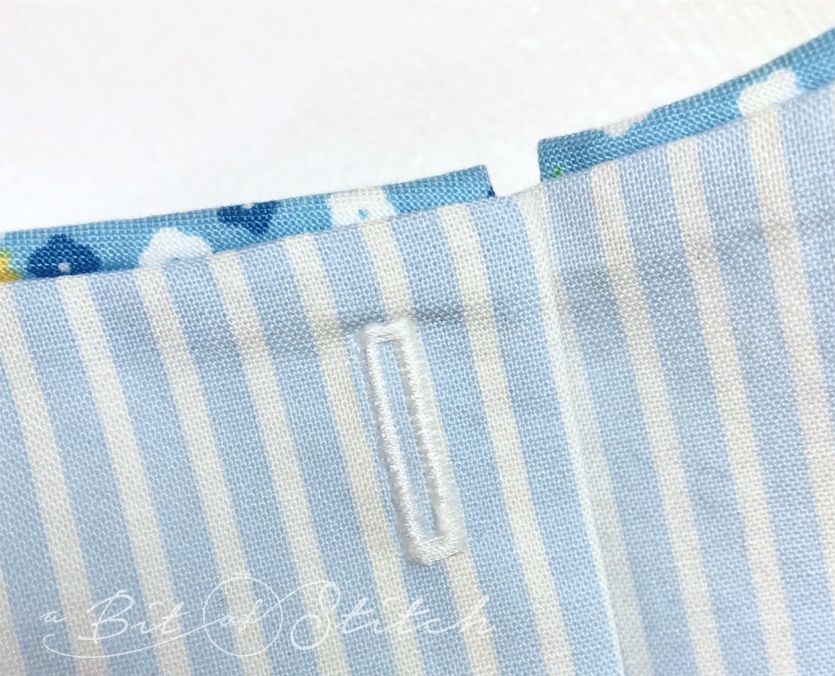
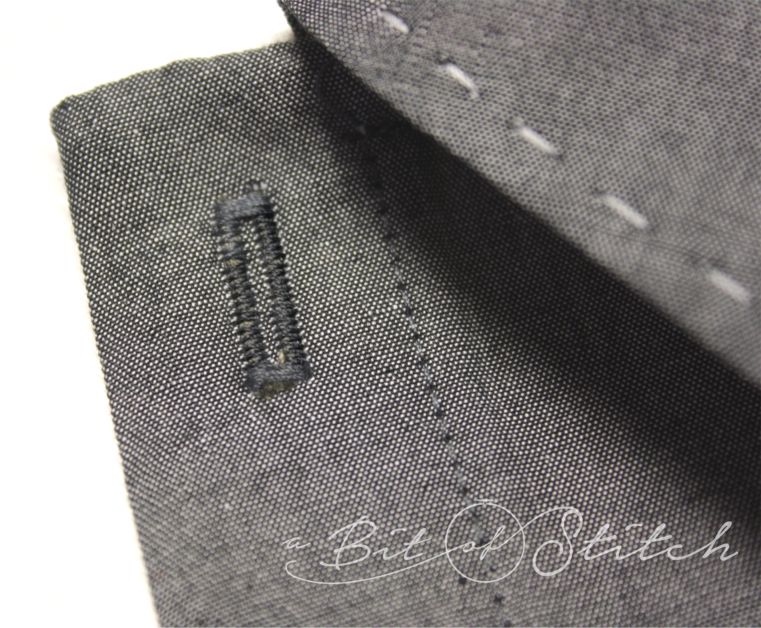
Perfect coverage! Nicely packed, very sturdy and neat little buttonholes, woo-hoo!
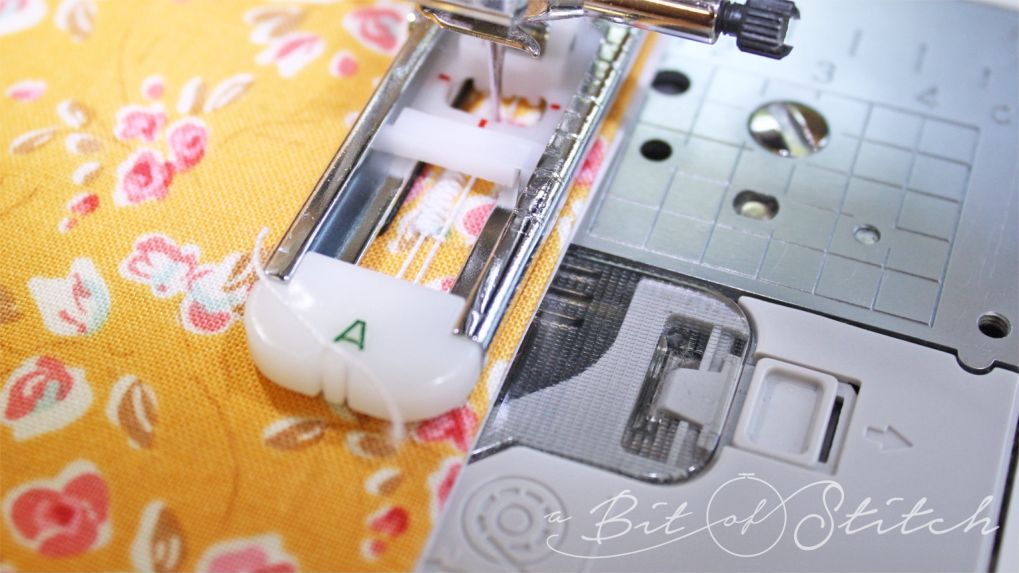
So, whip out your buttonhole attachment and turn it over.

At the front you should see two little grooves that form a sort of hook and a more obvious hook at the back on the very end. In the plastic part that glides within the attachment as you sew and under the front part of the attachment itself there should be two sets of grooves. Those are the cording grooves that help hold the cord in place as you buttonhole over it.
I found that when I was using fine cording like 12 wt cotton thread (Sulky’s Petite cotton thread is perfect for this), the cord stayed just fine inside those grooves.
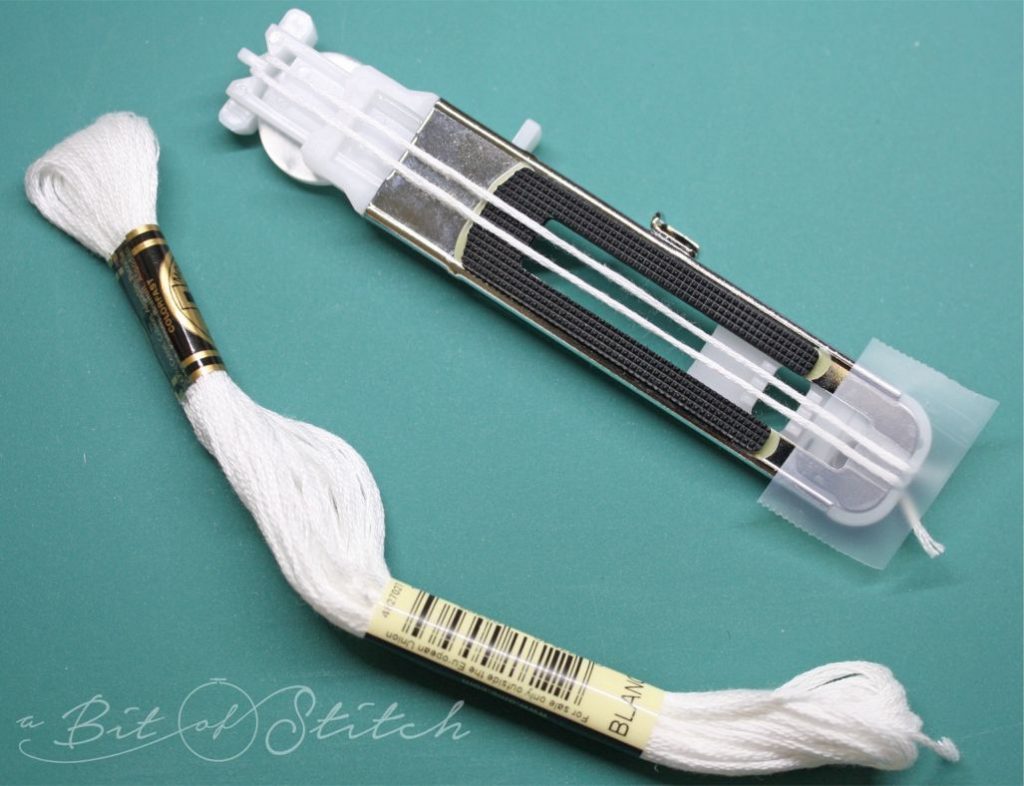
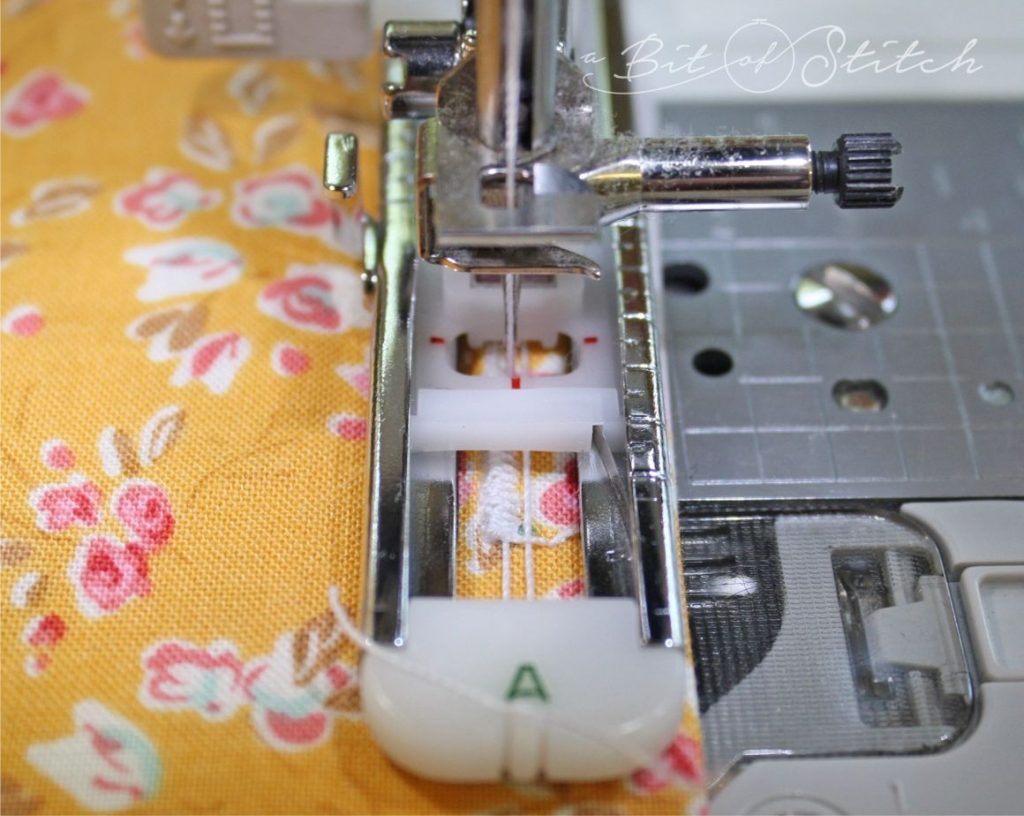
Then I discovered that embroidery floss was exceptionally suited for making the buttonholes even nicer, and I had a supply of that in every color of the rainbow, yay! However, it had a tendency to jump out of the grooves while stitching. I fixed that by applying a bit of tape to the tip of the foot. Just make sure the tape is wrapped around the foot at the front a bit so it won’t catch on anything while you work. You can see in the photo below how the tape helps to hold that thicker cord in the grooves at the front.

Here’s how you load it: First put your button in the button holder part. Cut a length of cord that is twice as long as the attachment with the button in place, plus about 6”. Fold the cord in half. Hook the halfway point over the hook in the back and pull the cords across the bottom to the front, being sure to press the cord into both sets of grooves. Keep it taut while you bring the cord to the front of the foot and tie it snugly at the front hook on top of the attachment. Put the foot on the machine and sew the buttonhole.
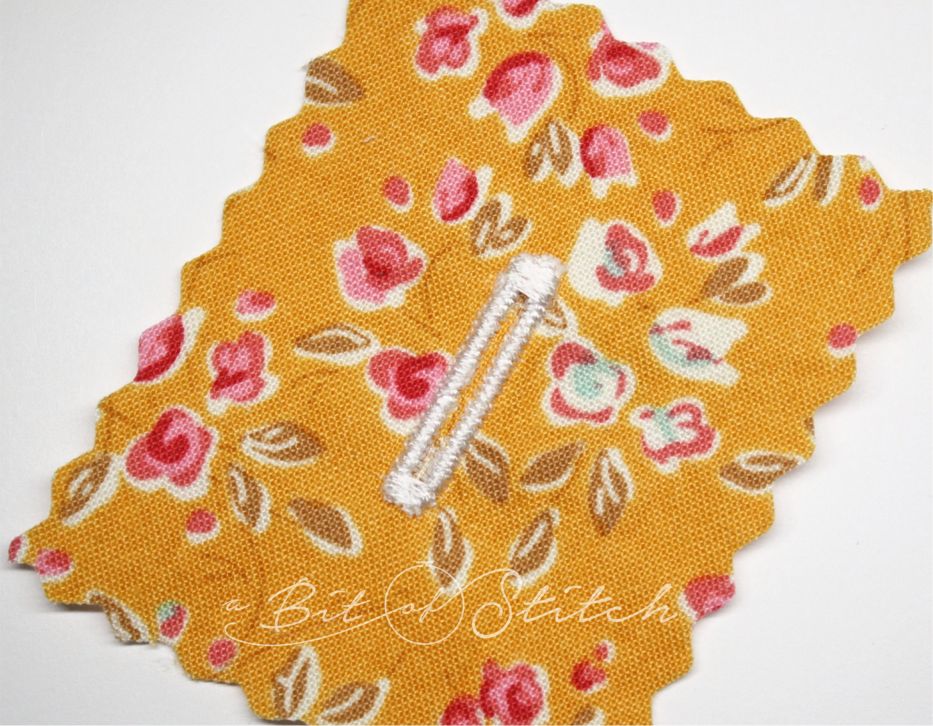
When finished, raise the foot, clip the cord at the front of the foot at the knot (if you need to) and tug the cord out of the hook on the back. Once the cord is free from the foot you can easily remove the fabric.
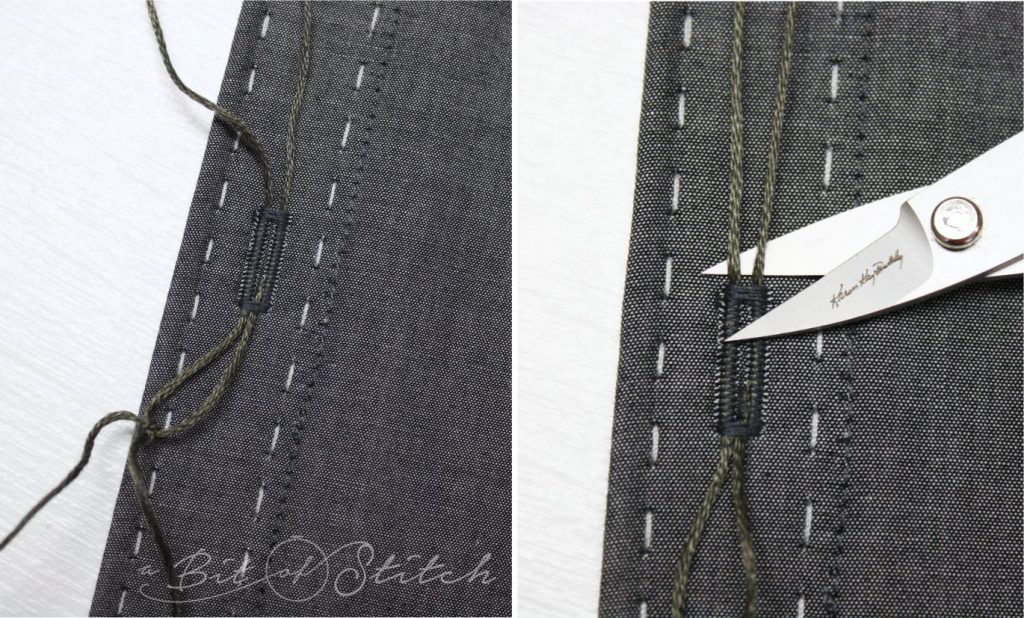
If the stitching did not extend into the cord, you should be able to pull the cord from the bottom of the buttonhole until the loop at the top is tucked slightly under the top end of the buttonhole. Then just clip off the excess cord at the bottom. This pretty much only works when using skinny and very taut cord. Embroidery floss… not so much; you’ll need to clip it off at the top and bottom. Clip carefully – you don’t want to cut into buttonhole. Use those curved snips!
You’ll find that using heavier weight threads in the top of the machine will create much better coverage than your average sewing thread. I love Sulky’s 30 wt thread for buttonholes. I use a size 16 top stitching needle and regular sewing thread in the bobbin that matches the color on top.
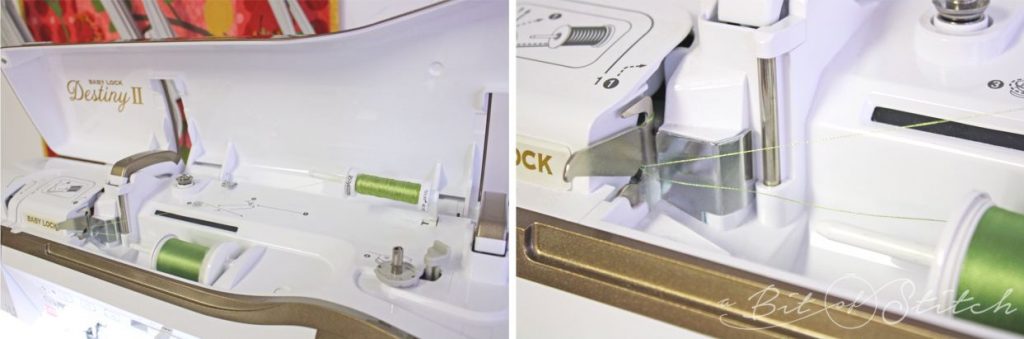
Sometimes, though, you just WANT to use a pretty decorative thread like our 40 wt. embroidery thread. It’s nice and shiny and sometimes you need a shiny thread, right? Here’s a handy little trick for those of you with machines that have that extra spool holder on top. Load up both of them with the same thread, thread the machine as if it were a single strand… and voila! Your 40 wt. thread has now become 20 wt.!
There’s just something so satisfying about really neat buttonholes!
May all your buttonhole projects be awesome! Happy Stitching!
Evy
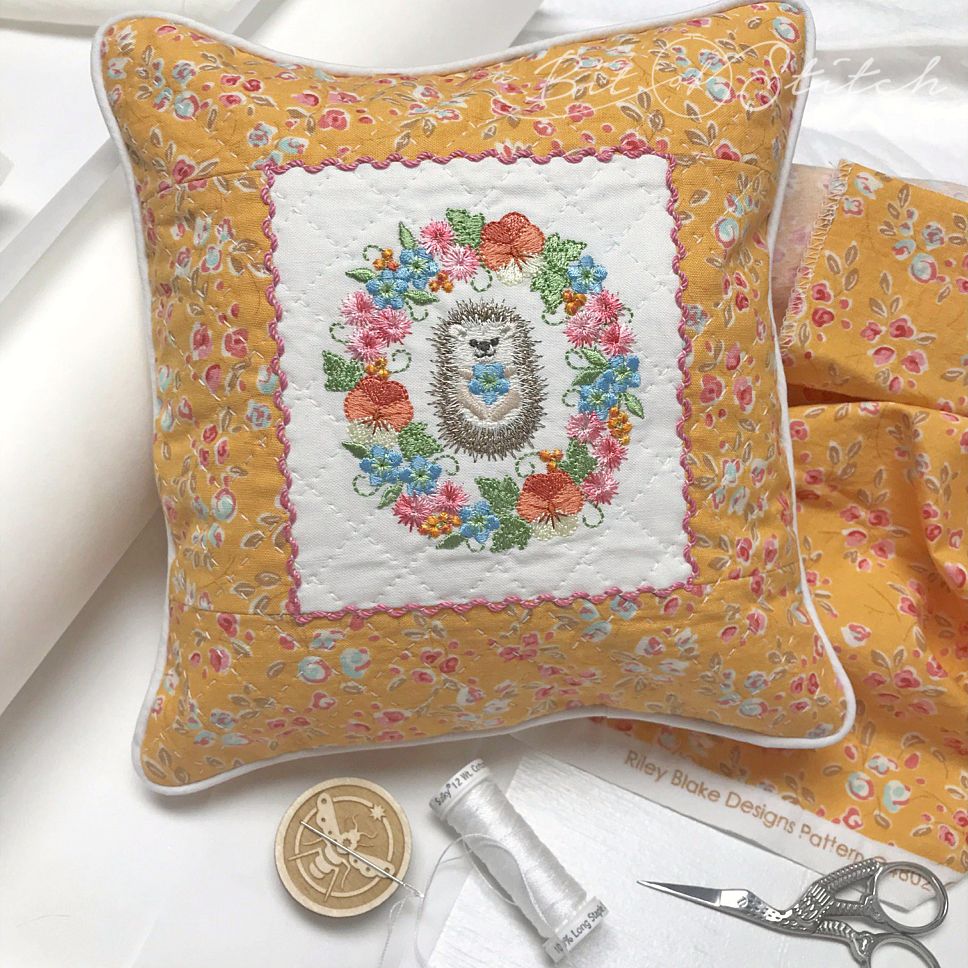
Find the Happy Hedgie embroidery designs HERE and find the Wildflower Friends (floral frame design) HERE. Stitch up some pretty pillows with beautiful buttonholed backs!
6 replies on “Beautiful Buttonholes!”
Hi Rachel
Please what did your mom used for the border of the appliqué on top of pillow? I appreciate your help.
Thanks & keep on being blessed & safe.
There aren’t any appliques shown in this blog post, but I think you’re referring to the pieced/quilted pillow top shown in the final photo. The border around the edge of the center block is pink sock weight yarn – I used my Baby Lock Sashiko machine to “flip stitch” the yarn into place on the quilted pillow top! 😀
Well, now I am inspired to use that cording feature on my buttonhole foot! Thank you for such a detailed explanation of your buttonhole “recipe”:
– cording (or DIY cording),
– size 16 topstitch needle
– 30 wt. thread in the needle, &
– regular sewing thread in the bobbin
Our volunteer group just helped some young stitchers learn to make bookmarks at our library’s MakerSpace. They sewed decorative stitches on felt, with an optional buttonhole on one end of the bookmark.
After the buttonhole was cut open, each stitcher got to pick out a ribbon and tie it through the buttonhole (does this make sense?).
The loose ends of the ribbon peek out of the book when the felt bookmark is tucked inside the pages. Pretty and practical!
The stitcher/reader knows exactly where she stopped reading.
How sweet! 🤗 I’m so glad you enjoyed this blog post. Happy stitching to you and your volunteer group!
I love this explanation of how to make a better buttonhole. Thank you I will certainly do this on my next buttonhole project.
You’re very welcome – so glad you found it helpful! 😊