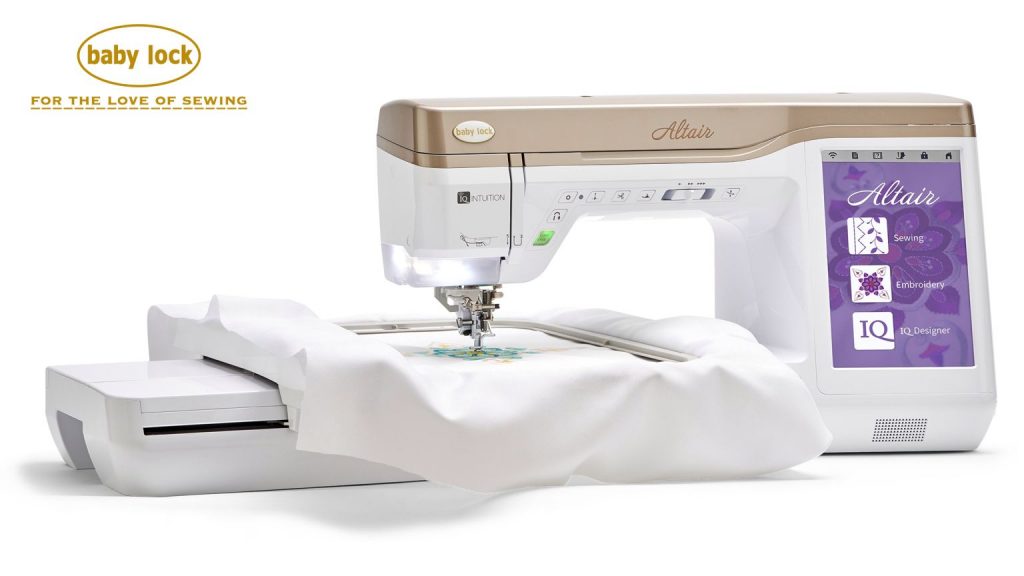
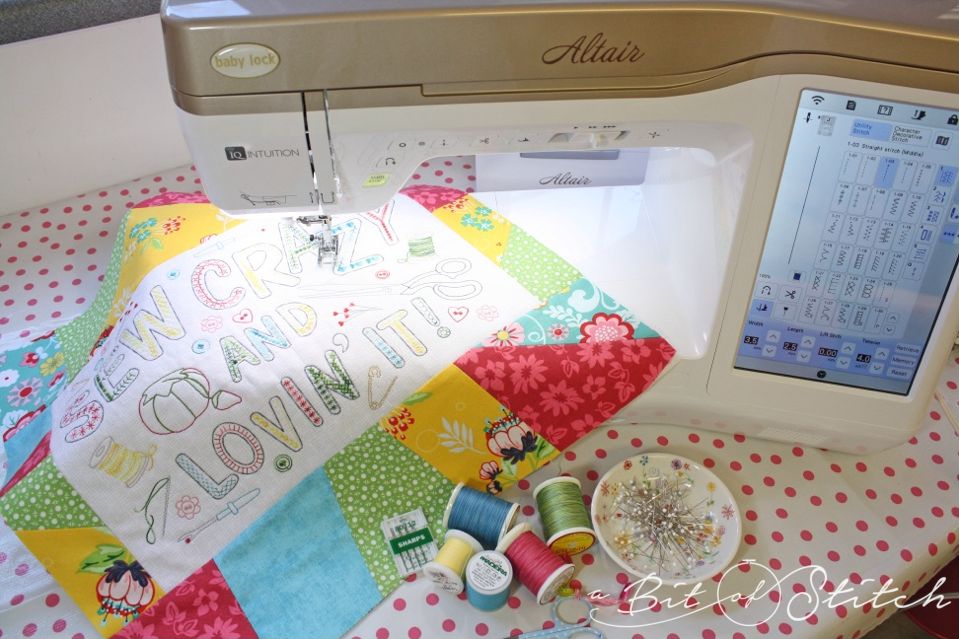
Yay for babies! There are TWO new babies in my family! Little baby Marlow arrived in February – we are all smitten, as you can imagine – and Baby Lock Altair arrived in my studio, yay! Yes, I’m totally smitten with her too. Even though she’s not quite as cuddly as Marlow, she sure stitches sweetly and I’m thoroughly enjoying learning all about her!
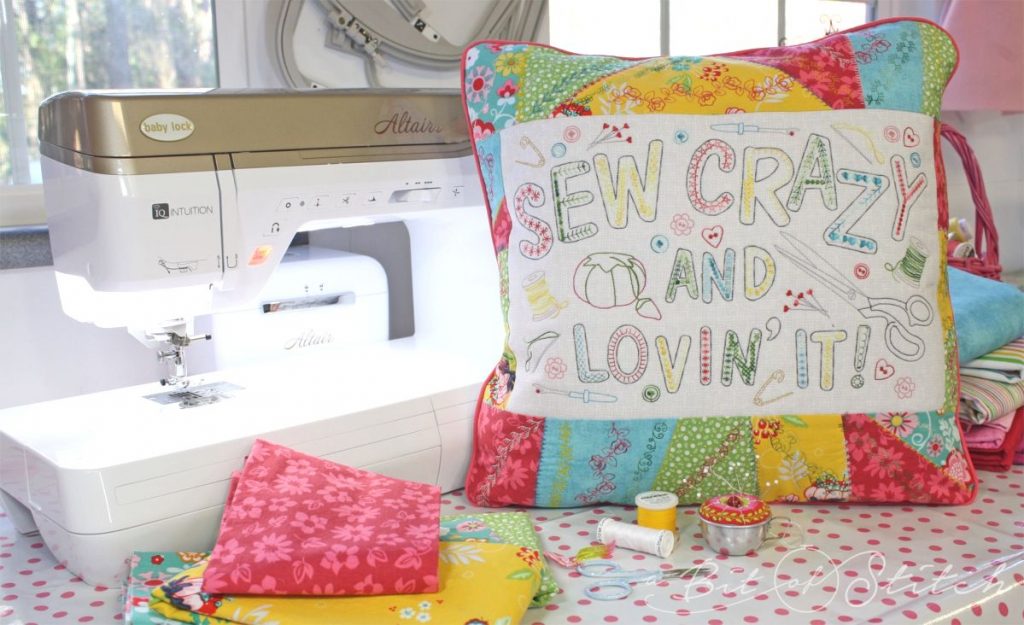
As you might guess, I had to put my new baby through her paces right away. First some machine embroidery (because who can’t resist that feature, right?) and then straight to some fancy stitching with a few motif stitch try-outs. It all came together in a fun new pillow for my sewing studio’s chair! Want to make one with me? Read on!
This machine has a new Wi-Fi phone/camera function that I am looking forward to exploring a LOT more, soon. But for now, since I was in a hurry to see her embroider something, I just popped a piece of fabric in the hoop and stitched up a pretty!
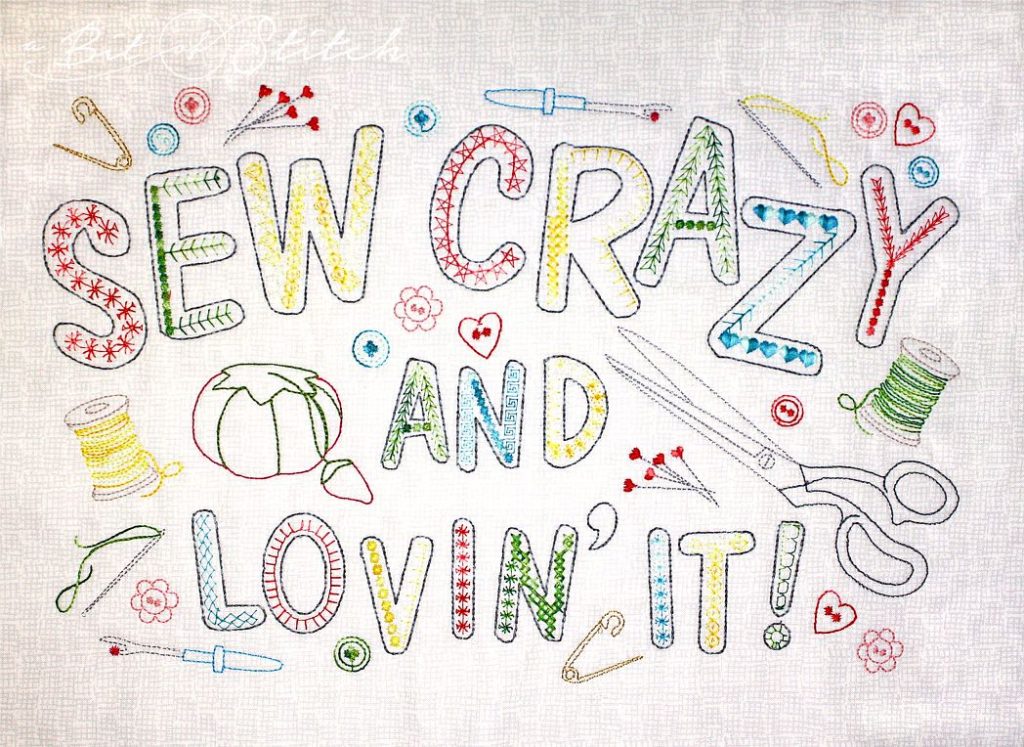
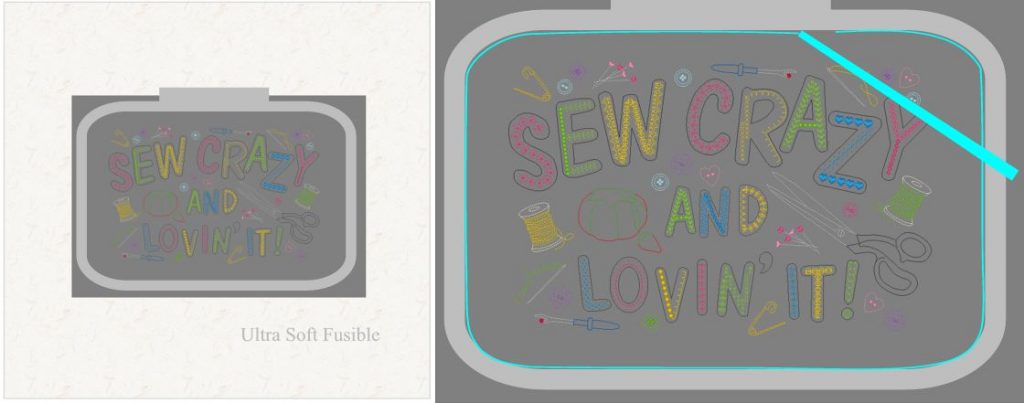
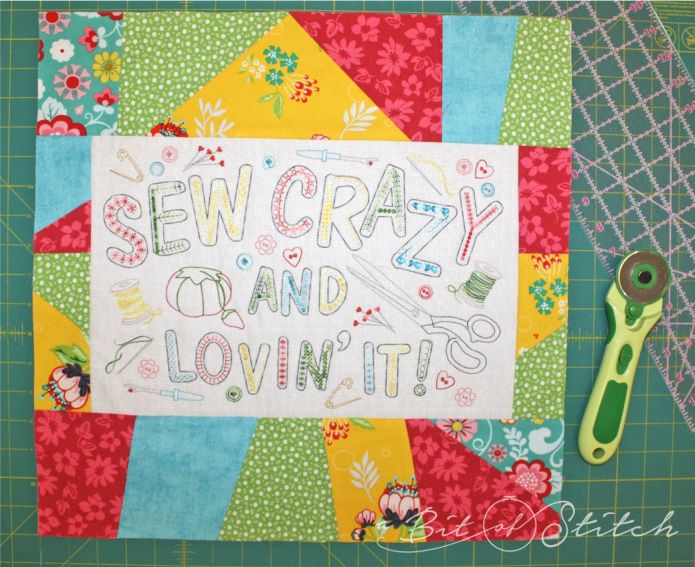
You can find the “Sew Crazy and Lovin’ It” design HERE, or you can use any design you may have in your stash. The Altair has a nice, big 9.5” x 14” embroidery field, so this design fits perfectly in her largest hoop.
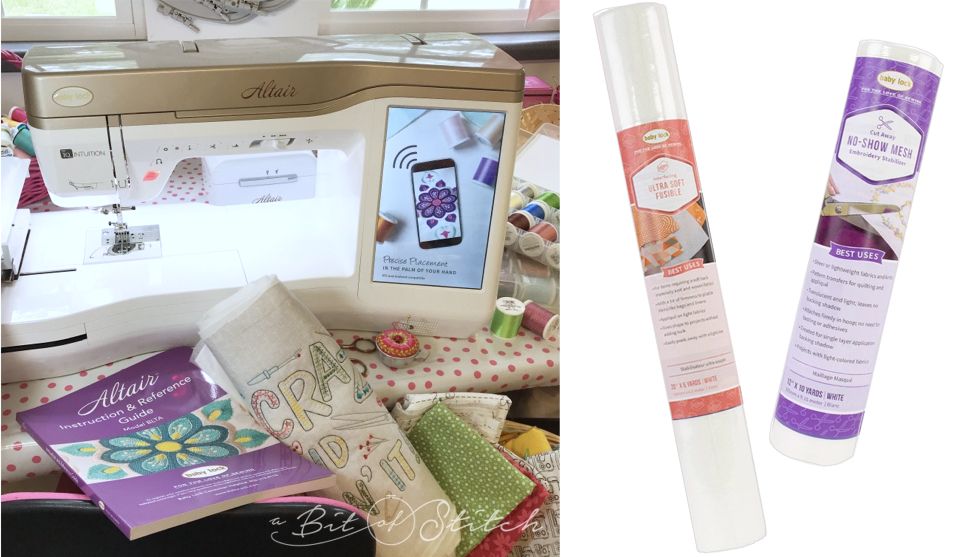
I stabilized my background fabric (pre-shrunk fabric) with a piece of Ultra Soft Fusible cut slightly larger than the pillow top I planned to make; I fused lightly – just enough to hold – so it would be easy to peel up and trim away the excess fabric after the embroidery. Then I added a layer of No-Show Mesh behind that and hooped the sandwich so that the design would stitch in the very center of the fabric block. (Find both of these stabilizers at your local Baby Lock Retailer.)
Before taking the fabric out of the hoop, I used a wash-away marker to trace around the inside perimeter of the hoop.

The traced line gave me a template to use so that I could measure and mark a rectangle around the design. I left about 1” of space around the perimeter of the design. Then I gently peeled the fabric away from the Ultra Soft and cut on the newly traced rectangle. (I love using my hoops for frame templates!)
Now we’re ready to add the scrappy borders. (Read more about lovely scrappy projects from Heather at The Sewing Loft. Such good tips for scrappy projects found here.)
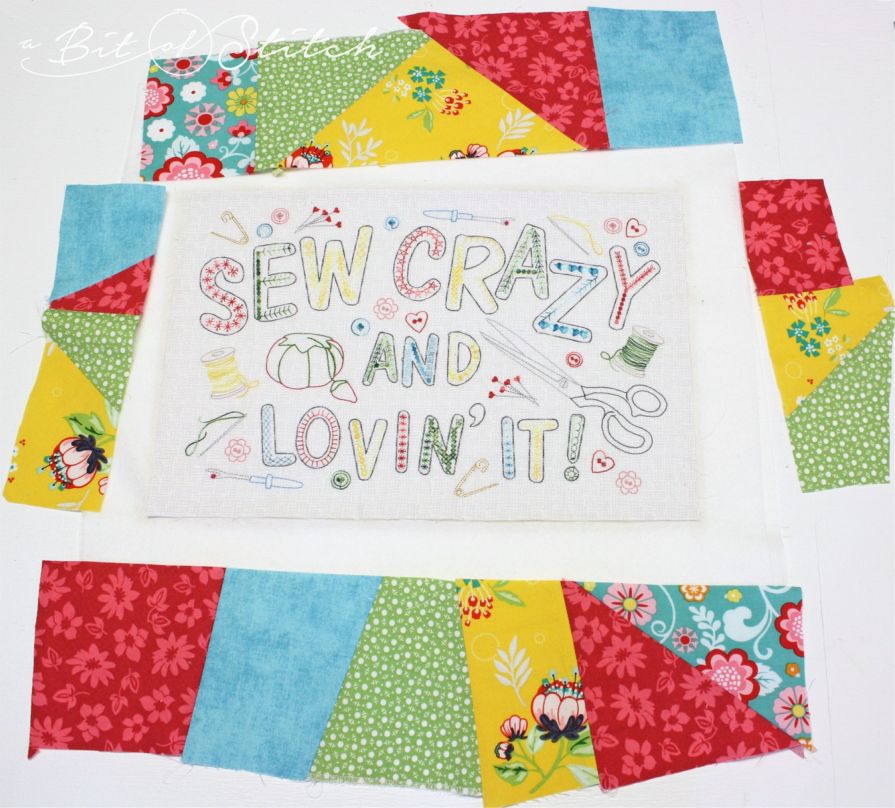
I created border pieces from random scraps sewn together however they would fit; I needed two shorter, narrower pieces for the sides and two longer, wider pieces for the top and bottom. I trimmed the edges that would meet the embroidered rectangle and each other so that they were straight and even.
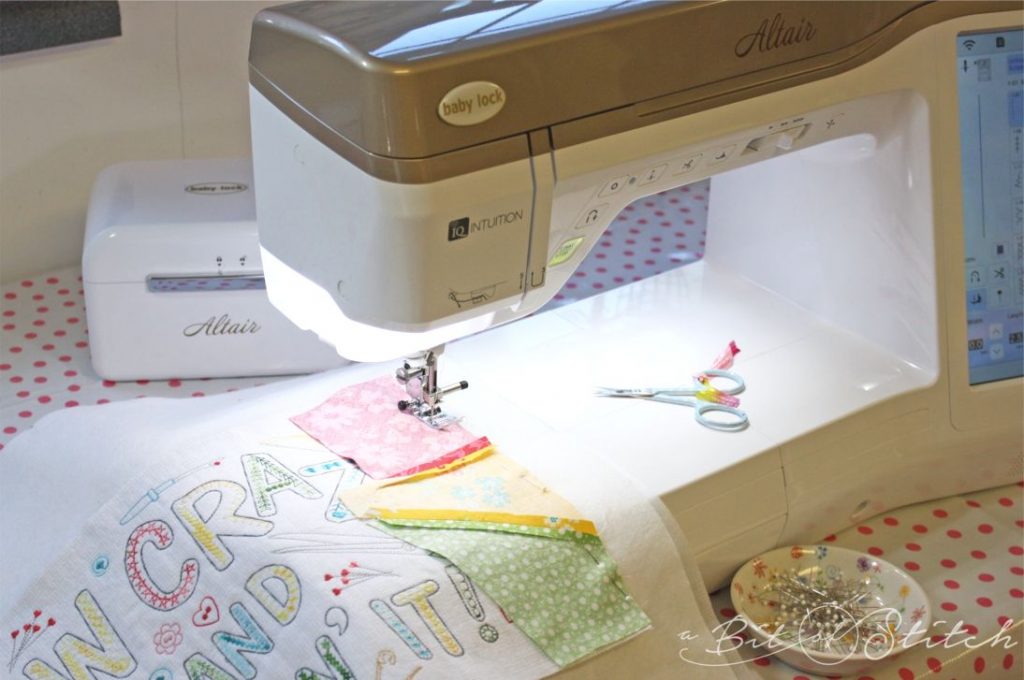
At the machine, I used the J foot with the needle in the left position and sewed the two side strips on first. Next, I sewed on the top and bottom border.
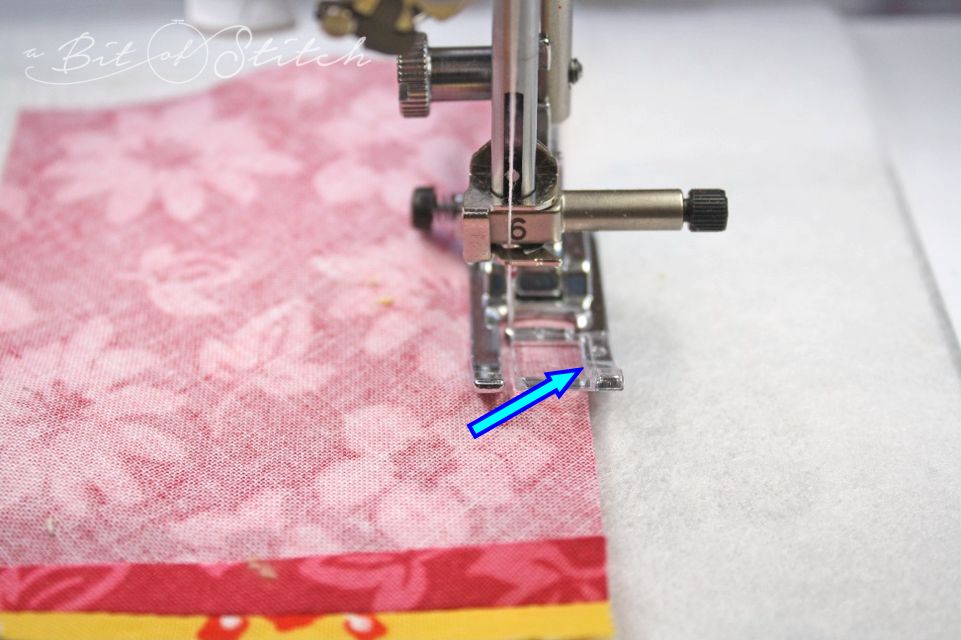
I like using the inside edge of the right side of my J foot for a seam guide when my seam allowance guides are covered up and I can’t see them. It’s an easy visual for me and works great for a nice, narrow seam allowance!
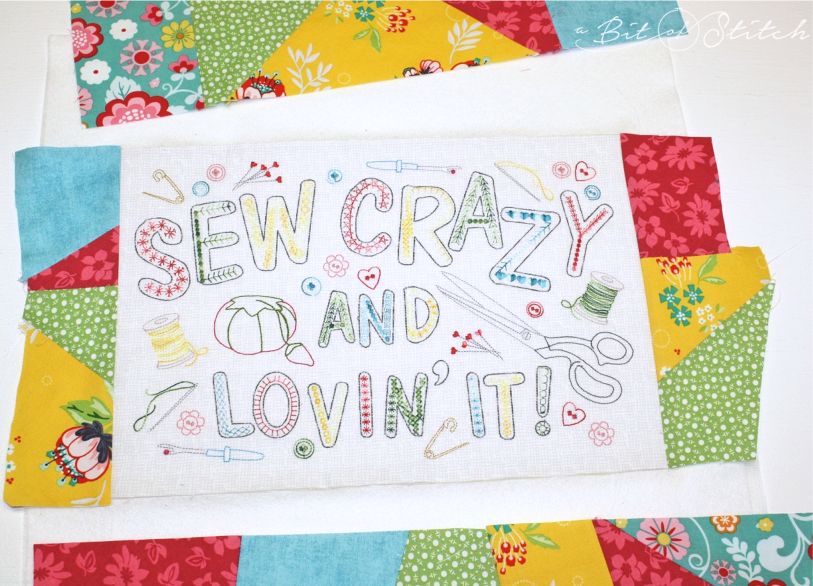
Finished and trimmed! (Note – You can always create your pillow top completely before adding the embroidery; then you won’t need to do any trimming and adding. However, I hadn’t yet decided what I wanted my project to be. So, flying by the seat of my pants as usual, I created it as I went along. Remember, that little Altair app on your phone and her special hoops will allow you to snap a photo, send it to the machine and perfectly place the embroidery design!
Now comes the fun part! Do you love those pretty little on-board motif stitches that come with your Baby Lock machine? I adore them and am always looking for ways to use them because they are just so fun! I love that the Altair (like other Baby Lock machines) allows you to mirror image, resize and edit these motifs.
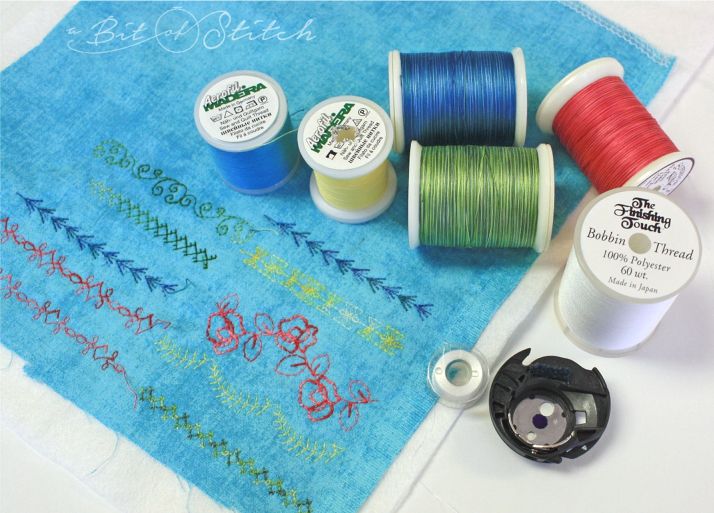
The first thing I do is create a sampler using the same type of fabric and stabilizer, recording my settings as I go. I discovered that while the regular sewing bobbin case worked perfectly fine with these motifs, the motifs looked even better when I switched to the embroidery bobbin case and bobbin weight thread. Nice!
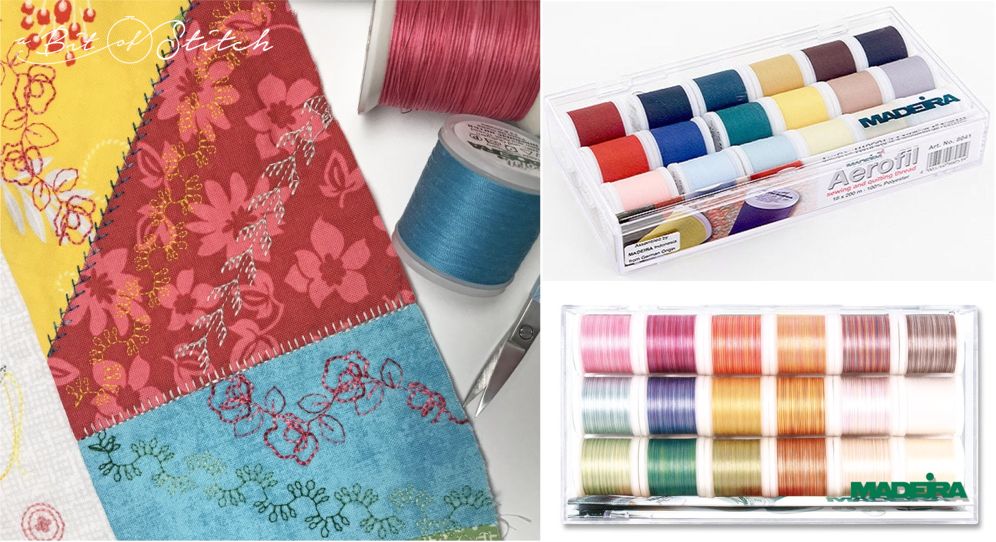
It’s fun to try out different threads and see what they will look like when stitching these pretty motifs. I love Madeira’s Aerofil sewing thread, Madeira’s Cotona variegated thread, and Superior Thread’s King Tut variegated thread. Follow the thread manufacturer’s needle size recommendation whenever you can. If you don’t have the right size, try a size 80/12 metallic thread needle. That usually does the trick for me with heavier threads. (You can find these great threads at your local Baby Lock retailer.)
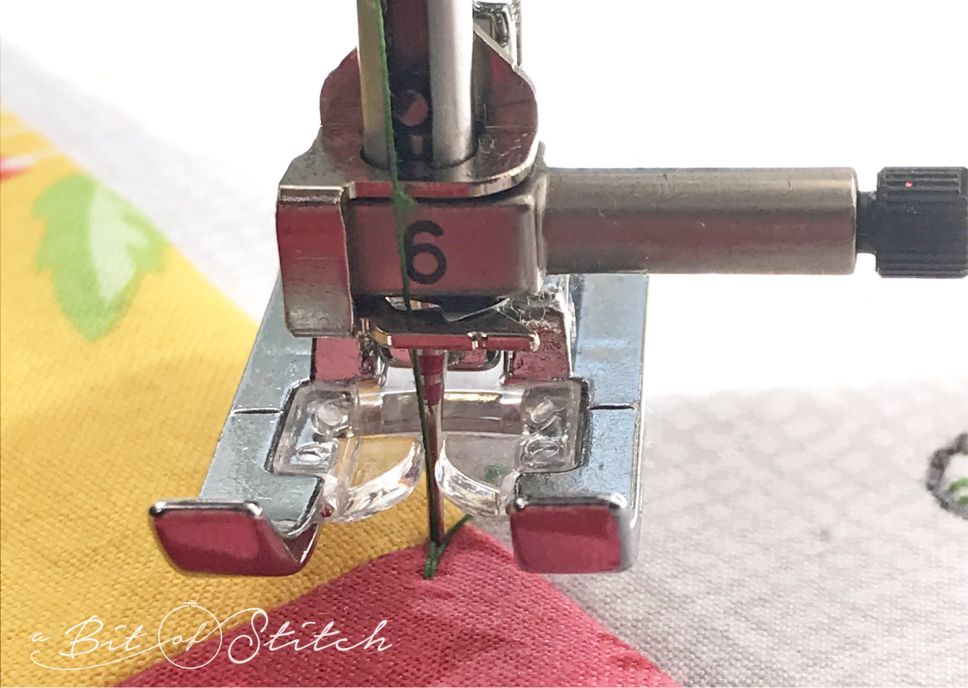
If you press and hold the “back up” button on the machine when you begin a line of motif stitching, it will sew in place a little bit. This helps to secure the thread end. If you are worried that even that may come undone, simply use a regular straight stitch in the center needle position and sew forward and then backward three stitches at the beginning. (The presser foot is raised in the photo above so you can see those stitches.) I made sure to end my motif lines at the edge of the pillow top so that I wouldn’t need to worry about securing them there. When finished, give everything a good press.
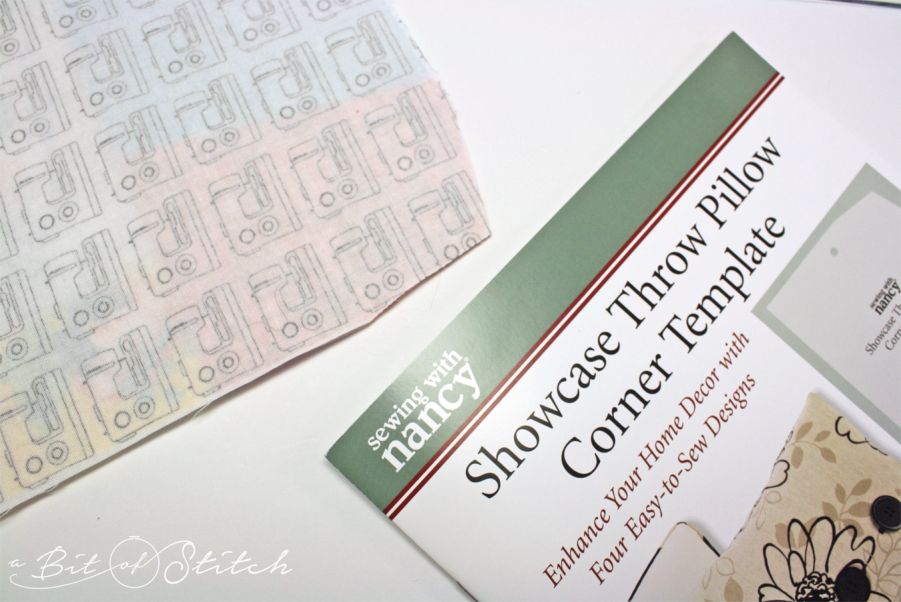
Do you know about the Nancy Zieman Showcase Throw Pillow Corner Template? It’s a great little tool for trimming the corners of decorative pillows so they won’t have “dog ear” flaps that the pillow form can’t fill. I love it!

Time to add the piping! Piping really makes a pillow perfect, doesn’t it? My favorite piping trick is shown above. As you can see, I trim away the cording inside the piping fabric so that the ends of the cording meet flush. Then I fold the extra fabric from the trimmed cord end back and then around the other end of the piping, and finally sew it in place using the Narrow Zipper foot.
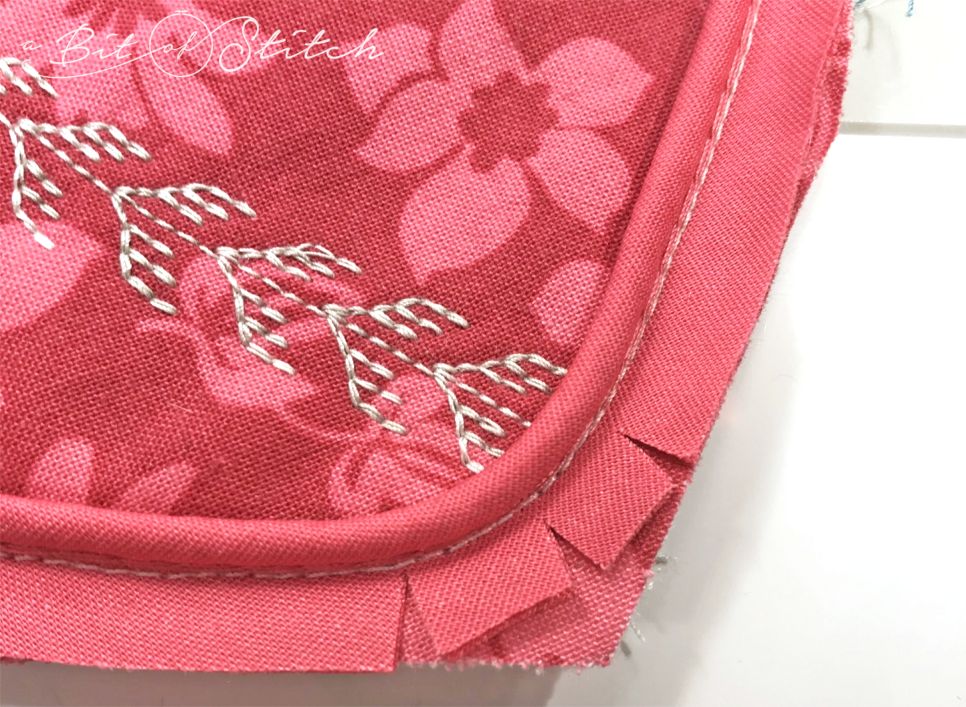
Clip the corner as shown above to make it easy to sew. Three clips is better than one or two!
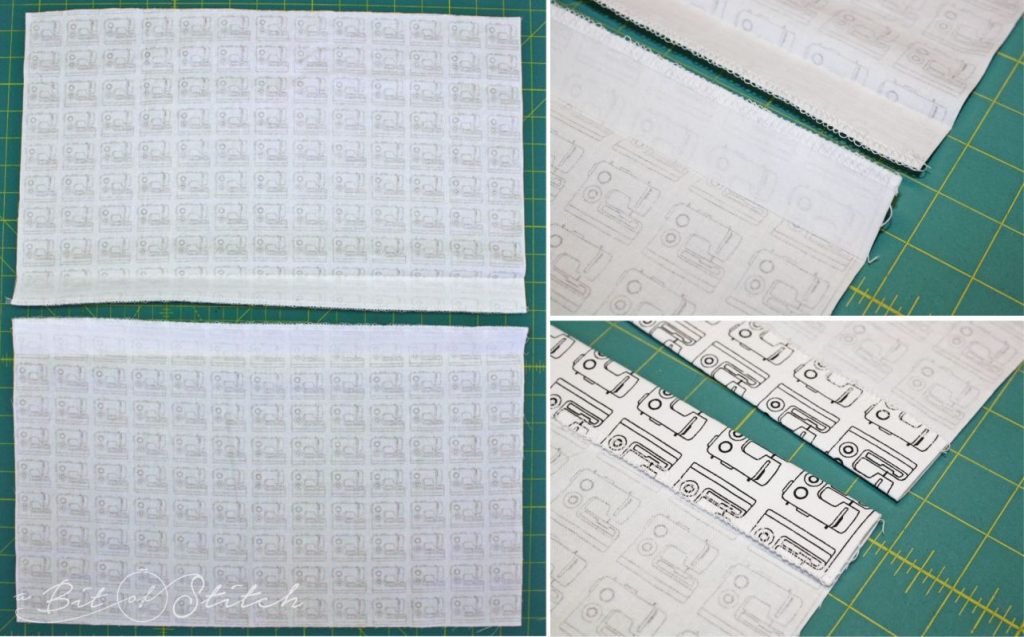
You’ll need two pieces of backing fabric; each piece should be the width of the finished pillow top and 1.25” taller than half the height of the pillow. In other words, if your pillow top is 16” wide and 16” tall, you will need two pieces of backing fabric cut at least 16” x 9.25”. (Why the extra one quarter inch? You will need that if you trim off any when serging the edges… better plenty than too little!)
I like to interface the opening edges with a 1” strip of fusible interfacing. Serge or zigzag stitch the raw, interfaced edges, and then fold those edges over 1” and press well.
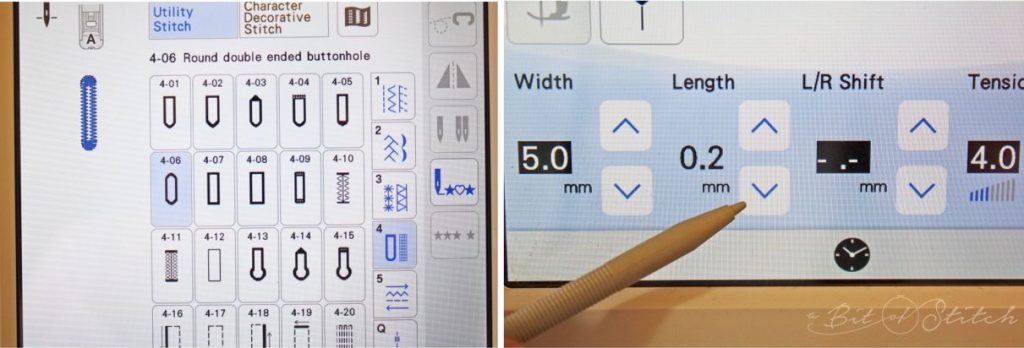
Choices, choices! I love the assortment of pretty buttonholes on my new Altair. And best of all, I discovered that she will let me adjust the density of the buttonhole – yay! Just check out the functions at the bottom of the screen once you have chosen a buttonhole type. Lower the “length” option to the shortest possible and your buttonhole will be nice and tight!
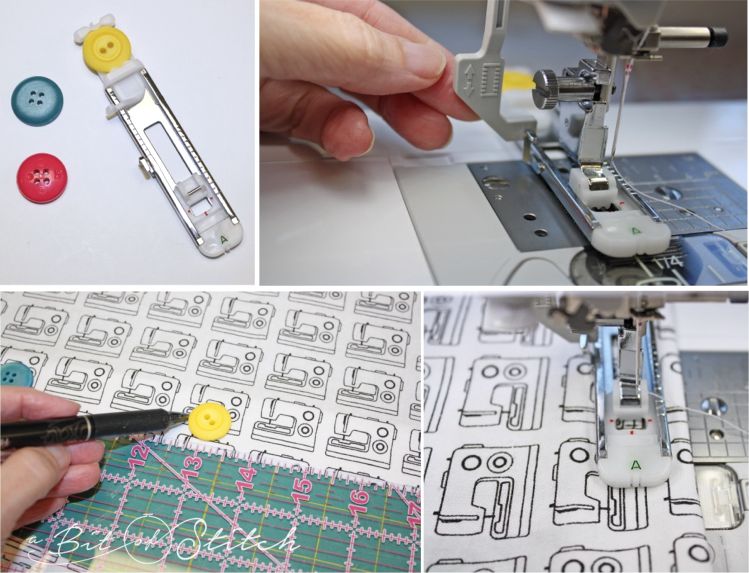
This little buttonhole foot is so easy to use. Just pop your button in the back clamp, clip the foot onto the machine, and pull down the lever so that it rests against the back of the little bar that sticks up on the foot at the left. Mark the buttonhole placements. The machine will begin sewing at the bottom of the buttonhole, so keep that in mind when you are marking them.
Sometimes I go ahead and sew on the buttons before adding the backing to the pillow front. It seems easier to get them lined up correctly.
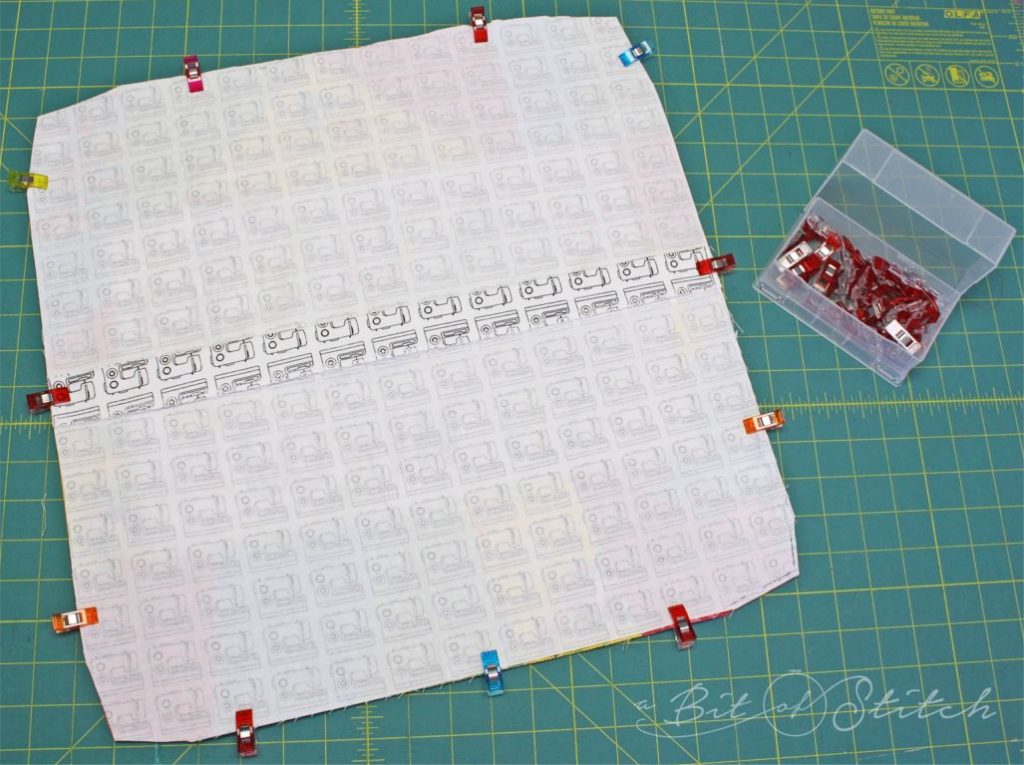
Now it’s time to sew it all up! I love Clover Wonder Clips… so much better than pins for projects like this. Overlap the pillow back pieces at the button closure and clip the pillow front and back pieces right sides together. Be sure you overlap so that the pillow back piece with the buttonholes will be on top when turned right side out.
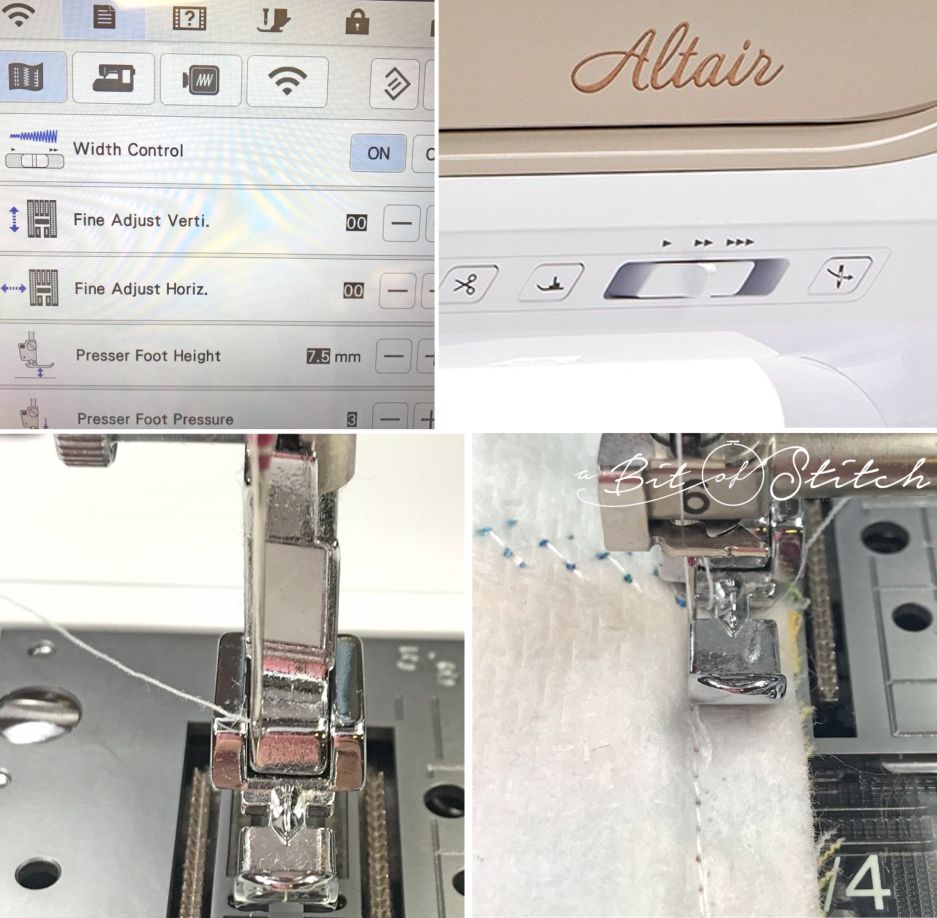
One of my favorite features on my Baby Lock machines is the ability to move the needle to exactly where I want it to be. How cool is that? Simply turn ON the width control in the menu, and now when you slide the “speed” button it will move the needle to the right or left. This means you can adjust the placement of your stitching line to be just to the inside of the line of stitching that attaches the piping to the pillow front. So, when sewing from the pillow front side through all layers (backing included), this will ensure that you get nice and close to the piping and that no extra line of stitching will show at the pillow’s edge. Now that really makes me happy!
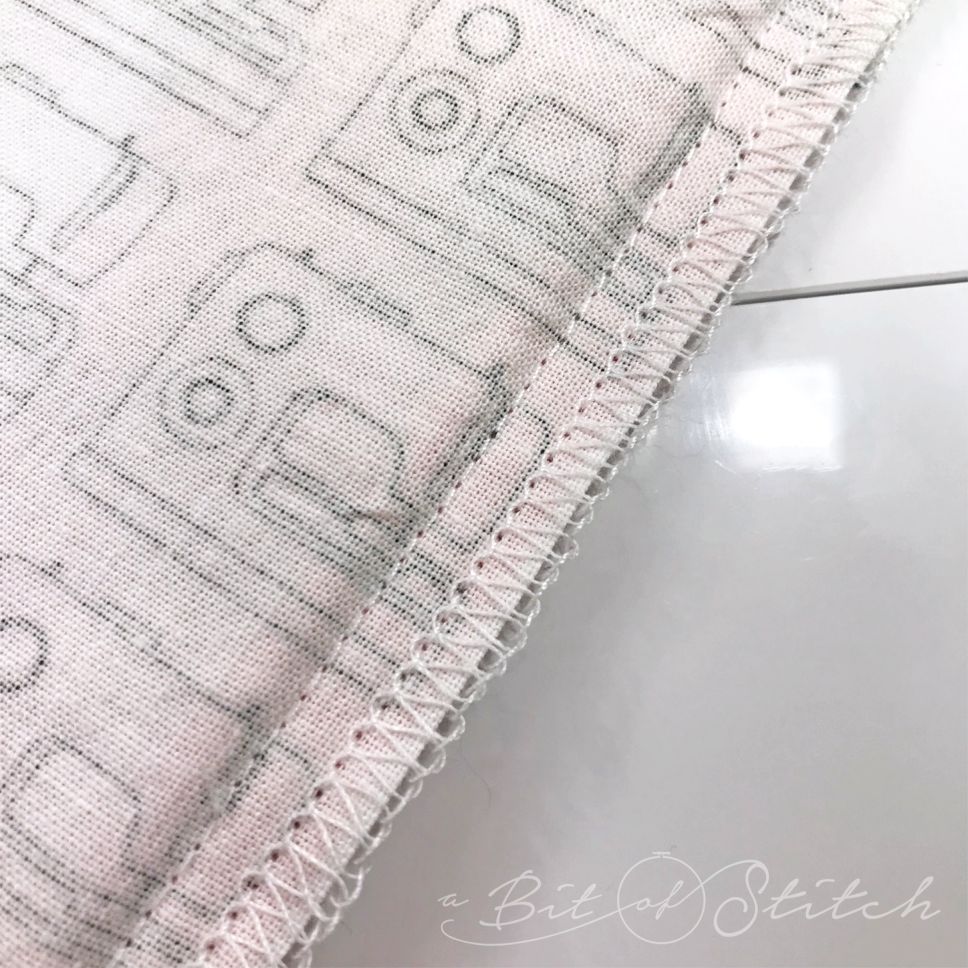
I like to serge the raw edges of the pillow with a 3-thread overlock before I turn it right side out. Makes it nice and tidy.
Use your Clear Curve Foot for your Baby Lock serger. It really helps you get around those corners! Plus, the clear foot makes it super easy to see where you need to be.
Ta-dah! How fun! I’m sew crazy and lovin’ it… how about you? 😊
Thanks for reading!
Evy
One reply on “Sew Crazy and Lovin’ it!”
Love the tips here Evy! Cute project too.