Let it shine, let it shine, let it shine! Machine embroidery, meet Creative Notion’s “Artistic Foils” and let the shine begin!
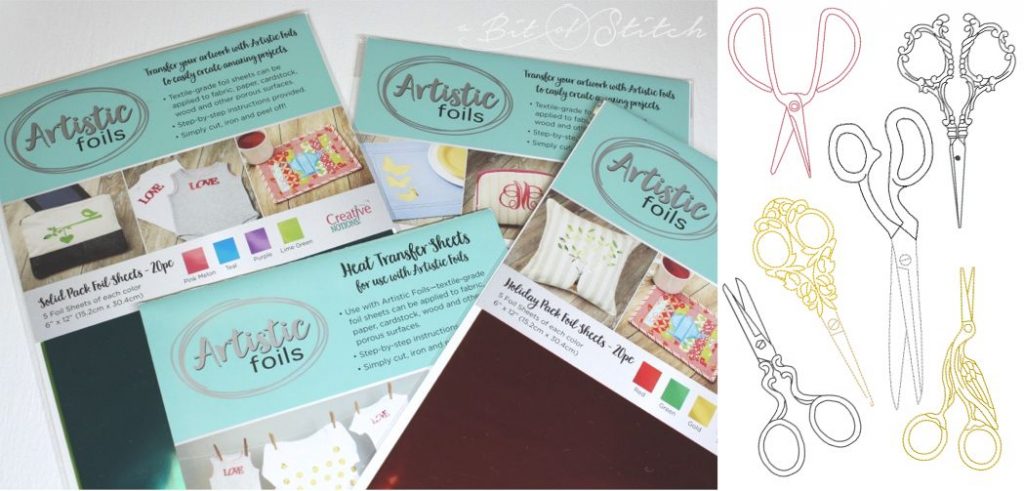
I first spied these pretty foil papers at Baby Lock’s Common Threads. All those pretty colors and the SHINE really caught my eye, but what really sparked my interest was that I didn’t need any special tools to use this product. Just scissors and an iron, pretty cool, eh? (Don’t get me wrong, I love cutting machines with all their clever possibilities, but some days it’s just nice to create “on the fly” with simple, easy stuff!)
The first thing I discovered was just how soft this product is when applied to fabric. It’s almost as if the foil becomes the fabric, which makes it a great choice for knits. AND…it also means that if one wishes to add machine embroidery on top of fabric that has been embellished with Artistic Foils, there’s no worry about needle perforations. That’s cool! I’ve been having a lot of fun with simple bean stitched designs sewn on felt and cut out to create crafty projects. Felt does not come in shiny, but I discovered that I could make it shiny with Artistic Foil. WOW!
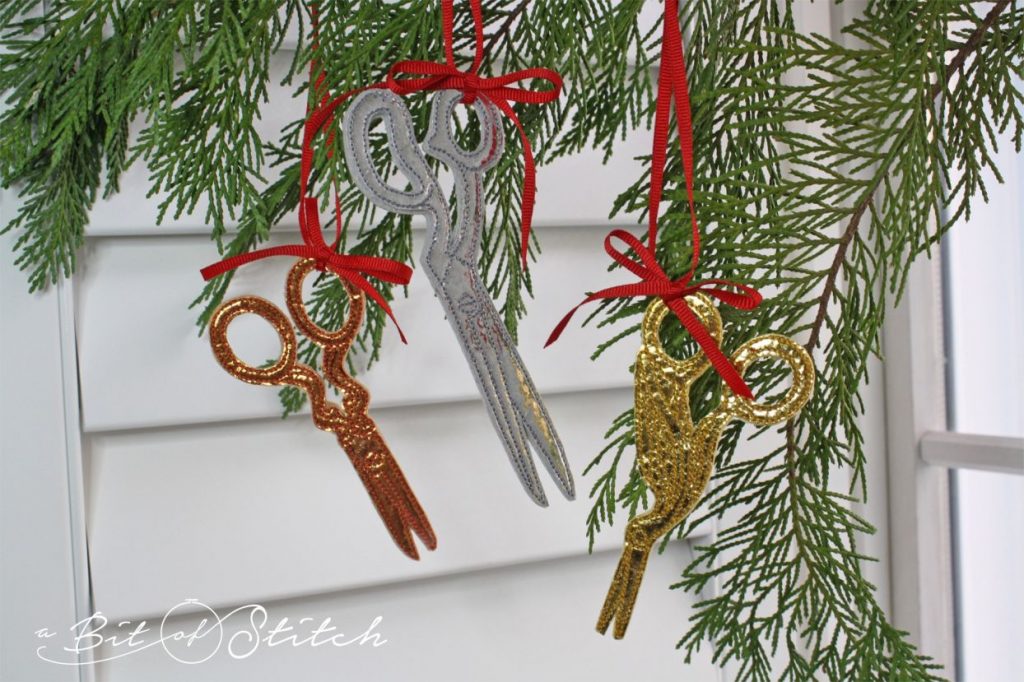
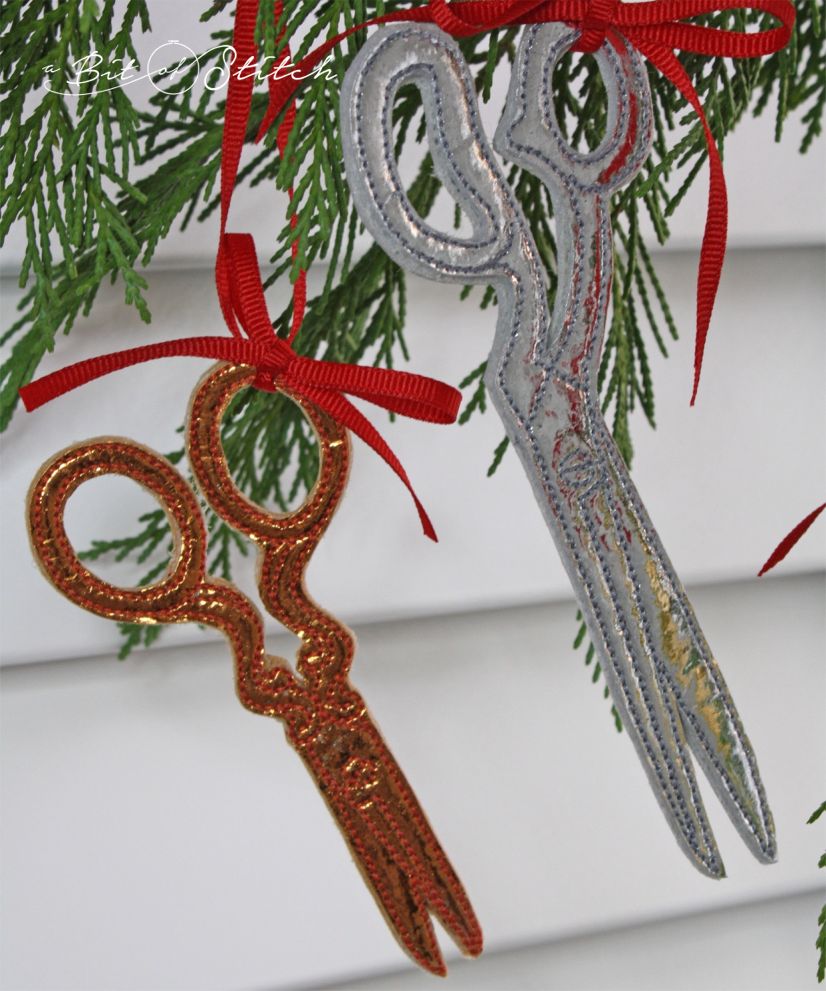
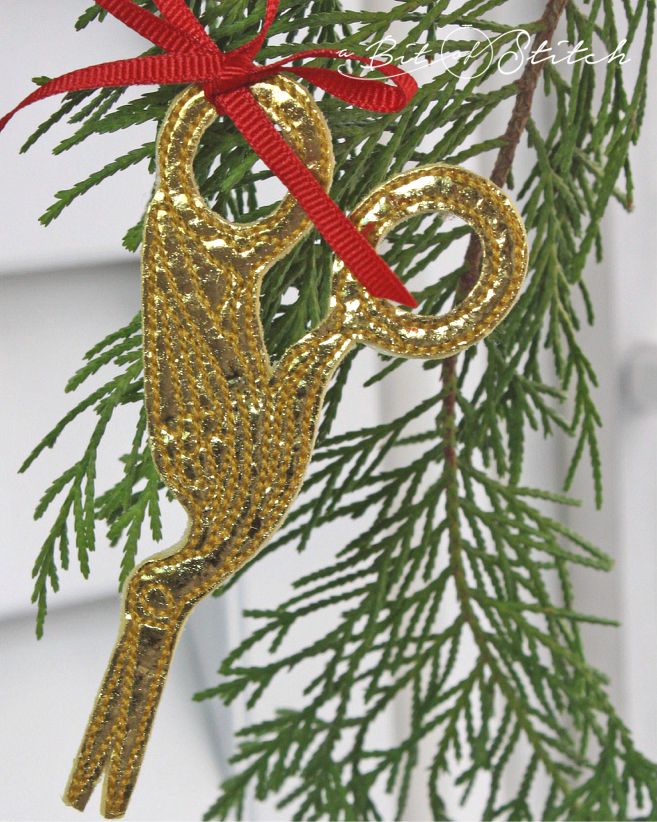
Like my shiny scissor ornaments? Want to make some? Here’s how…
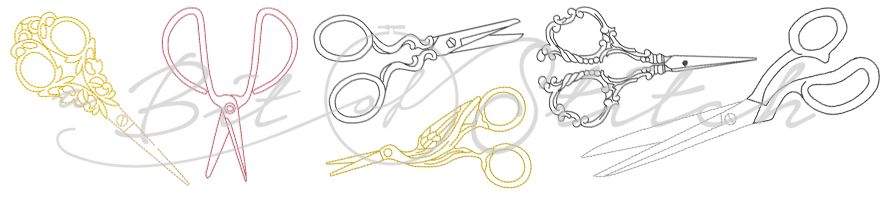
Grab your favorite pack of super shiny Artistic Foil from your local Baby Lock dealer and some bean stitch designs from your stash. I used my “Snip It!” embroidery design set which has six bean stitched scissors to choose from. Click HERE to find them.
Then you’ll need some No Show Mesh cut-away stabilizer (or a similar product.) You’ll also need some craft felt in a color that blends with the color of foil you plan to use. (Wool/rayon felt works best as it withstands high heat nicely, cuts cleanly, and is very sturdy. You can find wool/rayon felt in your local sewing store or online HERE.) You’ll also need sewing thread in a color that is slightly darker than the Artistic Foil and some type of permanent craft glue such as Super 77 spray adhesive or Beacon’s Fabri-Tac.
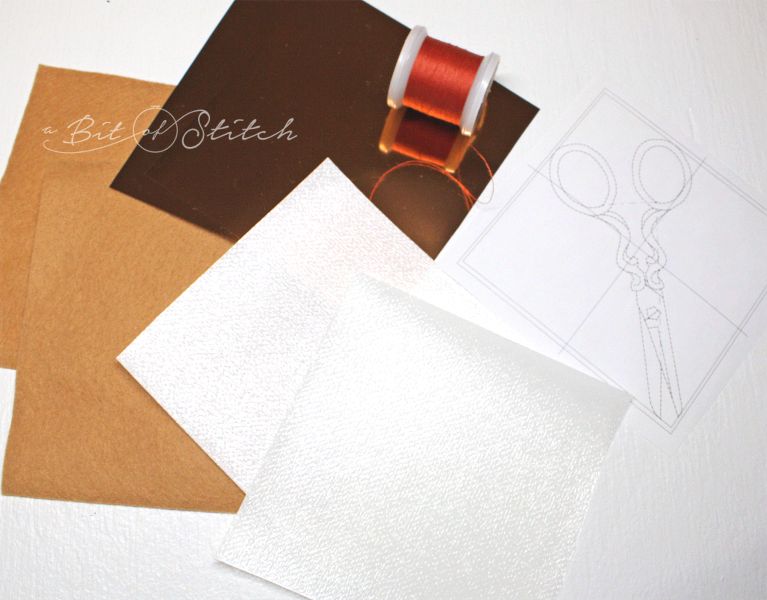
You might find it helpful to print out the design template of your chosen design so you can easily see the dimensions. Cut the craft felt about ½” larger than the design area block. Cut a piece of adhesive backing (it’s included with the Artistic Foil) about ¼” larger than the design area block. Cut the foil just slightly larger than the adhesive backing. Choose a thread color that will contrast but blend. I like to use regular sewing thread for bean stitched designs as the stitching really pops with that type of thread. Feel free to use embroidery thread if you wish; just keep in mind that it might blend in a bit more with the shiny foil background.
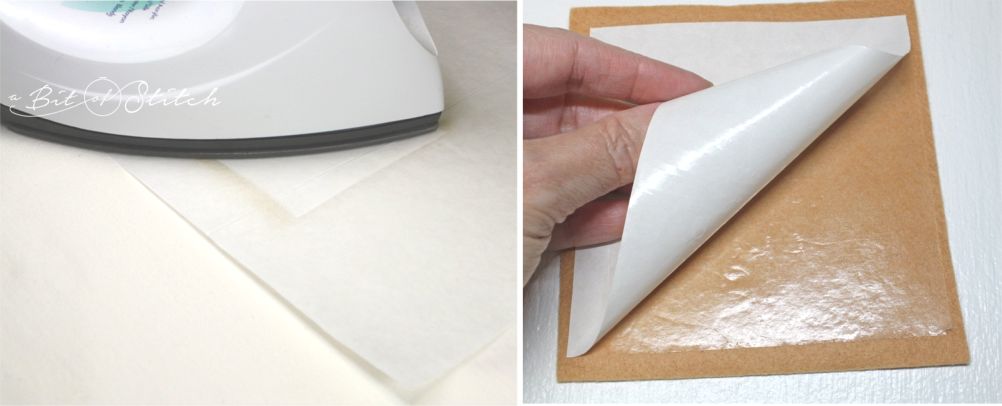
Follow the instructions on the foil pack to fuse the adhesive to the felt. Allow the material to cool completely before you peel up the paper backing to expose the slick adhesive. I found that the perfect setting on my iron for both the adhesive and foil was “cotton.” Experiment with a small scrap to see what setting your iron likes best. This adhesive fuses pretty fast at the right setting. There is a piece of parchment paper included in the foil pack that you can use for extra protection of your iron too.
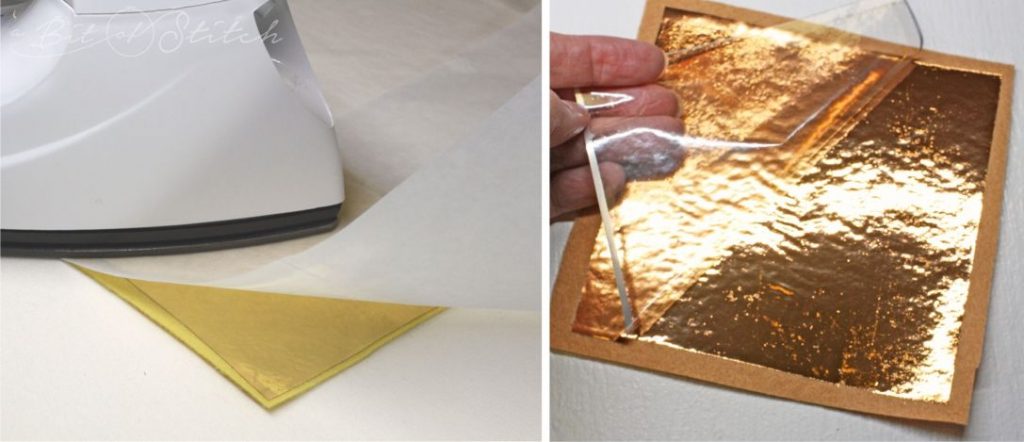
Place the foil block over the exposed adhesive, right side (shiny side) up. Make sure it covers the adhesive thoroughly. Place the parchment paper over the foil and fuse the foil. Don’t overheat it, but do go over the entire block thoroughly with the iron in smooth, slow sweeps. Once again, it’s a good idea to test your iron with a scrap or two to find out what setting is best. Too hot and you’ll melt the foil; too cool and it won’t adhere evenly. When you find the right setting for your iron it will fuse easily and cleanly. Use a dry iron. Once the product cools completely, gently peel up the clear release paper, exposing the super shiny foil. Take a minute to enjoy just how nicely pliable the felt still is!
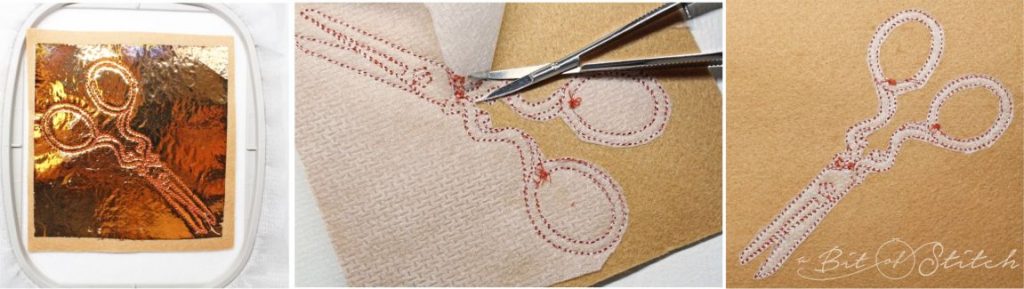
Hoop the No Show Mesh cut-away stabilizer in the appropriately sized hoop for your design. Place the felt in the center, foil side up, and use your on-board design perimeter finding tools to be sure the felt is placed where the design will stitch. Sew the design. Repeat the same steps to make another block of foiled felt. Mirror image the design and sew it again.
When you have two designs stitched (one a mirror image of the other), trim away the excess stabilizer from around the designs, cutting as close as you can to the stitching. Click HERE to find the trimming scissors I’m using in the photo – the best type ever to use for this job!
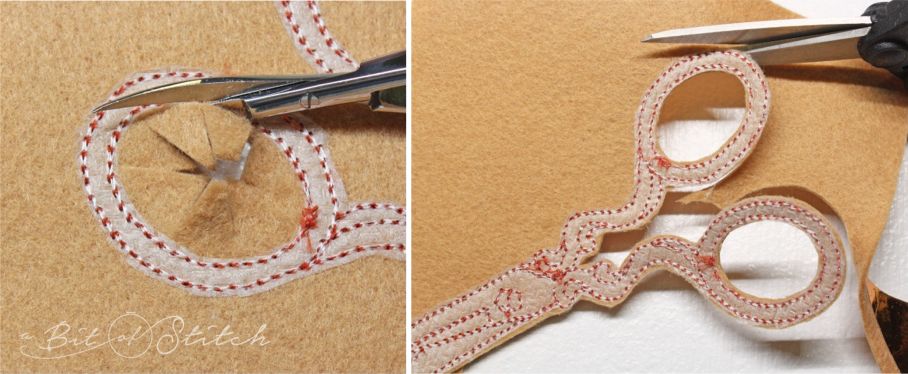
Use strong, short bladed scissors to clip open the inside of the scissor handles. I like to clip from the center to the stitching in a series of short cuts. Then I can use my curved bladed snips to easily cut away the fabric inside those handles. After you have trimmed away the inside of the handles, cut out the scissors, leaving a tiny selvage past the stitching line. It’s helpful to cut from the wrong side (stabilizer side) as you can easily see the stitches and won’t be distracted by that shiny foil. Audition the scissors wrong side against wrong side to be sure they will match up evenly. You might need to trim a bit more in some places to make them line up.
Apply permanent fabric glue to the wrong side of one of the stitched scissors and stick them together. Tie a narrow ribbon through the handles so you can hang them up. Voila! Shiny scissor ornaments!
Oh my! I’ll be dreaming of gleaming from now on – let’s see what else I can shine up! Happy Stitching, y’all! Hope you make a shiny or two, or three!
Evy
P. S. Watch this project making in action – Click HERE to view a video!
2 replies on “Foiled! Shiny Scissor Ornaments”
Where can we get the Artistic Foil? I searched your shop and didn’t find it . Thank you
Hi Tonya; I don't carry this in my shop sorry! (Wish I did, I'm about to run out of it myself!) It's sold at independent Baby Lock Retailers so if you have a BL dealer in your area that carries notions and fabrics give them a call and see if they have some. Otherwise you can find a very similar product on the Nancy's Notion's website called "Metallic Deco Foils" and they are applied with just a hot iron. The adhesive sheets are included. (Don't be fooled by the Deco Foil found elsewhere, some of those require a heat press or a special glue that is sold separately.)I hope this helps!