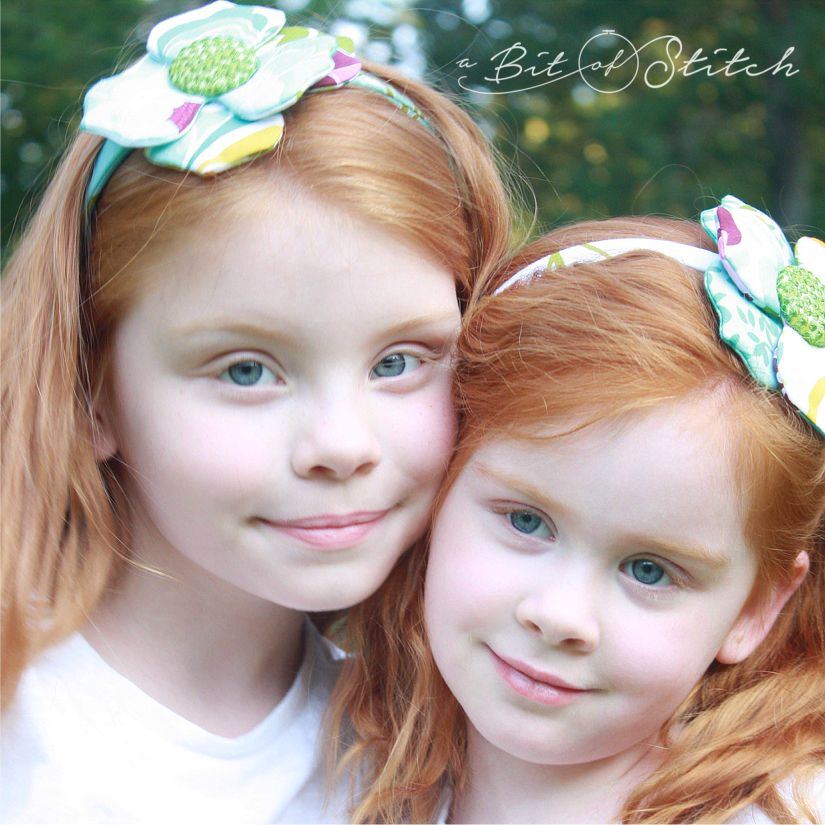
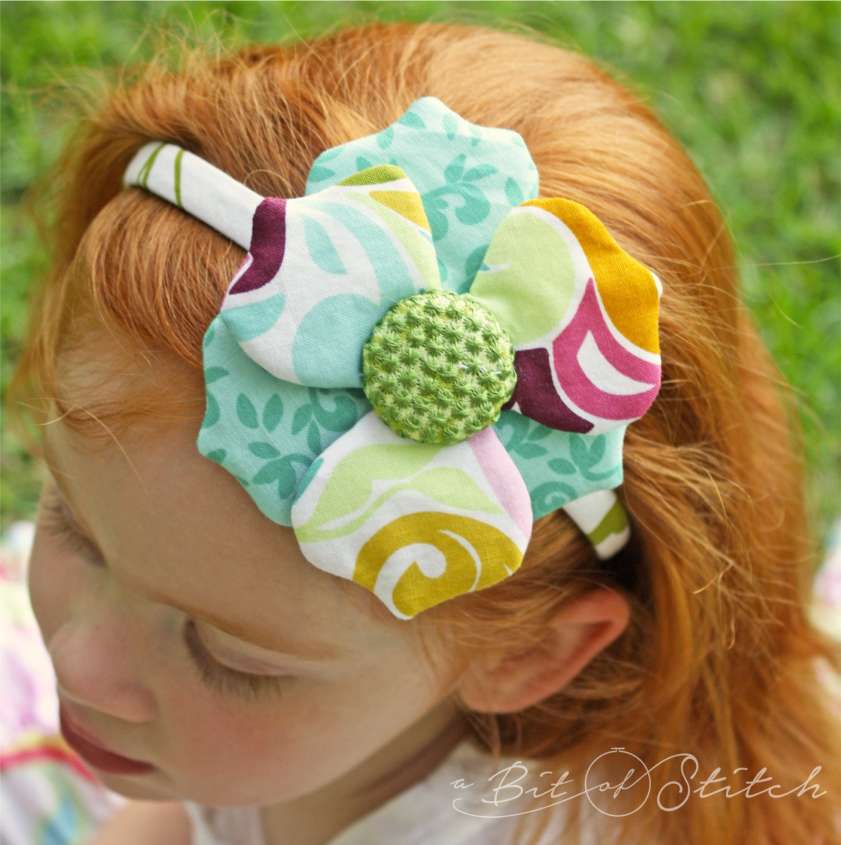
Make a fabric-covered flower headband and give it to a sweet little girl (or two) – who wouldn’t want a fancy topper for their noggin? Even not-so-little girls can enjoy these pretties! 😀
I used my Pretty Posy design set to create the flowers for the headbands shown here; however, you don’t have to have an embroidery machine to make a fabric flower! If you don’t have an embroidery machine, click HERE to find a PDF pattern to make the fabric flower with your regular sewing machine and follow the instructions in this blog post. If you do have an embroidery machine, you can use the Pretty Posy designs with your embroidery machine instead. There are even more options – like leaves and a daisy shaped flower – included in the Pretty Posy design set!
Those of you who have the Pretty Posy designs go ahead and follow the included directions to sew up a couple of pretty petals in your hoop, then follow along to finish the band.
Those of you who want to use your sewing machine to make them, let’s get started! Download and print the pattern (helps to print it on card stock) and cut it out. Trace around the pattern onto the wrong side of one 4” block of fabric. I picked pretty prints from Lila Tueller’s Halle Rose line for Riley Blake Designs.
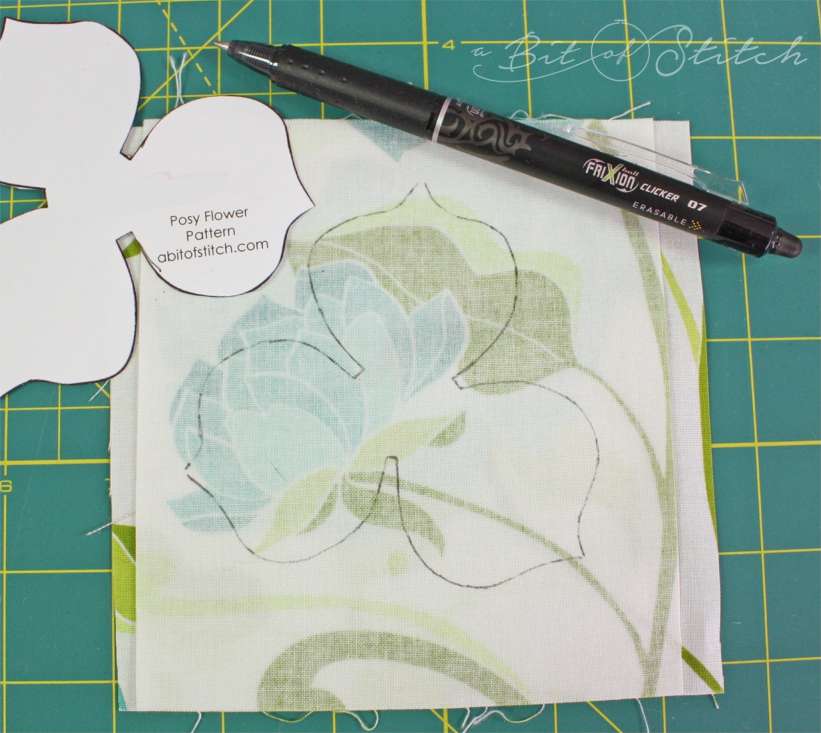
Have you ever used a FriXion erasable gel pen? These babies are pretty awesome! The ink disappears with heat, like an iron, who’da thunk it? I’ve tested them on lots of fabric and so far my marks have not returned. I love having a nice dark line to see. Plus it’s super nice not having to work with a soggy project when I’m too impatient to let it dry after trying to remove water-soluble pen marks. (Does that sound familiar to you? Ha!) I’m pretty much spoiled now. Find them at office supply places and your local Baby Lock retailers.
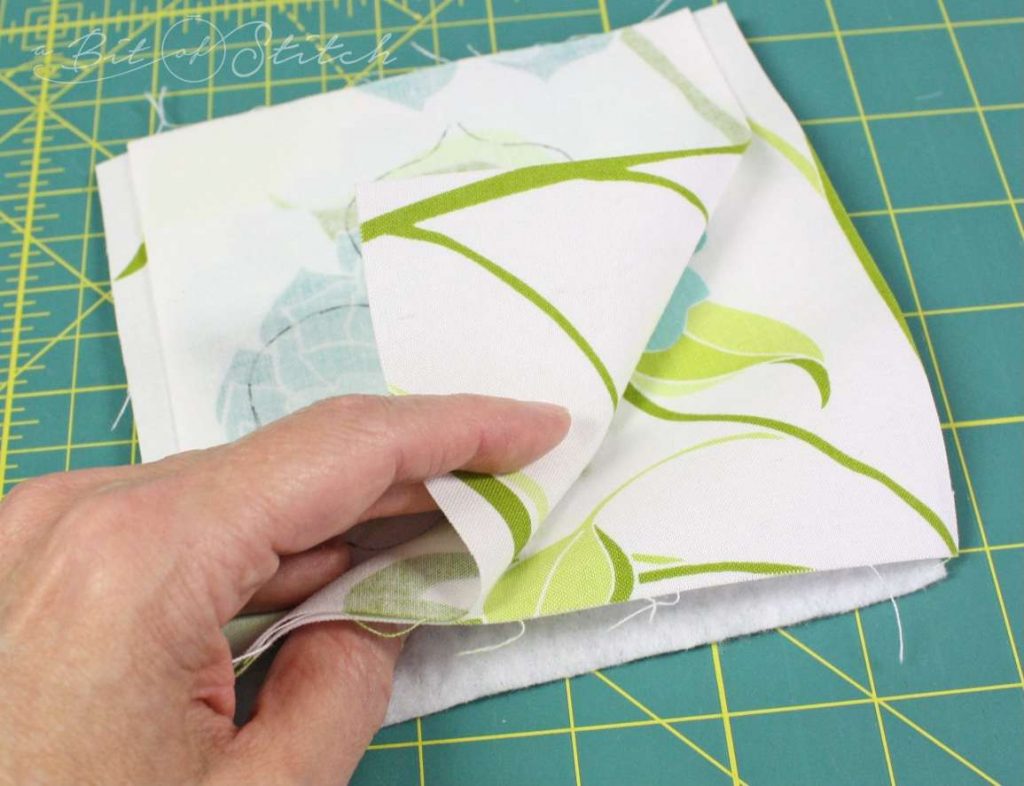
Add another 4” block of fabric under the traced one – right sides together, and then add a block of thin quilt batting under the fabric on the bottom. (The batting is optional, you don’t have to use it, but it makes nice, puffy flowers.)
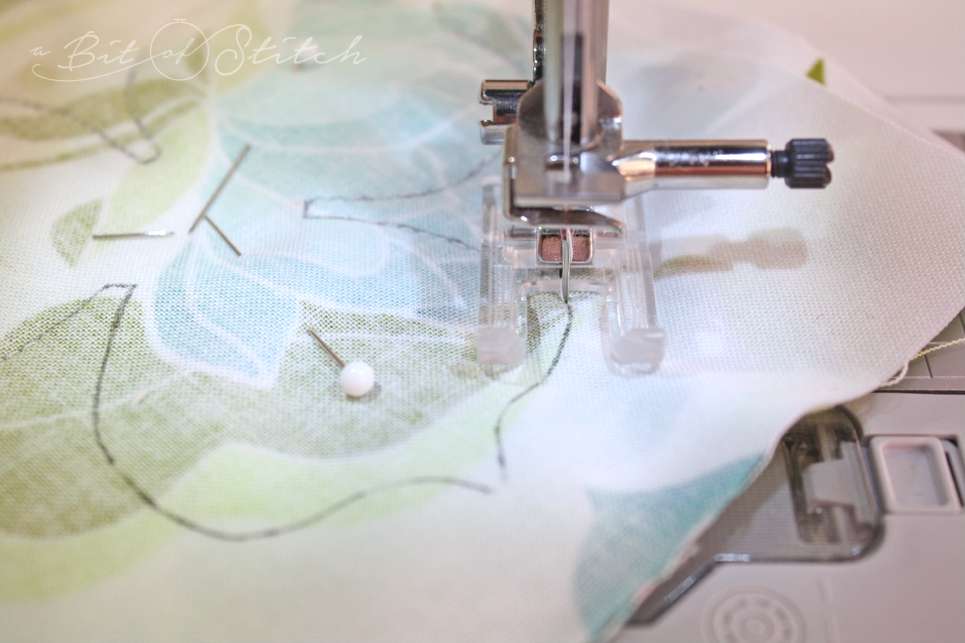
Pop in your clear Open Toe Foot and sew along the traced line through all layers. (Oh man I love this Baby Lock foot. You can see though it, around it and between it and the fabric, woo-hoo!)
Set the machine so that it will stop with the needle in the down position. Sew slowly, taking your time so you can stay right on the traced line. You’ll need to take a few stitches, stop, adjust the fabric under the foot and repeat. (It’s a small project; you’ve got time to be patient!) Having a knee-lift is very helpful for this kind of sew-stop-sew sewing too. Use a short stitch length and matching thread in the top and bobbin.

Trim away the batting first, cutting as close to the stitching line as possible.

Cut out the flower leaving a scant ¼” selvage past the stitching line. Clip the curves, notch the tips and cut a “Y” shaped opening in one layer of fabric.
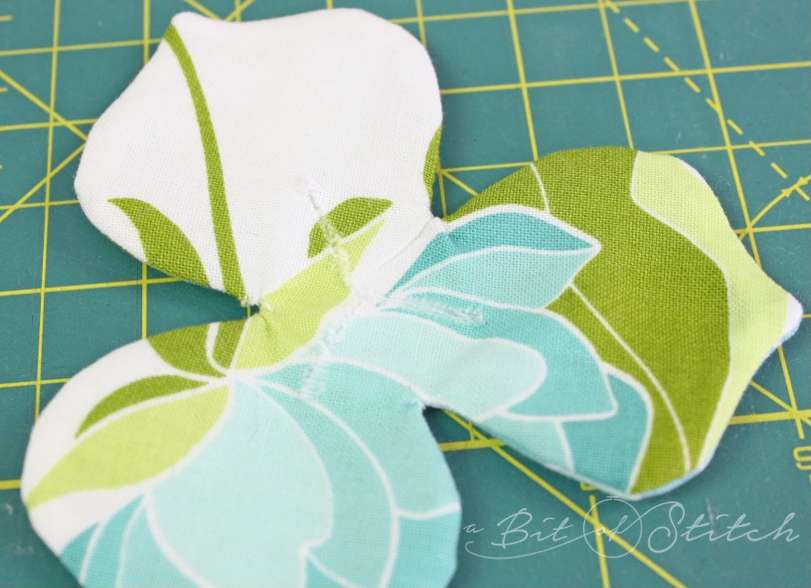
Turn the flower right side out using a turning tool to smooth out the curves. I like to use my Dritz Point Turner to push out the curved parts and points of the petal.
Press to smooth the fabric and straighten the opening. Slip a small bit of fusible web into the opening and use the tip of your iron to fuse it closed.
Make another! Keep in mind that you don’t need to match – use a different print or a different coordinating color – whatever floats your boat.
Cover a size 45 Dritz half ball cover button with pretty fabric to make a sweet flower center. You can pluck out the button loop wire before you cover the button. That makes it easier to use hot glue to apply the covered button to the flower petals when you attach them to the headband. (The covered button flower center shown on my sweet model below is included with the Pretty Posy design set.) You can also use regular buttons, pompoms or any other bit of trim that would make a nice flower center.
You can find inexpensive plastic headbands-to-cover at most craft and sewing stores or online.
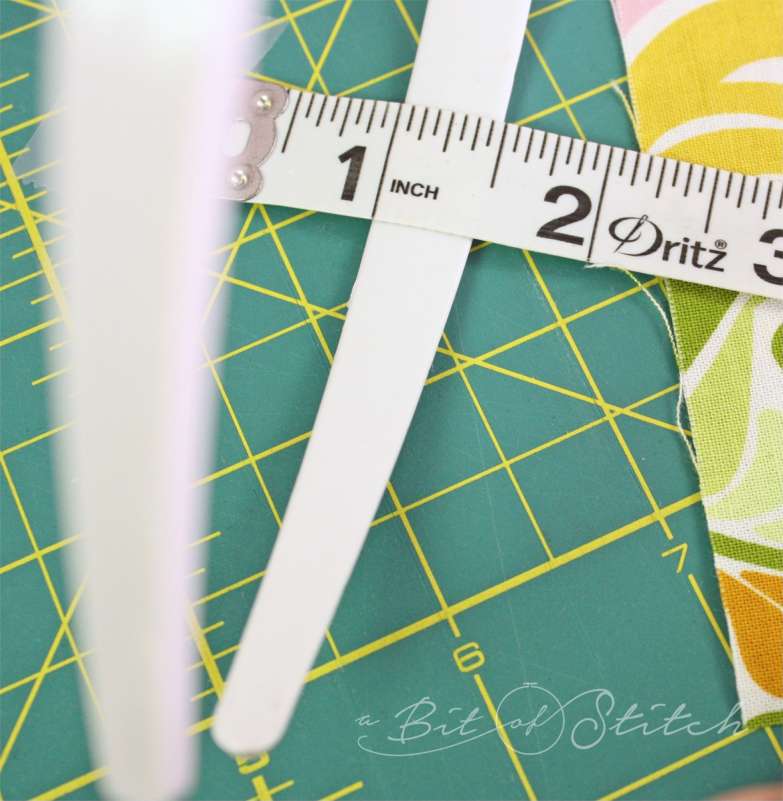
Measure the width and length of the head band. You will need a strip of fabric that is twice the width plus the thickness of the band, plus a ¼” seam allowance. So, if your headband is ½” wide then you will need a piece of fabric that is 1-½” plus enough to cover the thickness of the band. Usually that’s about 1/8”.
Divide the length of the headband in two with one piece about 1” shorter than the other, but put together still enough to cover the whole band. For instance, if your headband is 14” from tip to tip then you can divide that into 8” and 6”. Add ¼” to both ends for the turn-down bit and seam allowance. Now you have two fabric strips – one 8 ½” piece and one 6 ½” piece cut 1-5/8” wide.
Why a shorter and longer piece? Well, you will probably want the flower to perch on the side of her head somewhat, and not dead center on top, right? J
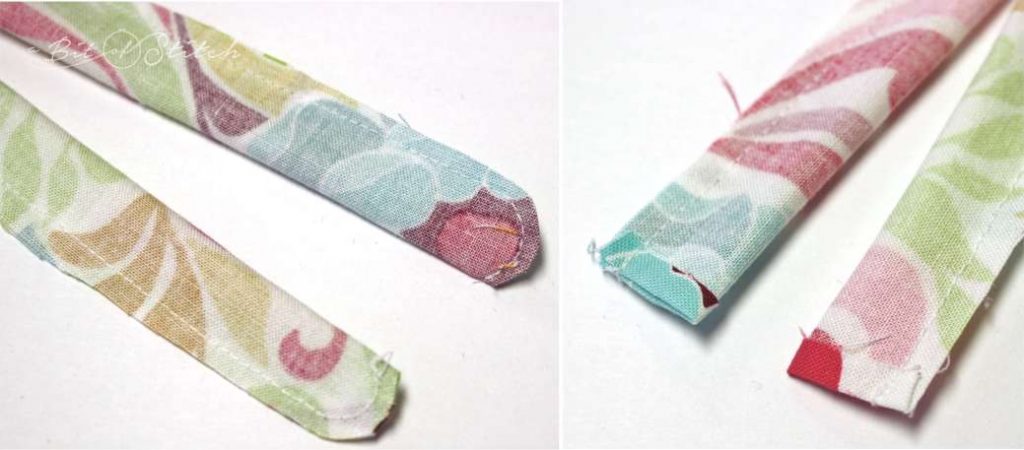
Press under ¼” at one short end of both strips. Fold the strips in half length-ways, right sides together and sew up the side and across the end. Round out the ends matching the curve of your headband tips for the prettiest results.
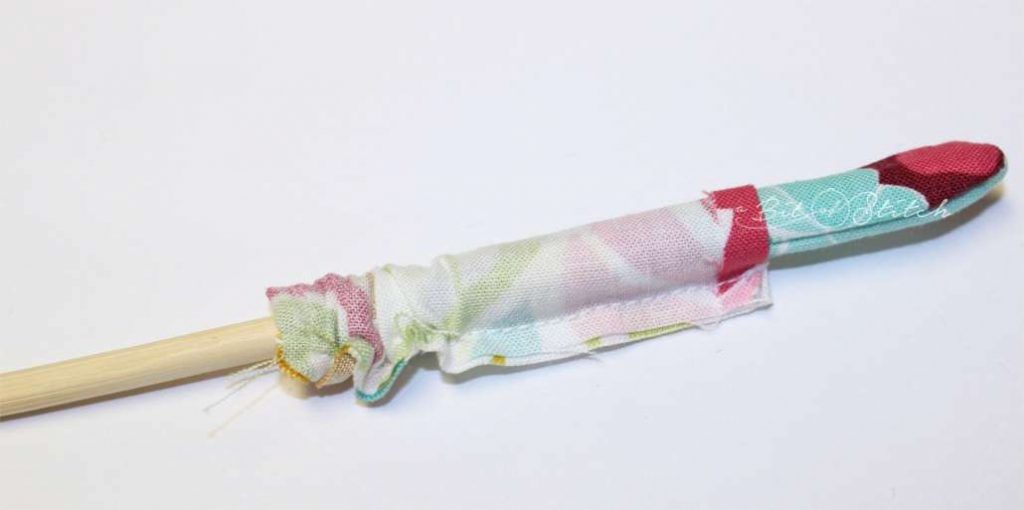
Turn the strips right side out and press. I use a skinny wooden dowel. What do you use?
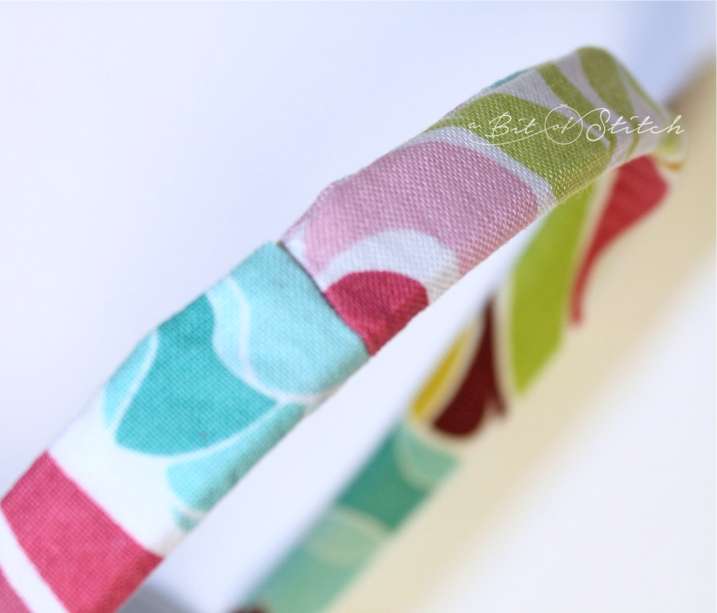
Slip the tubes on the headband keeping the seams at the back edge of the band. Apply a dab of Beacon’s Quick Grip adhesive where the two folded ends meet to secure the fabric to the band.
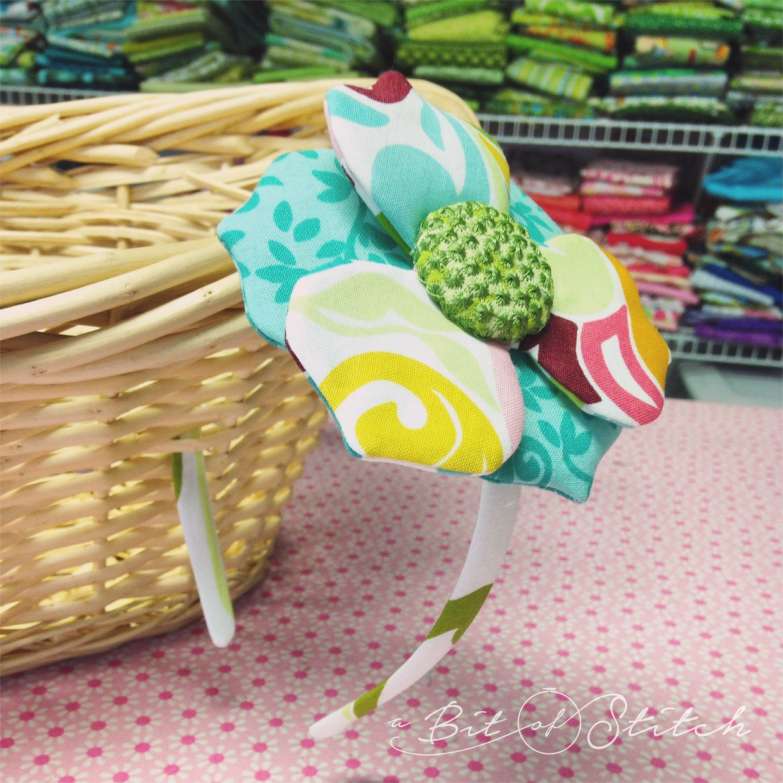
Use hot glue to assemble and apply the flower petals and flower center button to the covered band. Hot glue works great with fabric and is FAST.
Find a sweet little dear and gift her with a pretty posy headband!
Till next time! Thanks for reading!
Evy