
Make your appliqué designs POP! Fearlessly appliqué those beautiful, bold prints in your stash… and feel free to use white, sheer or lighter colored fabrics over dark and high contrast fabrics. YES, you can!

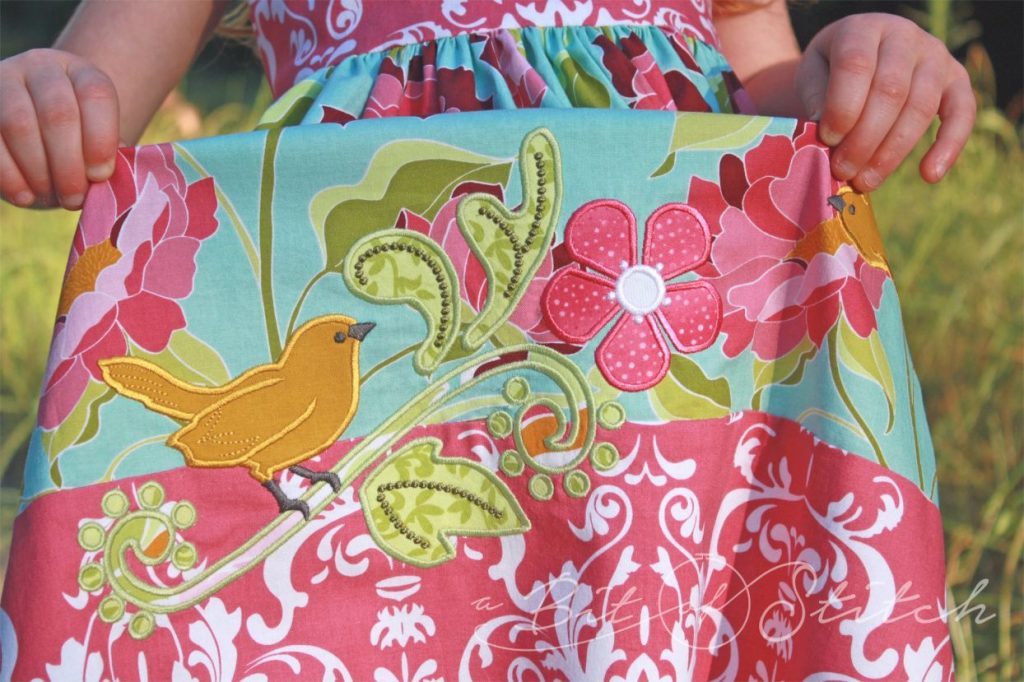
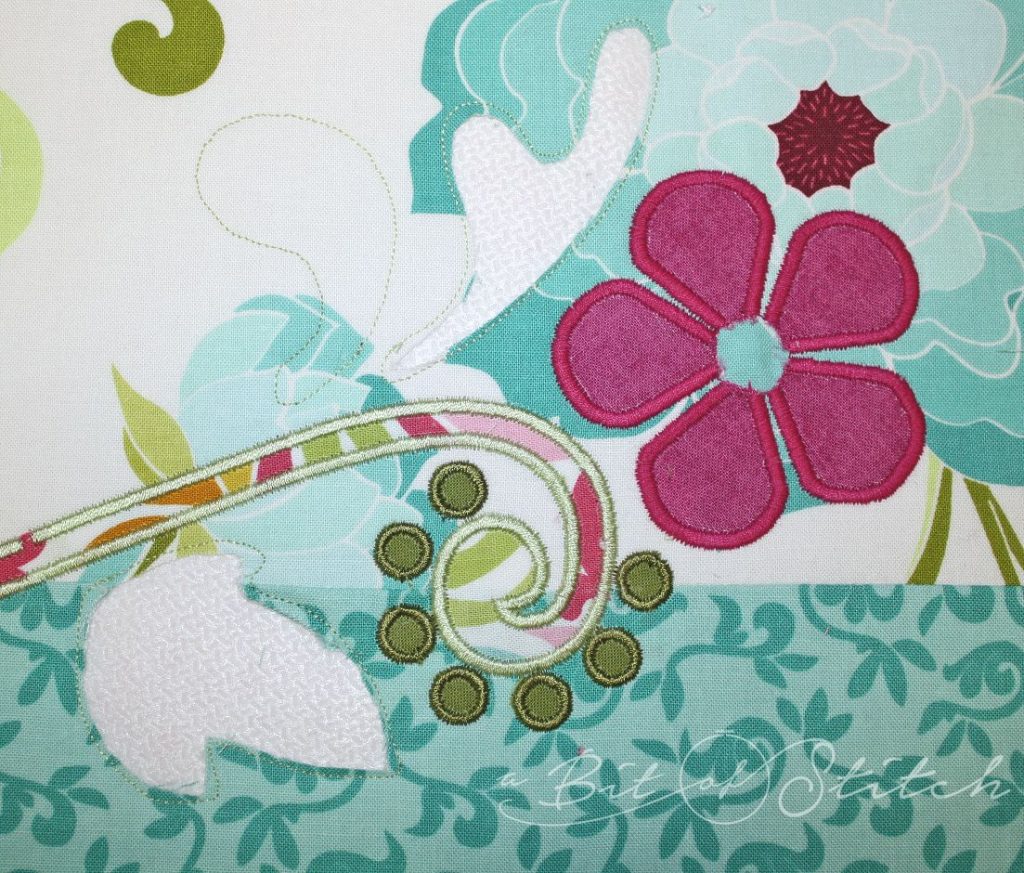
So what happens when your appliqué fabric is white and your background fabric is dark or rather brilliant? Yep. You get show-through. But see how pretty this white flower appliqué looks on this beautiful “Halle Rose” print by Lila Tueller for Riley Blake designs, pops right out there, doesn’t it?
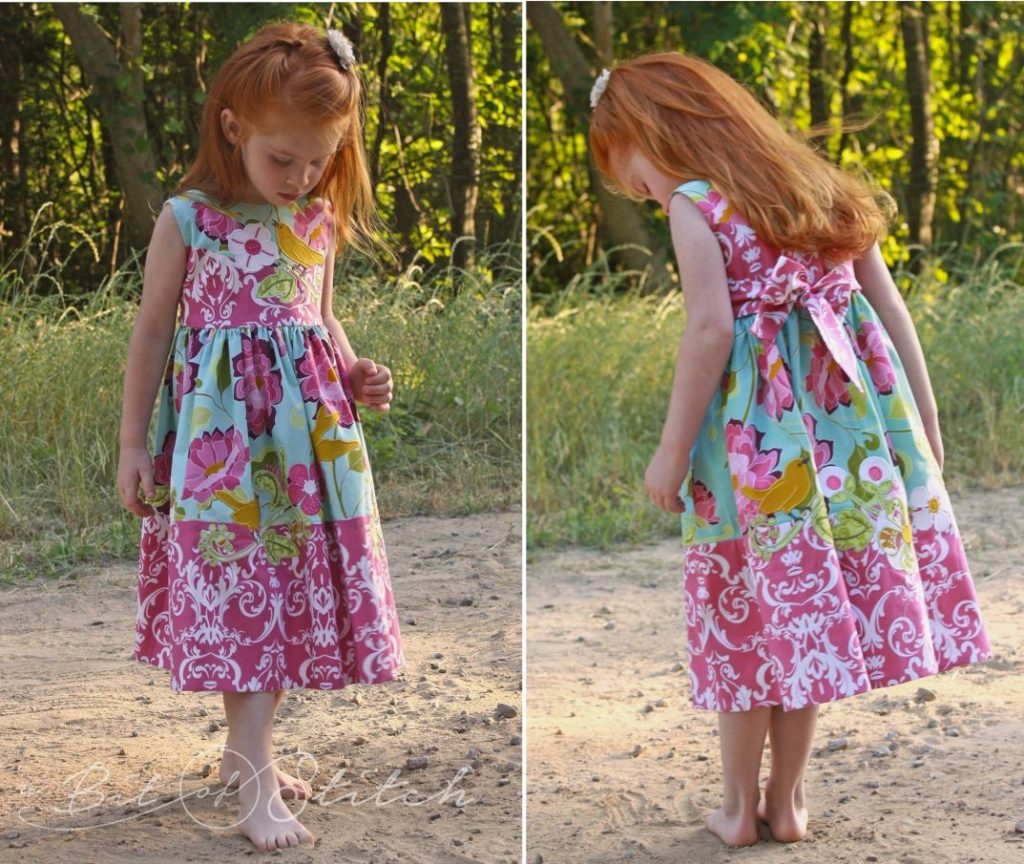
In the previous post I made my wee model’s sister a dress from Lila Tueller’s Halle Rose print in a white and teal combination of prints. That was challenge enough, but for this one I wanted to use the bold teal colorway with the coordinating dark orchid print for this dress. So, how did I make my appliqués stand up and pay attention?
It’s all in the stabilizer!
First of all, begin with pre-shrunk fabrics. Back your appliqué fabric with fusible webbing such as Steam a seam or Wonder Under 805 or whatever fusible web you like to use.
Get yourself a nice sturdy sheer cut-away FUSIBLE stabilizer. There are many versions of this product, sometimes called “No Show Mesh” or “Sheer Stitch” or something similar; I recommend it so much that I actually carry some in my shop – click HERE to find my Sheer Cut-Away Fusible Stabilizer! It is not stretchy and usually looks like a piece of sheer fabric made from non-woven polyester or nylon. Use any brand you are comfortable with, but do make sure it does not discolor when ironed or shrink when washed and that you will be able to peel it away from the fabric after lightly fusing.
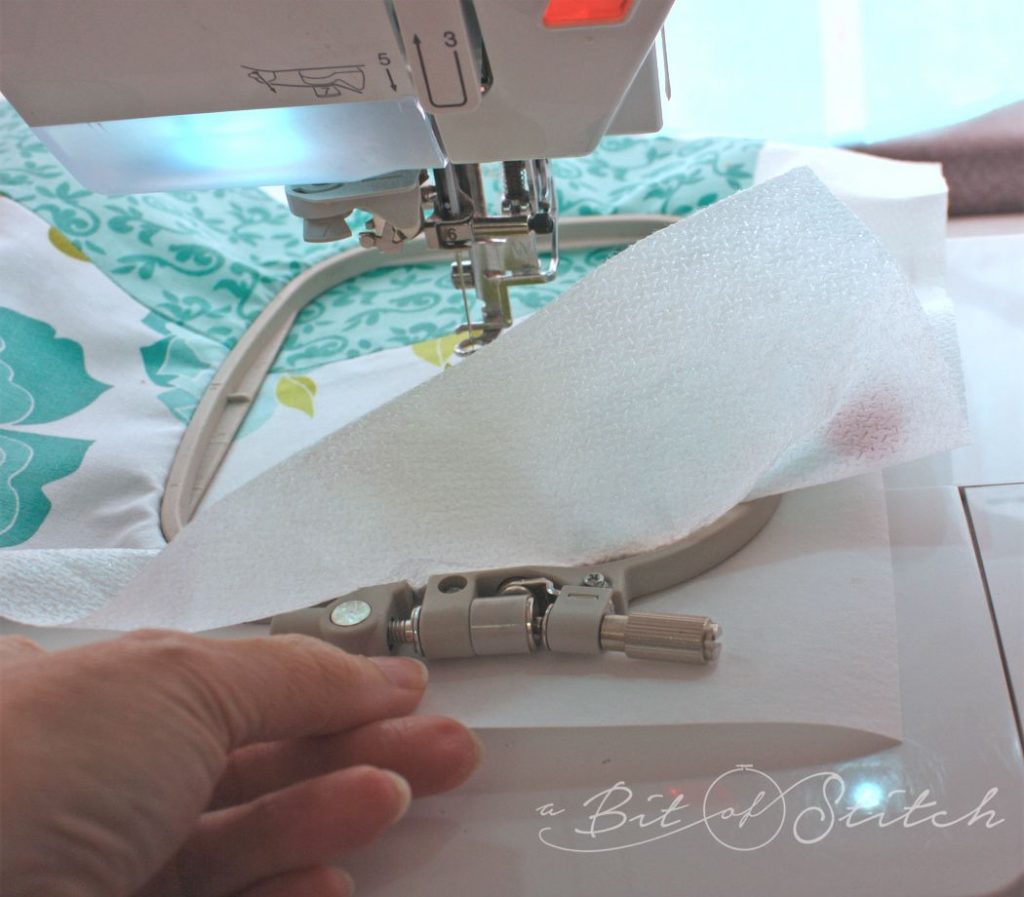
Gently fuse this stabilizer to the wrong side of your project fabric. Make sure it covers an area larger than the hoop you will be using. Hoop the fabric and attach the hoop to the machine.
Sheer cut-away stabilizer is rather light-weight. Appliqué designs have a satin stitched edging which can be stitch intense. You will need one more layer of a regular soft tear-away stabilizer for your project. Slide this extra piece under the hoop.
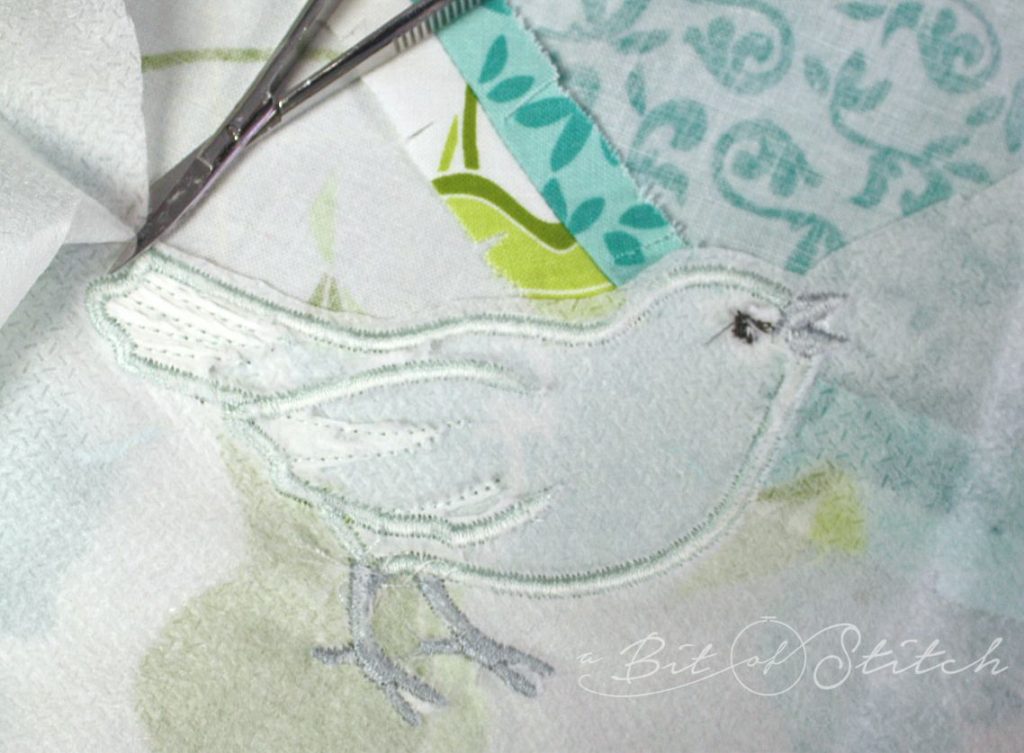
Sew the first running stitch outline for the appliqué. Remove the hoop from the machine and place on a hard flat surface while you carefully cut away the project fabric WITHIN the stitching line. It’s helpful to have little snippy scissors like THESE. You can poke a point carefully in and wiggle a little opening until you are able to slide the snips under the top layer of fabric. Take care not to cut through the sheer stabilizer beneath. This is why you fused lightly – so you can now peel up the cut-away fabric.
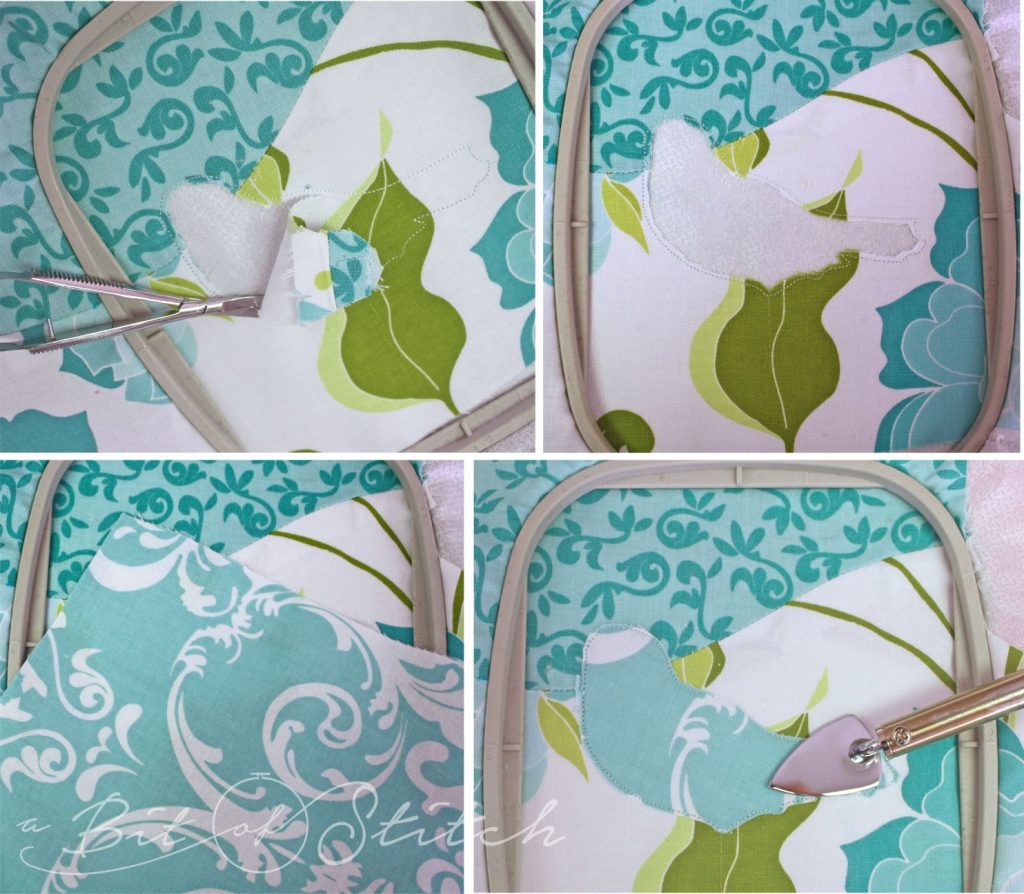
You’ll notice that I left a little “lip” of fabric within the stitching line. You are creating a seam allowance with that bit of fabric, so make sure you leave a little fabric there.
Apply the appliqué fabric, stitch it down, trim it close to the stitching line and fuse it well. Finish the appliqué design as you normally would.
In some places you might not need to cut away all of the appliqué parts if it’s a multi-part appliqué like this Peeps & Posies design. You’ll notice in the photo above that I cut away only the leaf parts that were over the dark teal print portions. My leaf appliqué fabric was a pale green, much lighter than the dark teal in the print beneath it.
When complete and removed from the hoop, gently remove the excess tear-away stabilizer. (That’s the extra piece you “floated” under the hoop.) Then peel up and trim away the excess sheer cut-away stabilizer around the finished appliqué on the wrong side of the fabric. Leave a little bit, but make it as neat and tidy as you can. Give the fabric a good press from the wrong side to finish fusing all the fusible layers together. Use a press cloth between your iron and the sheer cut-away.
Check out these photos. This is the same design, same background fabric and same appliqué fabric.
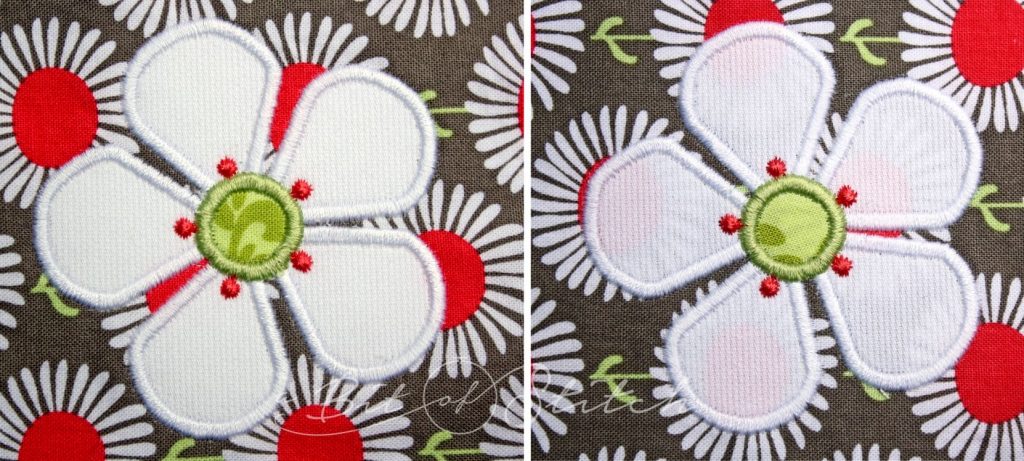
I used the “cut-away the background fabric method” on the left flower, but not for the one on the right. You can see the difference! This technique is awesome when used for appliqués that cross a seam. No more seam-ridge-bumpies distorting your pretty design either. Now that just makes my picky self happy, what about you?
Happy appliqué-ing!
Evy

4 replies on “Applique Pop!”
Evy this is brilliant! My picky self will absolutely be using this tip! 🙂
Thanks for the tips on applique- you did a beautiful job on these dresses! I love this fabric! cherisetoweratyahoodotca
I Love this method, I studied what you were saying, enlarged the screen to take a closer look, clicked on your links and BLAM I understood!
Thank you for putting this together and who would think to appliqué over such a busy print.
Brilliant Evy :>
Thank you! I’m so glad you found it helpful! 😀