Appliqué, appliqué – how do I love thee? Let me count the ways…
You let me cover ground fast. (That means bigger statement, less time!) You let me use up my precious scrap bits that I cannot seem to throw away. (Which makes the pack-rat in me say “see I KNEW you’d need that one day!”) AND, when I need bigger pieces you let me use up my stash, which means I have to go buy more. (I mean really, folks, what’s NOT to love about that!) PLUS, you are perfect for using all those “charm” packs and other wee bundles of tiny pre-cuts that I so love to collect. (Which means I can justify stockpiling more of them, ahem.)
I was a fan of appliqué back in the days of no-home-embroidery-machines even when it required a lot more work. Now that my fancy embroidery machines have taken all the huffing out of the job it’s really gotten fun! If you are new to machine embroidery appliqué, have never tried it (and want to), or just want to polish up your skills, this weeks glob of blog is dedicated to making YOU an appliqué pro AND getting you hooked on it! (That’s a forewarning; don’t blame me when you start walking around the house looking for stuff to appliqué. Hide the dog. And the cat!)
Things you will need:
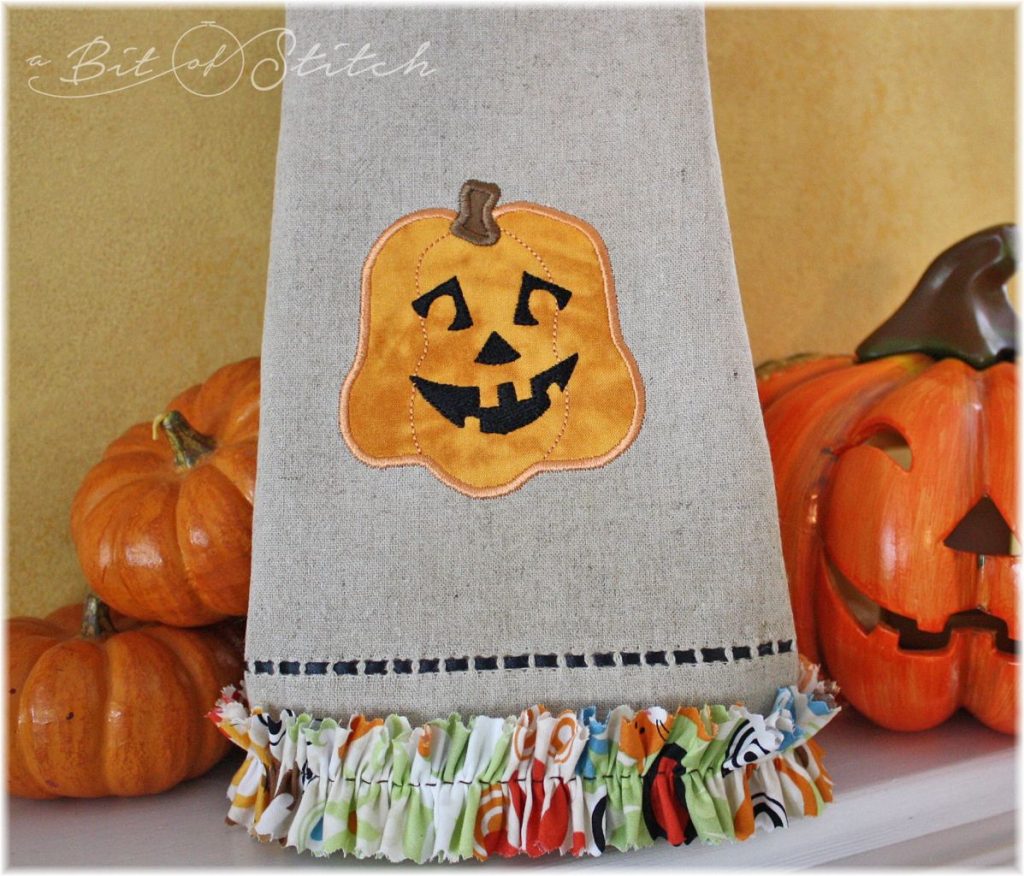
- Jack-o-lantern appliqué design (You can skip the face and just make a pumpkin if you wish)
- Something to stitch it on (I used a linen tea towel from All About Blanks)
- Appliqué fabric – quilt weight cotton works very nicely (You’ll need a block of pumpkin fabric and a small piece of stem fabric)
- Fusible web with release paper backing (Pellon® Wonder-Under® or whatever brand you like best)
- Embroidery thread (match the pumpkin and stem fabric plus black for his face)
- Bobbin weight thread (white is fine)
- Fusible tear-away stabilizer (such as THIS ONE)
- Soft tear-away stabilizer
- 4×4 Embroidery hoop
- Mini-iron
Let’s get started. First of all, let me emphasize to you the importance of pre-shrinking your project fabric and your appliqué fabric. You may choose not to do so, but if you plan to wash this project (at all) keep in mind that different fabrics reduce somewhat when washed. This can cause wrinkles and ripples later. Stitches do not reduce. Fabric does. You get the picture!
Back your appliqué fabrics with the fusible web and go ahead and remove the release paper so you won’t forget to do so later.
Apply one layer of a fusible (iron-on) tear-away stabilizer to the wrong side of your project fabric. This piece of stabilizer should cover an area larger than the hoop.
Why am I recommending a fusible tear-away? It does two things very well. It keeps the fabric from shifting, stretching, distorting or moving at all while it is in the hoop. And it keeps you from having to tug on the fabric to remove any wrinkles, etc. while you hoop it!
Hoop the stabilized fabric in your 4×4 hoop according to your design placement.
Load or send the Jack-o-lantern design to your machine. Print (or have handy on your computer) the color chart that came with the design.
Turn on your mini-iron. Make sure it isn’t touching anything and don’t forget where you put it! (I’ve melted plastic stuff and scorched fabric with mine. Yep. Some days I need a minder.)
Thread the machine with embroidery thread on the top and bobbin weight thread in the bobbin. Match the top thread to the pumpkin appliqué fabric. I like to use a size 12 needle for my appliqué designs. Satin stitching is tough on needles, but a too-big needle seems to mess with tiny detailing – a size 12 is usually just about right. A metallic 12 has a little larger eye, meaning less stress on your thread.
Attach the hoop to the machine. Make sure nothing is impeding the movement of the machine’s embroidery arm.
Slide a piece of soft tear-away stabilizer under the hoop, centering it within the hoop. This piece of stabilizer should be just a little larger than the 4×4 hoop.
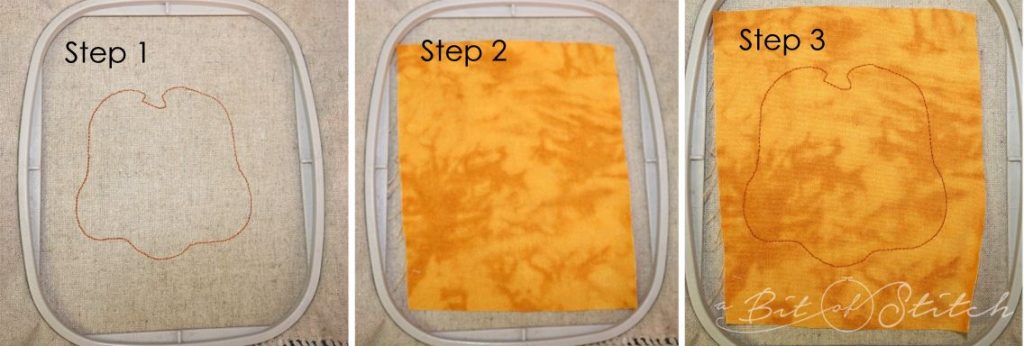
Sew the first stitch sequence. (Step 1 below.) This is the first pumpkin outline, named “Appliqué Material” on the design’s color chart. (Ignore the colors on your machine’s screen. Just watch the sequences.) This outline shows you exactly where the pumpkin appliqué fabric needs to go.
Place a piece of your fusible backed pumpkin appliqué fabric over the outline, covering it completely. (Step 2 below.) The appliqué fabric must be right side up and fusible side down. (Did you remove the release paper already? If not, do it now!)
Sew the second stitch sequence. This is the second pumpkin outline, named “Appliqué Position” as this step sews the appliqué fabric into position. (Step 3 below.)
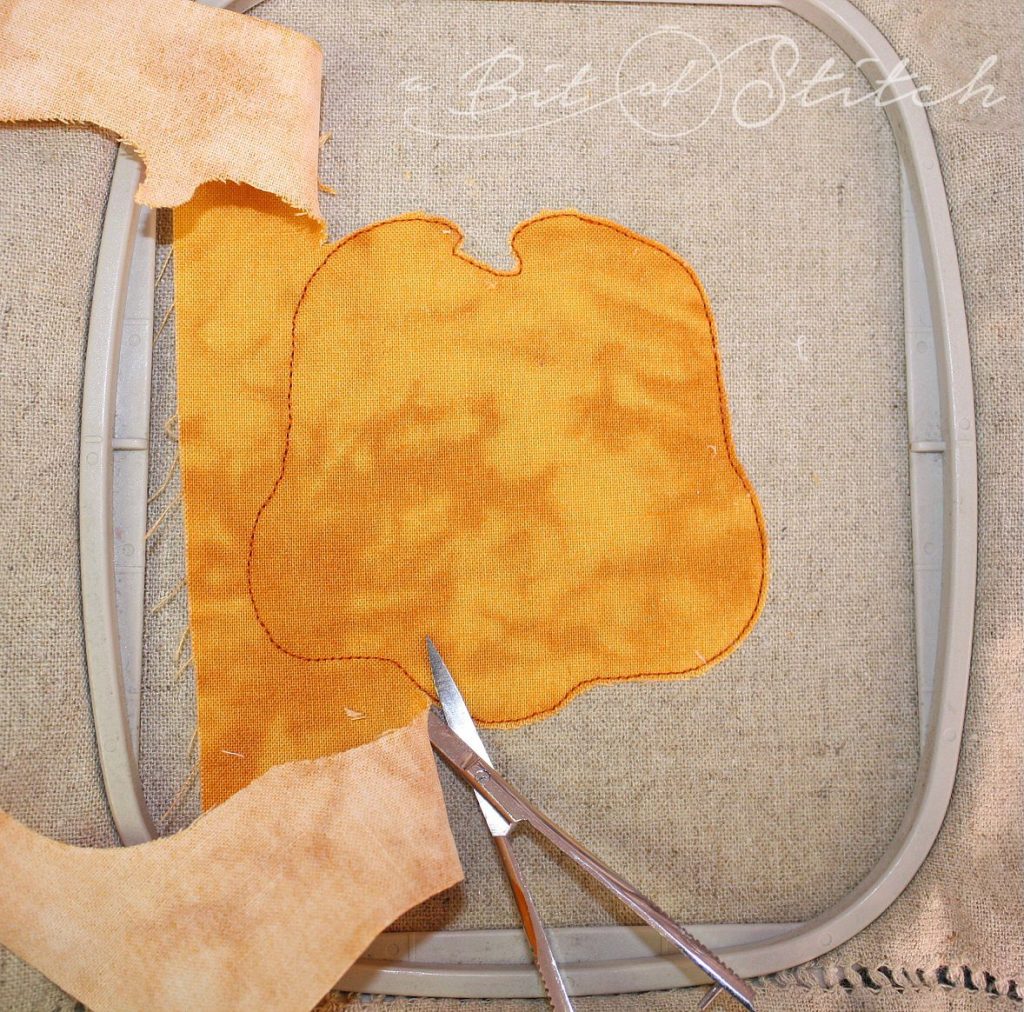
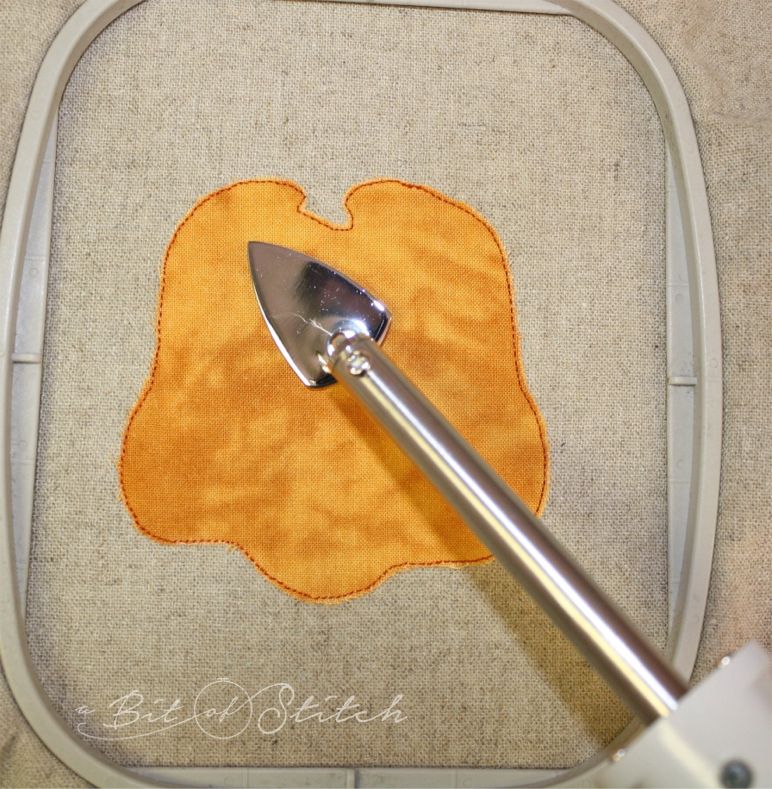
Carefully remove the hoop from the machine and place it right side up on a hard, flat surface. (Ahem. This is not your lap.) Use small, sharp scissors with curved blades to cut away the excess appliqué fabric. You’ll want to cut closely, but don’t cut into the stitching line.
Clean up the messy bits with a little masking tape, painters tape, cellophane tape or whatever type of tape (or mini-lint roller) you have handy.
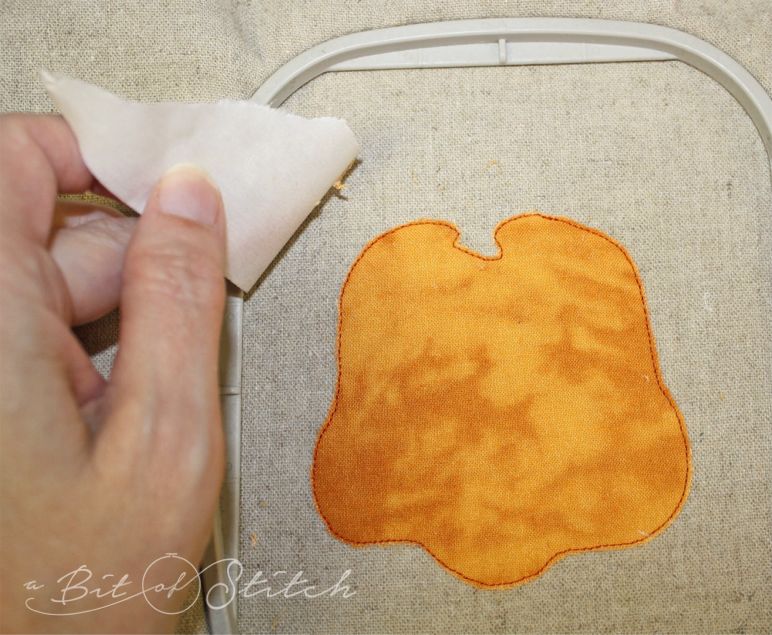
Fuse the appliqué fabric to the background fabric using your mini-iron. Make sure the surface beneath the hoop is heat protected, hard and flat.
Pop the hoop back in the machine. Always hold the hoop by THE HOOP and not the fabric in the hoop. In other words, don’t touch the fabric inside the hoop while you are moving the hoop around.
The third stitch sequence for this design is the pumpkin segment detail lines. They travel down the front of the pumpkin on the right and left and designate the pumpkin segments. I used the same color (matching my pumpkin appliqué fabric) for my pumpkin. You can use the same or a slightly darker shade if you wish. Sew the third stitch sequence now.
Stitch sequence four is the final satin stitching around the pumpkin. Use a thread color that matches the pumpkin appliqué fabric. This should be already in your machine unless you chose to stitch the pumpkin segment lines in a different color. (NOTE – this is why it’s important to always, always read the designer’s color charts and instructions. We like to change things up and keep it lively cause we’re sneaky like that!)
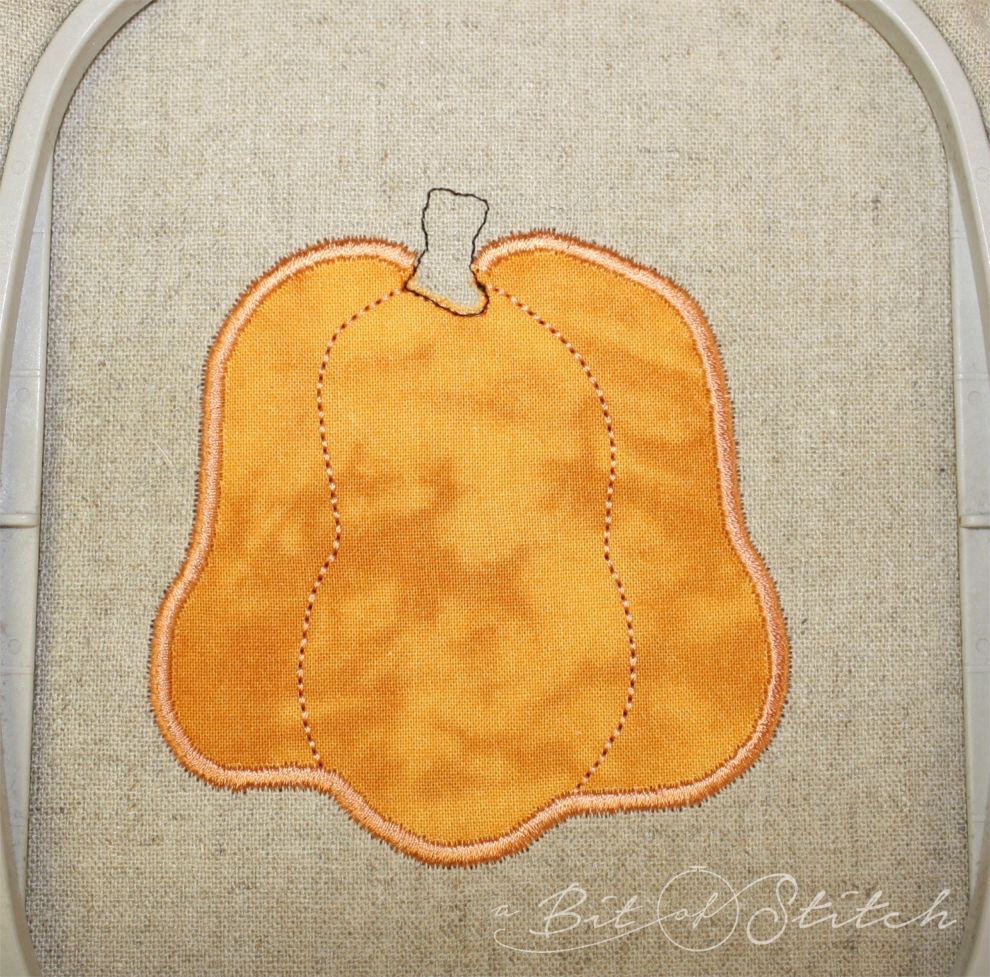
Thread the machine with embroidery thread on the top in a color that matches the pumpkin stem appliqué fabric. Sew stitch sequence five. This is the first outline for the pumpkin stem. Continue, following the same steps as you did for the pumpkin fabric. Cover, stitch down, trim, fuse and satin stitch. It’s that easy!

You’ll notice that I was being careful where I placed my mini-iron while I fused the stem appliqué fabric in place. I tried not to place it directly on top of the satin stitching on the pumpkin. Sometimes that can’t be avoided. In those cases I’ll place a piece of the scrap release paper or a pressing cloth over the design first and then fuse the appliqué part through the paper or press cloth.
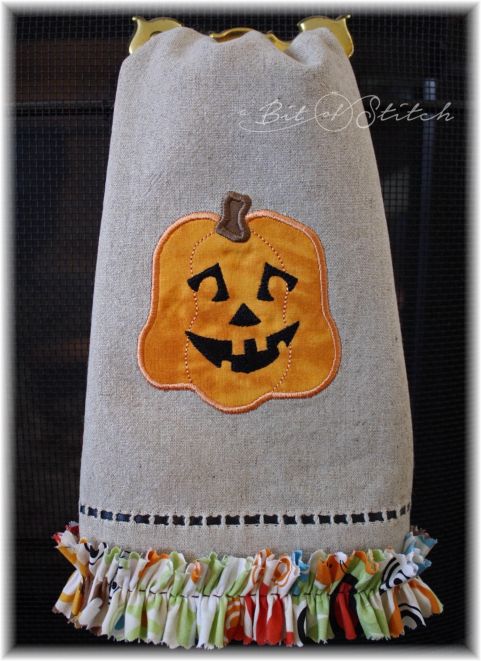
The final stitch sequence is Jack’s face. You can skip this part of the design if you’d rather just make a pretty pumpkin.
You are finished! All that’s left is to remove the stabilizer and give your new pretty a press from the wrong side. Boo to you too!
Wasn’t that fun? There’s a FREE little purse appliqué design HERE that you might enjoy for extra practice. And I also have a tutorial on my video page that you might find helpful HERE.
Thanks for visiting, now let’s get stitchin’!
Evy
P.S. Yes, that’s a sweet sassy Sashiko ruffle on the towel’s edge. You know I can’t resist playing with my Sashiko… and ruffles are so fun!
9 replies on “Amazing Applique!”
I typed a comment and can't see it so here I go again. Thank you so very much for the pumpkin applique design. It will be very useful this season
You are welcome Lisa! Thank you for taking the time to comment 🙂
Thank you so much for the fabulous pumpkin applique design! Your instructions and pictures are so intricate and easy to follow! Love applique!
Gail Beam
Do you use a Topper over your appliqué once you have the fabric down? Do you use a Topper if you have a machine embroidered name or wording above or below the pumpkin. Do you use Toppers on your machine embroidery? (Topper usually a clear or opaque water-soluble covering you stitch over & remove when finished).
I also have a question about using silk dupioni fabric. I have used it alot in the past for wedding pillows. On these I put a dance large initial (or initials). I did not have any trouble with stitching on the duping. However a month ago I put a machine embroidery saying on sold dupioni (for a pillow) & it was puckered. Any suggestions. Thank you. I also love your sense of humor; an extra bonus.
Water-soluble toppers are handy but not something I use often. The only time I put topper on top of applique fabric is when I am appliqueing on a pile fabric such as faux fur, fleece, velvet or anything with a nap in which the applique positioning stitches might be hidden. The topper helps me to see the line of stitching so I can trim the applique fabric accurately. After I’ve trimmed the fabric, I remove the topper.
The only time I use water-soluble topper under lettering (such as monograms or satin stitch letters) is when I am embroidering napped fabrics. In this case I also use a permanent topper as well. Water-soluble toppers wash away, so the pile or nap of the fabric can eventually work its way up through the stitches. I have my own techniques for this type of underlay. I need to do a blog post about that, hopefully soon!
In the interest of not making this a long note here, feel free to email us via the contact link in the shop and I’ll be glad to try to help you with your silk Dupioni questions! Thanks for your comments!
Hi dear Evy, you’re awesome teaching us as well as your creativity ❤️, very much appreciated.
Have a lovely Valentine’s Day.
Thank you so much! 😀
Evy, every thing you create is adorable. I appreciate your talented work very much. Thanks.
Thank YOU! 🤗