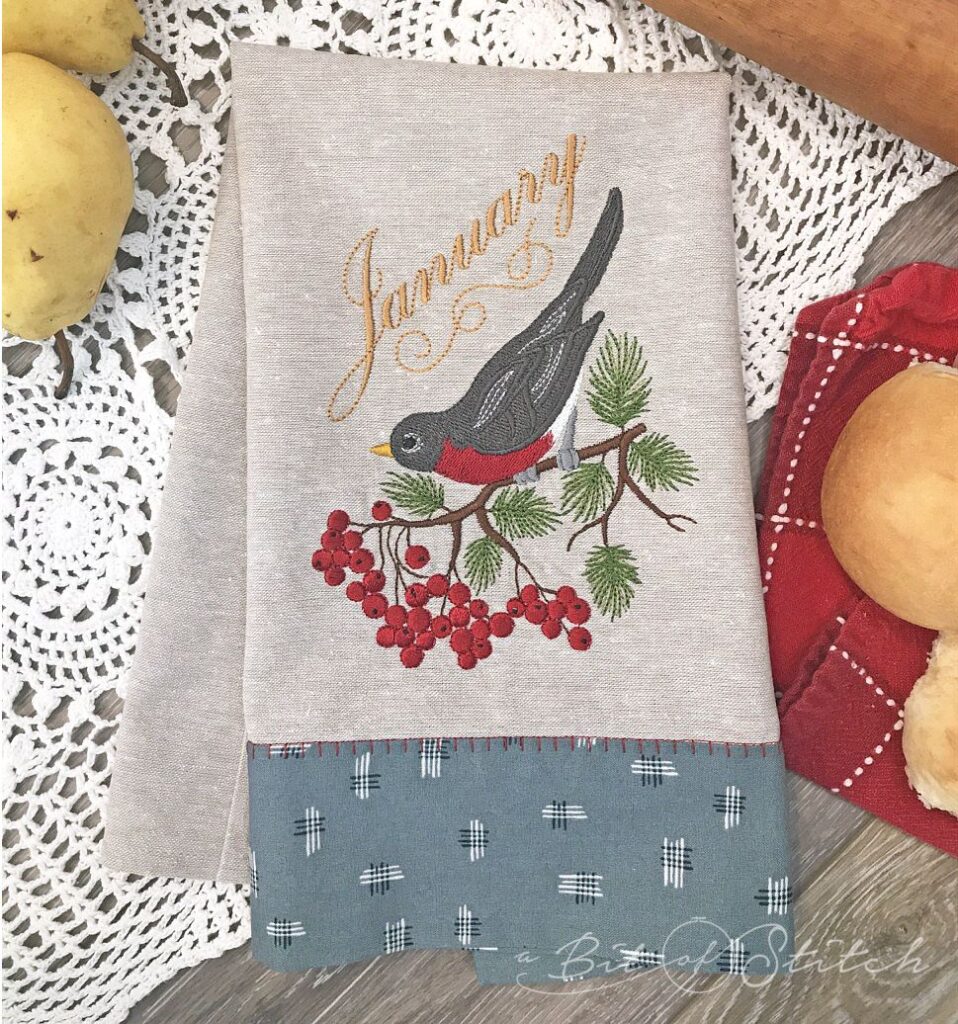
Tea towels are one of my favorite things to make and also to use. I find that I mostly use them as decoration to fluff my kitchen or powder room, but many times they end up as table toppers, breadbasket covers, and sometimes an apron tucked in my belt! Do you love tea towels? Do you make your own? Our market today has lots of options, which is lovely, but it’s super nice to be able to make exactly the size and type you need. Especially if you are like me and want to put machine embroidery on them. In that case, having a nice flat weave and solid or softly printed fabric is exactly what you need… but it’s not always easy to find. Since plain fabric can be boring, I like to add a colorful band of some other fabric to the bottom for contrast and interest. Here’s my favorite how-to for making banded tea towels…follow along if you’d like to make one or six!
First of all, start with pre-shrunk fabrics. (I’ll put links at the end for some of my favorite types of fabrics and where I buy them.) Flat woven cottons, linen, and linen blends work best for towels and for embroidery. The size of tea towels and kitchen towels varies quite a bit, but I personally like slightly narrower towels than what I can buy. The measurements I’m listing here are just suggestions – you can alter them to suit your own needs. Just keep in mind that the band needs to be twice the desired finished depth and the same width as the towel. Remember to include seam allowance selvages in your own measurements if you customize the size of your tea towel. I am using ½” seam allowances in this tutorial.
You will need:
- plain, flat weave fabric (referred to here as the “towel”) – 18” wide by 20.5” long*
- contrasting fabric for the band – 18″ wide by 7″ deep
- Fabric folding pen (optional but very handy!)
- Clover Fusible Web Tape (the kind with the release paper backing; other types may also be used)
- Fusible web (by the yard or wide width tape that you can cut triangles out of)
- Thread to match the towel fabric
- Thread to match the band fabric
- Contrast color of thread for the motif stitching, if desired
*Note: If you plan to add embroidery, you may find it easier to embroider the towel fabric before trimming it into the block size you need for your tea towel. This is especially helpful if you accidentally get wonky with your design placement – you can trim it straight!
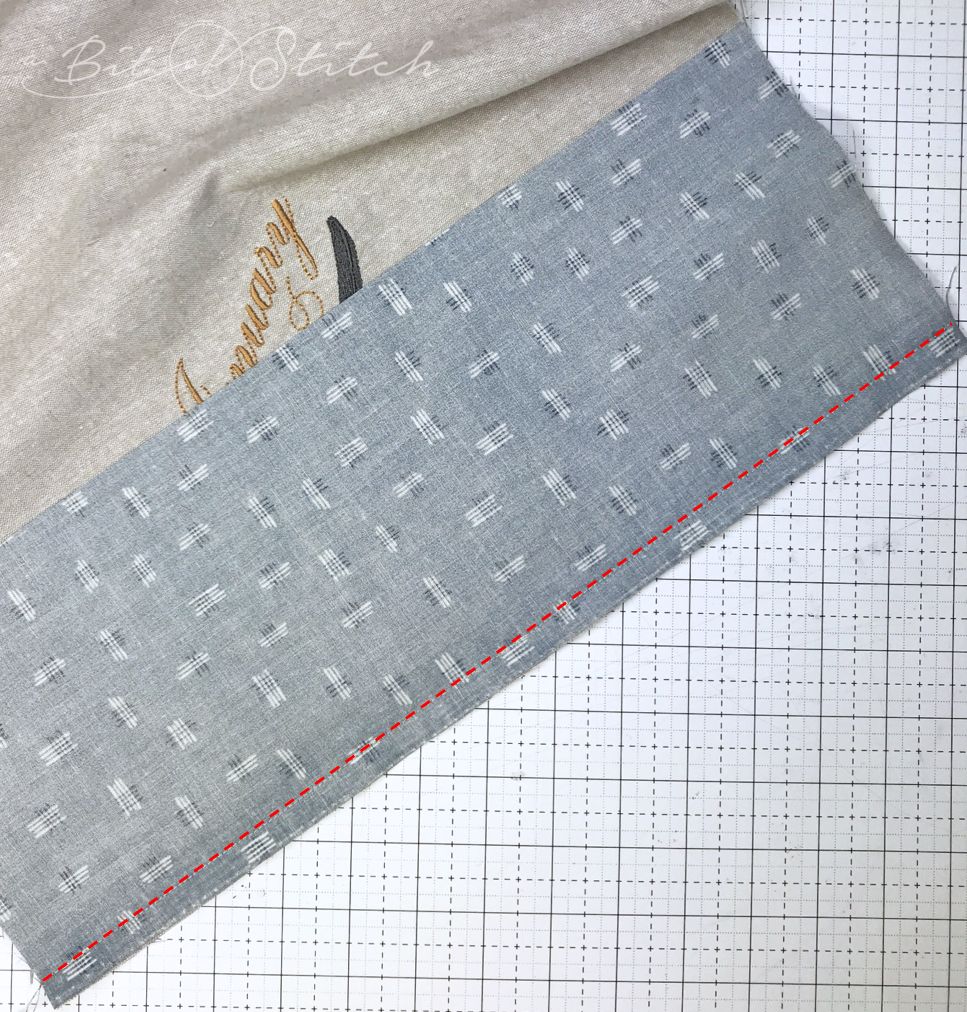
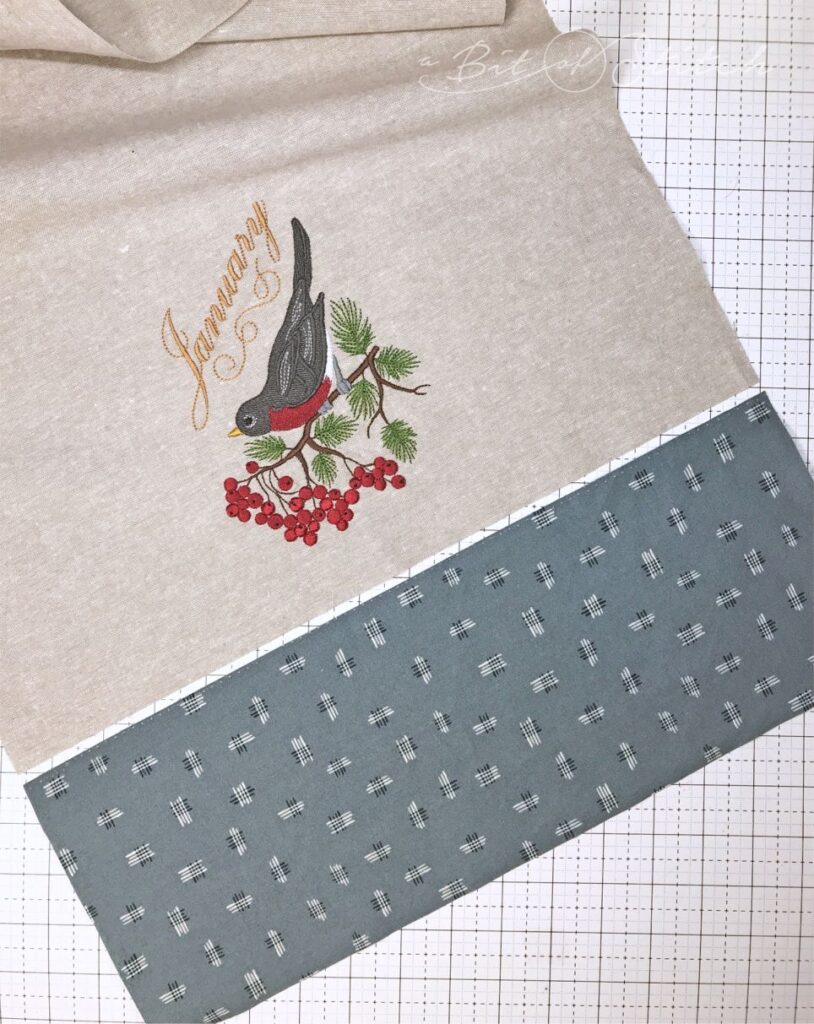
Place the band fabric on top of the lower edge of the towel fabric, right sides together, raw edges aligned. The band should not be folded, but open and flat as shown above. Sew together with a ½” seam allowance. Press the seam allowance selvages to the band side.

Use a ruler and fabric folding pen to mark lines on the top, left and right sides of the towel ½” away from the raw edge. (You don’t have to use a fabric folding pen… you can just fold under ½” and press, but the fabric folding pen makes that step a whole lot easier!) Fold the towel on the marked lines toward the wrong side and press; this will create a ½” folded under edge on all three raw edges of the towel.
Note: Do not fold or press the raw edges of the band.
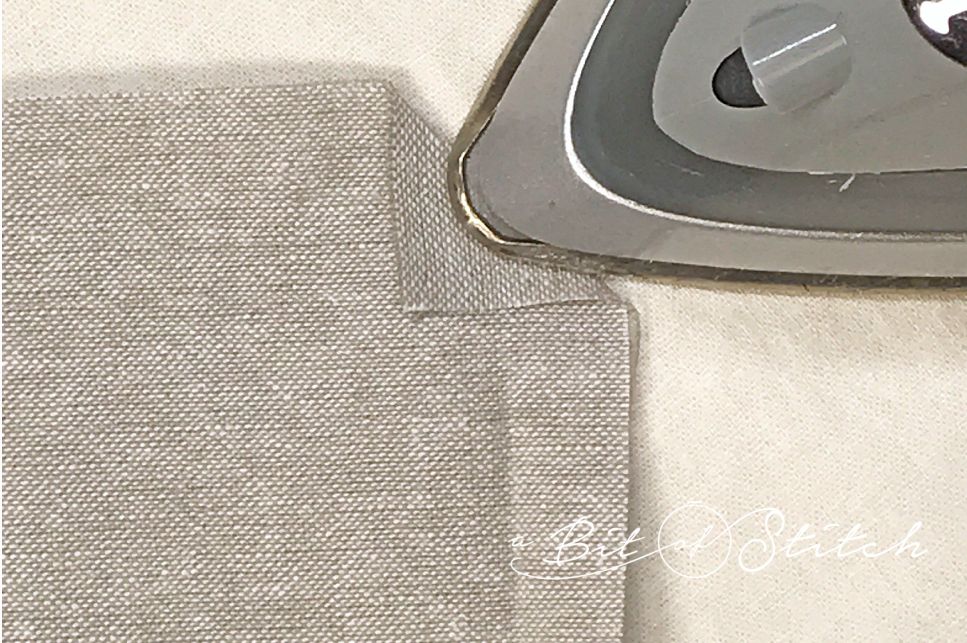
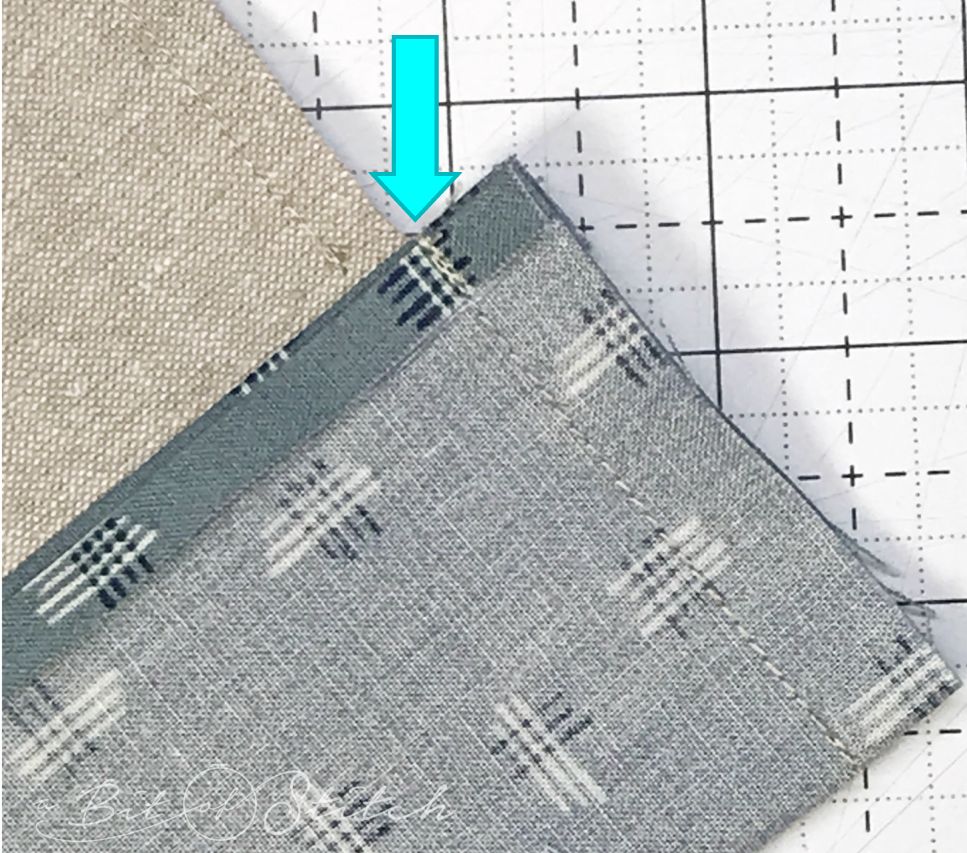
Unfold the top corners of the towel; then fold and press a 1” triangle* at each corner as shown above. Keep the fold of the triangle at a 45-degree angle.
*The folded triangle should measure 1″ from the folded edge to the tip of the corner.
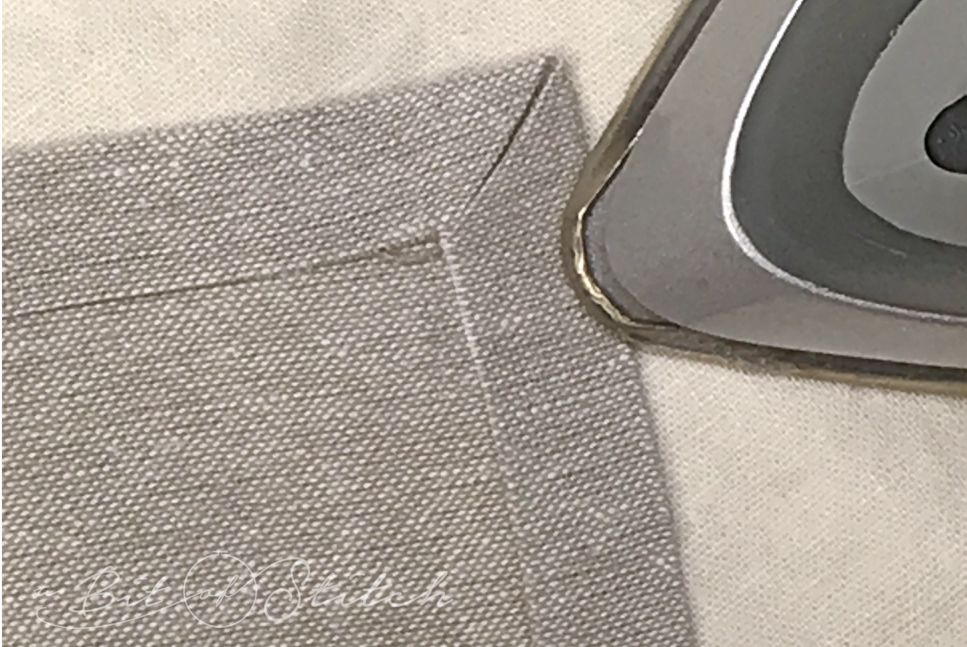
Re-fold the fabric back at the corners and press. The corners should miter themselves as shown above. If the angle of your triangle is off a bit, you may need to adjust it to keep the miter even.

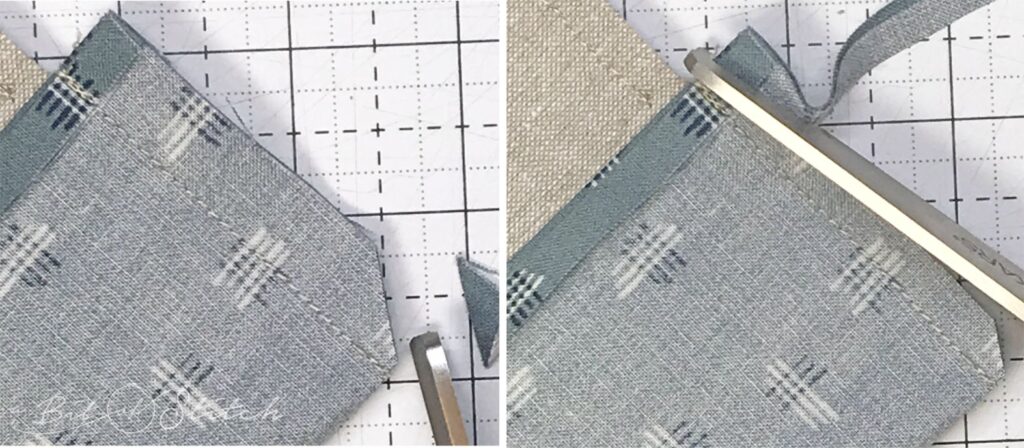
Open a corner and cut straight across the tip of the triangle, cutting it off. Do the same for the other corner.

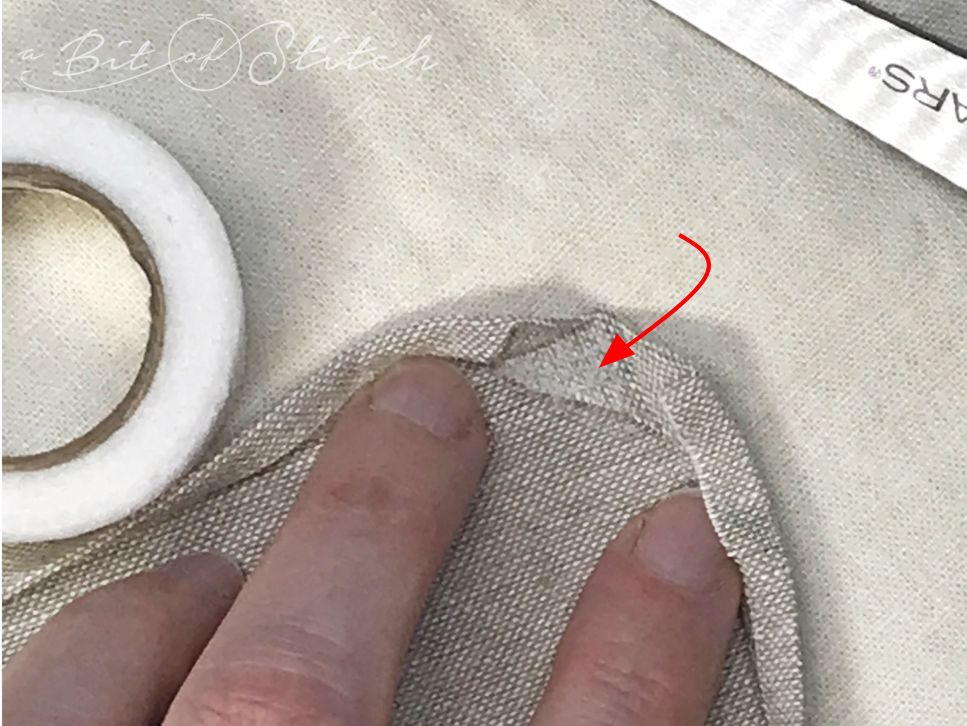
Tuck under ¼” of the raw edge all along the three towel sides and press well. (Note: You can use a fabric folding pen for this fold too, but you would need to make those marks at the same time you made the ½” fold marks, not at this point.)
Don’t press folds in the band fabric. We’re going to rip the band fabric away from the towel there later.
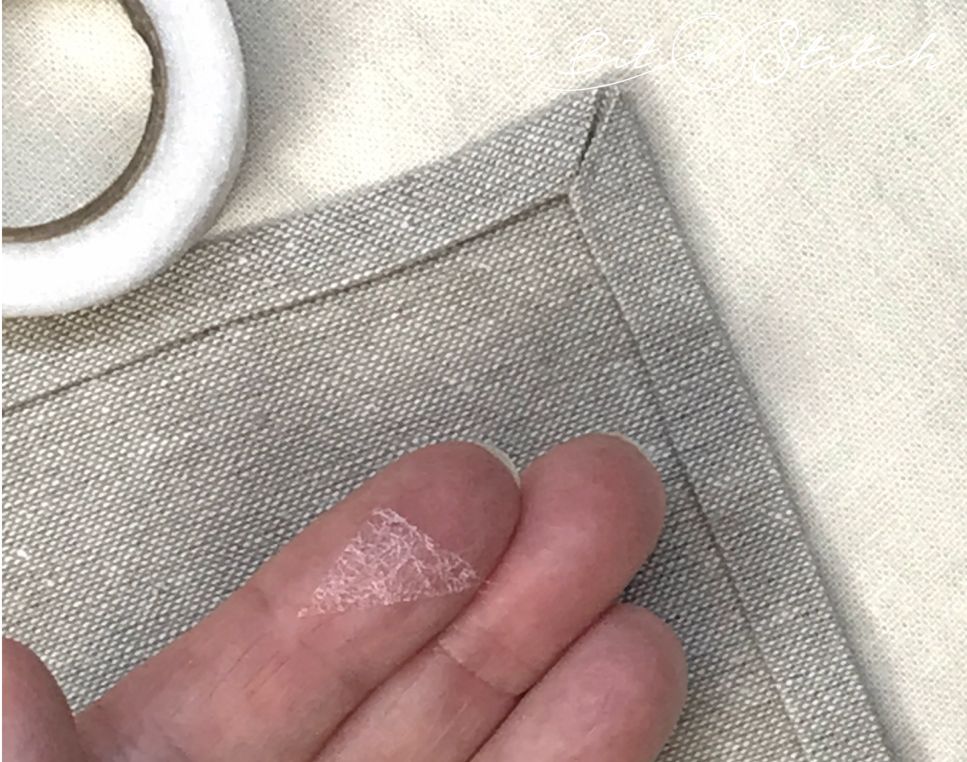
Cut two small triangles of fusible web just big enough to fit up into the mitered corners of the towel.
Slip the fusible web triangles into each corner as shown above. Press well to fuse.
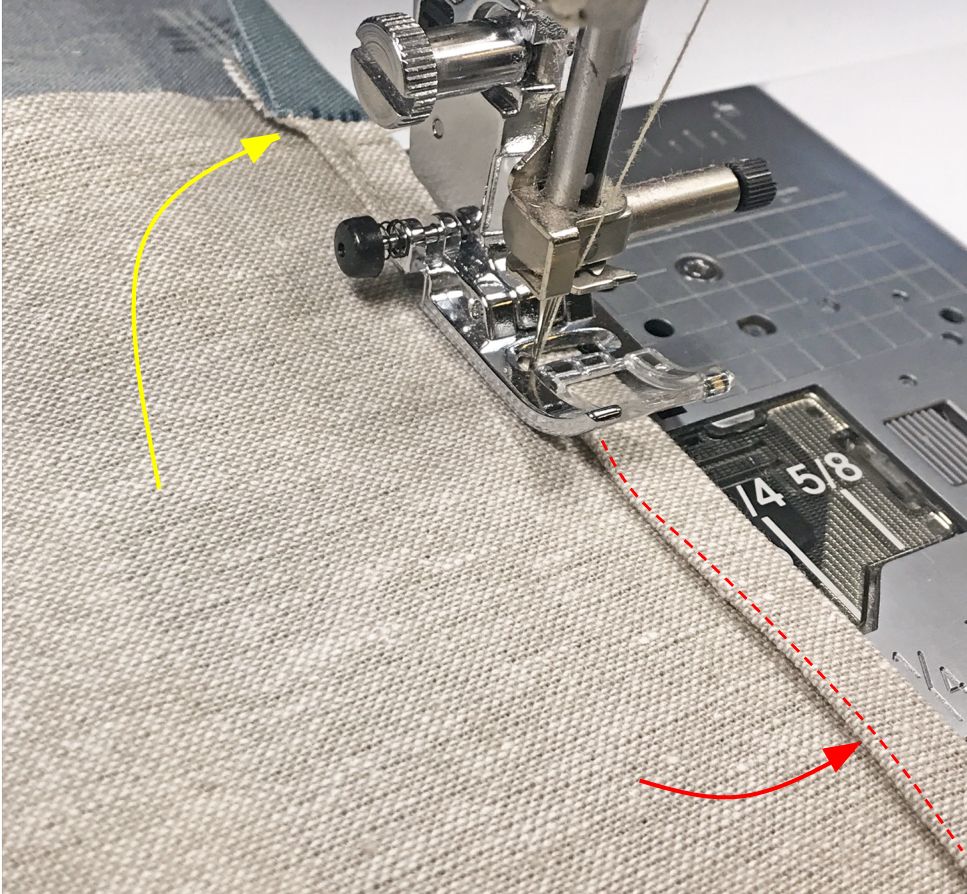
Thread your sewing machine in the top and in the bobbin with a thread that matches the towel fabric. Sewing close to the folded edge, sew the towel hem. Begin AT the seam where the band joins to the towel and end AT the seam on the opposite side of the band. (The yellow arrow above indicates where you will start.)
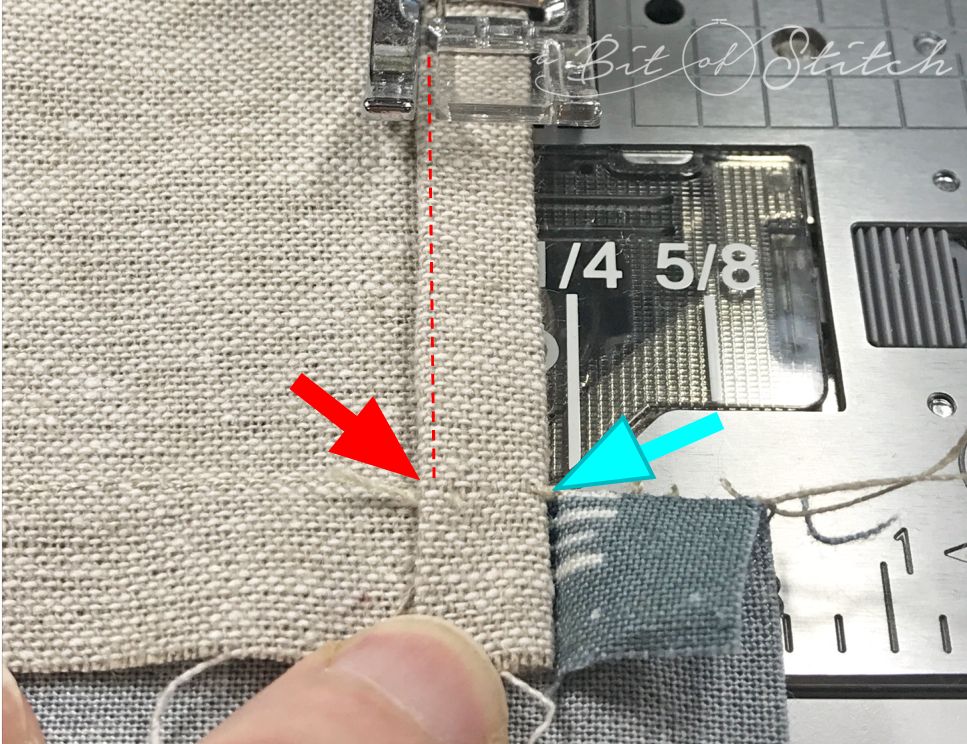
The red arrow above shows where you will stop sewing. Stop immediately at the seam; don’t cross over it. Now rip out a few stitches in the band seam there at the edge where the blue arrow is pointing. Open the band fabric out as shown.

Your seam should look like this, and the band should be open and flat on each side, as shown.
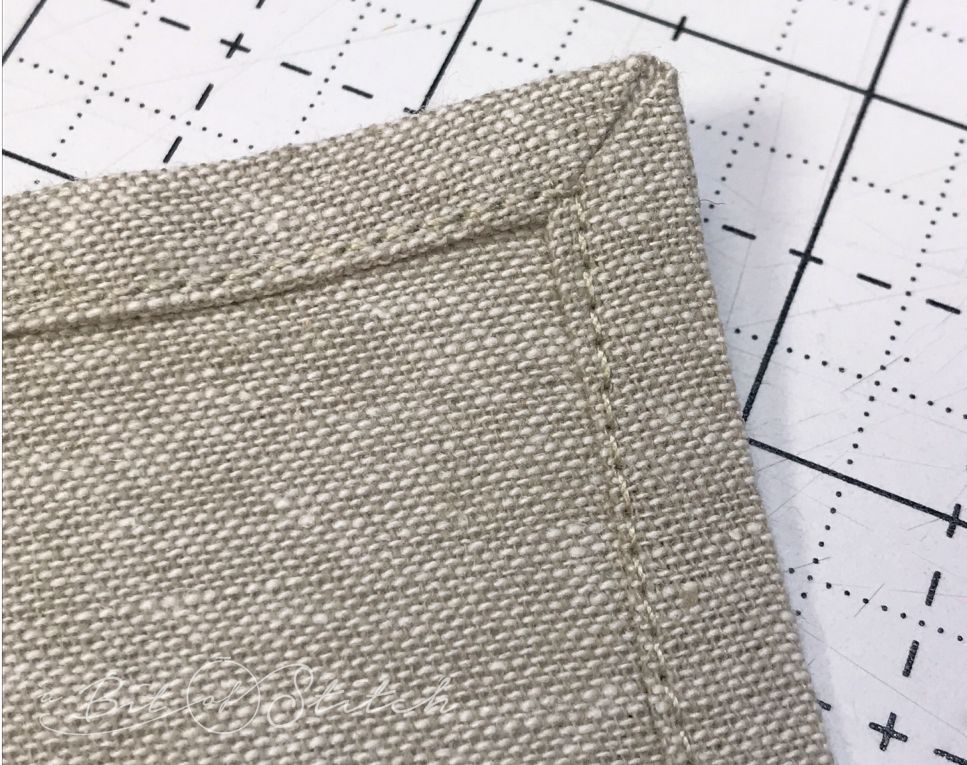
You will have noticed how easy it was to sew around those mitered corners! If you’re interested, there’s a bit more on this technique in the “I Miter Cheated” blog post.
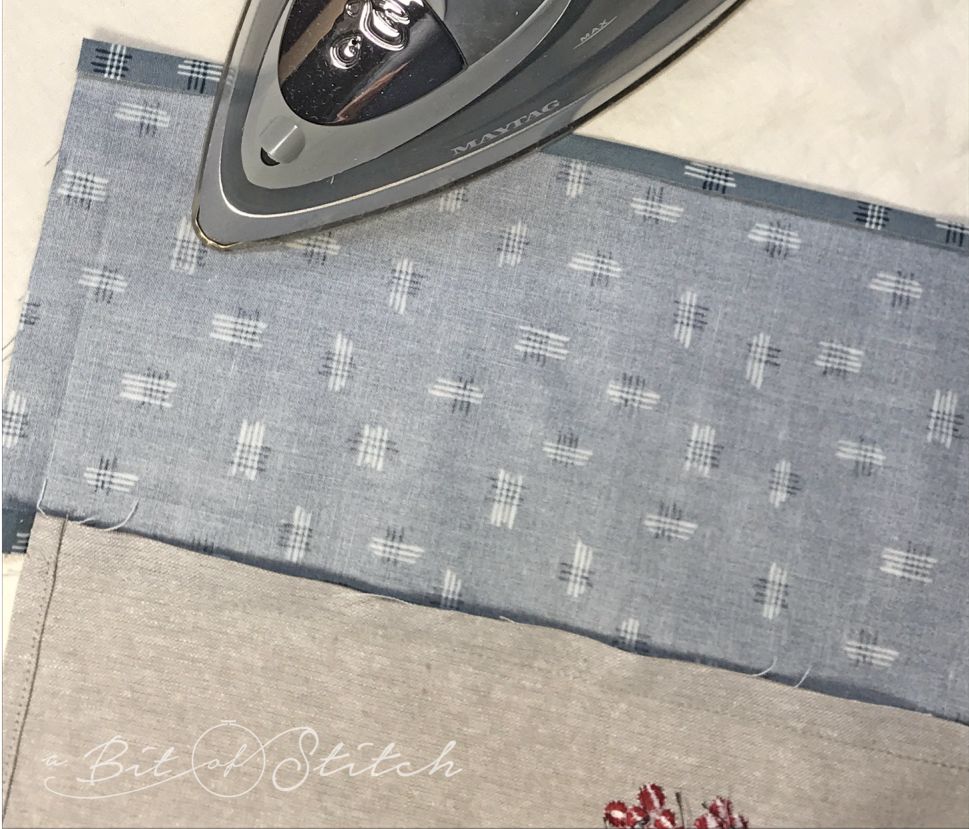
Press under ½” on the lower edge of the band fabric.
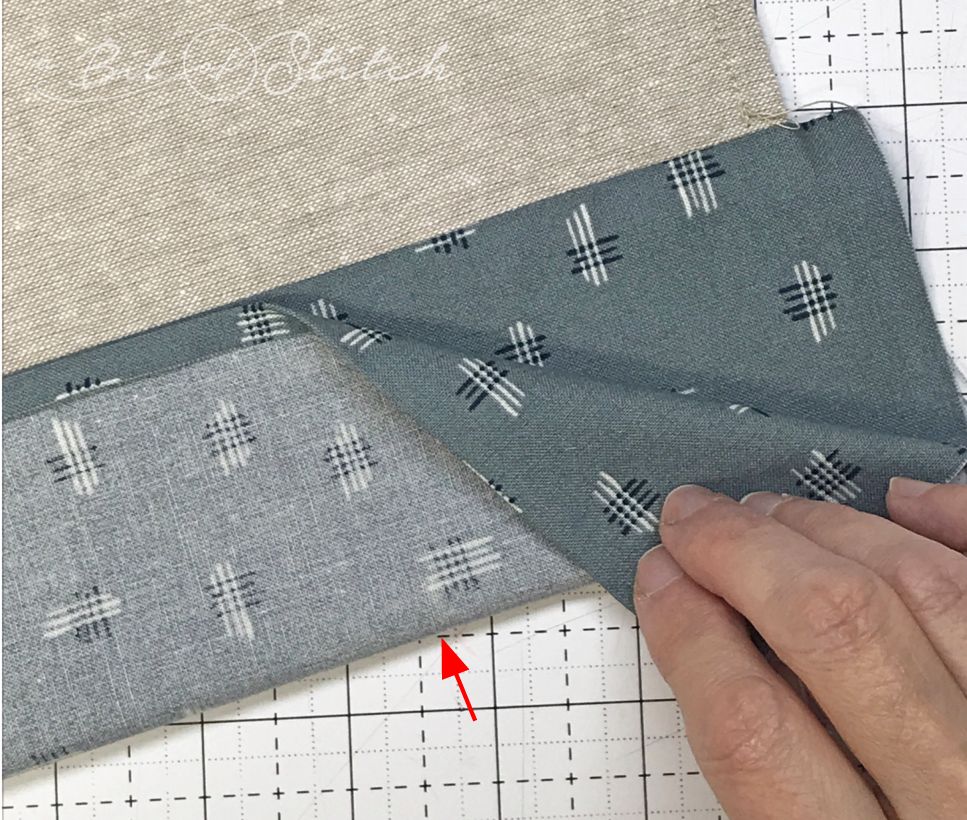
Fold the band fabric in half by bringing the lower folded edge to the top of the band at the seam that joins it to the towel, right sides together. Align carefully. Do not press the fold in the band (red arrow above) – you don’t want a crease there yet.
Sew the band fabric ends together: Keep your stitching immediately next to the towel’s hemmed edge (do not sew into the towel fabric, but keep your stitching as close as possible, as indicated by the blue arrow above) and sew straight down to the bottom where the band is folded.
Clip the corners and trim the selvages to ¼”. Turn the band right side out, poke out the corners, and press.
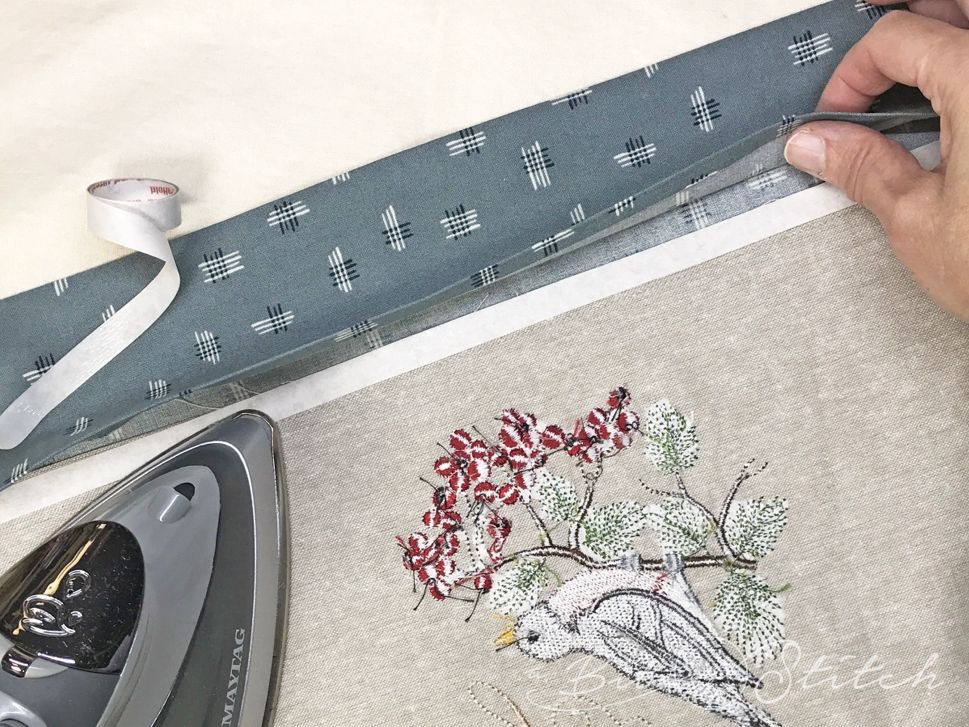
Apply a strip of fusible web tape to the selvage edge of the towel where it is sewn to the band. Keep the tape aligned immediately below the seam stitching.
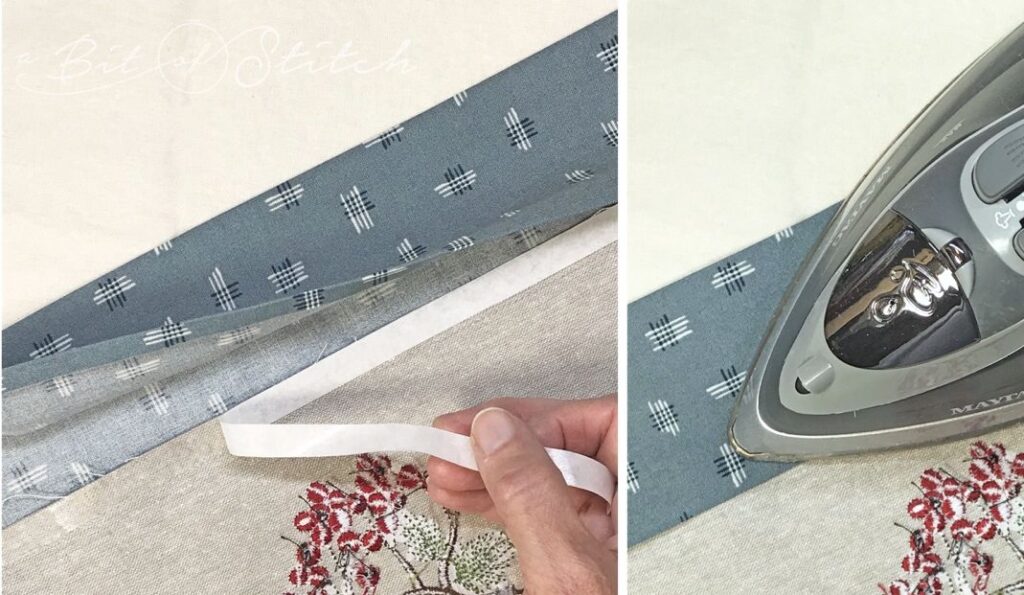
Remove the release paper and press to fuse. The fusible web tape will hold the band fabric in place nice and neatly until sewn.
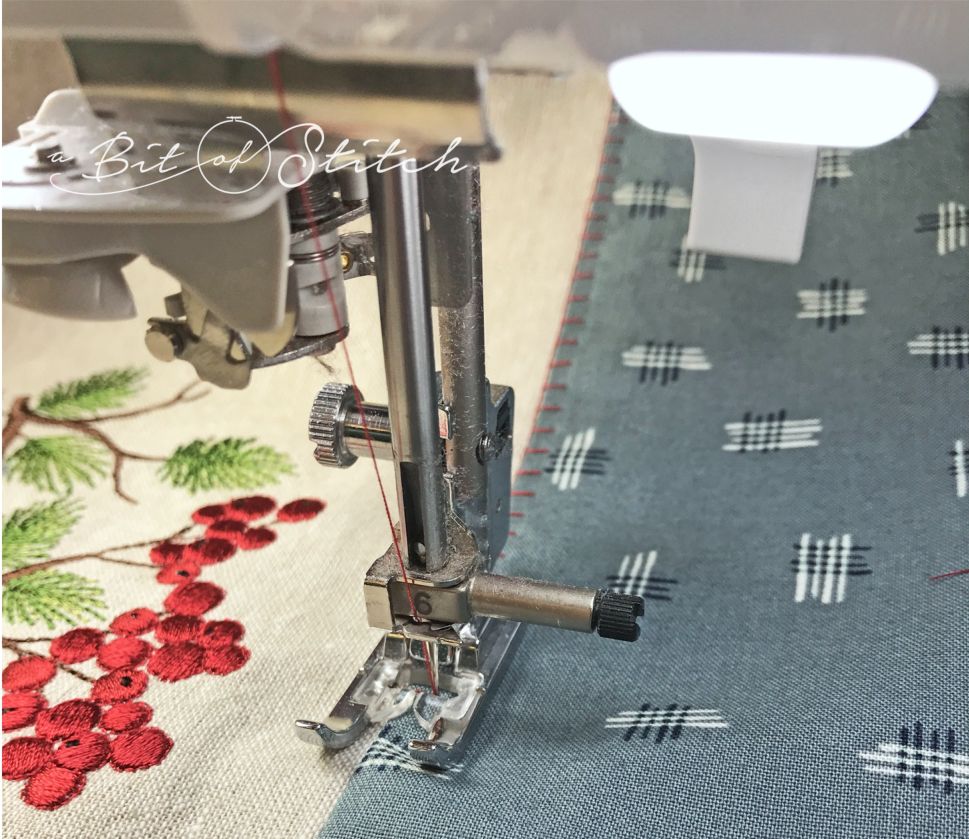
Sew across the top of the band on the right side – either with a straight stitch or a decorative motif stitch. I love using the Shell Stitch on my Baby Lock sewing machine to create an interesting finish to my tea towel bands, but just about any heirloom type motif stitch will work very nicely for this step. I find it helpful to create a faux band on a scrap of fabric and try out different motifs to see what looks best with my chosen fabric. Just remember to leave LONG THREAD TAILS at the beginning and end of the stitching if you do use a motif stitch.
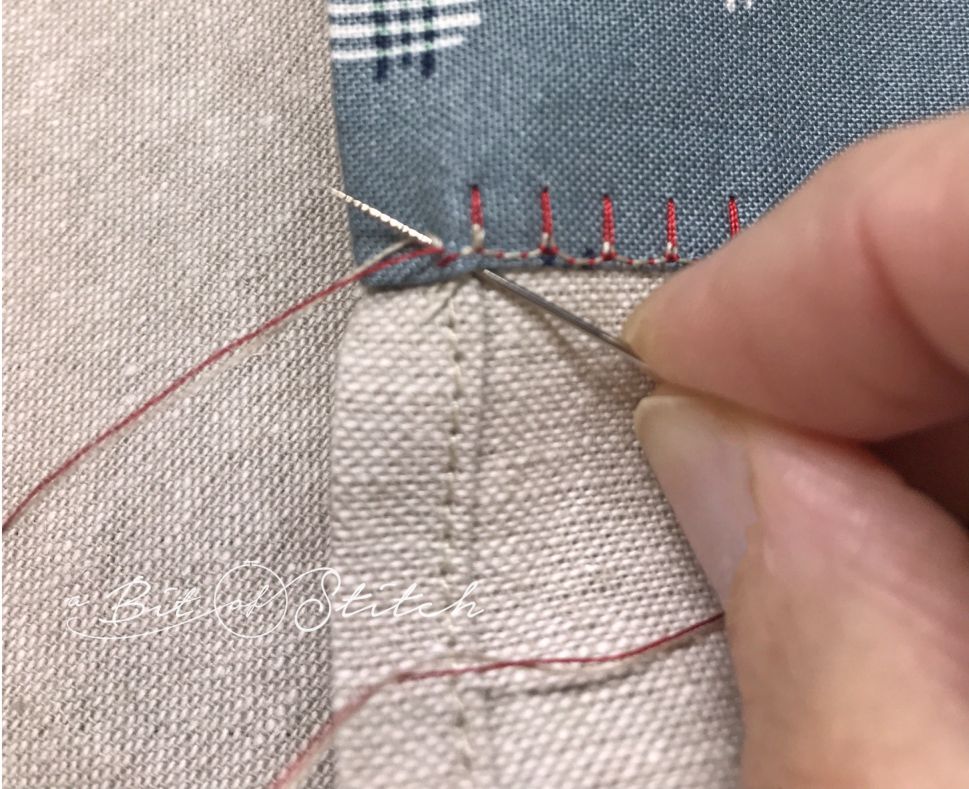
Thread a needle with the top thread tail used for the motif stitching and bring it to the bottom of the band. Then re-thread the needle with both top and bobbin threads and take a few stitches in place at the edge of the band to secure the threads.
That’s nice, isn’t it? I’ve widened the Shell Stitch and made the spaces between the teeth a little longer than the default settings on my machine. I try to use a foot that I can see through for this step – either my Baby Lock “N” foot or the Clear Open Toe foot.
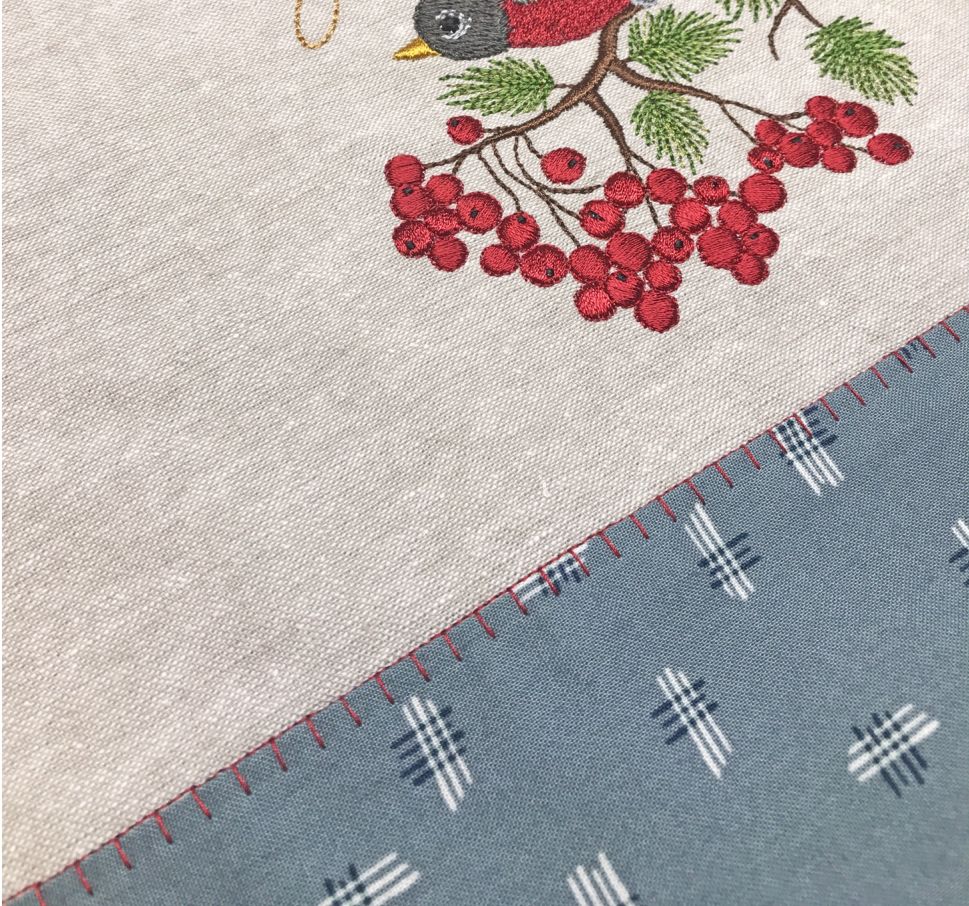
Finished! 😍
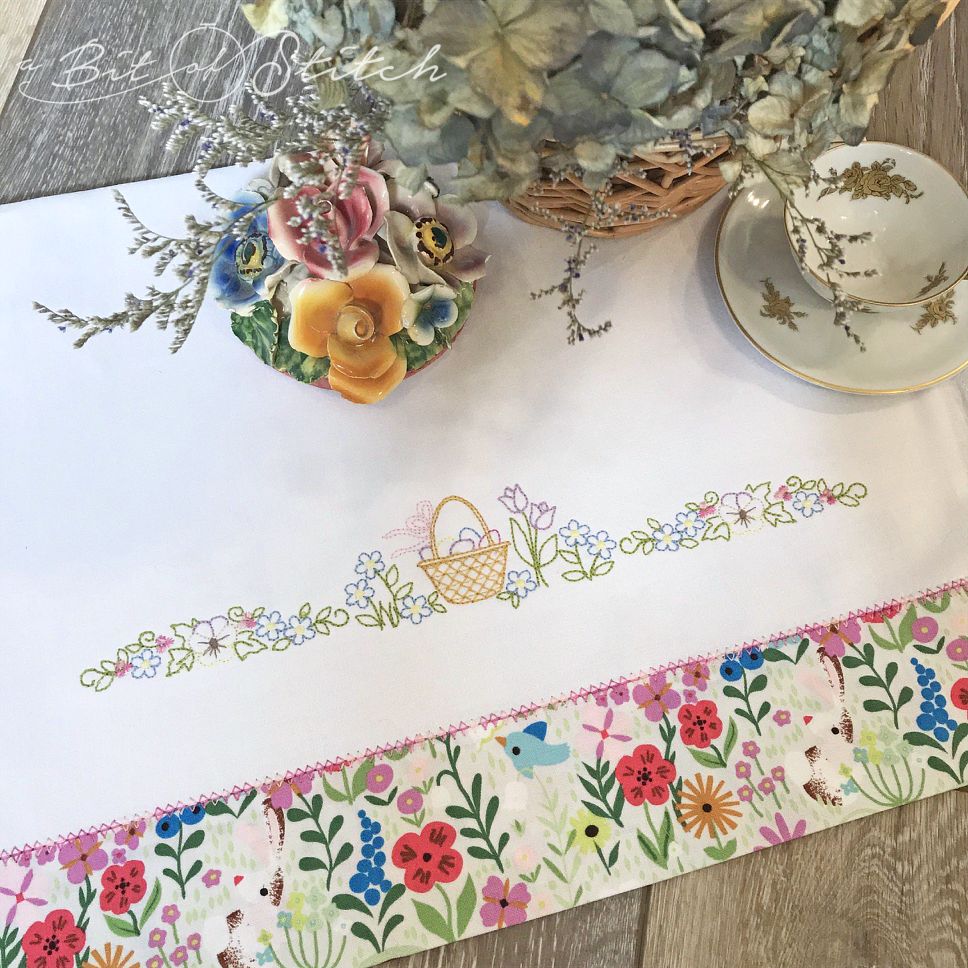
More ideas for banded towels… what will you make? 😄
Resources:
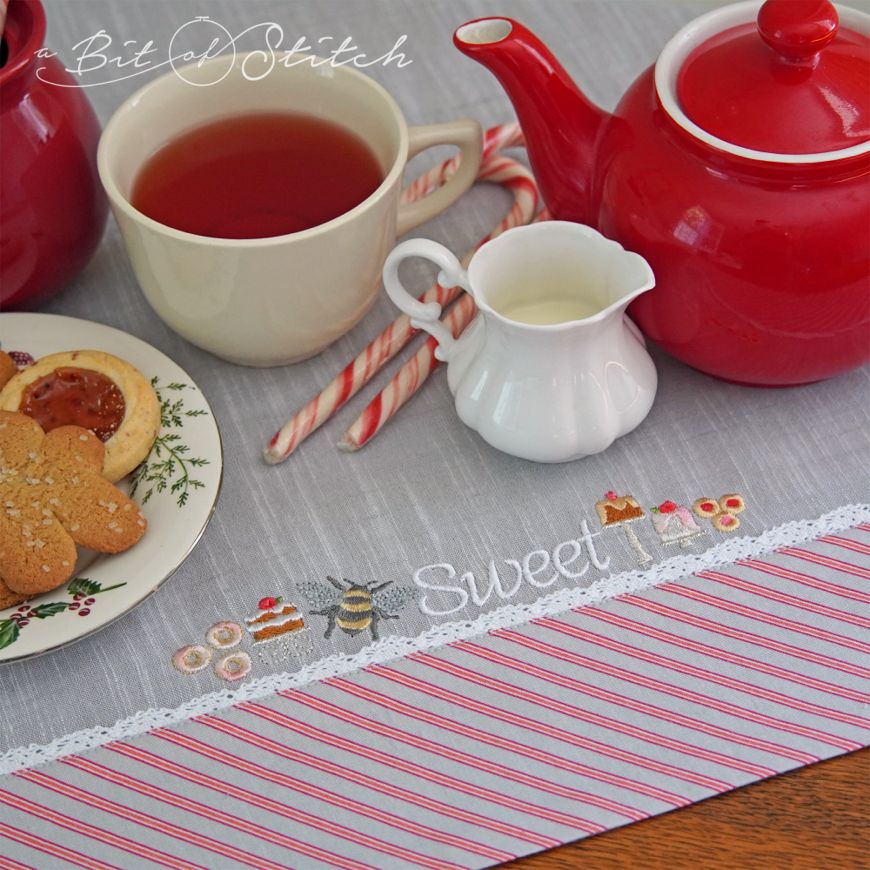
- Machine embroidery designs shown on my sample tea towels are January Robin, Spring Festivities, Queen Bee, and Petite Sweets.
- iseefabric.com (linen – shown in the project used for this tutorial)
- fabricworm.com (linen and linen blends)
- farmhousefabrics.com (linen)
- clover-usa.com (Fusible Web Tape with release paper)
7 replies on “Perfect to a “T” Towel”
Eva, I always love your designs and have so many of them! I cannot wait to band some linen towels!
Thank you so much! 😀 I hope you enjoy making lots of pretty towels!
Thank you Evy! Awesome inspiration and instructions. Everytime I make a towel or modify a towel from AAB I have to make up the whole thing all over again… It’s kindof a reinvent the wheel thing I seem to do a lot…
This will be very helpful! Thank you for the sources too. I always love a fabric shop with beautiful natural fiber fabrics.
Thank you! I hope you’ll share your makes with us! 😊
Dear Evy,
Wherever did you find that lovely bird embroidery design? So beautiful…
That’s the January Robin design from my Feathered Friends Collection – Thank you so much! 🥰
Its lovely, thank you for sharing.