
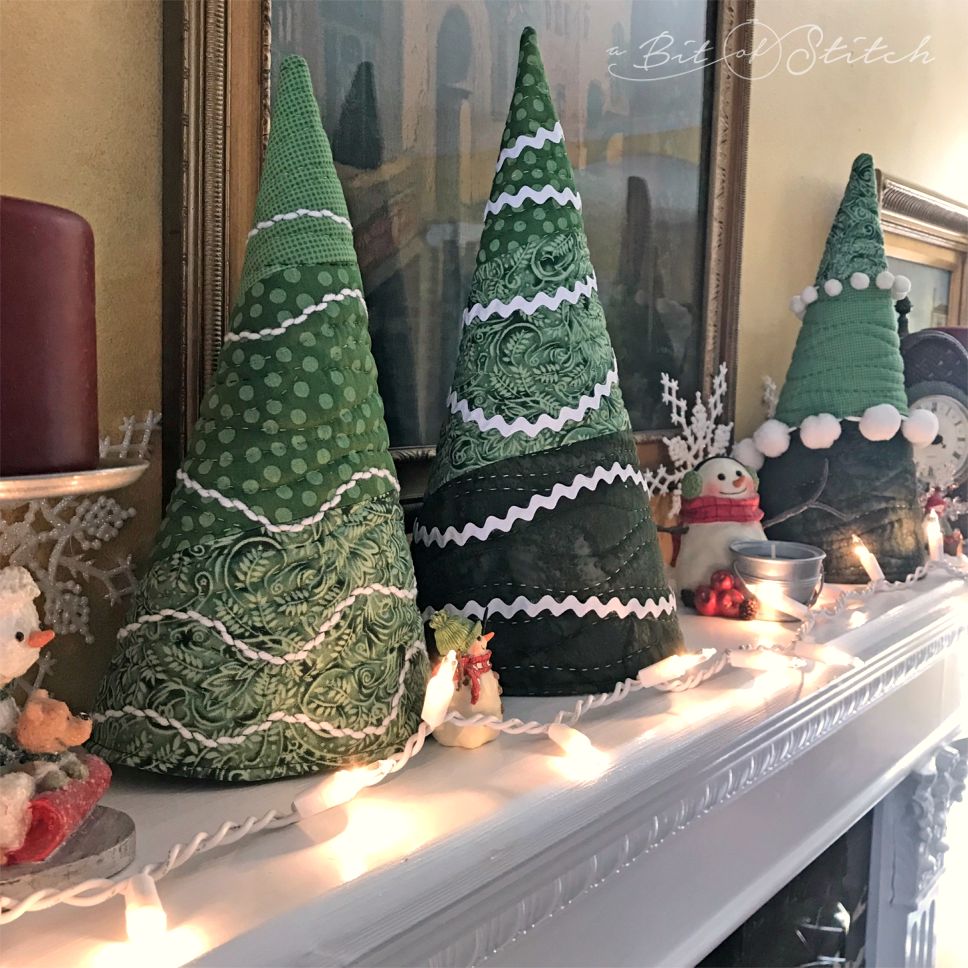
There’s a forest in my foyer! A very nicely behaving one too – NO shedding needles and no leaves to rake, just lots of pretty stitches! Want to make a forest for your house? Read on!
You will need:
- Assorted green quilt weight cottons (a fat quarter of three different green prints will do the trick)
- 14″ x 18″ of Soft and Stable foam from ByAnnie.com
- Variegated quilting thread
- Sewing thread
- Trims as desired (rick-rack, pompoms, yarn for couching)
- FREE downloadable pattern found HERE
Let’s get started!
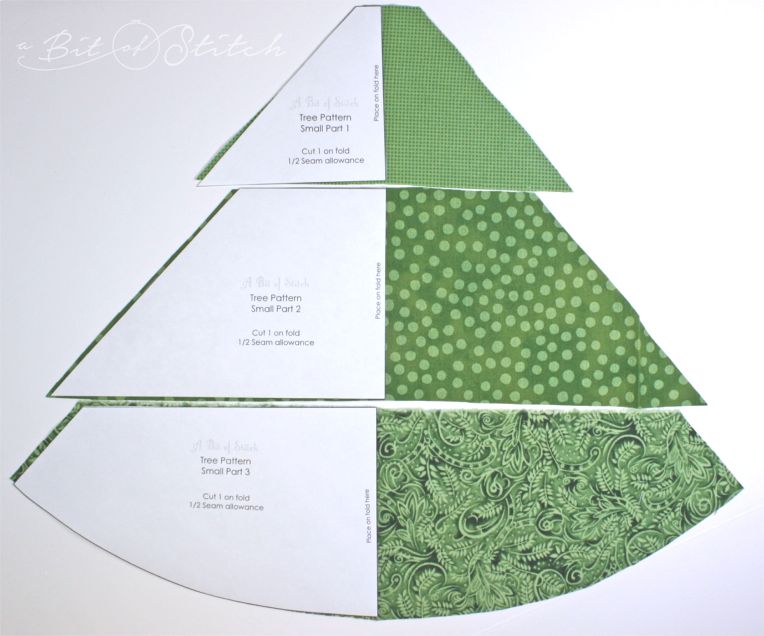
Download and print the pattern; it’s free! Cut out the pattern pieces on the black lines. There are two sizes, a large tree and a small tree.
Cut a different print for each part of the pattern, in any combination that makes you happy.
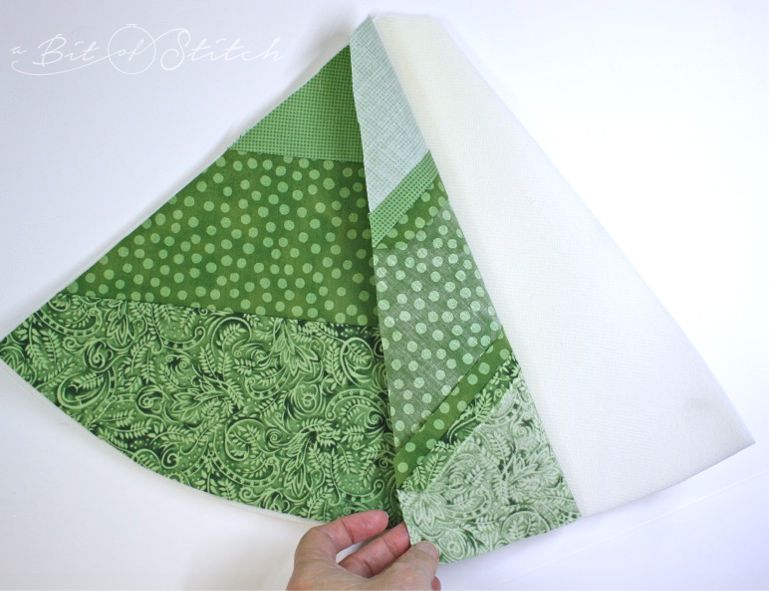
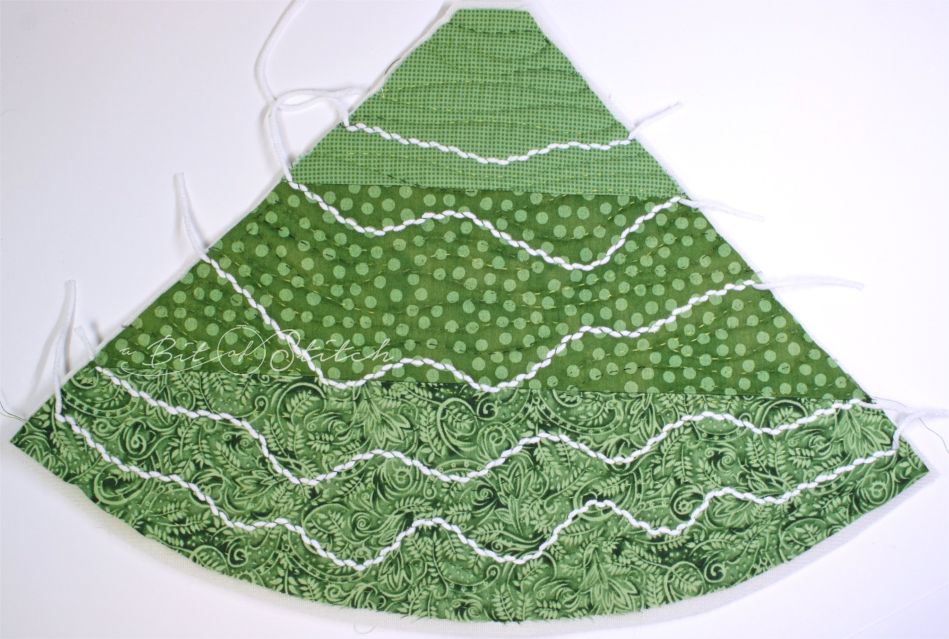
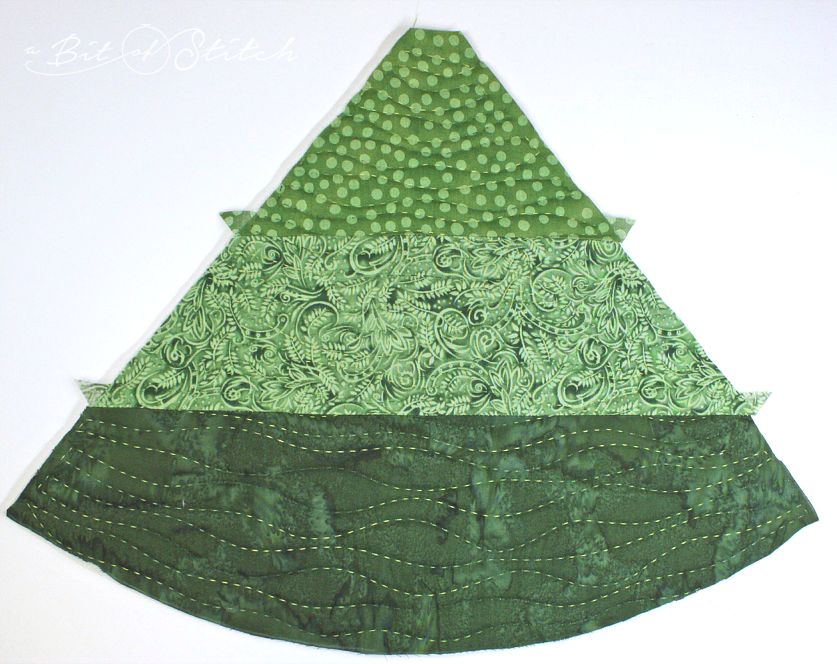
Sew the three parts together with a ½” seam allowance and press the seams open. (If you wish, insert pompoms or other suitable trim in between the seams as you sew them up.) Cut a piece of Soft and Stable foam a little larger than the joined together tree.
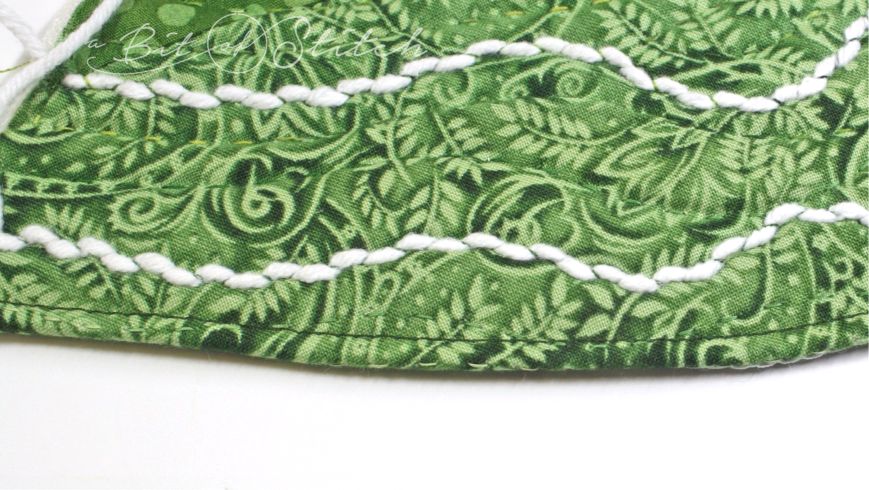
Quilt as desired. You can meander around, free motion stipple, or whatever takes your fancy. My Baby Lock Sashiko and I had some fun!
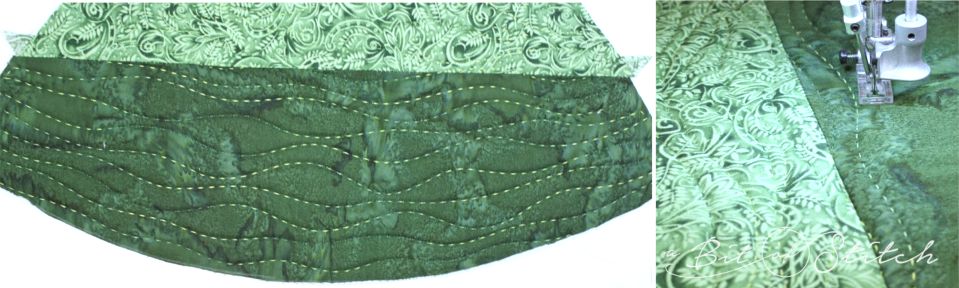
Not only did I quilt my trees on the Sashiko, but I also added flip-stitched yarn for a touch of “snow” on one of them! (Click HERE and scroll down to learn more about my Baby Lock SEWED online classes.)
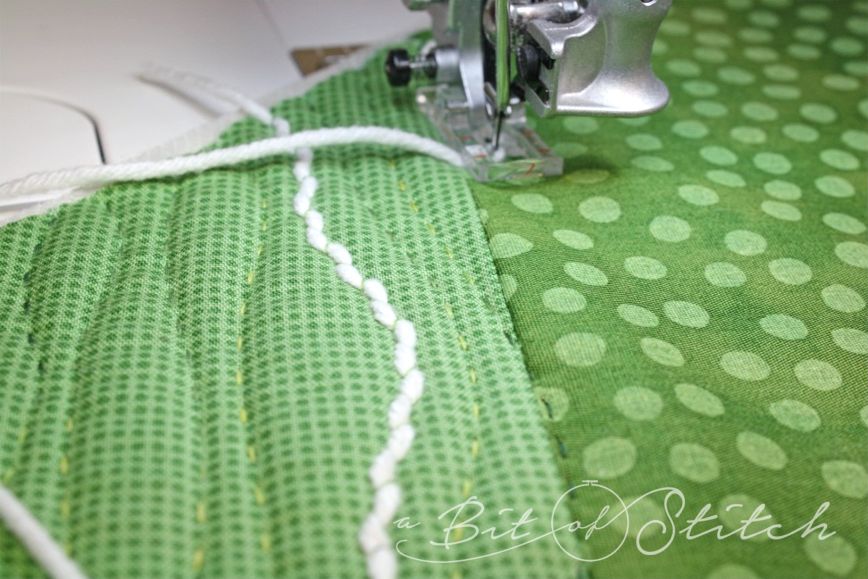
You can always couch on yarn with a wide zigzag or sew on other pretty trims. If you do, and if you’d like to keep the back seam on the tree neat, begin and end your added trim bits in the same place on their opposite sides. To make this easy, measure and mark those spots before you begin.
If you need to, trim away the extra foam from the two long sides of the quilted tree.
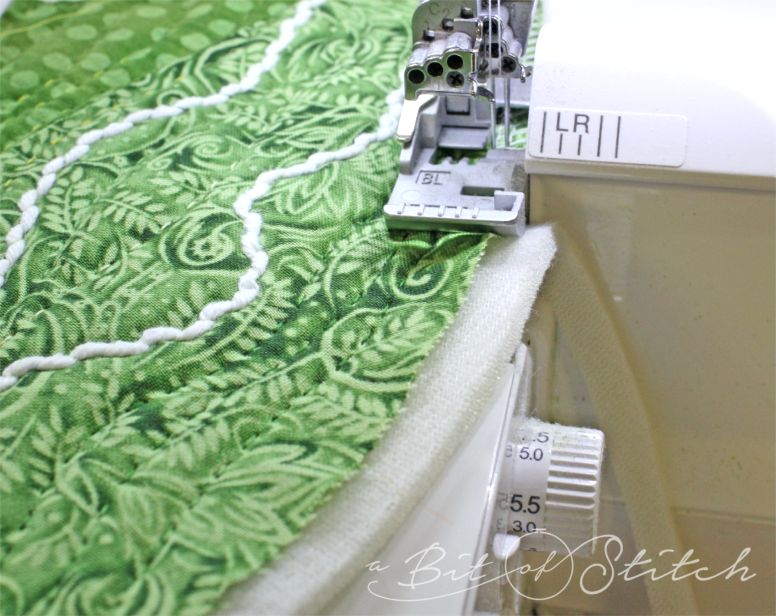
Serge off the excess foam along the bottom curved edge. If you don’t have a serger, cut off the excess foam and zigzag stitch instead. (My Baby Lock Ovation does lots of fancy stuff, but it’s the way she performs simple tasks like this so speedily that makes her worth her weight in gold to me!)
Press under the finished edge. Try to keep it even, and turn up just enough to hide the serged (or zigzagged) edge. Strangely enough, I found it easier to do this from the right side – you might have better luck on the wrong side; just keep in mind that you need a hot iron and steam, which might mess with the foam there. If you do iron from the wrong side, use a press cloth to be safe.
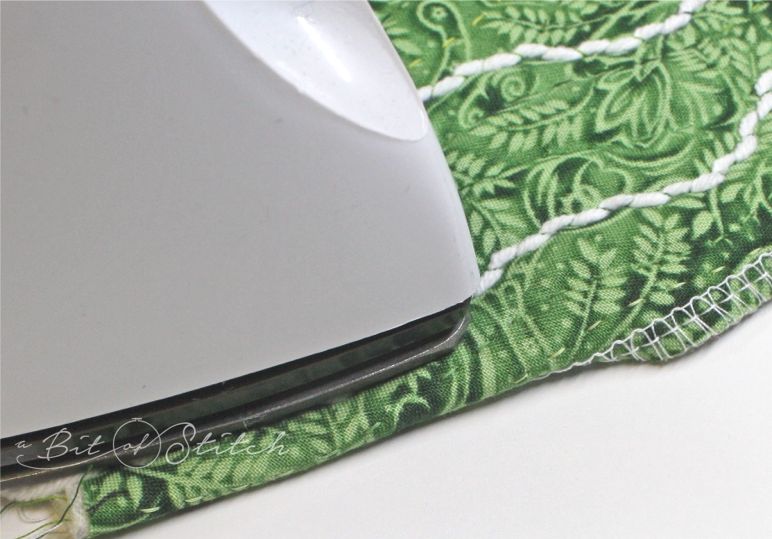
Stitch along the bottom to hem. Once again, I found it easier to do this from the right side.
Fold the quilted tree in half, right sides together, so that the raw edges of the two straight sides are aligned. Sew together with a ½” seam allowance. You will probably have better luck keeping the bottom hemmed edge aligned by starting there. (Helpful Hint: Set your presser foot down about 1” above the bottom hemmed edge. Sew in reverse until you get to the bottom, and then sew up the side of the tree.) Trim a little of the seam allowance away at the top pointed end of the tree.
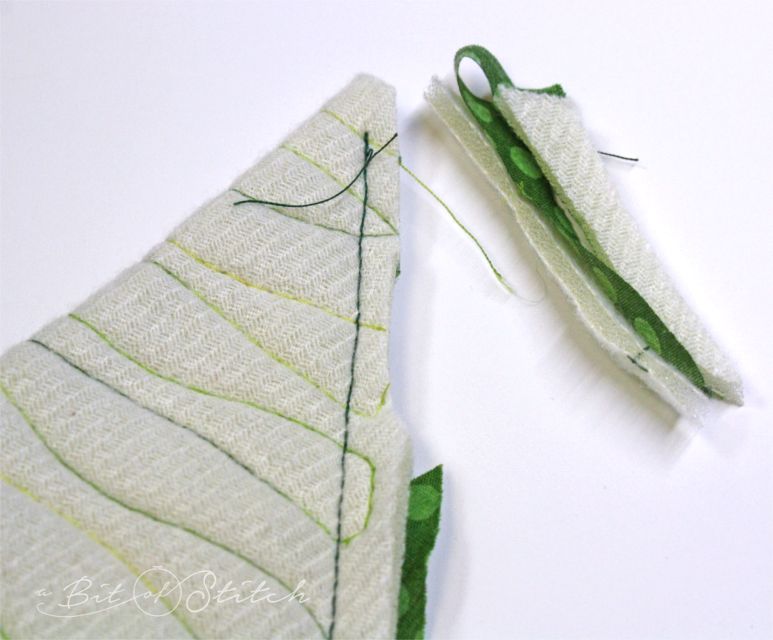
Turn your tree right side out. To make the bottom neat and tidy, open the seam flat and sew across along the hem stitching on the right side to secure it in place.
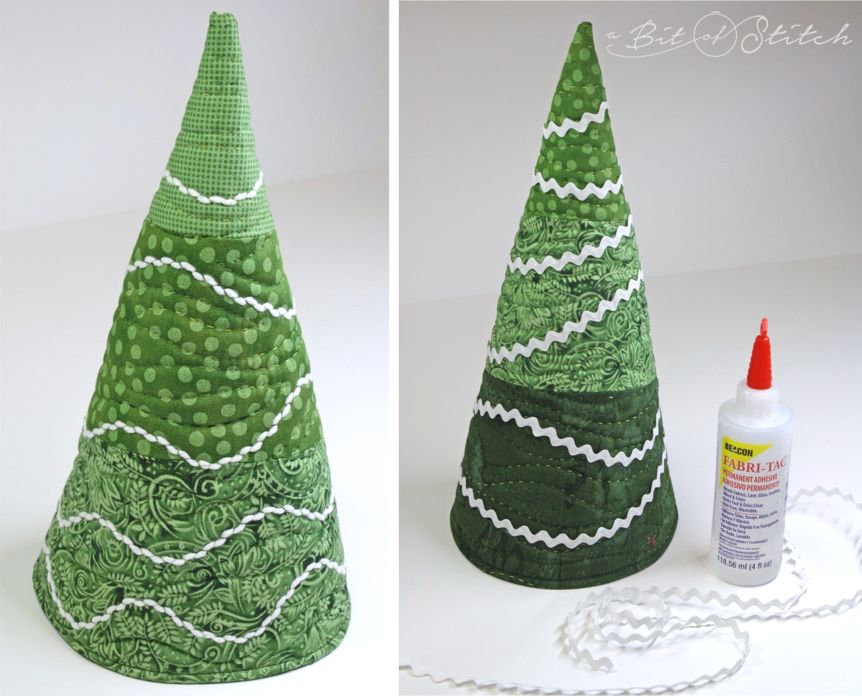
While you can certainly stitch any trim onto the tree quite easily before you sew up the sides, you can also just GLUE trim to it using fabric glue after it has been sewn. I love Beacon’s Fabri-Tac fabric glue. It holds quickly, and it dries clear and flexible.
Go for it! Make a pretty forest today! Wouldn’t these look cute with some felt stars on top? Or what about tiny, festive embroidery designs? I hope you enjoy this project – I sure have!
Happy Stitching!
Evy
6 replies on “Foyer Forest”
But our forest needs snowmen! How did you make them?
Such a great idea, Evy! I am wondering about the snowmen too??!!
Oh my, I should have mentioned that! Well, it's been an on-going saga for those silly little fellas, let me tell you! Did you know it takes paint forever to dry on pumpkin flesh? Yep. And about 5 layers of paint to get it to cover the orange! Those snowmen are just tiny decorative pumpkins left over from Thanksgiving – glued together with construction adhesive (my husband came to the rescue there), painted, sparkled with a frosting of glitter and adorned with twig arms tucked under their heads, fabric scrap scarves and the ends of two holiday socks for hats. Mini pompoms make the mouths and buttons the eyes. I rolled up a little cone of felt for the noses and glued that in place. First snowmen pumpkins I've ever made, and might be the last, ha!
They were worth the effort. They're adorable!!! Thanks for the info!
Thank you for all you've done for us this past year!! Every month there is so much happiness to look forward to from you and your staff and I so appreciate you all!! Merry Christmas and Happy New Year!
This is this kind of a fantastic resource that you are providing and also you give it absent for free. I adore seeing web sites that understand the value of offering a top quality resource free of charge. It?s the old what goes around comes about routine.