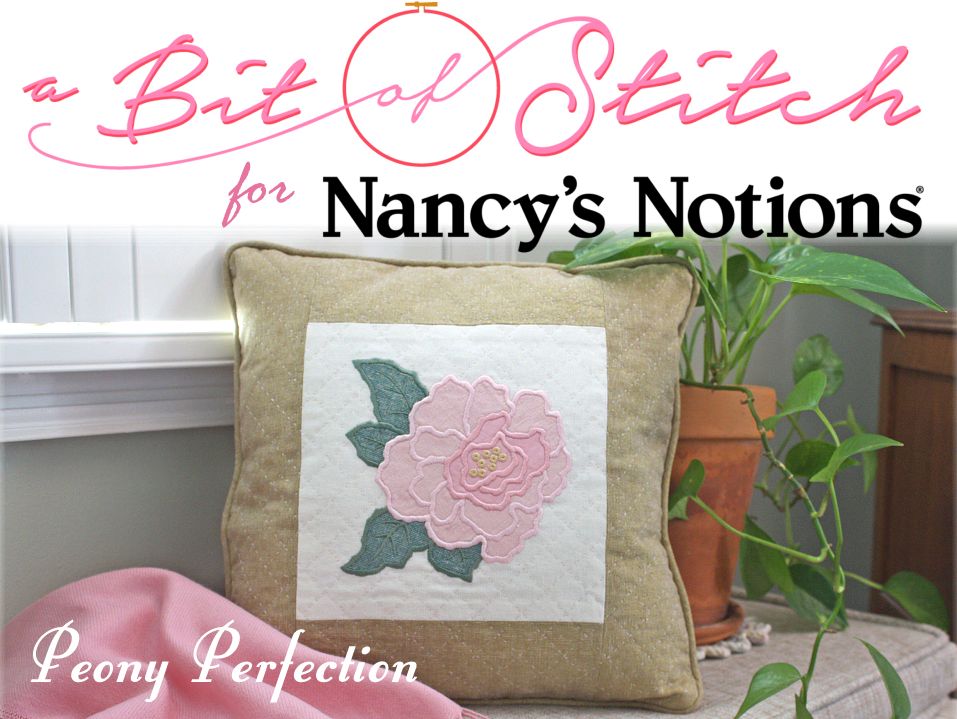
I’m passionate about pillows! They are so visually appealing with their inviting nature—soft, cheerful and comforting—and so easy to use for quick changes to my décor. Half the fun of throw pillows is displaying them; the other half is making them, and I love making them!
Nancy’s Notions is one of my favorite go-to resources for all kinds of nice pillow making supplies, and they also stock so many great machine embroidery accessories too. It’s been delightful to collaborate with them and create this machine embroidered fancy flower pillow to share with you. Let’s get started and make a Peony Perfection pillow!
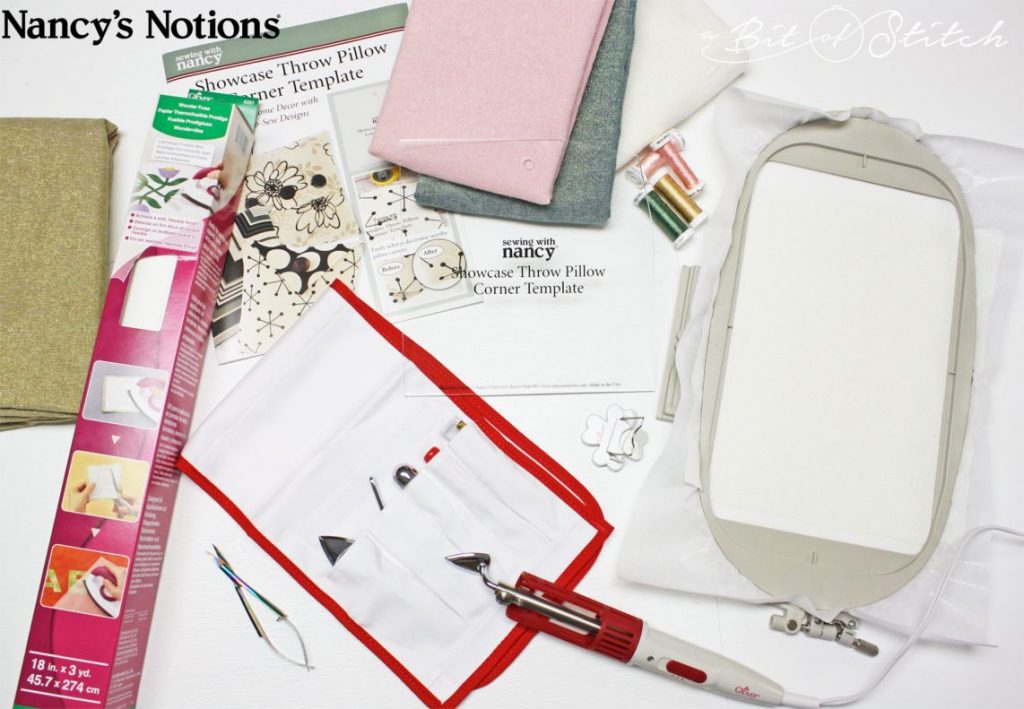
Gather your supplies:
- 3/4 yard of fashion fabric for the pillow & sewing thread to match (gold)
- 12” square of fashion fabric for the background behind the peony appliqué (white)
- 6” square of pink appliqué fabric & matching embroidery thread
- 7” square of green appliqué fabric & matching embroidery thread
- 4” square of sheer pink fabric to coordinate with the pink appliqué fabric (silk organza, wide polyester organza ribbon, or cotton organdy is recommended – click HERE to find pretty hand-dyed silk organza fat quarters!) and matching embroidery thread
- Clover Wonder Fuse (fusible web)
- Fusible tear-away stabilizer (firm)
- Clover Mini-iron & ironing pad
- Micro-serrated Snippers (scissors with small, very sharp, curved blades; click HERE to find Evy’s embroidery “Snips”)
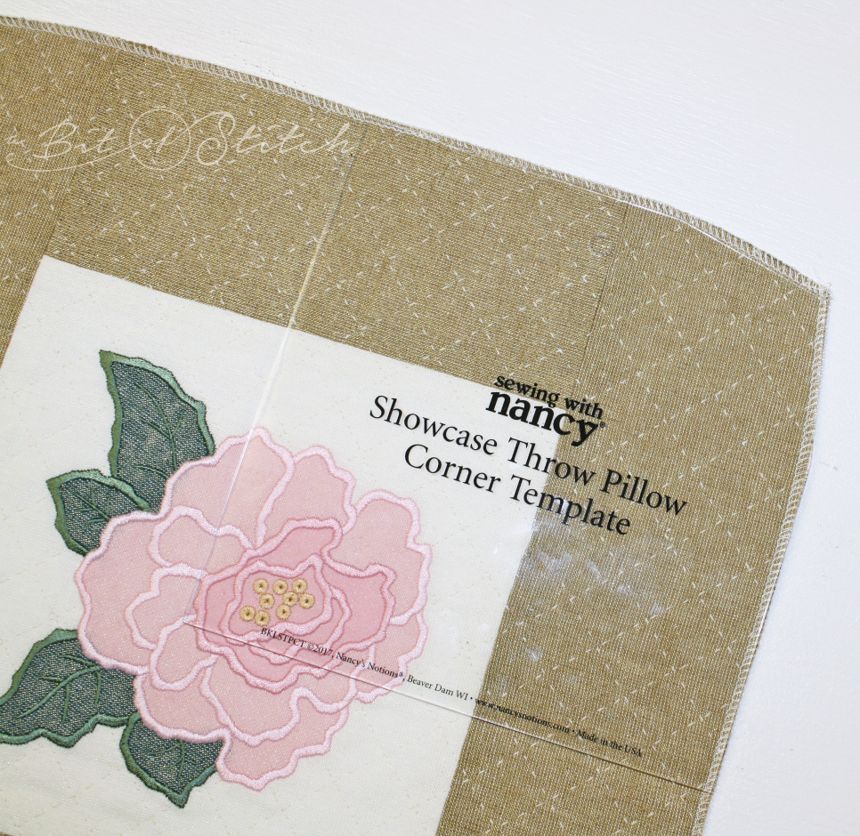
- Nancy’s Notions Showcase Throw Pillow Corner Template
- 16” square of lightweight quilt batting
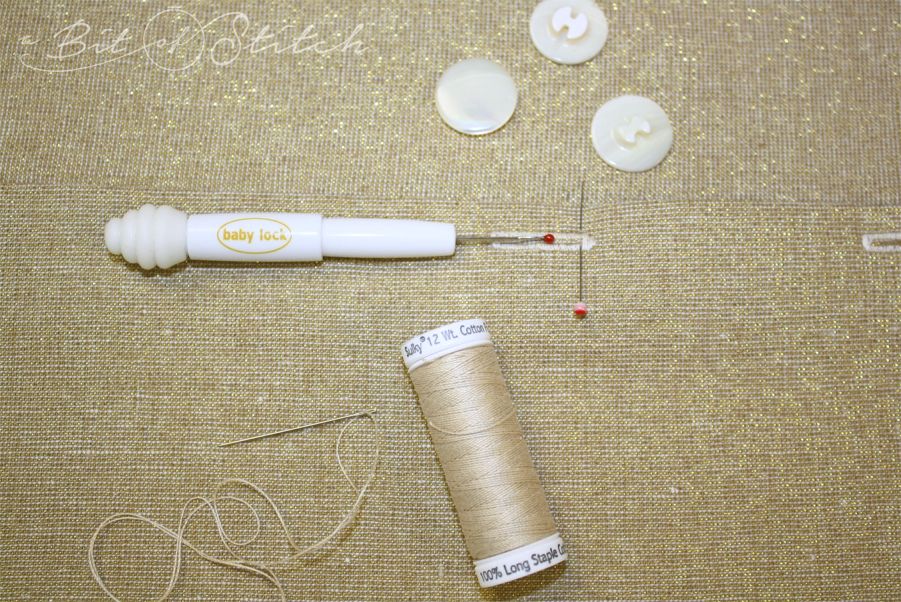
- 3 buttons
- 2 yards of 7/32” cording to cover or purchased 1/4” covered piping
- 14” pillow form
- 2 strips of 15” x 1” fusible interfacing
- 14” strip of 3/4” wide fusible web tape
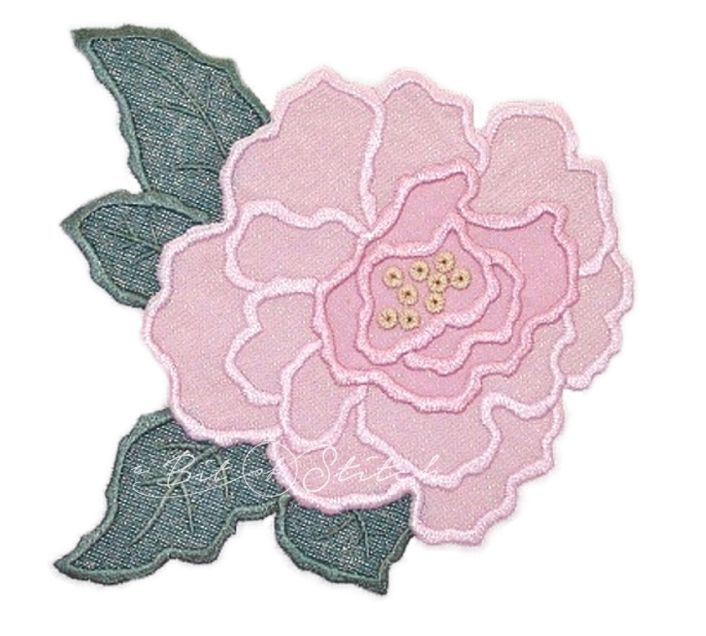
- Pretty Peony Applique machine embroidery design and machine hoop according to the design size as noted in the color chart
Find the notions listed in green above at Nancy’s Notions.
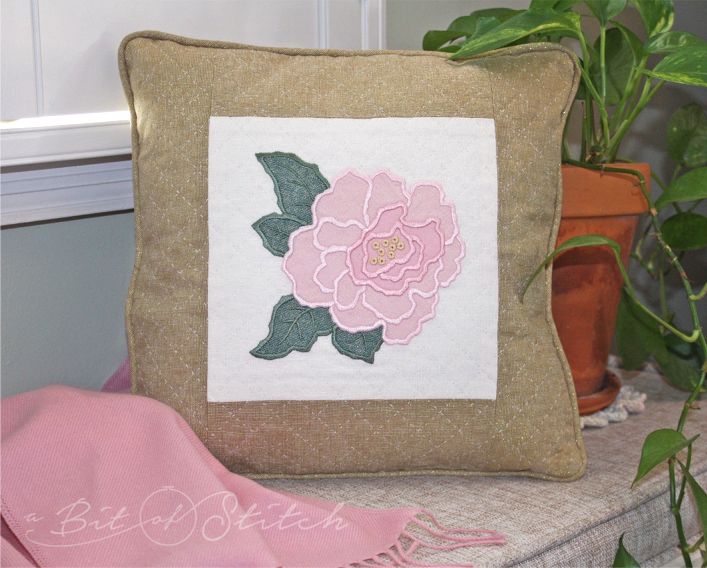
Fabrics shown on the sample pillow are from Robert Kaufman’s Yarn Dyed Metallic Linen collection; colors are Sand (gold), Peony (pink), Emerald (green) and Crystal (white).
It’s always a good idea to begin with pre-washed fabrics. This prevents shrinkage later that may cause puckers around your embroidery appliqué designs. So begin by pre-washing all project fabrics for best results.
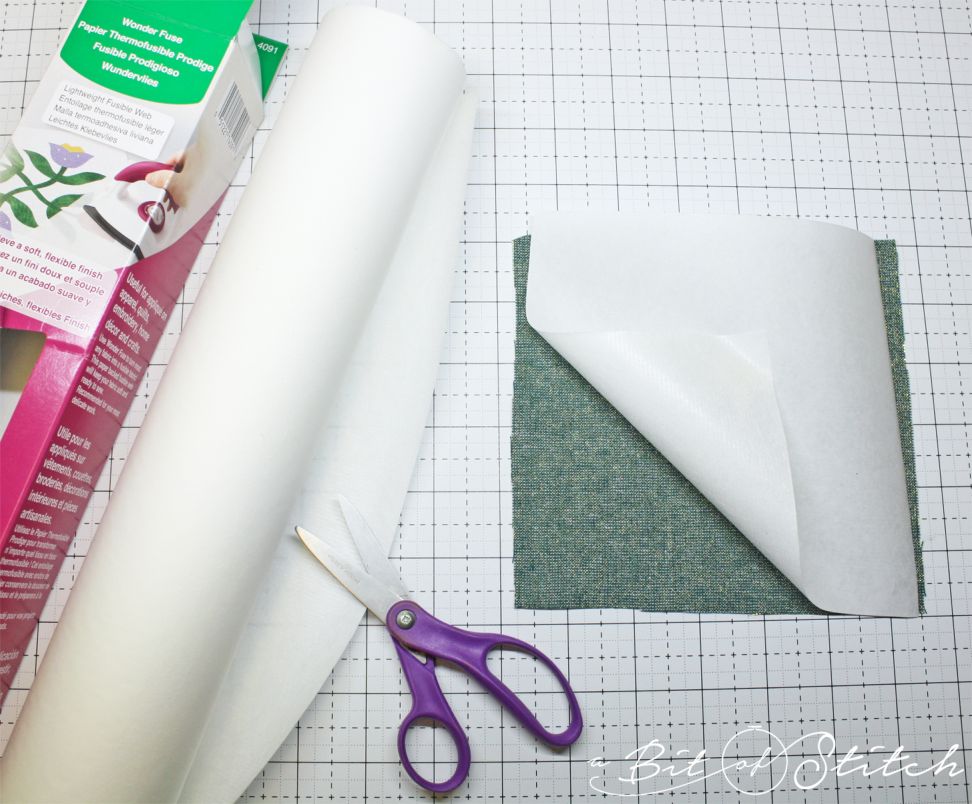
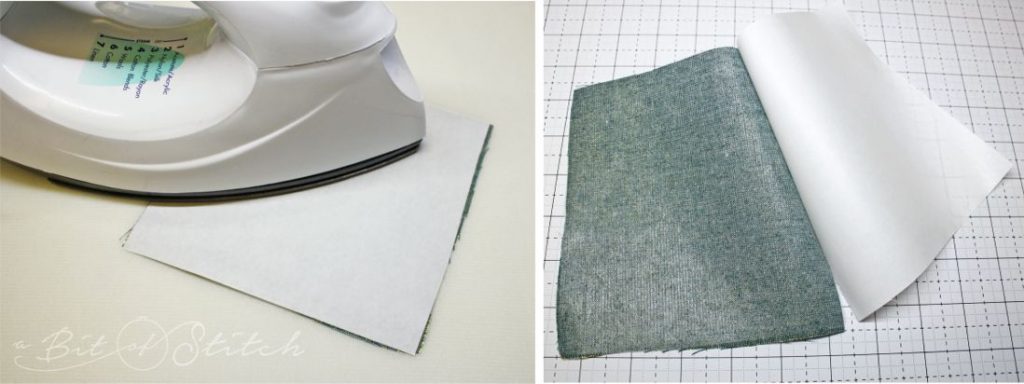
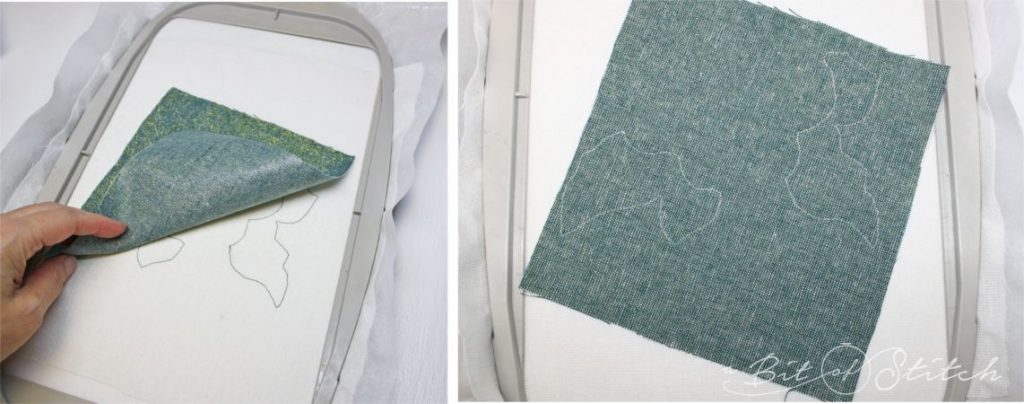
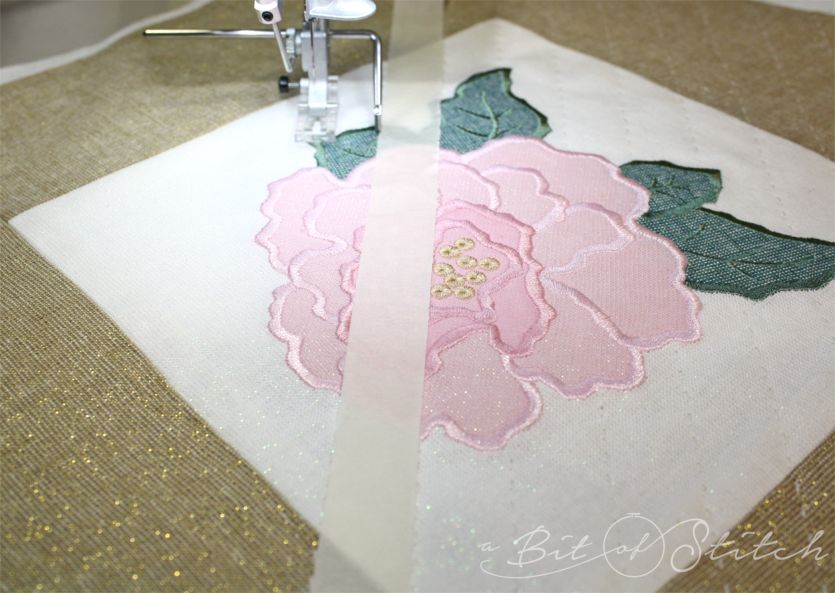
Prepare the appliqué fabrics (pink and green) by applying a piece of Wonder Fuse fusible web to the wrong side of each fabric square according to the package directions. You will not need to apply fusible web to the sheer fabric as long as it is stiff and crisp. Remove the release paper.
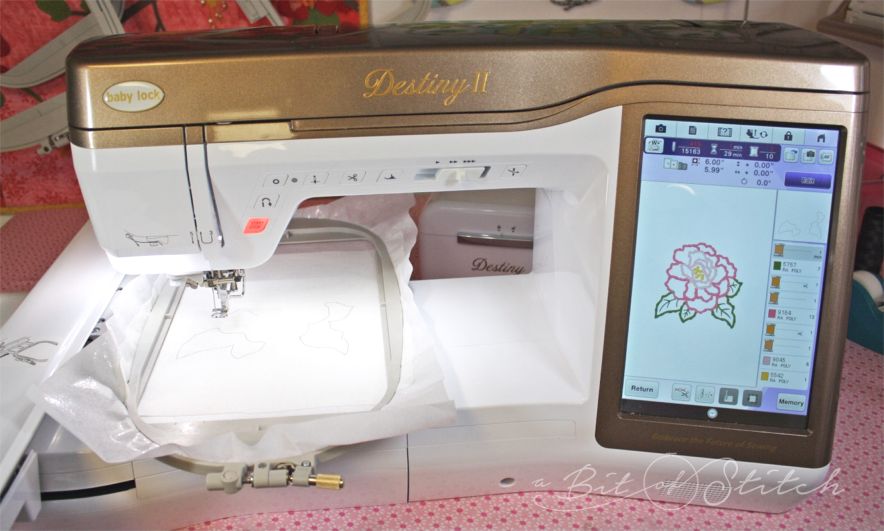
Load the Pretty Peony design into the machine. (Visit Baby Lock to see all the pretty embroidery machines!)
Apply fusible tear-away stabilizer to the wrong side of the 12” square of peony background fabric (white) in an area larger than the hoop. Center the fabric in the hoop, making sure the hoop encloses stabilized fabric. Center the design within the hoop. Follow along with the color chart instructions included with the design and the helpful hints provided here to appliqué the peony design.
For best results use polyester or rayon embroidery thread in colors that match the appliqué fabrics. The following Sulky thread colors match the Robert Kaufman fabrics very nicely: pink 942-1113 and green 942-1287. I used Sulky 942-1055 for the golden flower centers. You will also need a darker shade of pink to match the new color that is created when the sheer overlay is placed over the pink appliqué fabric.
Helpful hints for machine embroidery appliqué!
Most machine embroidery appliqué designs have three parts: The first stitch sequence shows you where the appliqué fabric needs to go. The second stitch sequence, which is a repeat of the first, sews the appliqué fabric into position. After the excess appliqué fabric has been trimmed away, the final stitch sequence “appliqués” or satin stitches the fabric in place. There are lots of variations and special stitches or effects that can be included, but those three steps are the basics. Always read the designer’s notes to be sure you don’t miss any extra steps or special information you’ll need.
The two photos above show the first two steps. The first one shows the outline stitching of the leaves for the peony design. Notice that I am covering the outline stitching with the fusible web backed appliqué fabric—the shiny, fusible side is facing down, and the right side is facing up. In the second photo you can see the second outline stitching. Sometimes it’s hard to see that outline stitching when using matching thread; you may find it helpful to change the thread color so you can see it easily. I find that just plain white or off-white thread works great for most fabrics!
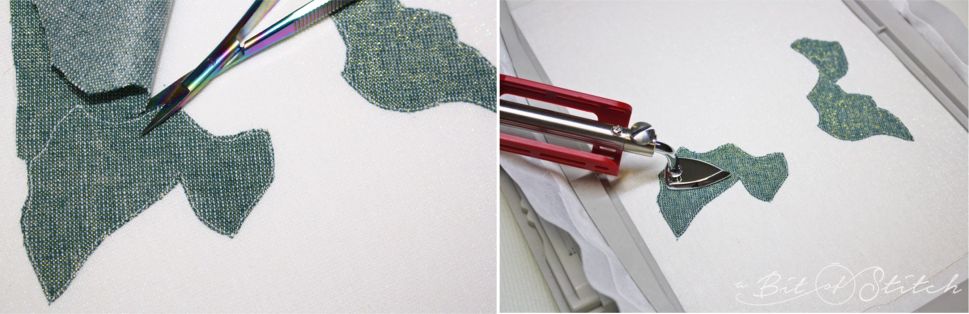
The photos below show the trimming and fusing process. ALWAYS place the hoop on a hard, flat surface to trim, and ALWAYS place it on a hard, flat, heat-protected surface to fuse the appliqué fabric. And finally… when taking the hoop in and out of the machine, ALWAYS hold the hoop by the hoop, not by the fabric in the hoop!
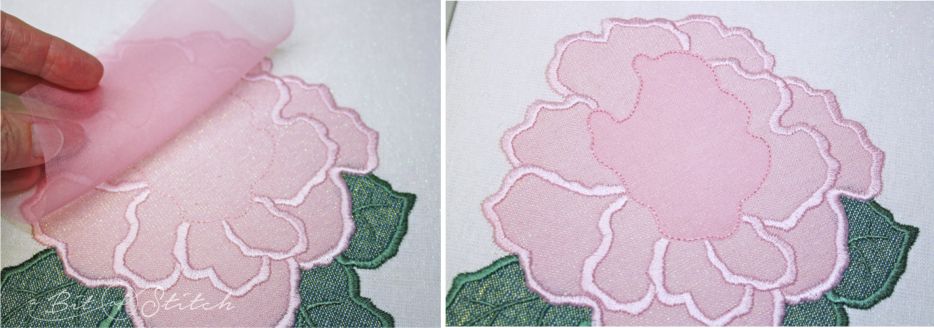
Continue following the appliqué instructions to apply the flower fabric in the same manner. The sheer overlay is the last part of the appliqué. The directions will tell you to stitch the “appliqué material” outline first and then place the sheer fabric over that outline. Hold it gently in place while you sew the “appliqué position” outline as it may not be necessary to fuse this fabric. Then trim away the excess before sewing the last “appliqué” satin stitching. The final stitch sequence will be the little flower centers. They look nice stitched in soft gold.
Click HERE to see a demonstration of this machine embroidery appliqué in action!
Pillow Construction:
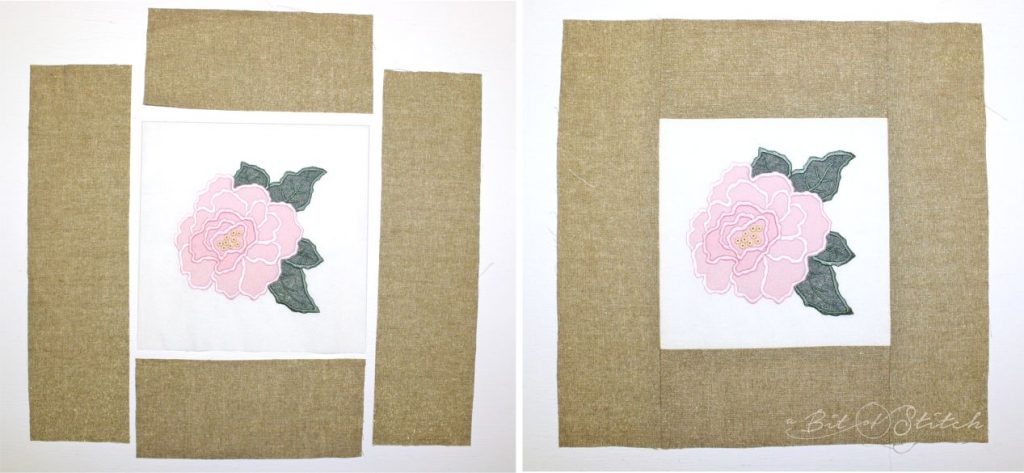
Before you begin constructing the pillow, you will need to trim the appliquéd peony fabric to 9” square. I find it helpful to cut a piece of tissue paper exactly 9” x 9” in size and lay it over the appliquéd fabric so I can easily center the appliqué design within my square.
You will also need pillow fabric cut into these sizes:
· Two 4” x 9” pieces (for the pillow front frame)
· Two 4” x 15” pieces (for the pillow front frame)
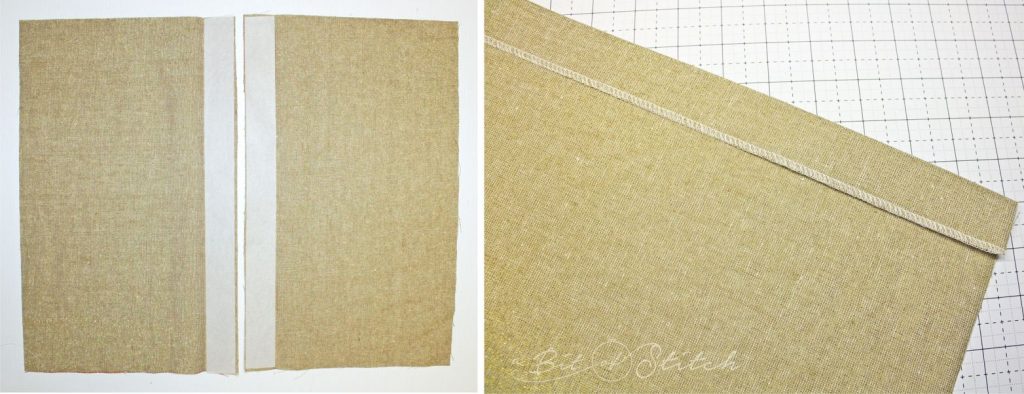
· Two 9.75” x 15” pieces (for the pillow back)
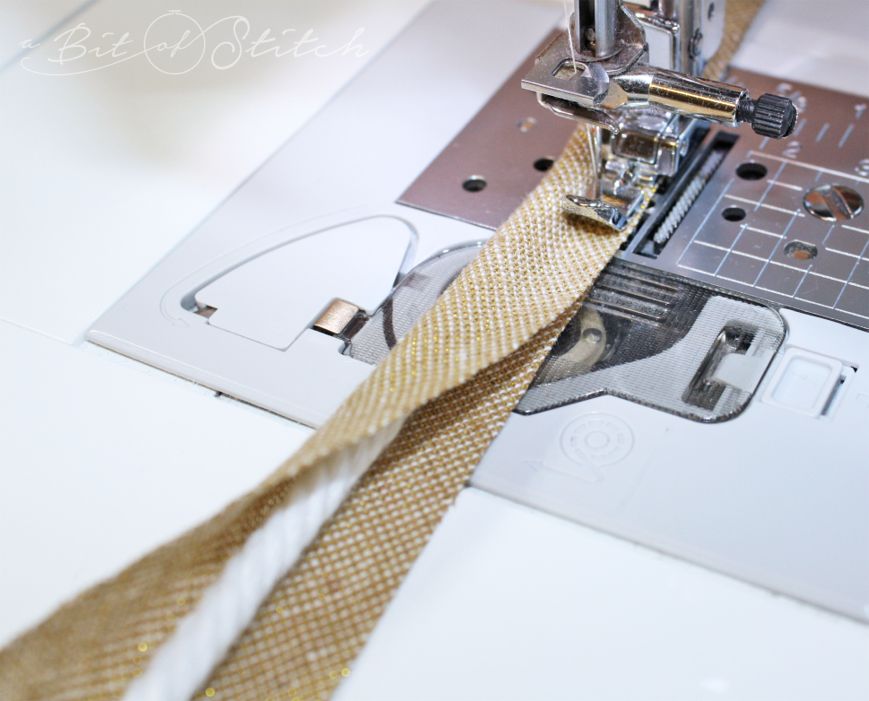
From the remaining pillow fabric, create 2 yards of covered cording. I find that when using cording that measures about 7/32” (5.6mm) in width, a bias strip of 1.25” wide gives me the desired 1/4” selvage edge, which perfectly suits a 1/4” seam allowance.
Use your narrow zipper foot to cover the cord.
Sew the two 4” x 9” pieces to the top and bottom of the peony block with a 1/2” seam allowance. Press the seam allowance open. Sew the two 4” x 15” pieces to each side of the new center block with a 1/2” seam allowance. Press the seam allowance open. You should have a pillow top that looks like the one in the photo below on the right.
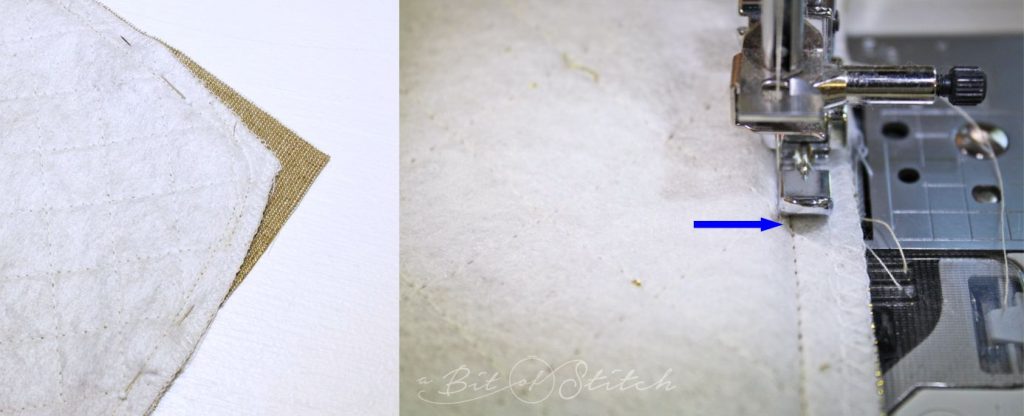
Locate the two 1” x 15” strips of fusible interfacing. Fuse a strip to one long edge of each 9.75” x 15” piece as shown in the photo below on the left. Serge or zigzag the interfaced edge and press over 1”.
Quilt the pillow top as desired with lightweight batting. I used my Baby Lock Sashiko machine to quilt the sample pillow. To read more about quilting a project with this machine, click HERE. As you can see in the photo below, I’m using a very high-tech tool to aid in hopping over the design as I quilt—masking tape! 😉
One small, nit-picking detail that I’ve always had a bit of a struggle with is the way the corners look on my finished throw pillow. No matter what, they never seem to fill out prettily with a pillow form. Usually, the corners stick up like little ears or fold and pucker. Not pretty! I used to stick extra fiberfill batting into the corners just to make them look better, but not anymore! I just discovered the Nancy’s Notions Showcase Throw Pillow Corner Template, and (wow!) it’s such a cool, simple solution to bunchy, awkward pillow corners!
Just place this nice, heavy, plastic template on the corner of the pillow, trace around it, and trim and construct as usual. Voila! Perfect corners on your throw pillows!
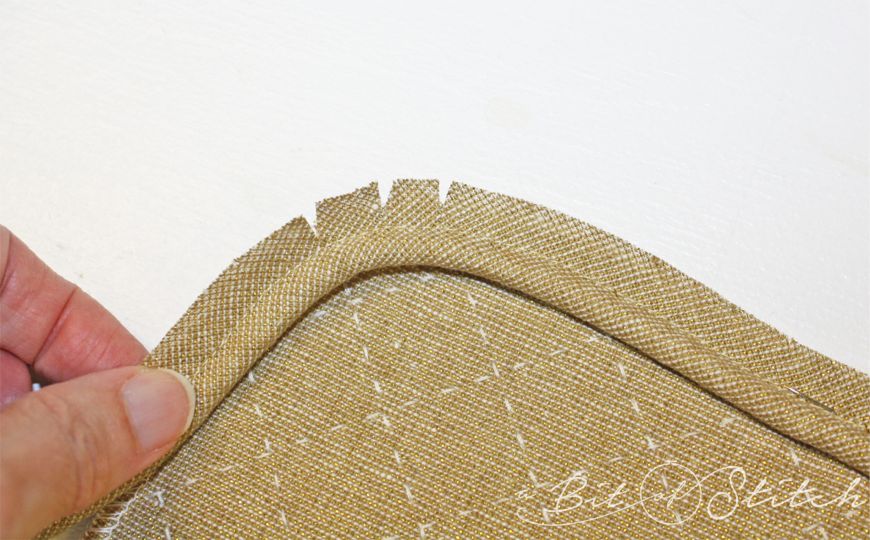
I used my serger to serge along the traced corners, thereby removing the excess corner fabric and giving my pillow top edge a nice, neat, non-raveling finish while I continued working. If you do not wish to serge the edge, simply use the Corner Template tool as a ruler and trim off the excess with a rotary cutter.
You will want a 1/4” seam allowance for the outside seam joining the pillow top to the pillow back. If your piping already has a 1/4” selvage, you’re good to go. Otherwise, trim it to 1/4”. Pin the piping around the edge of the pillow top. Clip the selvage edges of the piping at the pillow corners. This will keep the piping from bunching up or pleating while you baste it on.
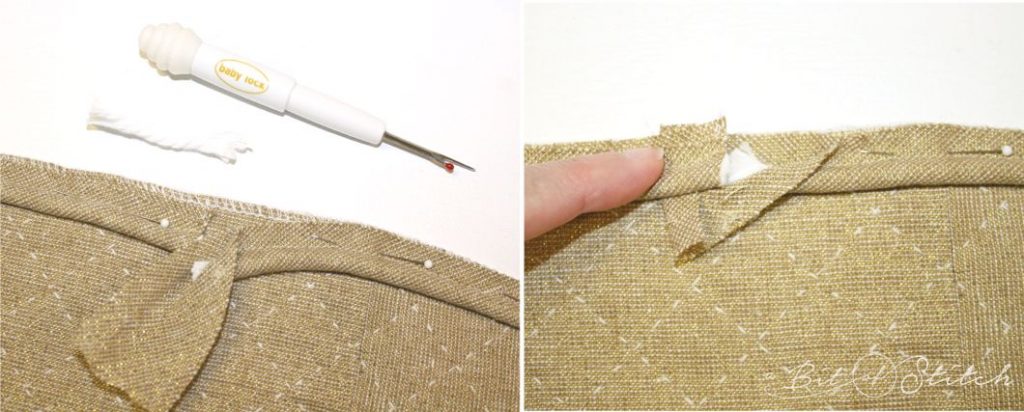
Pin the piping all the way around the pillow, beginning and ending at the bottom edge of the pillow top. Open the piping fabric to expose the cord and clip the cord so that the two ends meet. Leave about 1” of piping fabric remaining and trim off any additional excess, as shown in the photo above on the left. Fold the piping fabric’s raw edge under, tuck the beginning end of the piping into the folded end, and bump the cord ends together (photo above, right). Re-pin (photo right) and sew the piping to the pillow front.
Do use your narrow zipper foot, but don’t worry about getting too close to the piping. You’ll have time to do that when you sew the backing on.
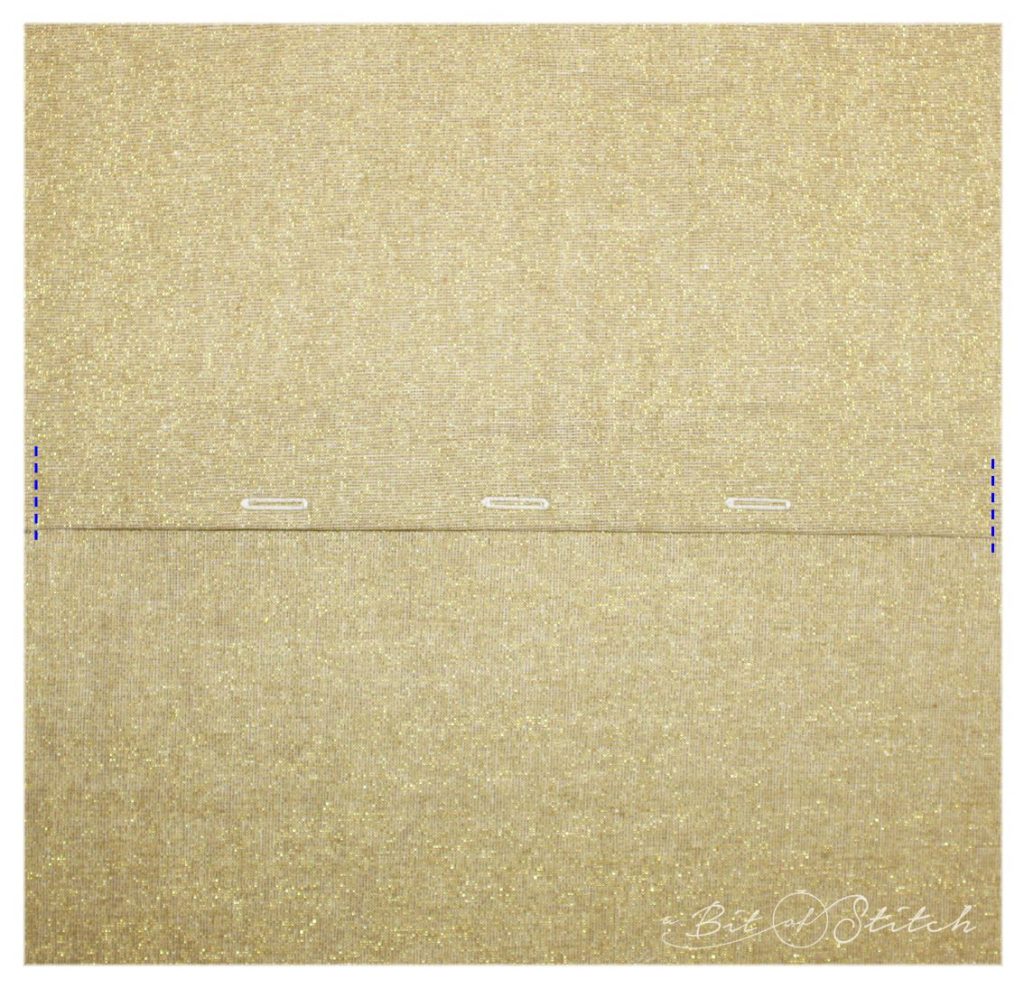
Prepare the pillow back by sewing three buttonholes evenly spaced on the right side of one interfaced folded edge pillow fabric piece. On the other piece, fuse the interfaced folded edge to the wrong side of the fabric with a strip of fusible web tape.
Overlap the buttonhole fabric over the non-buttonhole fabric, interfaced buttonhole flap on top of interfaced non-buttonhole flap. Make sure that your pillow back will still measure 15” – don’t overlap too much.
Baste the edges together at the overlap on each side, as shown in the photo above.
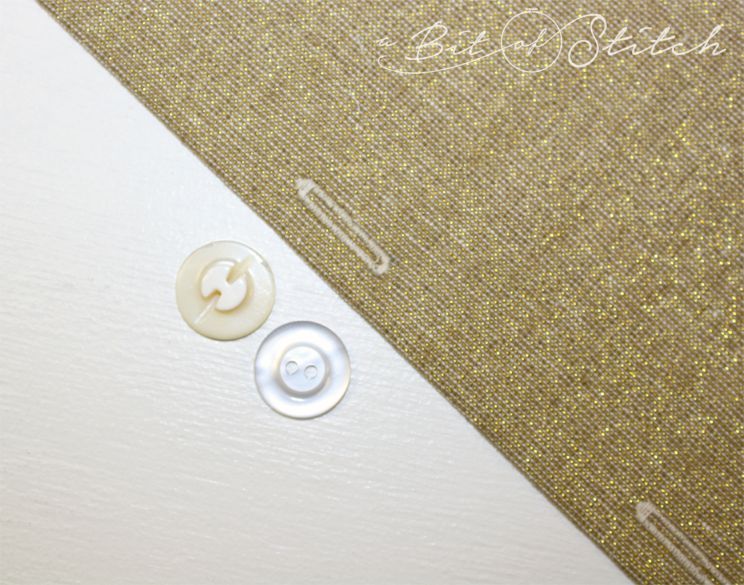
Helpful hints about buttonholes!
When using an automatic buttonhole foot for your Baby Lock sewing machine, make the buttonhole a little neater by using a button that is very slightly smaller than the buttons you plan to sew on. I love the rounded double ended buttonhole. Those round ends look so neat! If you want to cord your buttonholes to make them even nicer, use the straight end buttonholes and click HERE to read about cording buttonholes.
A chisel buttonhole cutter is the best tool for cutting open buttonholes. If you don’t have one, be sure to put a pin at both ends of the buttonhole where you need to stop cutting before slicing them open. I like using a nice, sharp seam ripper to open my buttonholes, but I’m careful to always have a pin in place so I don’t slice right on through the end!
Sulky Thread’s Petite 12 wt. cotton thread is a great choice for sewing on buttons. It comes in many lovely colors and is strong, yet soft.
Pin the pillow front to the pillow back, right sides together. You won’t need to use the Corner Template tool to trim the pillow back, because you’ll want to sew from the pillow front side which is already trimmed. Use your narrow zipper foot and sew as close as possible to the piping, especially at the corners. You can see in the photo above on the right that I am making sure my seam is within the seam that tacked the piping in place. If your piping seam allowance was 1/4” as suggested, this seam allowance will be about the same.
Before turning the pillow right side out, I like to serge the seam allowance selvages. This is a bit tricky with piping and corners, so if you decide to do so, serge carefully. Another option is a simple zigzag finish. Finishing the inside seam allowance will make your pillow wear and wash better.
Finished! I hope you enjoy your Peony Perfection pillow as much as I’m enjoying mine!
Thanks for reading!
Evy
3 replies on “Peony Pillow Perfection”
So lovely work, thanks.
WHat a wonderful tutorial!! Thank you so much.
I’m glad you enjoyed it! 🙂